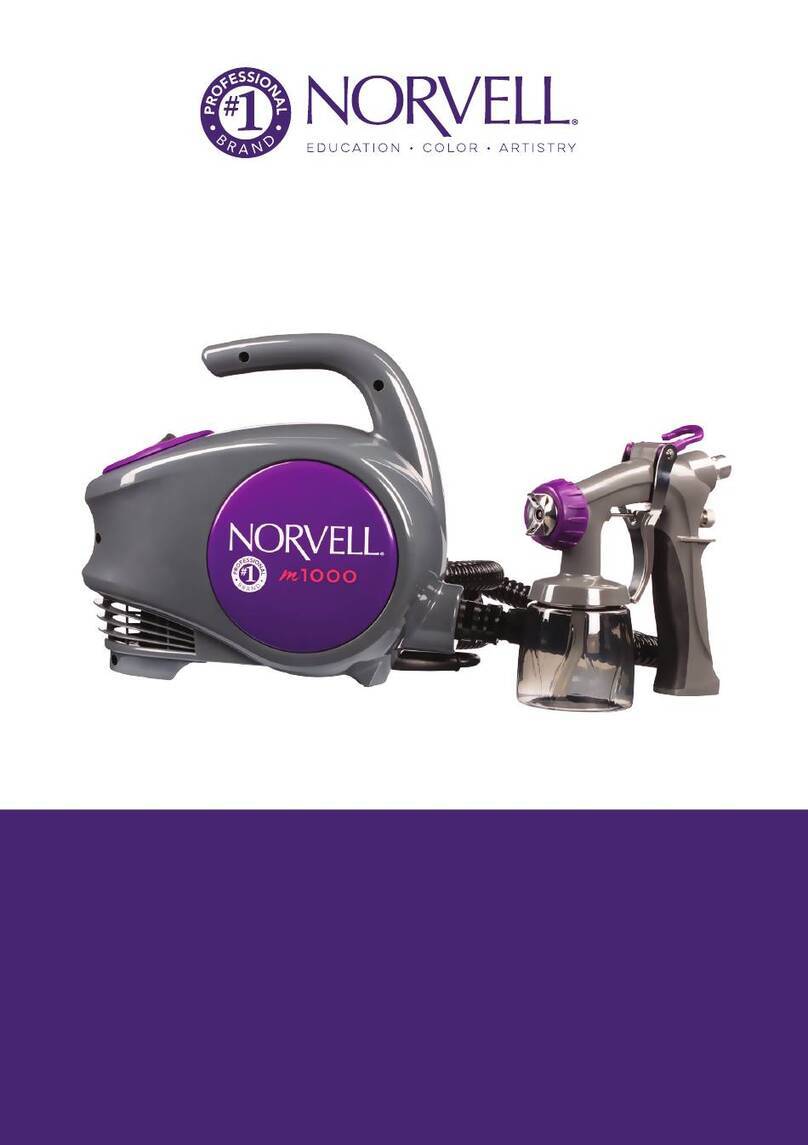
Aura Elite Click & Tan Plus Quick guide

Elite Click & Tan Plus
Sprayer
black
GB/D

Elite Click & Tan Plus Sprayer
Contents
1. Explanation of symbols used .....................................................1
2. Field of application ..............................................................1
3. General Safety Instructions.......................................................1
4. Processable materials ............................................................2
5. Non-processable materials .......................................................2
6. Preparation of the spray area.....................................................3
7. General preparations before the application of spray tanning lotion...............3
8. Preparation of the skin ...........................................................4
9. Start-up .........................................................................4
10. Operation ......................................................................5
11. Tips on using the spray tanning system..........................................6
12. After application of the spray tanning lotion.....................................6
13. Taking Out of Operation and Cleaning...........................................7
14. Maintenance ...................................................................8
15. Spare parts ....................................................................9
16. Correction of Malfunctions....................................................10

1
Elite Click & Tan Plus Sprayer GB
Translation of the original operating instructions
Congratulations on the purchase of your Aura Spray Tanning System.
You have purchased a branded product, which requires careful cleaning and care to ensure
smooth operation. Please read the operating manual carefully before commissioning
the Spray Tanning System and note the safety instructions. Keep the operating
instructions in a safe place.
1. Explanation of symbols used
This symbol indicates a potential danger for you or for the Spray
Tanning System. Under this symbol you can nd important
information on how to avoid injuries and damage to the Spray
Tanning System.
i
Indicates tips for use and other particularly useful information.
2. Field of application
The Aura Spray Tanning System has been specically developed for the application of
liquid spray tanning lotion. Any application other than that described in this operating
manual is not permitted.
3. General Safety Instructions
•
Do not use the spray guns to spray ammable substances.
•
The spray guns are not to be cleaned with ammable solvents.
•
There must be no sources of ignition such as, for example, open res, smoke of lit
cigarettes, cigars and tobacco pipes, sparks, glowing wires, hot surfaces, etc. in the
vicinity during spraying.
•
Caution against dangers that can arise from the sprayed substance and observe the
text and information on the containers or the specications given by the substance
manufacturer.
•
Do not spray any liquid of unknown hazard potential.
•
Attention! Spray tanning lotions do not generally oer any protection against
sunburn. Repeated unprotected contact with the sun increases the risk of skin cancer,
skin aging and other harmful eects.
•
This Spray Tanning System is not intended for use by persons (including children) with
reduced physical, sensory or mental capabilities, or lack of experience and knowledge,
unless they have been given supervision or instruction concerning use of the Spray
Tanning System by a person responsible for their safety.

2
Elite Click & Tan Plus Sprayer
GB
•
Do not let children play with the Spray Tanning System.
•
Never direct the spray gun at animals.
•
Ensure that the spray area is well ventilated.
•
Do not breathe in spray tanning lotion. Wearing nasal plugs is recommended.
•
Do not spray into the eyes. Wearing safety goggles is recommended.
•
If spray tanning lotion is sprayed into the eyes, wash them out with water immediately
and consult a doctor.
•
Do not spray spray tanning lotion into open wounds or onto damaged skin.
•
Cover your hair when spraying your face. Otherwise bleached hair in particular could
be stained by the spray tanning lotion.
•
Never immerse the Spray Tanning System under water.
• Warning: Never use your Spray Tanning System near bath tubs, shower trays
or other receptacles that contain water.
•
Always remove the power plug after use, if the Spray Tanning System is located near a
washbasin or another water source. Water always represents a hazard even when the
system is switched o.
•
As additional protection, the installation of a residual current protective device (FI/
RCD) with a rated tripping current of no more than 30 mA is recommended in the
bathroom circuit. Ask your installer for advice.
•
Always remove the power plug before topping up the spray container or cleaning the
system.
•
Only use genuine spare parts from the manufacturer. With original Aura accessories
and spare parts, you have the guarantee that all safety regulations are fullled.
•
Never open the Spray Tanning System yourself to carry out electrical repairs!
•
Do not place the spray gun on its side, as material could leak out.
•
The system is equipped with a thermal release which disconnects the system in case
of overheating. In this case, turn o the system, remove the plug and let the system
cool down for at least 1/2 hour. Eliminate the cause of heating, e.g. bent hose, soiled
air lter, slots for air intake covered.
4. Processable materials
Liquid spray tanning lotion
iOnly use spray tanning lotion up to the expiry date specied on the package.
12 M
means, for example, that the substance can be used for 12 months after
opening.
5. Non-processable materials
All materials not approved for skin treatment

3
Elite Click & Tan Plus Sprayer GB
Description (Fig. 1)
1) Air cap /Nozzle 2) Union nut
3) Spray attachment 4) Trigger
5) Material volume regulation 6) Gun handle
7) ON/OFF switch (2 speed) 8) Air hose
9) Cover of air lter compartment 10) Gun holder
11) Container
8
1
1
2
5
9
11
3
4
6
7
10
6. Preparation of the spray area
•
Remove all objects from the spray area if possible, in order to avoid contamination
from overspray.
•
Work in a room with a smooth, easy-to-clean surface.
The use of a spray booth/spray tent is recommended.
7. General preparations before the application of spray
tanning lotion
i
Test the compatibility of the spray tanning lotion on a small patch of skin
approx. 24 hours before the actual application of the spray tanning lotion.
Stop application if skin irritations occur.
•
Approx. 24-48 hours prior to treatment remove body hair by shaving or waxing.

4
Elite Click & Tan Plus Sprayer
GB
•
Do not apply any perfume, deodorant or make-up. These products can negatively
inuence the tanning result.
•
On the day of the treatment wear dark, loose-tting clothing, in order to prevent
discoloration of clothing by the spray tanning lotion.
•
Remove all jewelry, in order to avoid discoloration by the spray tanning lotion.
8. Preparation of the skin
iCorrect preparation of the skin is the key to an even and long lasting tanning
result. Please note the following instructions
•
Remove all dead skin cells by means of exfoliation before applying the spray tanning
lotion.
•
Make sure that the moisture content of the skin is as uniform as possible.
Use a moisturizer for dry areas (e.g. elbows and knees). Let the moisturizer dry before
commencing the treatment.
•
Apply a little balm to lips, nails, palms of the hands, eyebrows and the hairline for
protection.
9. Start-up
Before connecting to the mains supply, be
sure that the supply voltage is identical with
the value given on the rating plate.
1.
Unscrew the container from the spray
attachment.
2.
Prepare spray tanning lotion according
to manufacturer's instructions and pour
into the container.
3.
Screw the container rmly onto the spray
attachment.
4.
Connect the front part of the gun and the
gun handle to each other. (Fig. 2)
5. Mount the air hose (Fig. 3, a + b).
6.
Place the device only on a plane and
clean surface. Otherwise, the gun may
suck in dust, etc.
7.
Press the ON/OFF switch at the device
(position 1). (Fig.4)
2
➟
3
a
b

5
Elite Click & Tan Plus Sprayer GB
10. Operation
How the SprayTanning system is handled,
including preparation of the work place
and spray tanning lotion as well as the
nal result, is the sole responsibility of
the operator.
Wagner excludes any liability for damage
which may arise from overspray, applica-
tion errors, touch-ups, or non-compliance
with the instructions provided here.
•
Use the ON/OFF switch (Fig. 4) to choose
between 2 stages:
Switch in position 1: Recommended for
applying spray tanning lotion
Switch in position 2: Recommended for
drying spray tanning lotion
•
Turn the material control (Fig. 5, 1), in
order to adjust the desired delivery rate.
lower material volume (-):
turn anti-clockwise
higher material volume (+):
turn clockwise
•
Turn the air cap (Fig. 6, 1) with the union
nut slightly unscrewed (2), to adjust the
shape of the spray jet:
Fig. 7a vertical at jet:
For spray movements from left to
right
Fig. 7b horizontal at jet:
For spray movements from top to
bottom
•
Pull the trigger to spray the spray tanning
lotion.
5
1
4
6
1
2
a
b
7

6
Elite Click & Tan Plus Sprayer
GB
11. Tips on using the spray tanning system
Before commencing application, check that all necessary protective
measures (nasal plugs, safety goggles, hair covering) have been taken.
iPractice on a large piece of cardboard or paper rst of all, in order to nd the
optimal settings for the spray tanning lotion used.
•
Start and end the spray movement
outside the body.
•
Avoid interruptions during the spray
movement.
•
The spray movement should come
from the arm, not just from the wrist.
This ensures that a uniform distance is
maintained between the spray gun and
the body during the spray operation.
Select a distance of 20 - 30 cm, depending
on the desired spray jet width.
Fig. 8 a: CORRECT Even distance
Fig. 8 b: INCORRECT uneven distance
will result in uneven tanning
•
Move the spray gun at an even speed
20-30 cm
a
b
8
12. After application of the spray tanning lotion
iThe full tanning eect develops during the rst 24 hours after the treatment.
•
Allow the spray tanning lotion to dry for 15-20 minutes before getting dressed again.
iYou can also use the air from the air hose to
accelerate the drying process of the spray
tanning lotion. To do this, simply remove the
spray attachment from the handle and switch
the system on (switch in position 2).
•
Do not shower or bathe in the first 6-8 hours after
application, as this will affect the tanning result.
•
Prolonged hot baths and showers should be avoided,
in order to maintain the tanning effect for as long as
possible. Daily moisturization of the skin is also recommended.

7
Elite Click & Tan Plus Sprayer GB
13. Taking Out of Operation and Cleaning
i
Clean the Spray Tanning System as required, but at the end of the working
day/ application or before changing to a dierent colour as a minimum. Dried
spray tanning lotion makes cleaning more dicult and can even damage the
system.
1) Turn the system o.
2) Divide the spray gun. Press the hook
(Fig. 9 "click") slightly downwards.
Turn the gun front part and gun rear
part against each other.
3) Unscrew the container.
4)
Pour any remaining spray tanning lotion
back into the original packaging.
5)
Preclean the container and feed tube
with a brush.
6) Clean the ventilating bore (Fig. 10, 1).
7) Pour water into the container. Screw
the container back on.
Do not use ammable materials for
cleaning purposes.
8) Assemble the gun again.
9) Turn on the system and spray the water
into a container or a cloth.
10)
Repeat the above procedure until the
water emerging from the nozzle is
clear.
11)Turn o the system and divide the spray
gun.
12)
Screw o the container and empty it. Pull
out the feed tub with container seal.
CAUTION! Never clean seals, nozzles or
air holes of the spray gun with
metal objects..
13)Unscrew the union nut and remove the
air cap and nozzle (Fig. 11). Clean the air
cap, nozzle seal and nozzle with a brush
and water.
14)Clean the outside of the spray gun and
container with a cloth soaked in water.
15)Assemble the parts again (see
“Assembly”).
CLICK
9
1
10
11

8
Elite Click & Tan Plus Sprayer
GB
Assembly
1) Slide the nozzle seal (Fig. 12, 1) with the
groove (slot) facing forwards into the
nozzle (2).
2)
Put the nozzle onto the gun body and nd
the correct position by turning it.
3)
Put the air cap onto the nozzle and tighten
it using the union nut.
4) Place the container seal (Fig. 13, 1) from
below on the feed tube(2) and slide it over
the collar, while turning the container seal
slightly.
5)
Insert the feed tube with container seal
in the gun body.
14. Maintenance
Important! Never operate the system
without the air lter; dirt could
be sucked in and interfere with
the function of the system.
1) Change the air lter if it is soiled
(check daily in the case of intensive/
commercial use).
2)
Open the cover of the air filter
compartment (Fig. 14).
3)
Insertanewairlterintothecompartment.
4)
Close the cover of the air filter
compartment.
In order to mount the gun more easily
apply lubricating grease (enclosed)
liberally to the O-ring at the spray
attachment (Fig. 15, 1).
13
1
2
1
2
12
15
1
14

9
Elite Click & Tan Plus Sprayer GB
15. Spare parts
Spare Parts List (Fig. 16)
Pos. Designation Order No.
1 Spray attachment complete with 200 ml container 2334 403
2 Union nut 2334 405
3 Air cap 2334 407
4 Nozzle 2334 409
5 Nozzle seal 0417 706
6 O-ring of spray attachment 0417 308
7 Feed tube 2334 413
8 Container seal 2323 039
9 Container with cover 200 ml 2334 417
10 Gun handle 2334 880
11 Air hose 2333 239
12 Air lter 2318 585
13 Cover of air lter compartment 2334 882
Lubricant 2315 539
8
9
7
1
432
16
5
610 11
13
12

10
Elite Click & Tan Plus Sprayer
GB
16. Correction of Malfunctions
Malfunction Cause Remedy
No spray tanning
lotion comes out of
the nozzle
•
Nozzle clogged
•
Material volume setting
turned too far to the left (-)
•
No pressure build-up in
container
•
Container empty
•
Feed tube loose
•
Feed tube clogged
➞Clean
➞Turn to the right (+)
➞Tighten container
➞Rell
➞Insert
➞Clean
Spray tanning
lotion drips out of
the nozzle
•
Spray tanning lotion has
accumulated on the air cap,
nozzle or needle
•
Nozzle loose
•
Nozzle seal worn
•
Nozzle worn
➞Clean
➞Union nut tighten
➞Change
➞Change
Atomisation too
coarse •
Material volume adjusting
screw turned too far to the
right (+)
•
Nozzle contaminated
•
Too little pressure build-up in
container
•
Air lter heavily soiled
➞Turn material volume
adjusting screw to the left
(-)
➞Clean
➞Tighten container
➞Change
Uneven spray
pattern •
Spray tanning lotion in the
container is running out
•
Nozzle seal worn
•
Air lter heavily soiled
➞Rell
➞Replace
➞Replace
Excessive overspray •
Distance too large
•
Material volume adjusting
screw turned too far to the
right (+)
•
Switch in position 2
➞Reduce distance
➞Turn material volume
adjusting screw to the left
(-)
➞Adjust to position 1
Spray tanning
lotion runs down
body
•
Too much spray tanning
lotion applied
•
Spray paths overlap too much
•
Spraying distance too small or
spray movement too slow
➞Carefully dab aected
points with a towel,
reduce ow setting if
required and lightly
overspray again
The tan is patchy or
blotchy •
Skin was not correctly
prepared
•
Spray movement not even
enough
➞Correct by lightly
overspraying

11
Elite Click & Tan Plus Sprayer GB
Malfunction Cause Remedy
Customer's skin
appears orange •
Too much spray tanning
lotion applied
•
Skin was not correctly
prepared
•
High sensitivity to active
ingredient DHA
➞Remove spray tanning
lotion from the skin.
Prepare skin correctly for
new application, reduce
ow setting
➞Use another shade with
lower concentration of
DHA
System no longer
functions during
use
•
System overheated ➞Unplug the power plug,
let the system cool down
approx. 30 minutes, do not
bend the hose, check the
air lter, do not cover the
intake slots
Technical Data
Power source: 230 V ~, 50 Hz
Power consumption: 350 W
Double insulation:
Sound pressure level* 80 dB (A); Uncertainty K= 4 dB
Sound pressure output* 93 dB (A); Uncertainty K= 4 dB
Oscillation level < 2.5 m/s²; Uncertainty K = 1.5 m/s²
Air hose length: 2.8 m
Container capacity: 200 ml
Weight: approx. 2.8 kg
* Measured in accordance with EN 50144-2-7:2000
Environmental protection
The appliance and accessories should be recycled in an environmentally
friendly way. Do not dispose of the appliance with household waste. Support
environmental protection by taking the appliance to a local collection point or
obtain information from a specialist retailer.
Important Note regarding Product Liability!
Due to an EC ordinance in eect since 01.01.1990, the manufacturer is liable for his product
only if all parts originate from or were approved by the manufacturer and the devices
are assembled and operated correctly. The use of other accessories and spare parts can
partially or completely invalidate the liability.

12
Elite Click & Tan Plus Sprayer
GB
Guarantee
The guarantee runs for two years, counting from the date of sale (sales slip) in case
of private use, and 1year in case of commercial use. It covers and is restricted to free-
of-charge rectication of faults which are demonstrably attributable to the use of
faulty materials in manufacture, or assembly errors; or free-of-charge replacement of
the defective parts. The guarantee does not cover incorrect use or commissioning or
tting or repair work which is not stated in our operating instructions. Wearing parts
are also excluded from the guarantee. This includes in particular cables, valves, nozzles,
uid-carrying housing components, lters, hoses, seals, etc.. We expressly reserve the
right to full the guarantee. The guarantee expires if the tool is opened up by persons
other than WAGNER service personnel. Transport damage, maintenance work and loss
and damage due to faulty maintenance work are not covered by the guarantee. Under
any guarantee claim, there must be proof of purchase of the tool through submission
of the original receipt. Wherever legally possible, we exclude all liability for injury,
damage or consequential loss, especially if the tool has been used for a purpose other
than that stated in the operating instructions, commissioned or repaired other than
in accordance with our operating instructions or if repairs are performed by someone
who is unqualied. We reserve the right to perform any repairs in excess of those stated
in our operating instructions. In case of guarantee or repair, please refer to your point
of sale.
Warning
If the supply cord of this appliance is damaged, it
must only be replaced by a repair shop appointed
by the manufacturer, because special purpose tools
are required.
Warning: Do not connect the blue or brown wire to
the earth terminal of the plug! The wires in this mains
lead are coloured in accordance with the following
code:
blue = neutral brown = live
As the colours of the wires in the mains lead of this
appliance may not correspond with the coloured markings identiying the terminals in your plug,
proceed as follows:
Should the moulded plug have to be replaced, never re-use the defective plug or attempt to plug
it into a dierent 13 A socket. This could result in an electric shock.
ShoulditbenecessarytoexchangethefuseintheplugonlyusefusesapprovedbyASTAinaccordancewith
BS 1362. 5 Amp fuses may be used.
To ensure that the fuse and fuse carrier are correctly mounted please observe the provided
markings or colour coding in the plug.
After changing the fuse, always make sure that the fuse carrier is correctly inserted. Without the
fuse carrier, it is not permissible to use the plug.
The correct fuses and fuse carriers are available from your local electrical supplies stockist.

13
Elite Click & Tan Plus Sprayer GB

D
14
Elite Click & Tan Plus Sprayer
Inhalt
1. Erklärung der verwendeten Symbole ...........................................15
2. Anwendungsbereich .......................................................... 15
3. Allgemeine Sicherheitshinweise................................................15
4. Verarbeitbare Materialien ...................................................... 16
5. Nichtverarbeitbare Materialien .................................................16
6. Vorbereitungen des Sprühbereiches............................................17
7. Allgemeine Vorbereitungen vor dem Auftrag der Spray Tanning Lotion..........17
8. Vorbehandlung der Haut.......................................................18
9. Inbetriebnahme ............................................................... 18
10. Bedienung des Systems.......................................................19
11. Tipps zur Benutzung des Spray Tanning Systems...............................20
12. Nach dem Auftragen der Spray Tanning Lotion ................................20
13. Außerbetriebnahme und Reinigung........................................... 21
14. Wartung .....................................................................22
15. Ersatzteile ...................................................................23
16. Behebung von Störungen .................................................... 24

D
15
Elite Click & Tan Plus Sprayer
Herzlichen Glückwunsch zum Erwerb Ihres Aura Spray Tanning Systems.
Sie haben ein Markenprodukt erworben, das für eine reibungslose Funktion einer
sorgfältigen Reinigung und Pege bedarf. Bitte lesen Sie vor Inbetriebnahme des
SprayTanning Systems die Bedienungsanleitung genau durch und beachten Sie die
Sicherheitshinweise. Bewahren Sie die Bedienungsanleitung sorgfältig auf.
1. Erklärung der verwendeten Symbole
Dieses Symbol weist auf eine potenzielle Gefahr für Sie bzw. das
Systemhin.UnterdiesemSymbolndenSiewichtigeInformationen,
wie Sie Verletzungen und Schäden am System vermeiden.
i
Kennzeichnet Anwendungstipps und andere besonders nützliche
Hinweise.
2. Anwendungsbereich
Das Aura Spray Tanning System wurde speziell zum Auftrag von üssiger Spray
Tanning Lotion (Bräunungsmittel) entwickelt. Eine andere Anwendung, als in dieser
Bedienungsanleitung beschrieben, ist nicht zulässig.
3. Allgemeine Sicherheitshinweise
•
Die Sprühpistolen dürfen nicht zum Sprühen brennbarer Stoe verwendet werden.
•
Die Sprühpistolen dürfen nicht mit brennbaren Lösungsmitteln gereinigt werden.
•
Beim Sprühen dürfen in der Umgebung keine Zündquellen vorhanden sein, wie
z. B. oenes Feuer, Rauchen von Zigaretten, Funken, glühende Drähte und heiße
Oberächen.
•
Achten Sie auf die Gefahren die von dem versprühten Sto ausgehen können und
beachten Sie ebenfalls die Aufschriften auf den Behältern oder die vom Hersteller des
Stoes angegebenen Hinweise.
•
Versprühen Sie keinerlei Stoe von denen Sie die Gefährlichkeit nicht kennen.
•
Achtung! Spray Tanning Lotionen bieten im Allgemeinen keinen Schutz gegen
Sonnenbrand. Der wiederholte ungeschützte Kontakt mit der Sonne erhöht das Risiko
von Hautkrebs, Hautalterung und anderen schädlichen Eekten.
•
Dieses System ist nicht dafür bestimmt, durch Personen (einschließlich Kinder) mit
eingeschränkten physischen, sensorischen oder geistigen Fähigkeiten oder mangels
Erfahrung und/oder mangels Wissen benutzt zu werden, es sei denn, sie werden
durch eine für Ihre Sicherheit zuständige Person beaufsichtigt oder erhielten von ihr
Anweisungen, wie das System zu benutzen ist.
•
Lassen Sie Kinder nicht mit dem Spray Tanning System spielen.
•
Richten Sie die Sprühpistole niemals auf Tiere.
Originalbetriebsanleitung

D
16
Elite Click & Tan Plus Sprayer
•
Sorgen Sie für eine gute Belüftung des Sprühbereiches.
•
Spray Tanning Lotion nicht einatmen. Das Tragen von Nasenstöpsel wird empfohlen.
•
Nicht in die Augen sprühen. Das Tragen einer Schutzbrille wird empfohlen.
•
Falls die Spray Tanning Lotion in die Augen gesprüht wird, waschen Sie diese
unverzüglich mit Wasser aus und wenden Sie sich an einen Arzt.
•
Sprühen Sie die Spray Tanning Lotion nicht in oene Wunden oder auf geschädigte
Haut.
•
Decken Sie beim Besprühen des Gesichts die Haare ab. Insbesondere gebleichtes Haar
könnte durch die Spray Tanning Lotion sonst eckig werden.
•
Das Spray Tanning System niemals unter Wasser tauchen.
• Warnung: Verwenden Sie Ihr Spray Tanning System niemals in der Nähe von
Badewannen, Duschwannen oder anderen Gefäßen, die Wasser enthalten.
•
Ziehen Sie nach der Benutzung immer den Netzstecker, wenn sich das Spray Tanning
System in der Nähe eines Waschbeckens oder einer anderen Wasserquelle bendet.
Wasser stellt auch bei einem ausgeschaltetem System immer eine Gefahr dar.
•
Als zusätzlicher Schutz wird die Installation einer Fehlerstromschutzeinrichtung
(FI/RCD) mit einem Bemessungsauslösestrom von nicht mehr als 30 mA im
Badezimmerstromkreis empfohlen. Fragen Sie Ihren Installateur um Rat.
•
Ziehen Sie immer den Netzstecker bevor Sie den Sprühbehälter nachfüllen oder das
System reinigen.
•
Benutzen Sie nur original Ersatzteile des Herstellers. Mit original Aura Zubehör und
Ersatzteilen haben Sie die Gewähr, dass alle Sicherheitsvorschriften erfüllt sind.
•
Önen Sie das Spray Tanning System nie selbst um elektrische Reparaturen
auszuführen!
•
Sprühpistole nicht auf die Seite legen, da Material auslaufen könnte.
•
Das Spray Tanning System ist mit einer Thermosicherung ausgestattet, welche
das System bei Überhitzung abschaltet. In diesem Falle Spray Tanning System
ausschalten, Netzstecker ziehen und das System mind. 30 Minuten abkühlen lassen.
Überhitzungsursache abstellen, z. B. geknickter Schlauch, verschmutzter Luftlter,
abgedeckte Schlitze zur Luftansaugung.
4. Verarbeitbare Materialien
Flüssige Spray Tanning Lotion (Bräunungsmittel)
i
Verwenden Sie SprayTanning Lotion nur bis zum Ablauf des auf derVerpackung
angegebenen Haltbarkeitsdatums.
12 M
bedeutet zum Beispiel, dass das Mittel nach dem Önen noch 12 Monate
verwendet werden kann.
5. Nichtverarbeitbare Materialien
Alle nicht für die Hautbehandlung zugelassenen Materialien

D
17
Elite Click & Tan Plus Sprayer
Beschreibung (Abb. 1)
1) Luftkappe /Düse 2) Überwurfmutter
3) Sprühaufsatz 4) Abzugsbügel
5) Materialmengenregulierung 6) Pistolengri
7) EIN / AUS Schalter (2 Geschwindigkeitsstufen) 8) Luftschlauch
9) Deckel Luftlterfach 10) Pistolenhalter
11) Behälter
8
1
1
2
5
9
11
3
4
6
7
10
6. Vorbereitungen des Sprühbereiches
•
Entfernen Sie möglichst alle Gegenstände aus dem Sprühbereich, um
Verschmutzungen durch Sprühnebel (Overspray) zu vermeiden.
•
Arbeiten Sie in einem Raum mit einer glatten, leicht zu reinigenden Oberäche.
Die Verwendung einer Sprühkabine/Sprühzelt ist empfehlenswert.
7. Allgemeine Vorbereitungen vor dem Auftrag der Spray
Tanning Lotion
i
Testen Sie die Verträglichkeit der Spray Tanning Lotion auf einer kleinen
Hautpartie ca. 24 Stunden vor dem eigentlichen Auftragen der SprayTanning
Lotion. Brechen Sie die Anwendung ab, falls Hautirritationen auftreten.
•
Ca. 24-48 Stunden vor der Behandlung Körperbehaarung durch Rasieren oder
Entwachsen entfernen.
•
Kein Parfüm, Deo oder Make-up auftragen. Diese Produkte können das
Bräunungsergebnis negativ beeinussen.

D
18
Elite Click & Tan Plus Sprayer
VorAnschluss andas Stromnetzdaraufachten,
dass die Netzspannung mit der Angabe auf
dem Leistungsschild übereinstimmt.
1.
Behälter vom Sprühaufsatz abschrau-
ben.
2. Spray Tanning Lotion entsprechend den
Herstellerangaben vorbereiten und in
den Behälter einfüllen.
3.
Behälter fest am Sprühaufsatz an-
schrauben.
4.
Vorderteil der Pistole und Pistolengri
miteinander verbinden. (Abb. 2)
5. Luftschlauch montieren (Abb. 3, a + b).
6.
Gerät nur auf ebener und sauberer Fläche
abstellen. Gerät kann sonst Staub usw.
ansaugen.
7.
EIN / AUS Schalter am Gerät betätigen
(Position 1). (Abb. 4)
•
Am Tag der Behandlung dunkle, lockersitzende Kleidung tragen, um Verfärbungen
der Kleidung durch die Spray Tanning Lotion zu vermeiden.
•
Allen Schmuck ablegen, um Verfärbungen durch die Spray Tanning Lotion zu
vermeiden.
8. Vorbehandlung der Haut
iDie richtige Vorbehandlung der Haut ist der Schlüssel für ein gleichmäßiges
und langanhaltendes Bräunungsergebnis. Beachten Sie daher die folgenden
Hinweise
•
Entfernen Sie vor dem Auftragen der Spray Tanning Lotion unbedingt alle
abgestorbenen Hautzellen durch Peeling.
•
Achten Sie darauf, dass der Feuchtigkeitsgehalt der Haut möglichst gleichmäßig ist.
Verwenden Sie für trockene Stellen (z.B. Ellbogen und Knie) einen
Feuchtigkeitsspender. Lassen Sie den Feuchtigkeitsspender vor der Behandlung
zuerst trocknen.
•
Tragen Sie zum Schutz etwas Balsam auf Lippen, Nägel, Handinnenächen,
Augenbrauen und den Haaransatz auf.
9. Inbetriebnahme
2
➟
3
a
b
Table of contents
Languages:
Popular Paint Sprayer manuals by other brands

Graco
Graco Project Series owner's manual
Graco
Graco Magnum ProX instructions
Carlisle Fluid Technologies
Carlisle Fluid Technologies GA-313 Service manual
C.A. Technologies
C.A. Technologies Panther 100G 1590 Product information
PETIT auto wash
PETIT auto wash Accutrac 360-t installation manual

TrueHVLP
TrueHVLP Apollo 7500 AtomiZer instruction manual
