Auto-Sleepers Symbol Plus 2018 User manual

CONTENTS
Section
Introduction / Warranty / Body Construction............................. 1
Motorhome Code ..................................................................... 2
Preparing for the Road ............................................................. 3
On the Road ............................................................................. 4
Arrival on Site ........................................................................... 5
Safety & Security...................................................................... 6
Connection of Services ............................................................ 7
Technical Specification ............................................................. 8
Fitted Equipment ...................................................................... 9
Care of your Motorhome ........................................................ 10
Useful Information ................................................................... 11
Service Section ...................................................................... 12
Index ...................................................................................... 13
Copyright © 2011 Auto-Sleepers Ltd. All rights reserved.
No part of this document may be reproduced or transmitted in any form or by any means, electronic
or mechanical, for any purpose, without the express written permission of Auto-Sleepers Ltd.
Symbol Plus 2018 (HB1131)

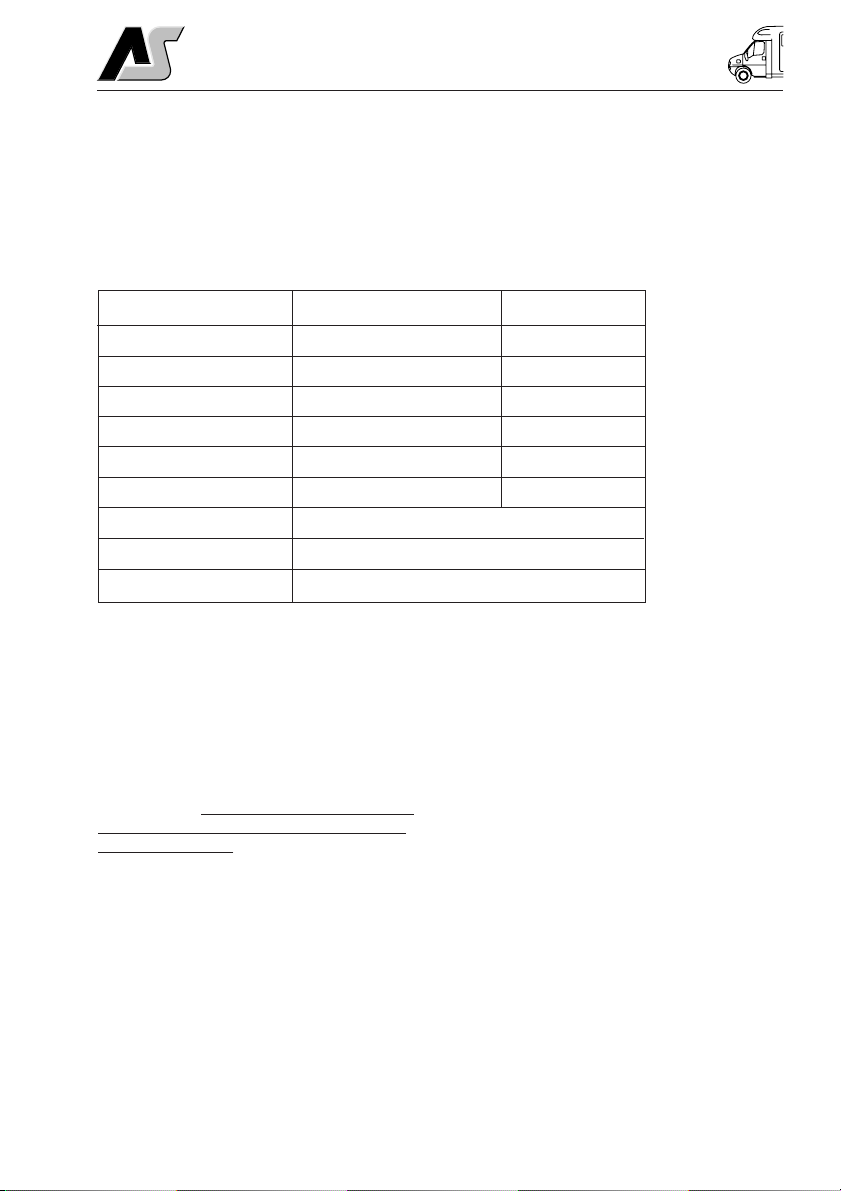
DATA RECORD
IMPORTANT NOTICE
Your vehicle is fitted with deadlocks on all doors. These are intended to
improve vehicle security, and mean that even if forced entry is gained to
the vehicle, for example through a broken window, it is still not possible to
open the doors from inside.
However, this also means that in some circumstances exit from the
vehicle may be delayed in an emergency.
Please read carefully the warning given on page 6-1.

1-1
Welcome.
Congratulations on your purchase of an Auto-
Sleeper motorhome. We are confident it will
give you many years of pleasure.
This handbook has been compiled to enable
you to obtain the maximum pleasure from
your vehicle. It contains the appliance
instructions along with advice on safety
matters.
Please read this Handbook thoroughly so that
you are conversant with all the motorhome
systems, operating instructions and
precautions.
Failure to observe these recommendations or
precautions may result in incorrect operation
of equipment and subsequent risk to
occupants.
Information leaflets and literature on safe
operation of appliances and equipment fitted
to your motorhome are included in the Auto-
Sleeper Customer Pack. Please read these
carefully prior to use.
Should you experience any difficulties contact
your dealer who will be pleased to offer
advise.
It is the policy of Peugeot and Auto-Sleeper to
continually improve their vehicles, so whilst
the details contained in this Handbook are
correct at the time of going to press, they
reserve the right to alter the specifications at
any time without notice.
Auto-Sleeper motorhomes offer a variety of
customer uses and whilst each vehicle
features the optimum storage, fluid, seating
and sleeping capabilities, it is the customer’s
responsibility to select the proper
combinations of loads without exceeding
weight capacities.
Your Auto-Sleeper motorhome conforms to
the European standard of EN 1646-1 for
habitation requirements relating to Health and
Safety.
IMPORTANT:
In the interests of safety, replacements parts
for appliances must conform to the
manufacturer’s specification and should be
fitted by them or an authorised agent.
Model
This Handbook covers the Symbol Plus
model, which is based on Peugeot Boxer L3
H2 long wheelbase high roof window van.
Gas System
The gas system is designed to operate on
LPG stored in a re-fillable tank fitted under
the vehicle. The regulator has a working
pressure of 30 mbar.
Conversion Type
Van conversion with end kitchen and
bathroom, combined with a front lounge with
seats that convert into a large double bed.
Climatic Conditions
This motorhome is designed for use in cold
climates, and is certified to grade 3 in
accordance with the European standard EN
1646-1: 2012. This means that it has been
tested and shown to provide a comfortable
internal environment even when the external
temperature is as low as -15ºC.
Handbook
Any queries should be addressed to your
Auto-Sleeper dealer.
Appliance Instructions
The appliance instructions included have
been extracted from those supplied from the
appliance manufacturers.
Automotive - Peugeot
For all automotive matters you should refer to
the Peugeot vehicle instructions manual. This
includes tyre pressures, referring to the type
of tyres fitted.
The Auto-Sleeper conversion does not affect
the tyre pressures in any way as it is built
within the design envelope of the base
vehicle.
The tyre pressures for your vehicle can be
found on a label located on the door pillar on
the left hand side of the body. Check the tyre
size fitted to your vehicle and read off the
appropriate information.
INTRODUCTION

1-2
WARRANTY
AUTO-SLEEPERS WARRANTY
Warranty Registration
The supplying dealer’s representative and
the purchaser must sign the declaration in
the Warranty/Service book to verify that the
dealer has explained the warranty terms and
conditions and that the purchaser
understands them.
The dealer must then register the sale on the
Auto-Sleepers warranty system to activate
the cover.
Warranty Terms and Conditions
For full details of the warranty terms and
conditions, please refer to the Warranty/
Service handbook supplied with your Auto-
Sleeper.
Contact Us
You may contact us at:
Auto-Sleepers Ltd,
Orchard Works,
Willersey,
Nr Broadway,
Worcestershire
WR12 7QF
England
Telephone: 01386 853338
Fax: 01386 858343
E-mail: [email protected]
Internet: www.auto-sleepers.co.uk
To enable us to deal with your q ueries
efficiently, always quote your vehicle’s
production number, which can be found
written on a label in the glovebox and on the
bottom edge of the Type Approval plate fitted
to the driver or passenger door pillar.
1-3
BODY CONSTRUCTION
BODY CONSTRUCTION:
Peugeot Boxer L2 H2 window van.
Body paint colours:
• Azzura Blue
• Golden White
• Iron Grey
• Silver
• White
Air Suspension
Your vehicle has been fitted with a
supplementary air suspension system on the
rear axle. This is called Air Top, is
manufactured by AL-KO, and uses additional
air springs to improve the quality of the
vehicle ride. The operating pressure may be
adjusted by the vehicle user to suit their
requirements. The system does not increase
the carrying capacity of the rear axle, or the
vehicle as a whole.
See Section 9 for further details.
Option 1 Option 2
Furniture Limewash Verada Oak
Furniture fittings Chrome Chrome
Work Surfaces Polyrey Maryland Fonce Slate Wraky
Table Polyrey Maryland Fonce Slate Wraky
Floor Vinyl Natural Oak Sweet Chestnut
Carpet Shepherds Friend Jute
Upholstery Sagrada (standard), Casa Mila (standard)
Curtains & Cushions To match upholstery colour
Exterior Graphics BS1880

1-4

2-1
MOTORHOME CODE
THE COUNTRY & COASTAL
CODES
Upon arrival at your destination you should
be aware of the Country Code relating to
motorhome owners. This is entitled the Motor
Caravanners’ Code.
Code of Conduct - Camp Sites
Arrivals
• Report to reception immediately on
arrival.
Vehicle Movement
• Keep to roadways unless otherwise
directed.
• Adhere to speed limits. Note that these
are generally 10 mph. (Remember that
the stopping distance on grass is
considerably greater than on tarmac).
• Only a person in possession of a current
driving licence may drive on the site.
• Park correctly as advised on your pitch.
Where possible leave 20ft of free space
around your vehicle.
Use of Site
• Use the electrical mains hook-up in the
correct manner and with caution.
• Ensure that all fresh water taps/
connections are turned off after use.
• Have care and consideration when using
all facilities (toilets and showers etc.) and
leave them clean and tidy. Young children
should be escorted.
To avoid possible damage to sewage
purification works, only approved chemical
fluids must be used. Under no circumstances
may coal tar, phenol or caustic-based fluids
be used. Disposable napkins and similar
bulky items must not be put into chemical
closet emptying points but should be
wrapped in a polythene bag and placed in the
container provided. (Put all litter in containers
marked for the purpose).
Noise
• Do not make excessive noise.
• Children should be restrained from
making excessive noise.
• Flying kites and model aircraft and the
use of items like catapults or air-guns as
well as ball games should not be
permitted among, or close to,
motorhomes.
• Musical instruments, record players,
radios and televisions should not be used
to the inconvenience of other people on
site.
• Open and close doors quietly.
• Power generators must be adequately
silenced and used with consideration.
Dogs and Pets
• All dogs and other pets should be kept
under control.
• Unless permission has been granted, no
animal should be allowed loose on the
site and leads must not exceed 10ft.
• No animal should be allowed in the
shower/toilet blocks.
• Do not let dogs foul the site.
Fire Precautions
Adhere to and make note of all fire
precautions concerning the whereabouts of
the fire points.
Although not compulsory, it is recommended
that a 1 kg (2lb) dry powder fire extinguisher
complying with standard EN 3-7 is carried. It
is important to check at regular intervals that
the extinguisher is working as is required by
types meeting EN 3-7.
Careful thought is necessary for the
positioning of the extinguisher, which should
be near the door but not too close to the
cooking equipment where sudden flames
could make it unreachable. In the kitchen
area, a fire blanket is a worthwhile
precaution.
Unless permission has been granted,
barbecues should not be used. When
permission has been given, consideration
should be given to the annoyance that can be
caused to other users of the site. Open fires
are not allowed.

2-2
MOTORHOME CODE
Awnings and Tents
Awnings and tents should only be used when
permission has been obtained.
When on grass and staying for more than a
few days, the ground sheet and/or side flaps
of awnings should be periodically raised in
order to avoid damage to the ground.
Departure
• Leave the pitch clean and tidy.
• On leaving, check out with the reception
paying the required dues.
Wild camping
Camping away from licensed sites, without
the permission of the landowner or his agent,
is not allowed in the United Kingdom. When
permission has been granted, all aspects of
this Code should be adhered to.
On no accounts should:
• Litter be disposed of other than in
receptacles provided.
• Water be allowed to escape from the
vehicle.
• Chemical toilets be emptied except into
the disposal places agreed with the
landowner.
• Washing or similar be hung outside the
vehicle.
Parking
Motorhomes should only be parked in
approved places.
When using the facilities of a motorhome at
such times, care and consideration should be
given to those around them.
Driving
When using a motorhome on either the public
highway or private road, the Highway Code
should be complied with and full
consideration given to other road users.
In the event of a motorhome travelling slowly
and there being a queue of traffic behind, the
driver of the motorhome should, where
possible, pull over in order to let the other
traffic pass.
When the vehicle is in motion it is compulsory
that all passengers are seated and seat
restraint straps worn.
Before moving off, elevating roofs MUST be
lowered and correctly secured, and top
hinged windows closed. Likewise all doors
and access lockers for gas containers and
chemical toilets must be properly closed.
Exterior steps should be properly retracted
and secured.
When the vehicle is being refuelled, or on a
ferry, all gas systems must be turned off.
Gas appliances should only be used when
the vehicle is in motion when the
manufacturer of the appliance permits such
use.
Handbook
Before using a motorhome all aspects of the
handbooks produced by the chassis
manufacturer and the converter must be read
and adhered to.
Environment
Care and consideration should be taken to
protect the environment.
Observe the Country and Coastal Codes
shown below:
The Country Code
Enjoy the countryside but respect its life and
work.
More people than ever before are exploring
the countryside, interested in farming, plant
life, bird watching or just observing the
general wildlife. Whatever your interest, there
is a lot to learn, but please observe the
following code.
Guard against all risk of fires. Hay and heath
land catch alight easily and once ablaze are
very hard to put out. Remember: Fire
Spreads Quickly.
• Keep to public paths across farmland.
• Use gates and stiles to cross fences,
hedges and walls.
• Leave livestock, crops and machinery
alone. View from a distance.
• Take your litter home - it is unsightly and
harmful to wildlife.

2-3
MOTORHOME CODE
• Help to keep all water clean.
• Take special care of country roads.
• Make no unnecessary noise. Most
animals are very timid, noises can disturb
them unnecessarily. If you want to get the
best out of the country, go quietly.
The Coastal Code
As our coastlines are increasingly used for
recreation and education, the following
suggestions are made to enable us to enjoy
our inheritance and preserve it for posterity.
• Do not trample about, or move rocks
unnecessarily.
• Do not frighten seals or seabirds.
• Do not spear fish.
• Do not spill detergents, solvents or fuel
from boats as these can kill marine life.
• When sailing, moderate your speed - the
wash from a fast boat can destroy banks
and nests.
• Live mollusks and crustaceans need not
be collected as souvenirs - dead shells
can usually be found.
• Shellfish can take years to grow and
fines can be imposed for not observing
national regulations.
• Do not pull up seaweed unnecessarily.
• Make your visit instructive - not
destructive.
• Look at material, don’t remove it. Take
notes and photographs, not specimens.
• Observe bye-laws and be considerate to
others.
• National Trust property or Country Parks
have regulations to protect the wildlife.
Follow these.
Fire Precautions
You should also make yourself aware of the
local fire regulations.

2-4
MOTORHOME CODE

3-1
PREPARING FOR THE ROAD
YOUR MOTORHOME (Weights
explained)
Mass in Running Order (MRO)
The weight of your motorhome as it leaves
the factory, as new with standard fixtures and
fittings, plus an allowance for driver and 90%
fuel.
Maximum Technically Permissible Laden
Mass (MTPLM)
The maximum weight of the vehicle when
fully laden for use on the road. See
specification section for actual figure.
User Payload
The load margin (payload), this represents
the difference between the Mass in Running
Order (MRO) and the Maximum Technically
Permissible Laden Mass (MTPLM). It shows
the maximum weight which can be loaded
into your motorhome, covering items such as
food, crockery, cutlery, clothing, bedding, gas
cylinders, etc. See Technical Specification for
actual figure.
Please take care to ensure that you have
allowed for the masses of all items you intend
to carry in the motorhome, e.g.. passengers,
optional equipment, essential habitation
equipment and personal effects such as
clothing, food, pets, bicycles etc.
Although there are additional seat belts within
the motorhome, please refer to the stated
number of passengers that are allowed due
to the MRO and MTPLM.
LOADING AND DISTRIBUTION OF
WEIGHT IN THE MOTORHOME
Loading
Correct weight distribution is a major factor in
making your motorhome a balanced and
pleasant vehicle to drive without
compromising road-holding. Care should
therefore be taken to ensure that heavy items
are well spaced and are in as low a position
as possible, for example, low cupboards and
bed boxes.
DO NOT EXCEED THE STATED MAXIMUM
LOAD. ITEMS FITTED OTHER THAN
STANDARD EQUIPMENT WILL DEPLETE
THE PAYLOAD STATED IN THIS
HANDBOOK.
WARNING: Under no circumstances
should the maximum permissible laden
mass of the motorhome be exceeded.
Roof Loading
DO NOT ALLOW CHILDREN TO CLIMB
ONTO THE ROOF.
Roof Bars
Note that the bars fitted to the sides of the
roof of your vehicle are intended as a styling
feature only. They are not intended to be
used to secure anything to the roof.
SENSIBLE LOADING
HOW TO APPORTION WEIGHT

3-2
PREPARING FOR THE ROAD
Before Moving Off
Whenever making a journey with your
motorhome, either setting off on holiday or
returning home, it is good practice to run
through this simple checklist.
1. Close and secure all cupboards and
drawers and check any loose articles. Do
not store tins, bottles, etc. in overhead
lockers.
2. Close and secure all windows and roof
lights.
3. Leave all curtains and blinds open to aid
visibility.
4. Turn off all gas appliances, except those
heating appliances designed to function
while the vehicle is in motion. Ensure that
the red isolation taps are in the ‘off’
position.
5. Ensure that there is sufficient gas to meet
your needs.
6.
Switch off 230 volt supply at source,
disconnect mains cable from site supply
before disconnecting from vehicle. Beware
of potential electric shock from wet cable.
Coil cable and store in a safe place.
7. Check your RCD’s/MCB’s for operation.
8. Check and if necessary, charge the
habitation battery.
9. Check battery selection switch is in the
OFF position.
10. Check that the battery is secure and that
the battery box lid is fastened.
11. Ensure the fridge is on 12V operation
and door lock is set. (Note: the electrical
relays will allow the fridge to be run on
the vehicle battery when the engine is
running.)
12. Remove any external fresh water
connections etc.
13. Make sure any heavy articles are stored
in accordance with the loading
procedure. Tables should also be made
secure.
14. Lock the motorhome exterior door
(remember to take out your keys).
15. Check your external rear view mirrors
and adjust if necessary.
16. Check that all corner steadies are wound
up and that, if a step is used, it is put
away before moving off.
17. Check wheel nuts are secure and tyre
pressures are correct.
18. Ensure, if required, that your fresh water
tank is full and your waste tank is empty.
19. Referring to your base vehicle manual,
check all fluid levels including automotive
fuel and tyre pressures. Remember to
check that your spare tyre is at the
recommended pressure.
20. Ensure that, on models fitted with an
elevating roof, the roof is securely locked
down with the exterior catches applied.
21. The fridge vent covers should be fitted
when the vehicle is to be driven in order
to comply with European Type Approval
regulations for vehicle external
projections.
22. Ensure that the toilet flush tank (where
fitted) only contains a small amount of
water (1-2 litres) in order to minimise the
risk of leaks or spillage whilst the vehicle
is in motion.
23. Check underneath the vehicle for stray
items.
24. Safely store levelling blocks away in an
appropriate place.

4-1
ON THE ROAD
Pulling Off
Engage the clutch smoothly.
Avoid wear and tear on clutch and
transmission by taking extra care.
Change gears smoothly.
Try not to jerk the clutch.
MOTORWAY DRIVING
Speed Limits (UK)
If a speed limit is not in force, your
motorhome can be driven up to 70mph on
motorways and dual carriageways.
1. Reduce Speed:
i) In high or cross winds.
ii) Downhill.
iii) In poor visibility.
2. High sided vehicles cause air buffeting,
so extra care must be taken when
passing or being passed. As much space
as possible should be given.
Motorway Handling
Do not bump the kerb with the wheels.
When passing other vehicles allow more than
the normal clearance.
Allow longer to get up speed to pass.
Do not swing out suddenly.
Carry out all manoeuvres as smoothly as
possible.
Use nearside wing mirror to check
motorhome has cleared when overtaking.
Changing a Wheel
Refer to the vehicle handbook
WARNING: Ensure the wheel is of the same
construction and size as the one that has
been removed.
Jacking
Front and Rear - use the standard jacking
points as per the base vehicle handbook.
Removing the Spare Wheel
CAUTION: Exercise care when lowering
the wheel frame due to its weight.
Removal
a. The spare is located under the rear floor
of the vehicle.
b. Tools - The jack, handle and wheel brace
are stored in a case located under the
front passenger seat.
c. Follow the procedure for changing a
wheel as described and illustrated in the
base vehicle handbook.
Replacement of Spare Wheel
Follow the procedure as described in the
base vehicle handbook.
Access to Vehicle Rear Lights
To gain access to the vehicle rear lights, on
the nearside remove the two white caps in
the rear corner of the shower. On the offside,
access to the top retaining nut is through a
hole in the panel in the corner below the sink,
while the lower nut is accessible through the
heater access door at the back of the kitchen.
To change a light bulb, follow the instructions
in the base vehicle manufacturer owner’s
handbook.
Caravan Door Step
Your vehicle is fitted with an electrically
operated side step. In the event of the step
being left extended a buzzer, positioned
under the dashboard, will sound (when the
ignition is switched on) and the step will self-
retract.
Cycle Rack
In the event of a cycle rack being fitted, the
cycle rack when folded will increase the
vehicle length by 400mm. Your Auto-Sleeper
dealer will give further advice or assistance if
required.

4-2
ON THE ROAD
Front Seat Swivel (where fitted)
Your vehicle may be fitted with a swivel base
to either or both of the front seats, so that
they may be turned to face the rear of the
vehicle.
The release lever, coloured red, is located at
the front of the seat and is pushed
downwards to unlock the swivel mechanism.
Note: It may be necessary to lower the
handbrake in order to swivel the driver’s seat.
In this case, ensure that first gear (or PARK
on automatic) is engaged and the road
wheels are chocked first.
WARNING: It is important that while the
vehicle is in motion, any seat swivels are
locked in the forward facing position.
Map Storage
In the rear of each cab seat there is a map
pocket for storage of maps, periodicals and
light items.
Whilst Driving
Whilst the vehicle is being driven ensure that:
• Both the passenger and driver wear seat
belts - this is a legal requirement.
• Heavy loads are not stored in top
cupboards or in areas from which they
may become detached. Please ensure
that heavy items are stored low down and
take care not to overload individual
wheels, the axles or the MTPLM.
• Table(s) are stowed in the correct
position and table legs secured in their
retaining clips.
• Furniture lids are lowered; cupboards and
flaps are closed and secured.
• The refrigerator door is closed and
secured by its travelling catch.
• The retractable rear step if fitted, is folded
away or, if a separate step is supplied, it
is safely stowed in the vehicle.
• Roof ventilators are closed and locked in
the down position.
• The bathroom is not used whilst the
vehicle is in motion. (Note: Refers only to
models fitted with shower or toilet
compartment).
• Top hinged windows are closed, and
securely fastened.
• Children do not roam around the vehicle;
they may fall and injure themselves.

5-1
ARRIVAL AT SITE
CHECK SITE REGULATIONS
Siting your Motorhome
When siting your motorhome, keep to the
roadways unless otherwise directed. Obey
the speed limit which, in general, is 10 mph.
Only a person in possession of a current
driving licence is permitted to drive on the
site. Stopping distances on grass are
considerably greater than on tarmac.
Selecting a Pitch
Carefully select where you wish to park your
motorhome. The site should be as level as
possible, well drained and away from boggy
areas and, preferably, not under or near
trees. Consider also, how you will move your
motorhome when leaving the site. For
example, on sloping ground in wet
conditions, pitch facing downhill.
Levelling
It is important to site your motorhome level to
ensure correct operation of the refrigeration,
cooker, etc, by using purpose made ramps
and NOT bricks or such items.
Awning Light
The exterior awning light is controlled by a
switch on the bulkhead adjacent to the
entrance door.
Fridge vent covers
Remove the fridge vent covers from the
outside vents by turning the screws anti-
clockwise and pulling the covers gently
outward from the bottom. Store in a safe
place and replace in the reverse fashion,
prior to driving on public roads as noted in
section 3.

5-2
ARRIVAL AT SITE

6-1
SAFETY & SECURITY
SAFETY
Important: Your attention is drawn to the
notice affixed in the motorhome advising on
fire prevention, ventilation and what to do in
case of fire.
Emergency Exit
WARNING: Your vehicle is fitted with
deadlocks, on all doors, as part of the
Peugeot security system. These are
activated when the ‘Lock’ button on the key
fob is pressed twice in succession, and
means that the doors cannot be opened
even if entry has been gained to the inside,
through a broken window for instance.
However, this also means that in an
emergency, exit from the vehicle may be
delayed if the key fob has been used to lock
the vehicle with people inside, and is not
immediately to hand.
In order to avoid this possibility it is
important that the vehicle is not locked
using the key fob when people are inside,
at night for instance.
Instead, use the central locking button on
the facia (adjacent to the hazard warning
lamp switch) to lock the vehicle.
This will lock the vehicle from the outside,
without applying the deadlocks, but means
that the doors can still be opened
immediately from inside by pulling the door
release lever.
Please refer to the Peugeot handbook
section on ‘Access’ for further details, and
note carefully the warnings given there
also.
Children
Do not leave children alone in the motorhome
in any event, keep potentially dangerous items
out of reach as at home. e.g. matches, drugs,
etc.
WARNING: When upper bunks are used by
children especially under six years of age
care shall be taken against the risk of them
falling out.
Fire Extinguishers
It is recommended that a 1 kg (2lb) minimum
capacity dry powder fire extinguisher be
located by the main exit door at all times.
A pan fire should not have an extinguisher
aimed at it but be smothered with a fire
blanket (which should be stored by the
cooker).
In case of fire
1. Get everyone out of the motorhome as
quickly as possible using whichever exit is
the quickest including windows. Do not
stop to collect any personal items.
2. Raise the alarm — Call the fire brigade.
3. Turn off gas container valve if safe to do
so.
Ventilation and Condensation
The ventilation points on your motorhome are
fixed points of ventilation which are stated by
the European Standards. Under no
circumstances must these vents be blocked or
obstructed. It is advised that fixed ventilation
points and any protective screens are
checked and cleaned (if necessary) on a
regular basis.
It is recommended that any elevating roofs be
raised when the motorhome is used for
habitation purposes.
Fresh air circulation should be allowed below
the motorhome when appliances are in use
and when flues terminate below the floor to
allow free evacuation of the products of
combustion. At least three sides of the
underfloor space should always be kept open
and unobstructed especially by snow. Do not
make any additional openings in the floor.
Under no circumstances must these vents
be blocked or obstructed.
Additional night time ventilation is obtained by
releasing the window catches and placing
them in the second groove on the frame
catch.

6-2
SAFETY & SECURITY
ELECTRICAL SYSTEMS
Batteries
Battery terminals and connectors should be
firmly attached. Battery surfaces should be
free of moisture and dirt.
Where removable cell taps are fitted these
must be screwed firmly home.
When removing a battery always remove the
negative cable first. On re-connection the
negative cable should be connected last.
Switch off all lamps and appliances before
disconnecting the battery. Do not smoke
while working on or near to the battery.
Fuses
Always replace blown fuses with one of a
correct rating.
Overload
Never overload any electrical circuit,
especially the 12-volt socket outlet. The
rating of appliances should be checked
before connection.
Shower Compartment Light
Ensure that water does not ingress into the
light unit.
Charger Unit
Keep the charger unit well ventilated and
never allow material or bags to be in contact
with the unit casing which gets hot when the
unit is operating.
230 Volt Mains Operation
Before connecting to the supply, ensure that
the contacts in both the plug and the socket
are clean and dry and that the hook-up plug
is firmly located and locked into the socket.
The RCD must be easily accessible at all
times.
GENERAL
Before using your Auto-Sleeper, you should
be fully conversant with the following safety
precautions; if you are in any doubt as to the
meaning of any of them you should contact
your supplying Auto-Sleeper dealer. Please
read the following carefully.
Awnings
There is no danger of pollution of an
enclosed awning space by the LPG exhaust
from the refrigerator venting into it.
WARNING: Space heaters may produce
sufficient exhaust gases to pollute the
awning space if it is totally enclosed (from
a general comfort, smell, and hygiene
point of view). In the extreme case, there
could be a build up of carbon dioxide to a
dangerous level.
Note: Motorhome owners are advised to
allow some fresh air circulation into the
awning space when such appliances are in
use.

6-3
SAFETY & SECURITY
In the interests of safety, replacement parts
for appliances should conform to the
appliance manufacturer’s specification and
should be fitted by them or their authorised
agent.
WARNINGS:
1 Never use portable cooking or heating
equipment, other than electric heaters
that are not of the direct radiant type,
as it is a fire and asphyxiation hazard.
2 Do not use cookers as heaters or dry
clothes etc on the cooker or space
heater.
3 Make sure that combustible materials
can not come into contact with hot
surfaces or burners.
4 Surfaces of appliances may become
hot in use and the guard provided
does not give full protection to the
young and elderly.
5 Do not use additional independent gas
appliances inside the vehicle.
6 Never allow modifications of electrical
or LPG systems or appliances except
by qualified technicians.
The water heater fitted to this vehicle is of the
“room sealed” type, any replacement should
be the same, i.e. “room sealed”.
Turn off all gas equipment and cylinders/
tanks and any other heating appliances
before travelling.
Ventilation openings are located below all the
gas appliances, and in the base of the gas
locker. In winter conditions make sure the
vents are clear of snow and mud. These
openings should be regularly checked and
any mesh covering them cleaned with a stiff
brush to prevent any risk of them becoming
blocked. The openings are provided for your
safety - please do not obstruct them.
Air Bags
Do not fit rear-facing children’s seats to front
facing seat protected by air bags. It is
recommended that small children do not sit in
the front passenger seat whilst the vehicle is
in motion. Follow the advice given in your
base vehicle instruction book.
Smoke Alarm
A Fire Angel battery operated smoke alarm is
fitted to your vehicle. Please read carefully
the manufacturers instructions supplied in
order to understand it’s operation.
Features
• Battery operated.
• Operating light (LED) flashes
approximately every 40 seconds
confirming unit is powered.
• Low battery warning. Unit “beeps”
approximately every 40 seconds for up to
7 days when the battery needs replacing.
• Sensitivity test button. Tests sensitivity,
circuitry, battery, horn.
• Loud 85 decibel Piezo electric alarm.
Automatically resets when hazardous
condition has passed.
• Smart Silence, which enables you to
temporarily silence your alarm for 10
minutes whilst cooking in order to avoid
unnecessary alarms.
WARNING: Test smoke alarm operation
after vehicle has been in storage, before
each trip and at least once per week
during use.
Your alarm requires one 9 volt battery. Under
normal use, the battery should last
approximately one year.
Simple maintenance
Gently vacuum the outside of the alarm every
three months using a soft brush to help keep
the unit working efficiently.
Problems are indicated by two events:
1. The alarm does not sound upon pressing
the test button.
2. The alarm chirps intermittently.
Try the following:
1. Inspect for obvious damage.
2. Visually check that unit contains
recommended battery type.
3. Check that battery is properly connected.
4. Gently vacuum as recommended above.
5. Replace battery.
If these procedures do not correct the
problem, do NOT attempt repairs. Contact
the manufacturer.
6-4
SAFETY & SECURITY
centre of the
Test/Reset
button briefly
to confirm
that the
detector is
operating
properly. The
sounder will
sound as
soon as the
button is
pressed and
the Alarm
LED will
illuminate red
indicating that
the sounder
is working
and the
power pack is
providing power to the unit. This test for
the sounder, power pack and circuitry
should be performed on a weekly basis.
This should be continued for the lifetime
of the product.
WARNING: Prolonged exposure to the
sounder in close proximity to your ears
may damage your hearing.
Under normal operating conditions the power
pack will last for the lifetime of the product, ie.
7 years.
The detector will not protect against the risk
of carbon monoxide poisoning when the
power pack has drained.
WARNING: Prolonged exposure to
extreme high or low temperature may
reduce the life of the power pack.
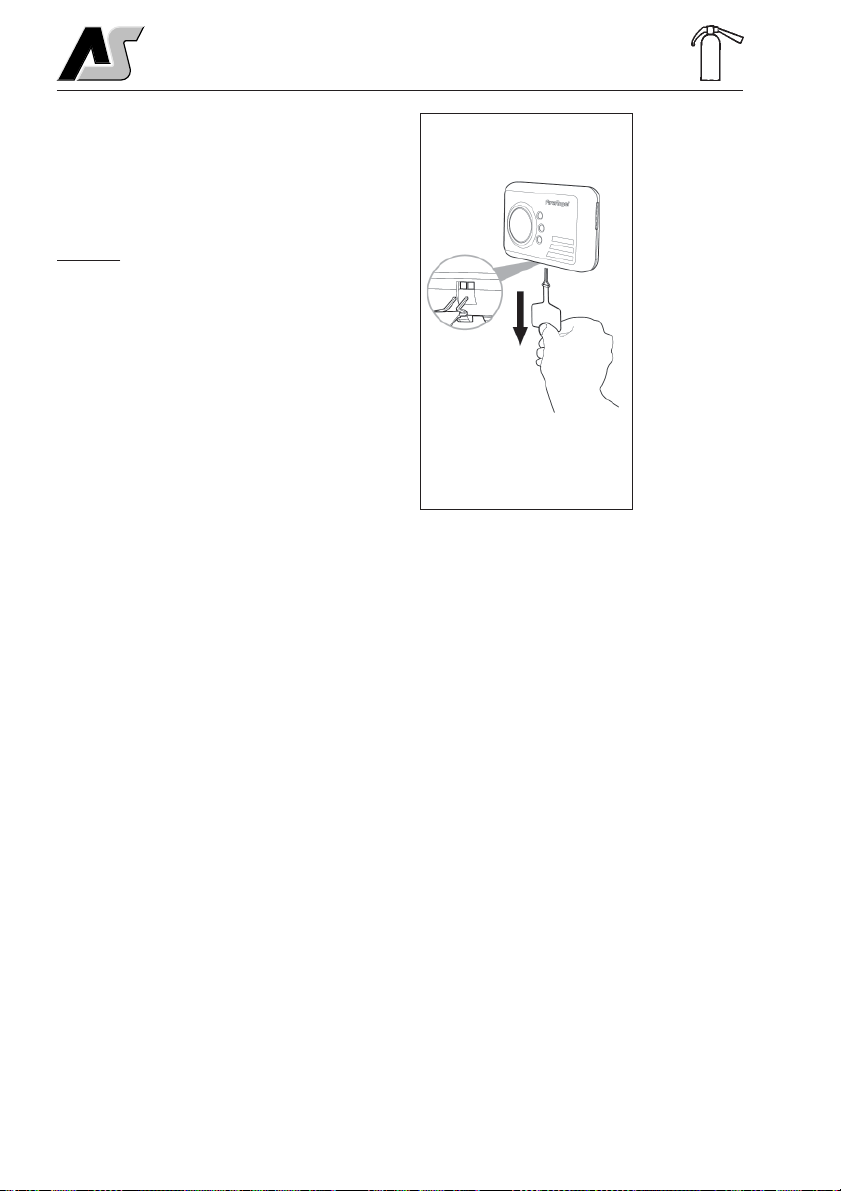
Power Pack Deactivation
Your CO-9X is portable, making it ideal for
taking with you on holiday. You will need to
deactivate your detector when travelling or
even when storing e.g. when decorating.
Fitting is the reverse of removal. To
deactivate the detector the two ends of the
metal clip must be inserted into the
corresponding holes in the disabling socket
located on the underside of the detector (see
Fig 2). You can ensure that the product is
Fig 1
Carbon Monoxide Alarm
A Fire Angel battery operated Carbon
Monoxide Poisonous Gas alarm is fitted to
your vehicle. Please read carefully the
manufacturers instructions supplied in order
to understand it’s operation.
Features
• An advanced electrochemical sensor
designed to accurately measure low
levels of carbon monixide (CO) providing
an early warning of toxic CO levels in
your motorhome.
• Detects carbon monoxide continuously.
• Resistant to false alarms caused by
normal household contaminants.
• Sounds a loud 85dB alarm (at 3 metres/
10 feet) to alert you in case of an
emergency.
• Test/Reset button.
• Regular self-check to ensure detector is
operating correctly.
• Simple to mount, portable, ideal for
travelling.
• Certified to European Carbon Monoxide
Alarm Standard BS EN 50291:2001.
• Seven year limited warranty (batteries
excluded).
Power Pack Activation
• Your detector comes complete with an
integrated power pack that will provide
power for its entire operational life. To
activate the power pack you need to pull
the disabling tab (see Fig 1). This will in
turn pull out the metal disabling clip,
which is attached to the end of the tab,
from the disabling socket which is
situated on the underside of the detector.
Retain the disabling tab for future use.
• When the detector is activated the Power
LED will begin to flash green once every
minute to indicate that the detector is
receiving power from the power pack and
is fully operational.
• Test the sounder, power pack and
circuitry by pressing and holding the
Table of contents


