manuals.online logo
Brands
  1. Home
  2. •
  3. Brands
  4. •
  5. AutomationDirect
  6. •
  7. Controllers
  8. •
  9. AutomationDirect CLICK Series User manual

AutomationDirect CLICK Series User manual

Manual Number: C0-USER-M
~WARNING ~
Thank you for purchasing automation equipment from Automationdirect.com®, doing business as,
AutomationDirect. We want your new automation equipment to operate safely. Anyone who installs or
uses this equipment should read this publication (and any other relevant publications) before installing or
operating the equipment.
To minimize the risk of potential safety problems, you should follow all applicable local and national
codes that regulate the installation and operation of your equipment. These codes vary from area to area
and usually change with time. It is your responsibility to determine which codes should be followed, and
to verify that the equipment, installation, and operation is in compliance with the latest revision of these
codes.
At a minimum, you should follow all applicable sections of the National Fire Code, National Electrical
Code, and the codes of the National Electrical Manufacturer’s Association (NEMA). There may be local
regulatory or government offices that can also help determine which codes and standards are necessary for
safe installation and operation.
Equipment damage or serious injury to personnel can result from the failure to follow all applicable
codes and standards. We do not guarantee the products described in this publication are suitable for
your particular application, nor do we assume any responsibility for your product design, installation, or
operation.
Our products are not fault-tolerant and are not designed, manufactured or intended for use or resale as
on-line control equipment in hazardous environments requiring fail-safe performance, such as in the
operation of nuclear facilities, aircraft navigation or communication systems, air traffic control, direct life
support machines, or weapons systems, in which the failure of the product could lead directly to death,
personal injury, or severe physical or environmental damage (“High Risk Activities”). AutomationDirect
specifically disclaims any expressed or implied warranty of fitness for High Risk Activities.
For additional warranty and safety information, see the Terms and Conditions section of our catalog.
If you have any questions concerning the installation or operation of this equipment, or if you need
additional information, please call us at 770-844-4200.
This publication is based on information that was available at the time it was printed. At
AutomationDirect we constantly strive to improve our products and services, so we reserve the right to
make changes to the products and/or publications at any time without notice and without any obligation.
This publication may also discuss features that may not be available in certain revisions of the product.
Trademarks
This publication may contain references to products produced and/or offered by other companies. The product and company names
may be trademarked and are the sole property of their respective owners. AutomationDirect disclaims any proprietary interest in the
marks and names of others.
Copyright 2019, Automationdirect.com®Incorporated
All Rights Reserved
No part of this manual shall be copied, reproduced, or transmitted in any way without the prior, written consent of
Automationdirect.com®Incorporated. AutomationDirect retains the exclusive rights to all information included in this document.
~ ADVERTENCIA ~
Gracias por comprar equipo de automatización de Automationdirect.com®. Deseamos que su nuevo equipo
de automatización opere de manera segura. Cualquier persona que instale o use este equipo debe leer esta
publicación (y cualquier otra publicación pertinente) antes de instalar u operar el equipo.
Para reducir al mínimo el riesgo debido a problemas de seguridad, debe seguir todos los códigos de seguridad
locales o nacionales aplicables que regulan la instalación y operación de su equipo. Estos códigos varian de
área en área y usualmente cambian con el tiempo. Es su responsabilidad determinar cuales códigos deben ser
seguidos y verificar que el equipo, instalación y operación estén en cumplimiento con la revisión mas reciente
de estos códigos.
Como mínimo, debe seguir las secciones aplicables del Código Nacional de Incendio, Código Nacional Eléctrico,
y los códigos de (NEMA) la Asociación Nacional de Fabricantes Eléctricos de USA. Puede haber oficinas de
normas locales o del gobierno que pueden ayudar a determinar cuales códigos y normas son necesarios para una
instalación y operación segura.
Si no se siguen todos los códigos y normas aplicables, puede resultar en daños al equipo o lesiones serias a
personas. No garantizamos los productos descritos en esta publicación para ser adecuados para su aplicación
en particular, ni asumimos ninguna responsabilidad por el diseño de su producto, la instalación u operación.
Nuestros productos no son tolerantes a fallas y no han sido diseñados, fabricados o intencionados para uso
o reventa como equipo de control en línea en ambientes peligrosos que requieren una ejecución sin fallas,
tales como operación en instalaciones nucleares, sistemas de navegación aérea, o de comunicación, control de
tráfico aéreo, máquinas de soporte de vida o sistemas de armamentos en las cuales la falla del producto puede
resultar directamente en muerte, heridas personales, o daños físicos o ambientales severos (“Actividades de Alto
Riesgo”). Automationdirect.com específicamente rechaza cualquier garantía ya sea expresada o implicada
para actividades de alto riesgo.
Para información adicional acerca de garantía e información de seguridad, vea la sección de Términos
y Condiciones de nuestro catálogo. Si tiene alguna pregunta sobre instalación u operación de este equipo, o
si necesita información adicional, por favor llámenos al número 770-844-4200 en Estados Unidos.
Esta publicación está basada en la información disponible al momento de impresión. En Automationdirect.
com nos esforzamos constantemente para mejorar nuestros productos y servicios, así que nos reservamos el
derecho de hacer cambios al producto y/o a las publicaciones en cualquier momento sin notificación y sin
ninguna obligación. Esta publicación también puede discutir características que no estén disponibles en ciertas
revisiones del producto.
Marcas Registradas
Esta publicación puede contener referencias a productos producidos y/u ofrecidos por otras compañías. Los nombres
de las compañías y productos pueden tener marcas registradas y son propiedad única de sus respectivos dueños.
Automationdirect.com, renuncia cualquier interés propietario en las marcas y nombres de otros.
PROPIEDAD LITERARIA 2019, AUTOMATIONDIRECT.COM®INCORPORATED
Todos los derechos reservados
No se permite copiar, reproducir, o transmitir de ninguna forma ninguna parte de este manual sin previo
consentimiento por escrito de Automationdirect.com®Incorprated. Automationdirect.com retiene los derechos
exclusivos a toda la información incluida en este documento. Los usuarios de este equipo pueden copiar este
documento solamente para instalar, configurar y mantener el equipo correspondiente. También las instituciones de
enseñanza pueden usar este manual para propósitos educativos.
~ AVERTISSEMENT ~
Nous vous remercions d’avoir acheté l’équipement d’automatisation de Automationdirect.com®, en faisant des
affaires comme, AutomationDirect. Nous tenons à ce que votre nouvel équipement d’automatisation fonctionne en
toute sécurité. Toute personne qui installe ou utilise cet équipement doit lire la présente publication (et toutes les
autres publications pertinentes) avant de l’installer ou de l’utiliser.
Afin de réduire au minimum le risque d’éventuels problèmes de sécurité, vous devez respecter tous les codes locaux
et nationaux applicables régissant l’installation et le fonctionnement de votre équipement. Ces codes diffèrent d’une
région à l’autre et, habituellement, évoluent au fil du temps. Il vous incombe de déterminer les codes à respecter et
de vous assurer que l’équipement, l’installation et le fonctionnement sont conformes aux exigences de la version la
plus récente de ces codes.
Vous devez, à tout le moins, respecter toutes les sections applicables du Code national de prévention des incendies,
du Code national de l’électricité et des codes de la National Electrical Manufacturer’s Association (NEMA). Des
organismes de réglementation ou des services gouvernementaux locaux peuvent également vous aider à déterminer
les codes ainsi que les normes à respecter pour assurer une installation et un fonctionnement sûrs.
L’omission de respecter la totalité des codes et des normes applicables peut entraîner des dommages à l’équipement
ou causer de graves blessures au personnel. Nous ne garantissons pas que les produits décrits dans cette publication
conviennent à votre application particulière et nous n’assumons aucune responsabilité à l’égard de la conception, de
l’installation ou du fonctionnement de votre produit.
Nos produits ne sont pas insensibles aux défaillances et ne sont ni conçus ni fabriqués pour l’utilisation ou la revente
en tant qu’équipement de commande en ligne dans des environnements dangereux nécessitant une sécurité absolue,
par exemple, l’exploitation d’installations nucléaires, les systèmes de navigation aérienne ou de communication, le
contrôle de la circulation aérienne, les équipements de survie ou les systèmes d’armes, pour lesquels la défaillance du
produit peut provoquer la mort, des blessures corporelles ou de graves dommages matériels ou environnementaux
(«activités à risque élevé»). La société AutomationDirect nie toute garantie expresse ou implicite d’aptitude à
l’emploi en ce qui a trait aux activités à risque élevé.
Pour des renseignements additionnels touchant la garantie et la sécurité, veuillez consulter la section Modalités et
conditions de notre documentation. Si vous avez des questions au sujet de l’installation ou du fonctionnement de
cet équipement, ou encore si vous avez besoin de renseignements supplémentaires, n’hésitez pas à nous téléphoner au
770-844-4200.
Cette publication s’appuie sur l’information qui était disponible au moment de l’impression. À la société
AutomationDirect, nous nous efforçons constamment d’améliorer nos produits et services. C’est pourquoi nous
nous réservons le droit d’apporter des modifications aux produits ou aux publications en tout temps, sans préavis ni
quelque obligation que ce soit. La présente publication peut aussi porter sur des caractéristiques susceptibles de ne
pas être offertes dans certaines versions révisées du produit.
Marques de commerce
La présente publication peut contenir des références à des produits fabriqués ou offerts par d’autres entreprises. Les désignations
des produits et des entreprises peuvent être des marques de commerce et appartiennent exclusivement à leurs propriétaires
respectifs. AutomationDirect nie tout intérêt dans les autres marques et désignations.
Copyright 2019, Automationdirect.com®Incorporated
Tous droits réservés
Nulle partie de ce manuel ne doit être copiée, reproduite ou transmise de quelque façon que ce soit sans le consentement préalable
écrit de la société Automationdirect.com®Incorporated. AutomationDirect conserve les droits exclusifs à l’égard de tous les
renseignements contenus dans le présent document.
CLICK PLC User Manual
Please include the Manual Number and the Manual Issue, both shown below,
when communicating with Technical Support regarding this publication.
Manual Number: C0-USER-M
Issue: 6th Edition, Rev. G
Issue Date: 2/2020
Publication History
Issue Date Description of Changes
1st Edition 5/08 Original
Rev. A 10/08 Updated specifications and drawings throughout manual.
2nd Edition 5/09 Added Port 3 and C0-02DD1-D, C0-02DD2-D, C0-02DR-D analog CPU units.
Rev. A 8/09 Updated wiring diagram for C0-02DR-D CPU module.
3rd Edition 10/10 Added four Standard CPUs and C0-08NE3 and C0-16NE3 24VAC input modules
Rev. A 11/10 Revised current consumption specification for Standard and Analog CPUs.
4th Edition 6/13 Added 11 I/O modules: 3 discrete combo, 4 analog in, 2 analog out, 2 analog combo.
Rev. A 10/13 Added 11 I/O modules: 3 discrete combo, 4 analog in, 2 analog out, 2 analog combo.
5th Edition 12/15 Added eight CLICK PLC units with built-in Ethernet
Rev. A 4/17 Added Interlocking examples to Chapter 4, software and firmware updates, and other
misc. minor corrections.
6th Edition 11/17 Added twelve CLICK Ethernet Analog PLC units.
Rev. A 10/03/18 Added detailed information on high-speed operations and configurations.
Rev. B 10/18/18 Updated high-speed module specifications.
Rev. C 4/10/19 Added EtherNet/IP Implicit and Explicit (adapter server) in S/W
Rev. D 5/2/19 ZIPLink modules ZL-LTB16-24 and ZL-LTB32-24 have been obsoleted and replaced
by ZL-LTB16-24-1 and ZL-LTB32-24-1 respectively.
Rev. E 7/11/19 Added Error 108 to Error Table page 6-12.
Rev. F 9/18/19 Added CLICK PID features.
Rev. G 2/18/20 Added specs for C0-08SIM, C0-04TRS-10, C0-08TR-3, and terminal block C0-8TB-1.
Table of ConTenTs
Publication History
Table of Contents
Chapter 1 - Getting Started
Introduction...................................................................................................................2
Conventions Used..........................................................................................................3
Before you begin... ........................................................................................................4
Step 1: Install Programming Software..........................................................................5
Step 2: Launch Programming Software........................................................................6
Step 3: Create a Project.................................................................................................8
Step 4: Compile and Save Project...............................................................................14
Step 5: Apply Power ....................................................................................................15
Step 6: Establish PC to PLC Communications.............................................................16
Step 7: Write Project into PLC ....................................................................................24
Step 8: Place PLC in RUN Mode..................................................................................25
Step 9: Test Project using Data View Monitor ...........................................................26
Step 10: Y001 Output On? ..........................................................................................27
Additional Training Resources.....................................................................................28
Chapter 2 - Specifications
Overview of PLC System ........................................................................................... 2–2
PLC Units ...................................................................................................................2–3
Basic PLC Units ........................................................................................................ 2–3
Built-in I/O (Basic PLC Units) ...................................................................................2–3
Standard PLC Units ..................................................................................................2–4
Built-in I/O (Standard PLC Units) .............................................................................2–4
Analog PLC Units .....................................................................................................2–5
Built-in I/O (Analog PLC Units).................................................................................2–5
Ethernet Basic PLC Units...........................................................................................2–6
Built-in I/O (Ethernet Basic PLC Units) .....................................................................2–6
Ethernet Standard PLC Units ....................................................................................2–7
Built-in I/O (Ethernet Standard PLC Units) ...............................................................2–7
Ethernet Analog PLC Units ....................................................................................... 2–8
Built-in I/O (Ethernet Analog PLC units) ...................................................................2–8
Communication Ports ............................................................................................. 2–9
Memory ..................................................................................................................2–9
I/O Modules ............................................................................................................2–10
Power Supply ......................................................................................................... 2–13
Programming Software ........................................................................................... 2–14
PC Requirements....................................................................................................2–14
Data Types, Memory, and Numbering System ......................................................2–15
Data Types . ..........................................................................................................2–15
Memory Types .......................................................................................................2–16
I/O Numbering System .......................................................................................... 2–18
PLC Operation ......................................................................................................... 2–19
Introduction ...........................................................................................................2–19
PLC Operating System ...........................................................................................2–19
PLC Operating Modes ............................................................................................2–20
Stop Mode ............................................................................................................ 2–20
Run Mode ............................................................................................................. 2–20
Read Inputs ...........................................................................................................2–21
Service Peripherals and Force I/O ..........................................................................2–21
Update System Control (SC) Relays and System Data (SD) Registers .....................2–22
Solve Application Program ....................................................................................2–22
Write Outputs .......................................................................................................2–22
Diagnostics. .......................................................................................................... 2–22
Power Budgeting.....................................................................................................2–23
What is Power Budgeting? ..................................................................................... 2–23
Power Budget Calculation ......................................................................................2–24
CLICK PLC Hardware User Manual, 6th Edition, Rev. F – C0-USER-M
ii
Table of Contents
Power Budget Example .......................................................................................... 2–25
Power Budgeting using the CLICK Programming Software.....................................2–25
General Specifications ............................................................................................. 2–26
General Specifications (all CLICK PLC units) ........................................................... 2–26
PLC Unit Specifications............................................................................................2–27
Common Specifications..........................................................................................2–27
PLC LED Status Indicators....................................................................................... 2–29
Memory Map .........................................................................................................2–32
Basic PLC Unit Specifications ..................................................................................2–35
C0-00DD1-D – 8 DC Input/6 Sinking DC Output Micro PLC ................................. 2–35
C0-00DD2-D – 8 DC Input/6 Sourcing DC Output Micro PLC ...............................2–37
C0-00DR-D – 8 DC Input/6 Relay Output Micro PLC .............................................2–39
C0-00AR-D – 8 AC Input/6 Relay Output Micro PLC ..............................................2–41
Standard PLC Unit Specifications............................................................................ 2–43
C0-01DD1-D – 8 DC Input/6 Sinking DC Output Micro PLC ................................. 2–43
C0-01DD2-D – 8 DC Input/6 Sourcing DC Output Micro PLC ...............................2–45
C0-01DR-D – 8 DC Input/6 Relay Output Micro PLC .............................................2–47
C0-01AR-D – 8 AC Input/6 Relay Output Micro PLC ..............................................2–49
Analog PLC Unit Specifications ...............................................................................2–51
C0-02DD1-D – 4 DC Input/4 Sinking DC Output;
2 Analog In/2 Analog Out Micro PLC.....................................................................2–51
C0-02DD2-D – 4 DC Input/4 Sourcing DC Output;
2 Analog In/2 Analog Out Micro PLC.....................................................................2–54
C0-02DR-D – 4 DC Input/4 Relay Output; 2 Analog In/2 Analog Out Micro PLC...2–57
Ethernet Basic PLC Unit Specifications ...................................................................2–60
C0-10DD1E-D – 8 DC Input/6 Sinking DC Output Micro PLC ...............................2–60
C0-10DD2E-D – 8 DC Input/6 Sourcing DC Output Micro PLC .............................2–62
C0-10DRE-D – 8 DC Input/6 Relay Output Micro PLC............................................2–64
C0-10ARE-D – 8 AC Input/6 Relay Output Micro PLC ............................................ 2–66
Ethernet Standard PLC Unit Specifications ............................................................2–68
C0-11DD1E-D – 8 DC Input/6 Sinking DC Output Micro PLC................................ 2–68
C0-11DD2E-D – 8 DC Input/6 Sourcing DC Output Micro PLC .............................2–70
C0-11DRE-D – 8 DC Input/6 Relay Output Micro PLC............................................2–72
C0-11ARE-D – 8 AC Input/6 Relay Output Micro PLC ............................................ 2–74
CLICK PLC Hardware User Manual, 6th Edition, Rev. F – C0-USER-M iii
Table of Contents
Ethernet Analog PLC Unit Specifications................................................................2–76
C0-12DD1E-D – 4 DC Input (Sink/Source)/4 Sinking DC Output ..........................2–76
2 Analog Voltage/Current Input
2 Analog Voltage/Current Output Micro PLC .........................................................2–76
C0-12DD2E-D – 4 DC Input (Sink/Source)/4 Sourcing DC Output;........................2–79
2 Analog Voltage/Current Input
2 Analog Voltage/Current Output Micro PLC .........................................................2–79
C0-12DRE-D – 4 DC Input (Sink/Source)/4 Relay Output; .....................................2–82
2 Analog Voltage/Current Input
2 Analog Voltage/Current Output Micro PLC .........................................................2–82
C0-12ARE-D – 4 AC Input/4 Relay Output; ...........................................................2–85
2 Analog Voltage/Current Input
2 Analog Voltage/Current Output Micro PLC .........................................................2–85
C0-12DD1E-1-D – 4 DC Input (Sink/Source)/4 Sinking DC Output; ......................2–88
4 Analog Current Input
2 Analog Current Output Micro PLC ......................................................................2–88
C0-12DD2E-1-D – 4 DC Input (Sink/Source)/4 Sourcing DC Output; ....................2–91
4 Analog Current Input
2 Analog Current Output Micro PLC ......................................................................2–91
C0-12DRE-1-D – 4 DC Input (Sink/Source)/4 Relay Output; ..................................2–94
4 Analog Current Input
2 Analog Current Output Micro PLC ......................................................................2–94
C0-12ARE-1-D – 4 AC Input/4 Relay Output; ........................................................ 2–97
4 Analog Current Input
2 Analog Current Output Micro PLC ......................................................................2–97
C0-12DD1E-2-D – 4 DC Input (Sink/Source)/4 Sinking DC Output; ....................2–100
4 Analog Voltage Input
2 Analog Voltage Output Micro PLC .................................................................... 2–100
C0-12DD2E-2-D – 4 DC Input (Sink/Source)/4 Sourcing DC Output; ..................2–103
4 Analog Voltage Input
2 Analog Voltage Output Micro PLC .................................................................... 2–103
C0-12DRE-2-D – 4 DC Input (Sink/Source)/4 Relay Output; ................................2–106
4 Analog Voltage Input
2 Analog Voltage Output Micro PLC .................................................................... 2–106
C0-12ARE-2-D – 4 AC Input (Sink/Source) /4 Relay Output; ................................2–109
4 Analog Voltage Input
2 Analog Voltage Output Micro PLC .................................................................... 2–109
CLICK PLC Hardware User Manual, 6th Edition, Rev. F – C0-USER-M
iv
Table of Contents
I/O Module Specifications.....................................................................................2–112
I/O Terminal Block Specifications for CPUs and I/O Modules................................ 2–112
LED Indicators ...................................................................................................... 2–113
C0-08SIM – 8-Point Toggle Switch Input Module ................................................2–114
C0-08ND3 – 8-Point Sink/Source DC Input Module.............................................2–115
C0-08ND3-1 – 8-Point Sink/Source DC Input Module.......................................... 2–116
C0-16ND3 – 16-Point Sink/Source DC Input Module...........................................2–117
C0-08NE3 – 8-Point Sink/Source AC/DC Input Module........................................2–118
C0-16NE3 – 16-Point Sink/Source AC/DC Input Module......................................2–119
C0-08NA – 8-Point AC Input Module...................................................................2–120
C0-08TD1 – 8-Point Sinking DC Output Module ................................................. 2–121
C0-08TD2 – 8-Point Sourcing DC Output Module ............................................... 2–122
C0-16TD1 – 16-Point Sinking DC Output Module ............................................... 2–123
C0-16TD2 – 16-Point Sourcing Output Module ...................................................2–124
C0-08TA – 8-Point AC Output Module.................................................................2–125
C0-04TRS – 4-Point Relay Output Module............................................................2–126
C0-04TRS-10 – 4-Point Relay Output Module ......................................................2–127
C0-08TR – 8-Point Relay Output Module .............................................................2–128
C0-08TR-3 – 8-Point Relay Output Module .......................................................... 2–129
C0-16CDD1 – 8-Point DC Input and 8-Point DC Sinking Output Module............2–130
C0-16CDD2 – 8-Point DC Input and 8-Point DC Sourcing Output Module..........2–132
C0-08CDR – 4-Point DC Input and 4-Point Relay Output Module........................2–134
C0-04AD-1 – 4-Channel Analog Current Input Module........................................ 2–136
C0-04AD-2 – 4-Channel Analog Voltage Input Module ........................................2–137
C0-04RTD – 4-Channel RTD Input Module ..........................................................2–138
C0-04THM – 4-Channel Thermocouple Input Module ......................................... 2–140
C0-04DA-1 – 4-Channel Analog Current Output Module..................................... 2–142
C0-04DA-2 – 4-Channel Analog Voltage Output Module .....................................2–143
C0-4AD2DA-1 – 4-Channel Analog Current Input and 2-Channel Analog
Current Output Module .......................................................................................2–144
C0-4AD2DA-2 – 4-Channel Analog Voltage Input and 2-Channel Analog Voltage
Output Module .................................................................................................... 2–146
C0-4AD2DA-2 – 4-Channel Analog Voltage Input and 2-Channel Analog Voltage
Output Module (continued).................................................................................2–147
Power Supply Specifications ................................................................................. 2–148
C0-00AC Power Supply........................................................................................ 2–148
CLICK PLC Hardware User Manual, 6th Edition, Rev. F – C0-USER-M v
Table of Contents
C0-01AC Power Supply........................................................................................ 2–148
PSP24-DC12-1 DC-DC Converter.........................................................................2–148
Accessories .............................................................................................................2–149
Chapter 3 - Installation and Wiring
Safety Guidelines ....................................................................................................... 3–2
Plan for Safety .......................................................................................................... 3–2
Three Levels of Protection ........................................................................................ 3–3
Orderly System Shutdown........................................................................................3–3
System Power Disconnect ........................................................................................3–3
Emergency Stop Circuits ..........................................................................................3–4
Introduction to the CLICK PLC Mechanical Design..................................................3–5
CLICK PLC Units.......................................................................................................3–5
Component Locations on Basic and Standard PLC Units ..........................................3–5
Component Locations on Analog PLC Units .............................................................3–6
Component Locations on Ethernet PLC Units...........................................................3–7
CLICK I/O Modules .................................................................................................. 3–8
CLICK Power Supplies .............................................................................................. 3–9
Battery Backup (Standard, Analog and Ethernet PLC Units)....................................3–10
Mounting Guidelines...............................................................................................3–11
Environmental Specifications .................................................................................. 3–11
Agency Approvals................................................................................................... 3–11
CLICK Unit Dimensions ..........................................................................................3–11
Enclosures ..............................................................................................................3–14
Panel Layout and Clearances ..................................................................................3–14
Installing the CLICK PLC..........................................................................................3–16
Connecting the Modules Together .........................................................................3–16
Mounting CLICK PLC System on DIN Rail .............................................................. 3–17
Optional Mounting Method...................................................................................3–17
Wiring Guidelines ....................................................................................................3–18
Power Input Wiring to Click Power Supply .............................................................3–18
Power Input Wiring to CLICK PLC ..........................................................................3–18
Fuse Protection.......................................................................................................3–19
CLICK PLC Hardware User Manual, 6th Edition, Rev. F – C0-USER-M
vi
Table of Contents
Planning the I/O Wiring Routes ............................................................................. 3–20
Wiring I/O Modules................................................................................................3–21
ZIPLink Wiring System Compatibility Matrix for CLICK PLCs................................... 3–22
I/O Wiring Checklist ................................................................................................3–25
System Wiring Strategies ........................................................................................3–26
PLC Isolation Boundaries ........................................................................................ 3–26
Powering I/O Circuits .............................................................................................3–27
Sinking/Sourcing Concepts ....................................................................................3–28
I/O “Common Terminal” Concepts ........................................................................3–29
DC Input Wiring Methods......................................................................................3–30
DC Output Wiring Methods...................................................................................3–30
Relay Outputs - Wiring Methods ............................................................................ 3–32
Relay Outputs – Transient Suppression for Inductive Loads in a Control System..... 3–33
Analog I/O Configuration .......................................................................................3–37
Terminal Block Wiring - Analog PLC Units ..............................................................3–37
Terminal Block Wiring - Expansion Analog I/O Modules .........................................3–39
Configuration in the CLICK Programming Software ............................................... 3–40
Analog PLC units....................................................................................................3–40
Analog I/O Modules...............................................................................................3–41
Analog I/O Monitoring...........................................................................................3–43
High-Speed Input Configuration ............................................................................3–44
Wiring Examples High Speed Inputs.......................................................................3–46
3-Wire Sensors........................................................................................................ 3–46
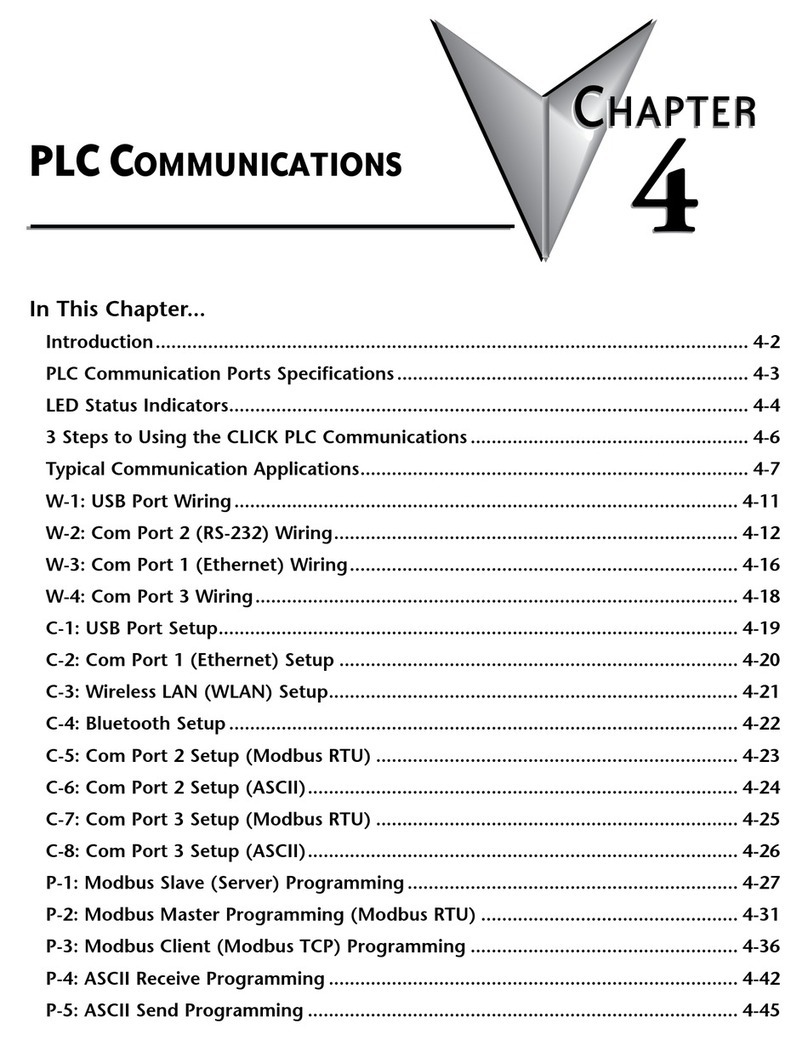
Chapter 4 - PLC Communications
Introduction...............................................................................................................4–2
PLC Communication Ports Specifications .................................................................4–3
LED Status Indicators.................................................................................................4–5
LED Status Indicators................................................................................................4–5
DirectLogic Devices That Do Not Work With CLICK PLCs.........................................4–5
3 Steps to Using the CLICK PLC Communications ...................................................4–7
Typical Communication Applications........................................................................4–8
Port 1 (RS-232) – Modbus RTU Slave Mode Only..................................................... 4–8
Port 1 (Ethernet) – Modbus TCP .............................................................................. 4–9
CLICK PLC Hardware User Manual, 6th Edition, Rev. F – C0-USER-M vii
Table of Contents
Port 2 (RS-232) – Modbus RTU or ASCII................................................................. 4–10
Port 3 (RS-485 – Modbus RTU or ASCII)...............................................................4–11
W-1: Com Port 1 & 2 (RS-232) Wiring....................................................................4–12
W-2: Com Port 1 (Ethernet) Wiring........................................................................4–17
W-3: Com Port 3 Wiring..........................................................................................4–19
C-1: Com Port 1 (RS-232) Setup ............................................................................. 4–20
C-2: Com Port 1 (Ethernet) Setup ..........................................................................4–21
C-3: Com Port 2 Setup (Modbus RTU) ...................................................................4–22
C-4: Com Port 2 Setup (ASCII)................................................................................4–23
C-5: Com Port 3 Setup (Modbus RTU) ...................................................................4–24
C-6: Com Port 3 Setup (ASCII)................................................................................4–25
P-1: Modbus Slave (Server) Programming .............................................................4–26
P-2: Modbus Master Programming (Modbus RTU) ...............................................4–29
P-3: Modbus Client (Modbus TCP) Programming .................................................4–34
P-4: ASCII Receive Programming ............................................................................4–40
P-5: ASCII Send Programming ................................................................................4–43
Chapter 5 - Maintenance
PLC Maintenance.......................................................................................................5–2
Check LED Indicators................................................................................................5–2
Project Backup ......................................................................................................... 5–2
Check Operating Environment .................................................................................5–2
Check Operating Voltage ......................................................................................... 5–2
Check Physical Condition .........................................................................................5–3
Check Project Functionality ......................................................................................5–3
Check the PLC Program from CLICK PLC Programming Software ............................5–3
Chapter 6 - Troubleshooting
Troubleshooting Direction ........................................................................................6–2
PLC unit Troubleshooting..........................................................................................6–3
Toggle Switch ..........................................................................................................6–3
LED Indicators .......................................................................................................... 6–4
CLICK PLC Hardware User Manual, 6th Edition, Rev. F – C0-USER-M
viii
Table of Contents
Power Supply Troubleshooting.................................................................................6–5
The input voltage measures less than 20VDC...........................................................6–5
The input voltage measures greater than 28VDC .....................................................6–5
How to check the power budget.............................................................................. 6–5
I/O Module Troubleshooting .................................................................................... 6–6
Input Module Troubleshooting.................................................................................6–6
Output Module Troubleshooting..............................................................................6–7
How to Check the I/O Configuration .......................................................................6–7
How to Check the I/O Status....................................................................................6–8
Replacement of I/O modules....................................................................................6–9
Troubleshooting Electrical Noise Problems ............................................................6–10
Electrical Noise Problems........................................................................................6–10
Reducing Electrical Noise........................................................................................6–10
Error Codes .............................................................................................................. 6–11
CLICK PLC Hardware User Manual, 6th Edition, Rev. F – C0-USER-M ix
Table of Contents
GettinG Started 1
1
1
Chapter
Chapter
Chapter
In This Chapter...
Introduction.............................................................................................................. 1–2
Conventions Used..................................................................................................... 1–3
Before you begin... ................................................................................................... 1–4
Step 1: Install Programming Software..................................................................... 1–5
Step 2: Launch Programming Software................................................................... 1–6
Step 3: Create a Project............................................................................................ 1–8
Step 4: Compile and Save Project.......................................................................... 1–14
Step 5: Apply Power ............................................................................................... 1–15
Step 6: Establish PC to PLC Communications........................................................ 1–16
Step 7: Write Project into PLC ............................................................................... 1–24
Step 8: Place PLC in RUN Mode............................................................................. 1–25
Step 9: Test Project using Data View Monitor ...................................................... 1–26
Step 10: Y001 Output On? ..................................................................................... 1–27
Additional Training Resources................................................................................ 1–28
Introduction
Purpose of this Manual
Thank you for purchasing the AutomationDirect CLICK PLC family of products. This
hardware user manual provides information that will help you install, set up, program,
troubleshoot, and maintain your CLICK PLC system. The manual includes information that
is critical to the safety of the personnel who will install and use the PLC, and to the machinery,
processes, and equipment controlled by the PLC.
The manual also includes important information about power and signal wiring, mounting of
the PLC, and configuring the PLC system.
About Getting Started
If you are familiar with PLCs in general, then following the simple steps in this first chapter
may be all you require to start being productive using a CLICK PLC system. After you have
completed the steps, your CLICK PLC will be running the ladder logic project that you
programmed. If you are new to the world of PLCs, be sure to read through all of the chapters
in this hardware user manual.
Supplemental Manuals and Other Help
The CLICK Programming Software, C0-PGMSW, can be downloaded free from the
AutomationDirect web site (link shown below under Technical Support). Both this Hardware
User Manual, C0-USER-M, and the Software Installation Guide are free as a download. The
CLICK Programming Software includes searchable online help topics covering all aspects of
the software and instruction set.
Technical Support
We strive to make our manuals the best in the industry. We rely on your feedback to let us
know if we are reaching our goal. If you cannot find the solution to your particular application,
or, if for any reason you need technical assistance, please call us at:
770–844–4200
Our technical support group will work with you to answer your questions. They are available
Monday through Friday from 9:00 A.M. to 6:00 P.M. Eastern Time. We also encourage you
to visit our web site where you can find technical and non-technical information about our
products and our company.
http://www.automationdirect.com
CLICK PLC Hardware User Manual, 6th Edition, Rev. G – C0-USER-M
1–2
Chapter 1: Getting Started
Conventions Used
WARNING: When you see the exclamation point icon in the left-hand margin, the paragraph to its
immediate right will be a warning. This information could prevent injury, loss of property, or even
death in extreme cases. Any warning in this manual should be regarded as critical information that
should be read in its entirety. The word WARNING: in boldface will mark the beginning of the text.
NOTE: When you see the notepad icon in the left-hand margin, the paragraph to its immediate right will be
a special note. Notes represent information that may make your work quicker or more efficient. The word
NOTE: in boldface will mark the beginning of the text.
TIP: Whenever the “light bulb” is shown in the left-hand margin, the paragraph to its immediate right will
provide a special tip. The word TIP: in boldface will mark the beginning of the text.
Key Topics for Each Chapter
The beginning of each chapter will list the key topics
that can be found in that chapter.
Getting Started!
CHAPTER
1
In This Chapter...
.............................................................................1-2
....................................................................1-3Conventions Used
Introduction
....................................................................1-2Purpose of this Manual
......................................................................1-2
About Getting Started!
............................................1-2
Supplemental Manuals and Other Help
.............................................................................1-2
Technical Support
CLICK PLC Hardware User Manual, 6th Edition, Rev. G – C0-USER-M 1–3
Chapter 1: Getting Started
Before you begin...
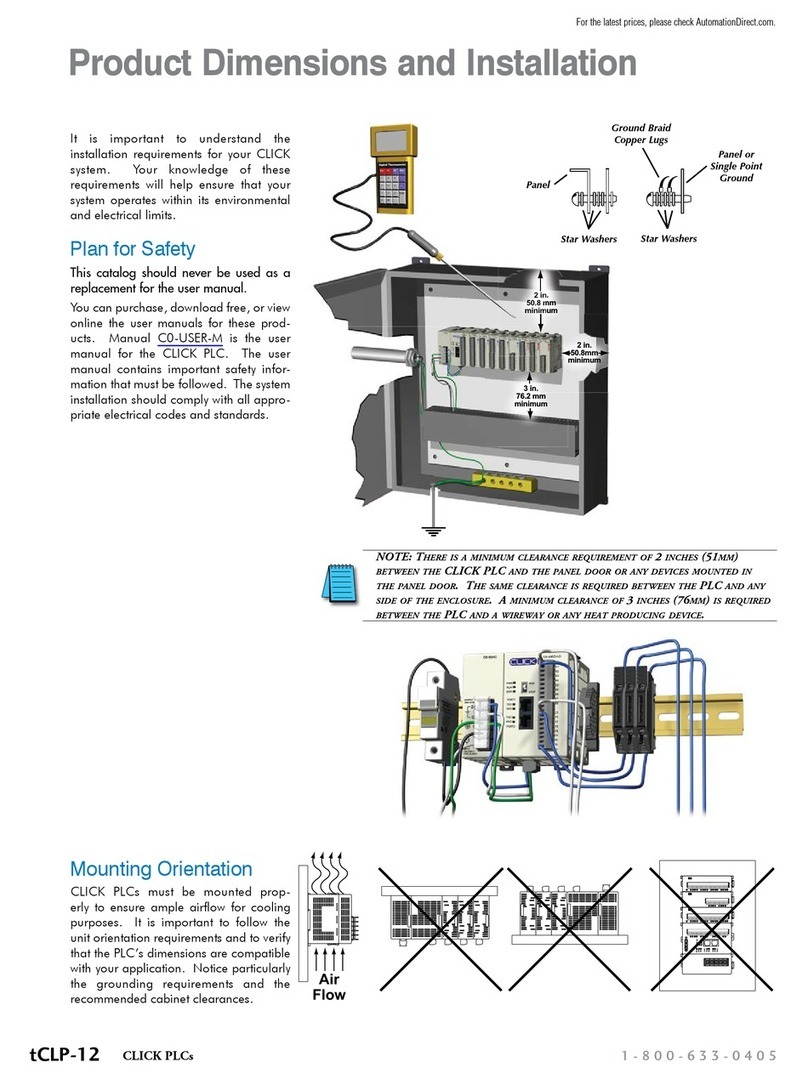
It is recommended that the following items be available to make this short step-by-step
introduction to the CLICK PLC go smoothly.
CLICK PLC unit
CLICK
Programming Software
C0-PGMSW
Screwdriver
TW-SD-MSL-2
PC Programming Cable
D2-DSCBL
PC with USB port to
Panel Programming
Cable Assembly
EA-MG-PGM-CBL
PC Running
Windows
Hookup Wire
or
CD-ROM or Free download @
http://support.automationdirect.com/
products/clickplcs.html
AC Power Cord
Other 24VDC Power Supply
Example: PSP24-60S
CLICK 24VDC Power Supply
C0-00AC or C0-01AC
PC requires RS-232 port.
Wire Strippers
DN-WS
Not available from ADC.
Based on your CLICK PLC,
One of the cables shown below:
Ethernet Cat5 Cable
CLICK PLC Hardware User Manual, 6th Edition, Rev. G – C0-USER-M
1–4
Chapter 1: Getting Started
Step 1: Install Programming Software
1. If you have the programming software on CD, insert the CD in the computer drive
and follow the instructions. Otherwise, download the free CLICK Programming
Software, C0-PGMSW, from the following Automationdirect.com web site:
http://support.automationdirect.com/products/clickplcs.html
2. Unzip the downloaded ZIP file.
3. Double click Install.exe. The CLICK PLC Programming
Software splash screen should appear after a short time.
4. Click on the splash screen’s Install Software button and follow the dialog boxes.
5. If you intend to communicate via USB ports on your personal computer using cable
EA-MG-PGM-CBL, click on the Install USB Drive button. Follow the dialog boxes.
You can install the USB driver either before or after the software is installed.
NOTE: For additional details, see the CLICK
Software Installation Guide, C0-PGMSW-SIG,
included in the ZIP file. (file name: Click_
software_installation.pdf)
Install USB Driver Button
CLICK PLC Hardware User Manual, 6th Edition, Rev. G – C0-USER-M 1–5
Chapter 1: Getting Started
Step 2: Launch Programming Software
After installing the CLICK Programming Software, C0-PGMSW, choose one of three methods
to launch the software. Double click the desktop CLICK icon or, from the PC’s Start menu,
slide the mouse pointer through the menus (Start > All Programs > AutomationDirect > CLICK
Ver 2.50 > CLICK Programming Software) and click the CLICK Programming Software
selection or, simply click the icon on the Quick Launch bar. See examples below.
The CLICK Programming Software will start up and display the Main Window as shown on
the next page.
NOTE: The recommended minimum screen size for the CLICK Programming Software is 1024 X 786 pixels.
CLICK PLC Hardware User Manual, 6th Edition, Rev. G – C0-USER-M
1–6
Chapter 1: Getting Started

This manual suits for next models

58

Other AutomationDirect Controllers manuals

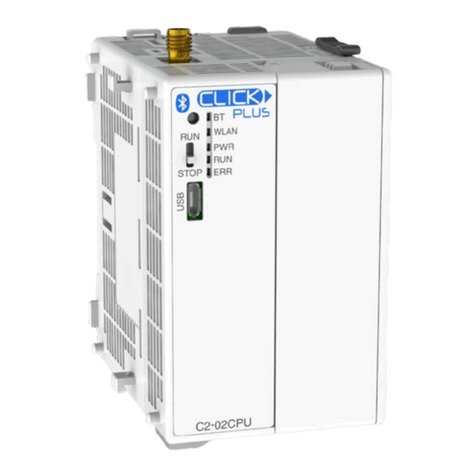
AutomationDirect CLICK PLUS PLC User manual

AutomationDirect

AutomationDirect CLICK PLUS PLC User manual

AutomationDirect GS1 Series User manual

AutomationDirect

AutomationDirect GS1 Series User manual

AutomationDirect Stellar SR55 Series User manual

AutomationDirect

AutomationDirect Stellar SR55 Series User manual

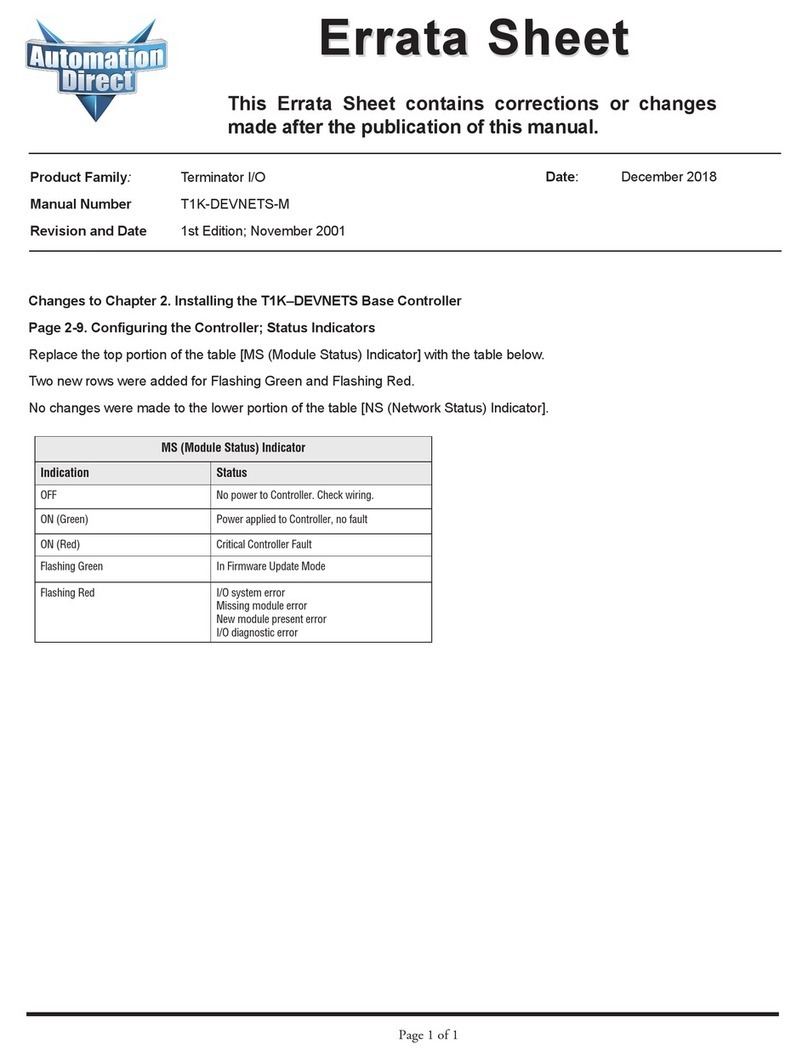
AutomationDirect T1K-DEVNETS User manual

AutomationDirect

AutomationDirect T1K-DEVNETS User manual

AutomationDirect CLICK PLUS PLC User manual

AutomationDirect

AutomationDirect CLICK PLUS PLC User manual

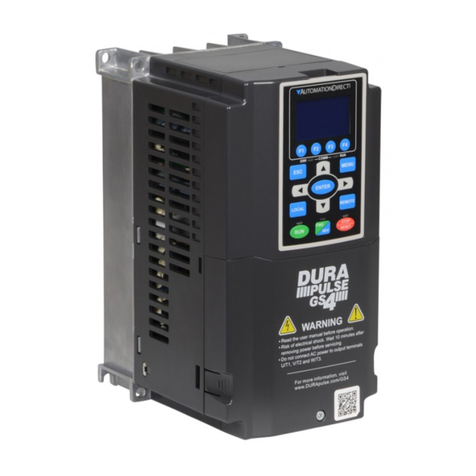
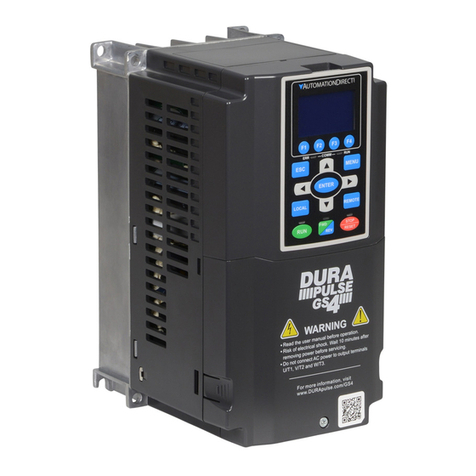
AutomationDirect DURApulse GS4 User manual

AutomationDirect

AutomationDirect DURApulse GS4 User manual

AutomationDirect CLICK PLUS Series User manual

AutomationDirect

AutomationDirect CLICK PLUS Series User manual

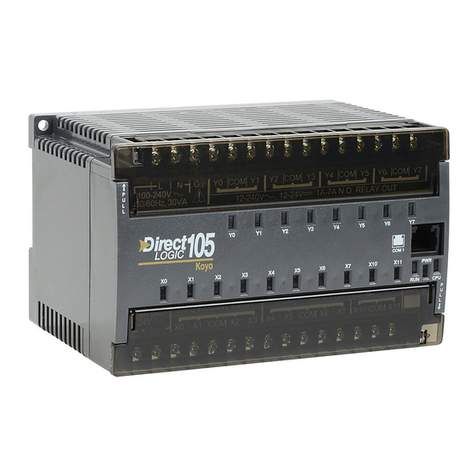
AutomationDirect DL105 User manual

AutomationDirect

AutomationDirect DL105 User manual

AutomationDirect SureServo2 User manual

AutomationDirect

AutomationDirect SureServo2 User manual

AutomationDirect DL05 User manual

AutomationDirect

AutomationDirect DL05 User manual

AutomationDirect GS4-21P0 User manual

AutomationDirect

AutomationDirect GS4-21P0 User manual

AutomationDirect NITRA PNEUMATICS Manual

AutomationDirect

AutomationDirect NITRA PNEUMATICS Manual

AutomationDirect DirectLogic Series Installation and operating instructions

AutomationDirect

AutomationDirect DirectLogic Series Installation and operating instructions

AutomationDirect DL05 User manual

AutomationDirect

AutomationDirect DL05 User manual

AutomationDirect Stellar SR35 Series User manual

AutomationDirect

AutomationDirect Stellar SR35 Series User manual

AutomationDirect C0-USER-M User manual

AutomationDirect

AutomationDirect C0-USER-M User manual

AutomationDirect DL205 User manual

AutomationDirect

AutomationDirect DL205 User manual

AutomationDirect Stellar SR55 User manual

AutomationDirect

AutomationDirect Stellar SR55 User manual

AutomationDirect DL05 User manual

AutomationDirect

AutomationDirect DL05 User manual

AutomationDirect CLICK Manual

AutomationDirect

AutomationDirect CLICK Manual

AutomationDirect T1K-MODBUS-M User manual

AutomationDirect

AutomationDirect T1K-MODBUS-M User manual

Popular Controllers manuals by other brands

Carel WB000S series quick start guide

Carel

Carel WB000S series quick start guide

SMC Networks EX250-SMJ2 Installation & maintenance manual

SMC Networks

SMC Networks EX250-SMJ2 Installation & maintenance manual

Danfoss CCR3+ operating guide

Danfoss

Danfoss CCR3+ operating guide

Duplomatic Oleodinamica EWM-SP-DAD/20E Startup manual

Duplomatic Oleodinamica

Duplomatic Oleodinamica EWM-SP-DAD/20E Startup manual

Fluke 1722A user guide

Fluke

Fluke 1722A user guide

Mystery MY8A manual

Mystery

Mystery MY8A manual

Smartgen HGM4020DC user manual

Smartgen

Smartgen HGM4020DC user manual

YATO YT-83080 Original instructions

YATO

YATO YT-83080 Original instructions

Spirax Sarco LC2250 Installation and maintenance instructions

Spirax Sarco

Spirax Sarco LC2250 Installation and maintenance instructions

Victron energy CCGX manual

Victron energy

Victron energy CCGX manual

Tornatech HFD Installation and maintenance manual

Tornatech

Tornatech HFD Installation and maintenance manual

ICP DAS USA PISO-CAN200 user manual

ICP DAS USA

ICP DAS USA PISO-CAN200 user manual

Taco iWorX HPU2 installation guide

Taco

Taco iWorX HPU2 installation guide

Automation Devices 6006 Series Adjustments and Set Up

Automation Devices

Automation Devices 6006 Series Adjustments and Set Up

Gardner Denver DELCOS 3100 user manual

Gardner Denver

Gardner Denver DELCOS 3100 user manual

Viking RC-4 Technical practice

Viking

Viking RC-4 Technical practice

Dettson EVO Installation and owner's manual

Dettson

Dettson EVO Installation and owner's manual

Mohlenhoff OEM-Actuator 24 V technical information

Mohlenhoff

Mohlenhoff OEM-Actuator 24 V technical information

manuals.online logo
manuals.online logoBrands
  • About & Mission
  • Contact us
  • Privacy Policy
  • Terms and Conditions

Copyright 2025 Manuals.Online. All Rights Reserved.