Autostopcock Plus User manual

Autostopcock Plus
Ver 9c
© Autostopcock 2023
User Manual
English

QUICK START GUIDE
2
1
2
4
3
KEY
+
-
5V
SIG
GND
www.FlowReporter.com
SIG
GND
Or search FlowReporter
See p12
5s

CONTENTS
3
4Introduction
5Installation guide
Overview .....................................................................................................................5
Item checklist.............................................................................................................6
Before you begin ........................................................................................................7
Plumbing instructions................................................................................................8
Wall-mounting instructions .....................................................................................10
Wiring instructions...................................................................................................11
Connecting to the internet.......................................................................................14
17 User manual
Autostopcock Plus Base .........................................................................................17
Using the buttons and LEDs....................................................................................18
Oine mode .............................................................................................................19
Overview of software...............................................................................................21
Dashboard ................................................................................................................22
Congure Base.........................................................................................................23
Graphs.......................................................................................................................24
Device settings.........................................................................................................25
Thresholds and alerts..............................................................................................27
Sharing access.........................................................................................................28
29 Troubleshooting
30 Specications
31 Maintenance
32 Technical support

4
INTRODUCTION
Online capability
WARNING
First of all, thank you - you have made an excellent decision to go with Autostopcock Plus, the
complete online water management and leak detection system. A solid investment for the future of
your water.
Using Autostopcock Plus, water consumption can be visualised anytime from anywhere in the world.
If a leak is detected, an alert is immediately sent to the user via email. If desired, Autostopcock Plus
can automatically shut off the water supply, so no water damage is caused in the event of a leak.
The Autostopcock Plus Base (pictured) is mains supplied and contains the connection to the
Internet via WiFi. It can connect a meter, a valve, and a leak cable, as well as support for BMS inputs
and outputs. For water monitoring only (no valve), up to 4 meters can be supported to measure the
water ow through 4 different pipes. Using 1 meter, a valve can also be connected to turn off the
water supply. Almost any pipe size is accepted, and meters/valves supplied by Autostopcock come
in standard sizes.
You will manage and monitor your Autostopcock Plus online
using an app called FlowReporter.
Download the app from the iOS or Play store.
Register for your account at www.FlowReporter.com.
If equipment is installed or used in a manner not specied in this document,
the product may not work as expected, and the leak protection capabilities
may be impaired. Please contact us if you have any problems or are unsure.

Find the stopcock
Decide where the Autostopcock Plus will be placed - this
will normally be just after the stopcock, where the water
enters the building. This will usually be coming up from the
ground.
1.
Install the Base
Choose a location to mount the Base and check WiFi
connectivity. Wire the cables from the meter(s) and valve to
the Base, making sure to use the cable grip. Screw on the
front of the Base, clip in the inserts which hide the screws,
and then connect the power adaptor.
3.
Test online
Run a nearby tap. Online, select the name of your new Base,
and then click “Close valve”. A few seconds later, the water
will stop owing. Click “View” then “Real time” then “Open
valve”. You will see the graph change as the water is turned
back on.
5.
Install valve and meter
Make sure the valve (optional) and meter are facing the
correct way (arrow pointing in the direction of ow) and
install in the proposed location.
2.
Connect to WiFi
With the “Status” light ashing blue, use your smartphone
to login to FlowReporter and select “Register new Base”.
Follow the on-screen instructions. Congure the Base
online by selecting the ttings used in the above step.
4.
5
INSTALLATION GUIDE
Overview

Lithium-ion rechargable battery giving
at least 24 hours of operation during a
power outage.
Backup battery (optional)
To extend the reach of the
power adaptor by 3m.
Autostopcock Plus Base front
Power adaptor
Autostopcock Plus Base back
box
Water meter
Cable grip, screws and inserts
Valve
With integrated circuit board.
Standard mains DC power
adaptor.
Wall mountable.
To measure water ow.
Different sizes are specied on
page 12.
To fasten cables, battery and
enclosure, and increase the
visual appeal.
To turn off water ow.
Different sizes are specied on
page 12.
Item checklist
6
INSTALLATION GUIDE
DC extension cable (optional)

7
INSTALLATION GUIDE
Before you begin
The Base uses WiFi to communicate over the internet, and requires mains power.
Before installing, decide where the Autostopcock Plus Base will be located:
●Within 3 meters of plumbed ttings,
●Within 1 meter of a 100-240V 50/60 Hz mains socket,
●Within range of WiFi (use your mobile phone to check for WiFi signal). Also ensure you have
access to the name of the WiFi connection and password.
If WiFi is not available, a standard 3G router can be supplied to provide the wireless connection. Data rates are 4MB
per day as a maximum.
Location Power WiFi
The Base should be wall-
mounted and located no more
than 3 meters aways from
plumbed ttings.
The Base should be located no
more than 1 meter away from a
mains plug socket.
The Base should be located
within range of WiFi. Use a
smartphone to check the
connection is at least 2 bars.
<1m
< 3m
Tools required
●Phillips head screwdriver
●Pipe cutter (suitable for your pipe size)
●Adjustable wrench/spanner (suitable for your plumbing ttings)
●PTFE tape and/or rubber washers
●Drill (if wall mounting)

INSTALLATION GUIDE
8
Plumbing instructions
1. Choose location for meter and valve. They will usually be installed together, but try
to place the meter as far upstream as possible.
The optimum conditions for placement of
a meter are as follows:
a) Straight length of 10 pipe diameters
upstream
b) Straight length of 5 pipe diameters
downstream
c) Direction of ow travelling upwards
Of course, it is usually very dicult to
conform to all of these so if you don’t manage it, do not worry, the meter will still
work but very low ows may not get caught and accuracy will slightly decrease.
2. Assemble all ttings.
With pusht ttings, use a rubber washer to make
watertight connections. Make sure the rubber
washer is clean, and hand tighten.
With compression ttings, use about 20 turns of
PTFE tape around the thread (wrapping around
clockwise), and then use a wrench to tighten.
Watertight connections between the valve and
meter can easily be achieved using 3 rubber
washers or 25 turns of PTFE tape.
If you are in any doubt, we recommend
professional installation by a qualied
plumber.

INSTALLATION GUIDE
Plumbing instructions (continued)
9
3. Turn the water supply off and drain the system (or up until the next
stopcock downstream).
4. Remove any dried paint on the pipes where the connections will be tted.
5. Plumb in the ttings, making sure the arrows on the ttings match the
direction of water ow. For the best accuracy, if using a solenoid valve,
it should be placed downstream of meter. Motorised valves are direction
independent.
6. Make sure the pipes and ttings are assembled securely, and turn the
water supply on.
7. Check for leaks and tighten any ttings.
8.
Optional: Earth bond either side of the installation together if necessary. Ask a
qualied electrician if you are unsure.
9.
Optional: Re-lag the pipework for insulation against freezing.

INSTALLATION GUIDE
10
Wall-mounting instructions
Autostopcock Plus should be wall mounted with 5mm screws at a minimum. Make
sure the appropriate wall plugs are used and that the length of the screws are not long
enough to protrude the other side of the wall.
A standard 2-gang pattress back box commonly found with merchants can also be
used to ush mount the device. If a 2-gang pattress is used, make sure it is 25mm or
deeper and do not overtighten the front screws.
The Autostopcock Plus Base and its power supply are not waterproof and should be installed in
an appropriately safe place. The plug socket should remain accessible after installation in case of
emergency.
1. Position the Autostopcock Plus Base back
box on the wall. To ensure maximum WiFi
exposure, position the Base at least 30cm away
from metal objects, including pipes, and other
electronics.
2. Using the appropriate drill bit, drill through the
plastic enclosure and wall.
3. Remove the Autostopcock Plus Base back box
and insert wall plugs.
4. Replace the Autostopcock Plus Base back box
and screw into the wall plugs.
Alternatively, you could also simply hang the
backbox with screws 90mm apart.
After mounting and wiring, use the small
inserts to cover any unused holes, and the
larger inserts to cover the 2 screw holes on
the front. If these need to be removed, use a
small athead screwdriver to lift out.

INSTALLATION GUIDE
Wiring instructions
Up to 4 water meters or 1 valve and 1 meter can be connected to the circuit board
terminal blocks, as pictured below. The exact wiring will depend on your conguration.
1. Take 5mm insulation off each wire which does not have a connector.
2. Use the wiring guide on the next page and insert each wire into the correct
terminal block position then tighten the terminal block screw.
Note: Each input will have an associated position (1, 2, 3, 4). If only one
water meter is used, use INPUT 1.
3. Plug the power in, then if using a battery, plug the battery in.
4. Thread all the cables through the cable grip.
5. Finally, place the Autostopcock Plus front onto the
wall-mounted back box, screw into place and
use the plastic inserts to hide the screws.
DO NOT OVERTIGHTEN THE SCREWS.
Power
A suitable DC power adapter will be supplied with the kit. If the distance to the nearest
plug socket is more than 1m, an extension cable is also provided to extend the reach
by an extra 3 metres.
11

INSTALLATION GUIDE
Wiring instructions
12
3/4” ow meter
GND: Brown
SIG: Green
5V: White
Wiring guide for water meters
Solenoid valve
1.5”-2” water meter
(0.1 litre per pulse)
GND: Black
SIG: Red
1” motorised valve
Autostopcock Plus connection + - OSIG GND CSIG BMS
OPEN
BMS
COM
BMS
CLOSE
Solenoid valve (DC) Red Black
1” motorised valve (DC) Red Black Green White Yellow
2” motorised valve (DC) Red Black Grey White Brown
2”-4” anged motorised valve (AC)* Grey White Brown Black AC Live Red
2” motorised valve
1” ow meter
GND: Brown
SIG: Green
5V: White
Wiring guide for water valves
2”-4” anged water meter
(0.1 litre per pulse)
GND: Black
SIG: Red
2”-4” anged motorised valve
* Also required: AC neutral (blue) and earth (green/yellow)

INSTALLATION GUIDE
13
Wiring instructions
Wiring guide for optional inputs
Leak Cable
With leader cable, use red and black.
Without leader cable, use the 2 black cables.
Valve bypass
To override the valve and keep it open
during a sprinkler event, feed a volt-free
closed circuit to this input.
Wiring guide for optional outputs
Alert
Outputs whether an alert is present.
Normal operation when there is no alert. Open circuit between COM and NO, and
closed circuit between COM and NC.
Switched operation when there is an alert. Closed circuit between COM and NO,
and open circuit between COM and NC.
Valve
To signal an external system such as a BMS (Building Management
System), use these relays.
Outputs the status of the valve, open or closed.
When the valve is open, there would be a closed circuit between COM and OPEN.
When the valve is closed, there would be a closed circuit between COM and CLOSE.
Maximum Switching Power: 60 W, 125 VA
Maximum Switching Voltage: 220 VDC, 250 VAC
Maximum Switching Current: 2 A
Relay specications

INSTALLATION GUIDE
Login online
Install the app or browse to www.FlowReporter.com.
Once you have registered for an an account, log in.
1.
Congure the Base
Congure the Base online by selecting the ttings used (as
cabled on page 12).
The Base will then restart with the new conguration.
3.
Register new Base
Connect the Base to WiFi by clicking “Register Base” and
follow the on-screen instructions.
You will be asked to connect to the new WiFi hotspot that
the Base creates, so it is important you know how to change
WiFi on your device.
2.
Wait for Base to update
Wait 1 minute for the Base to update. The “Status” LED will
start breathing light blue when it has nished updating.
4.
Connecting to the internet
14
These steps are to be performed by a computer or smartphone with WiFi capability. The entire
process uses an internet browser.

Install the app by searching for
FlowReporter on the app store.
Alternatively, open up a new
browser window and register for
an account at
www.FlowReporter.com.
Once you have an account, log in
and click “Register Base”.
Plug in the Autostopcock Plus base and make sure
the “Status” light is blinking dark blue. If it isn’t,
press and hold the “Mode” button until it does.
Then click “Ready”.
You will now need to connect to the new WiFi hotspot
it creates, if the app doesn’t do this automatically,
go to your WiFi settings to connect to the new WiFi
hotspot. It will look similar to FlowReporter-ABCD
on your network list.
If this fails, try turning your WiFi off and on again, go
back to the main Dashboard page, restart the Base
and try again from scratch.
If still not working, set your IP addressto 192.168.0.2
when connecting to the base, instead of using
DHCP. To do this, go to your WiFi settings, tap and
hold the FlowReporter-ABCD network until a box
appears. Select “Manage network settings”, then
“Show advanced options”. Choose “Static” from the
“IP settings” menu, and input 192.168.0.2 as the IP
address and 255.255.255.0 as the subnet. Finish by
selecting “SAVE”. Now try registering the new Base.
INSTALLATION GUIDE
Details of each step can be found below (for Android devices - Apple/Windows users will have very
similar steps). Note that this process can also be done on a laptop in a web browser.
Connecting to the internet - in detail
15

Return to the app and click “Next”.
The screen should change to show the
device scanning the area for nearby WiFi
(if not, refer to the previous page). A few
seconds later, a list of available WiFi
will appear. Select yours and type in the
password.
MAKE SURE YOUR WiFi IS 2.4GHz ONLY!!!
Wait a few seconds, if the “Status” light is
ashing dark blue or green, the connection
failed and you should press “Restart”.
Make sure you’re connected back online, and the “Status” light is
slowly breathing light blue, give the device a name, then tap “Done”.
If the Base has been registered before, you will be asked whether
you’d like to keep the previous settings and data.
Congure the Base online by selecting the ttings used (as
recorded on page 12).
Save the settings, then wait 5 seconds for the Base to restart with
the new conguration.
Make sure to enable leak alerts and review the thresholds.
Return to your dashboard by clicking the drawer icon (in the top left) and click “Dashboard”.
You will see your new device on your dashboard.
Test the conguration by running a nearby tap, then click “Close valve” and check the water
stops owing. Click “View” then “Real time” then “Open valve”. You will see the graph change
as the water is turned back on.
INSTALLATION GUIDE
Connecting to the internet - in detail (continued)
16

Flow level
indicator
Antenna
Mode button
(change WiFi)
USER MANUAL
On the front of the Base, you will see LEDs (lights), buttons and connections.
Reset
button
Status
LED
Open
button
/LED
Close
button
/LED
DC connector
Cable
entries
Screws
and
inserts
Autostopcock Plus Base
17

USER MANUAL
Status
Close
To connect the Base to a new WiFi access point, hold down
the Mode button for around 5 seconds until the “Status” LED
ashes dark blue.
To close the valve, hold the “Close” button until the “Close” LED
shows red and you hear the water stop owing. This should
take 1 second for a solenoid valve, and 10-45 seconds for a
motorised valve.
1.
3.
Using the buttons and LEDs
Open
Status
To open the valve, hold the “Open” button until the “Open” LED
shows green and you hear water owing. This should take 1
second for a solenoid valve, and 10-45 seconds for a motorised
valve.
The“Status” light indicatesthestatus of theinternetconnection:
●Breathing light blue: Normal operation - connected to the
internet
●Breathing white: Normal operation - oine
●Flashing dark blue: Waiting for WiFi credentials
●Flashing purple: Updating to new software
See page 29 for the full list of LED status lights.
2.
4.
18

USER MANUAL
Oine mode
19
If the device has not been setup online, it can also be congured using the SD card. The default
factory conguration can be seen below but can also be edited without requiring to be online.
There are 2 congurations which can be applied independantly, one to be used during commissioning
(for example during testing, construction stage, or as an “away” mode) and one to be used in normal
operational settings. From now on, these congurations will be known as commissioning and
operational.
Commissioning is the default, and can be switched to operational by doing the following:
1. Turn on the device and wait at least 10s.
2. Press the open button and then press Reset while keeping
the open button pressed.
3. Keep the open button pressed until you hear 2 beeps (and
the status light blinks pink twice).
To switch the conguration back to commissioning, do the
same again but this time the device will beep and blink pink
only once.
If you restart or power off, the conguration will be the same as the one before power off.
If the status blinks pink 3 times, then there is an error with the SD card. Try restarting. If it still shows
the error, then try changing the SD card and reset.
The following oine mode thresholds will close the valve when exceeded.
Commissioning Configuration
Time threshold: 10 minutes 2 hours
Volume threshold: 100 litres 2 m3
Maximum ow threshold: 40 l/min none
Inactivity threshold: none none
Operational Configuration
Time threshold: 60 minutes 2 hours
Volume threshold: 600 litres 2 m3
Maximum ow threshold: 40 l/min none
Inactivity threshold: 24 hours 24 hours
Factory default congurations
For ttings 2”
and above:
For ow sensor (default 1”)
plus valve :

USER MANUAL
Oine mode
20
This setting is to protect from a sudden spike in ow as could happen from a burst pipe. As soon as
the maximum ow is exceeded, the valve will shut off the water immediately to prevent damages.
The default maximum ow value is specied in the default congurations. However, this can be
customised for your own property. The following steps show how to do this calibration automatically,
without need to guess:
Maximum ow calibration
1. Press the close button to shut the water off.
2. Open all faucets and empty the ush tanks downstream.
3. Long press the close button until the status LED shows pink
- now you are in max ow calibration mode. Note this mode
will exit after 1 minute if nothing else happens.
4. Open the valve using the open button.
5. The device will start measuring the maximum ow for 10-
20 seconds before shutting the valve off.
6. Make sure to close all the faucets before re-opening the
valve.
7. The max ow threshold will be saved in the current
conguration.
If you want to update this threshold in another conguration, do the same procedure whilst in that
conguration (Reset + open as described above).
If there are any problems with the new thresholds, you can always revert
back to the factory default congurations by pressing the Mode button 3
times.
This will clear the memory and restart the device. When it is restarted, the
status LED will beep and blink pink once to show it is in commissioning
conguration.
Factory reset
An optional accessory is the lithium ion backup battery, which
will supply at least 24 hours of backup power to the device
with enough power to close the DC valve (check page 12 to
see whether your valve is DC). When the power is restored,
the battery will be recharged automatically so you won’t need
to replace it. Make sure it is plugged into the correct socket
labelled BATTERY.
Battery backup
Table of contents
Other Autostopcock Security Sensor manuals
Popular Security Sensor manuals by other brands
Buckleys
Buckleys PHD PRO2 quick start guide
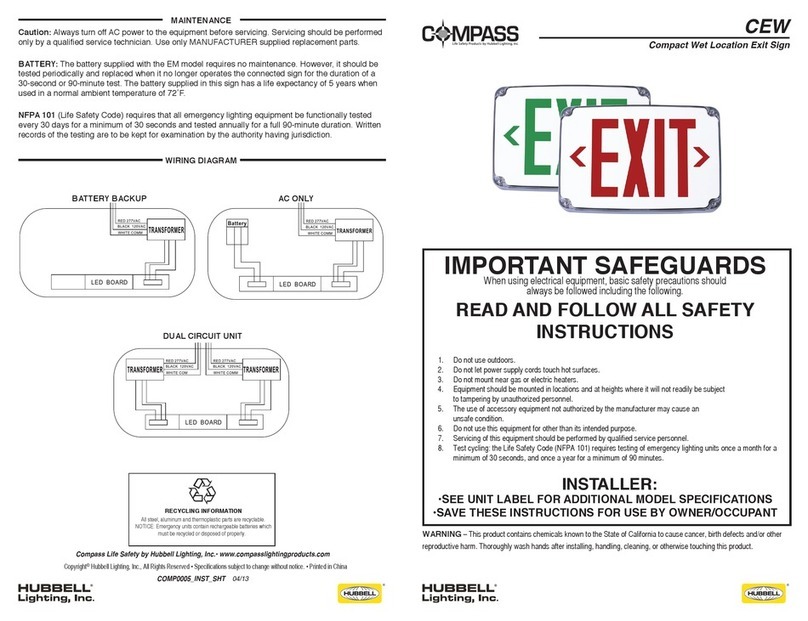
HUBBELL LIGHTING
HUBBELL LIGHTING Compass Compact Wet Location instructions

erlab
erlab Halo Sense Smart VOC Installation & user manual

Abexo
Abexo P41 Assembly and use instructions

Inventure Automotive
Inventure Automotive CL-J1708 user manual

IFM Electronic
IFM Electronic efector 500 PF20 operating instructions
