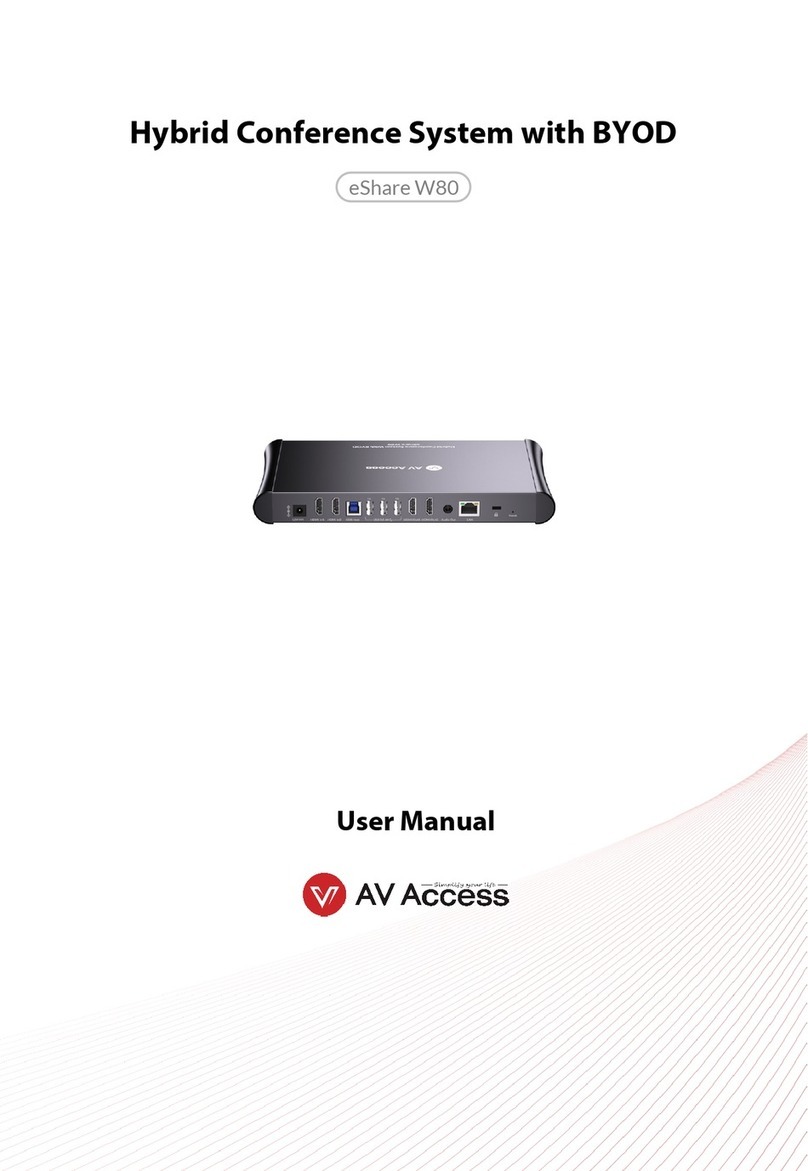
AV Access eShare W50 User manual

eShare W50
Hybrid Conference System with Wireless BYOD
User Manual

Disclaimers
The information in this manual has been carefully checked and is
believed to be accurate. AV Access Technology Limited assumes no
responsibility for any infringements of patents or other rights of
third parties which may result from its use.
AV Access Technology Limited assumes no responsibility for any
inaccuracies that may be contained in this document. AV Access
Technology Limited also makes no commitment to update or to
keep current the information contained in this document.
AV Access Technology Limited reserves the right to make
improvements to this document and/or product at any time and
without notice.
Copyright
Copy, Reproduce, Distribute and/or Edit of this document or part of
it as well as utilization of its contents and communication thereof to
others without express authorization are prohibited. Offenders will
be held liable for payment of damages. All rights created by patent
grant or registration of a utility model or design patent are reserved.
Copyright ©2022 AV Access Technology Limited All rights reserved.
Trademarks Notice
All products or service names mentioned in this document may be
trademarks of the companies with which they are associated.
Contact Us
Email: info@avaccess.com

Important Safety Instructions
Do not expose this device to rain, moisture, dripping or
splashing. No objects filled with liquids, such as vases, shall be
placed on the device.
Do not install or place this unit in a bookcase, built-in cabinet,
or in another confined space. Ensure the unit is well ventilated.
To prevent risk of electric shock or fire hazard due to
overheating, do not obstruct the unit’s ventilation openings
with newspapers, tablecloths, curtains, or similar items.
Do not install near any heat sources such as radiators, heat
registers, stoves, or other device (including amplifiers) that
produce heat.
Do not place sources of naked flames, such as lighted candles,
on the unit.
Clean this device only with dry cloth.
Unplug this device during lightning storms or when unused for
long periods of time.
Protect the power cord from being walked on or pinched,
particularly at plugs.
Only use attachments / accessories specified by the
manufacturer.
Refer all servicing to qualified service personnel.

www.avaccess.com
3
info@avaccess.com
Table of Contents
Introduction..........................................................................................................4
Overview .................................................................................................................................. 4
Features .................................................................................................................................... 4
Package Contents.................................................................................................................. 5
Panel .......................................................................................................................................... 5
Front Panel ..................................................................................................................... 5
Rear Panel ....................................................................................................................... 6
Installation............................................................................................................7
Application ...........................................................................................................8
Key Functions .......................................................................................................9
Screen Mirroring .................................................................................................................... 9
Screen Mirroring over Airplay (for Apple Devices)............................................. 9
Screen Mirroring over Miracast (for Android Phones & Windows PCs).....10
Screen Mirroring over Dongle................................................................................ 11
Automatic Signal Switching............................................................................................. 12
Guide Screen......................................................................................................................... 13
OSD .......................................................................................................................................... 14
Specifications .....................................................................................................15
Web UI.................................................................................................................17
Wireless Setting.................................................................................................................... 18
Output Setting...................................................................................................................... 20
Network Setting ................................................................................................................... 21
Web UI Logon Password.................................................................................................... 22
Guide Screen Change......................................................................................................... 23
Firmware Upgrade .............................................................................................................. 23
Version Information ............................................................................................................ 24
Firmware Upgrade..............................................................................................25
Warranty .............................................................................................................26

Introduction
www.avaccess.com
4
info@avaccess.com
Introduction
Overview
The eShare W50 is a high-performance BYOD presentation switcher
with wireless presentation capability. It equips built-in Wi-Fi module
and offers multiple access approaches, including Airplay Mirroring,
Miracast, Dongle and physical HDMI and USB-C ports, with which
you can project the screen contents of your computers
(Mac/Windows) or mobile devices (iPhone/iPad/Android phone) to
a display.
Multiple features like automatic signal switching, CEC, Guide Screen,
OSD display are also included. It is a collaboration terminal that
perfect for conferencing system.
Features
Built-in Wi-Fi module for wireless connectivity with devices
over Airplay Mirroring, Miracast and Dongle.
Supports USB signal return for controlling host PC on touch
screen.
Supports HDMI input and output resolutions up to 4K@30Hz
4:4:4.
Detailed and friendly OSD information.
Offers friendly Web UI for easy configuration.

Introduction
www.avaccess.com
5
info@avaccess.com
Package Contents
Before you start the installation of the product, please check the
package contents:
eShare W50 x 1
DC 12V Power Adapter (with US, UK and EU Pins) x 1
Wi-Fi Antenna x 1
USB Type-C to USB Type-C Cable with Lock (L=2m) x 1
HDMI Cable with Lock (L=2m) x 1
Mounting Brackets x 2
Mounting Screws x 4
Self-drilling Screws x 4
User Manual x 1
Panel
Front Panel
3 4
21
No.
Name
Description
1 Power Lighting yellow-green when
the device is
powered on.
2 Status
•
Lighting yellow-green:
The device is
outputting at least one video source.
•Blinking yellow-green: The device is in standby
mode.
•Off: The device is outputting Guide Screen.
3 Pairing USB-C port for connecting to the
dongle for
pairing.

Introduction
www.avaccess.com
6
info@avaccess.com
No.
Name
Description
4 Reset
Reset button.
When the device is powered on, use a pointed
stylus to hold down this button for five or more
seconds and then release, the device will reboot
and restore to its factory defaults.
Rear Panel
165
4
3
2
No.
Name
Description
1
12V
Connect to the DC 12V power adapter provided.
2
Input port
Connect to an HDMI and/or a USB-C source.
3 USB 3.0
USB-A ports with the two following functions
supported:
(1)
Connect to USB peripheral devices (e.g.
keyboard, mouse, touch screen, etc.).
Note: All USB ports can supply power to USB
peripheral devices.
•1A port: outputs DC 5V 1A power
•0.5A port: outputs DC 5V 0.5A power
(2) Connect the port to a U-disk for firmware
upgrade. More information, see Firmware
Upgrade section.
4
HDMI Out
Connect to an HDMI display.
5 LAN
Connect to a network device (e.g. network switch,
router, computer, etc.) for LAN control (Web GUI)
and airplay mirroring signal input.
6 Wi-Fi
Connect to the antenna provided for the access to
Miracast and soft AP function.

Installation
www.avaccess.com
7
info@avaccess.com
Installation
Note: Before installation, ensure the device is disconnected from the
power source.
Attaching the Antenna
Attach an antenna provided to the threaded connector, and screw it
down in clockwise.
Attaching Brackets
1. Attach the bracket to the bottom panel using screws provided
in the package. The bracket is attached to the bottom panel as
Figure (a) shown.
2. Repeat step 1 for the other side of the bottom panel.
3. Attach the brackets to the surface (e.g. on the wall, under the
table) you desire using self-drilling screws provided (see Figure
b).

Application
www.avaccess.com
8
info@avaccess.com
Figure (a) Figure (b)
Application
Laptop Laptop
HDMI
HDMI
USB-C
Speakerphone
Camera
USB
USBUSB
Touch Sreen
iPad iPhone
Android
Tablet
Android
Mobile
Macbook
Windows 11 PC
Dongle
Laptop
Note: If the USB-C video source (e.g. a laptop) is being displayed, all
USB devices connected to USB 3.0 Type A ports of eShare W50 will
be routed to the USB-C video source as well.

Key Functions
www.avaccess.com
9
info@avaccess.com
Key Functions
Screen Mirroring
If you’re working on a PC and want its apps and content to be
shown on another screen, you may want to consider mirroring your
PC’s screen to that screen.
With screen mirroring support, the device allows you to share your
mobile devices’ content wirelessly on any HDMI displays over
Airplay Mirroring, Miracast and/or Dongle. In this manual, mobile
devices available for screen mirroring are referred to as “screen
mirroring source”, such as Apple devices (iPhone/iPad/Mac),
Android phones, Windows PCs, Dongle, etc.
Screen Mirroring over Airplay (for Apple
Devices)
a. Connect your iPhone/iPad/Mac to the device’s Wi-Fi.
Wi-Fi SSID: as same as the device name and can be
obtained from OSD at the upper right of the display screen.
By default, it is set as eShare W50.
Password: set through Web UI and can be obtained from
OSD at the upper right corner of the display screen. By
default, it is set as 12345678.
b. Open Control Center on your Apple device, tap
Screen
Mirroring
to
select appropriate mirroring device (the device name can be

Key Functions
www.avaccess.com
10
info@avaccess.com
obtained from the upper right corner of the display screen)
from the pop-up menu.
c. To disconnect Apple device from the device: click Stop
Mirroring, the display stops displaying your device’s screen.
Screen Mirroring over Miracast (for Android
Phones & Windows PCs)
For Android smartphone (take Samsung Galaxy series for example):
1. Enable the Wi-Fi or WLAN feature of your smartphone.
2. On your phone, swipe down from the top and tap
SmartView
or
Wireless
Projection
to select appropriate mirroring device (the device name
can be obtained from the upper right corner of the display
screen) from the pop-up CONNECT menu.
3. To disconnect the smartphone from the device: click
“DISCONNECT” on your smartphone’s screen.
Note:
•The icon, instruction and entrance of the Miracast function may
vary on different Android phones, please refer to your phone’s
manual to get accurate instruction.
•If you fail to use Miracast function, please disable your phone’s
Wi-Fi and enable it later, or restart the mobile if necessary.
For Windows PC (Window 10 or higher):
1. Enable the WLAN feature of your PC.
2. On your PC, press the combination keys “ + K” to select

Key Functions
www.avaccess.com
11
info@avaccess.com
appropriate mirroring device (the device name can be obtained
from the upper right corner of the display screen) from the
pop-up menu.
3. To disconnect PC from the device: click Disconnect, the display
stops displaying PC’s screen.
Note:
The icon and interface of the Miracast function may vary on
different computers.
Some Windows 10/11 computers may fail to perform screen
mirroring with Miracast due to compatibility issues.
Tip: Both the Airplay mirroring and Miracast support PIN code. If
you see the PIN entry window appears on your devices, input the
PIN code that can be obtained through OSD (see OSD section for
more information).
Screen Mirroring over Dongle
Users are able to share laptop’s content on a display wirelessly
without even installing an application by using eShare D10 Dongle.
Note:
(1) eShare D10 Dongle is sold separately.
(2) Before you insert eShare D10 Dongle into your laptop, ensure
your laptop’s USB-C port supports video output.
Steps to share laptop’s screen on the display using eShare D10
Dongle:
1. Pair Dongle with the device.
Connect Dongle to the Pairing port on the device’s front panel.
Once pairing between Dongle and the device is completed,

Key Functions
www.avaccess.com
12
info@avaccess.com
“Pairing successful” appears on the display screen.
2. Connect Dongle to a laptop.
Insert eShare D10 into the laptop’s USB-C port, it will start
running and connecting to the device’s Wi-Fi. After it is
connected to the device successfully, the Dongle LED stops
blinking and starts lighting constantly.
3. Now press the Dongle’s projecting button, you can project your
laptop’s screen on the display immediately.
Automatic Signal Switching
The device supports automatic signal switching function, allowing
you to output desired sources easily and quickly. This function
follows Last-In-First-Out rule:
1. When a wired video source (HDMI or USB-C) is connected to
the device, the device will automatically switch to this latest
connected source and output it.
2. When a wireless video source (Airplay, Miracast or Dongle) is
connected to the device, the device will automatically project
its screen content to the connected display.
3. When disconnect the source being displayed from the device,
the device will switch to the active wired video source that
most recently connected or selected. If no active source
remains, the display shows the Guide Screen image finally.

Key Functions
www.avaccess.com
13
info@avaccess.com
Guide Screen
The device outputs Guide Screen picture when no video source is
selected or being output. The Guide Screen can be personalized to
allow customized connection instructions on the device’s Web UI
page.
Figure 1 – Guide Screen Image
The Guide Screen image will appear automatically on the display
screen after all video sources are removed from the device.
Note:
• This Guide Screen image can be changed though Web UI, for
more information, refer to Guide Screen Change section.
• By default, if the device is outputting Guide Screen image for 60
seconds, a countdown timer with the time period of 60 seconds
will appear on the Guide Screen. When the timer reaches zero,
the connected display will enter standby mode if it is
CEC-capable.

Specifications
www.avaccess.com
15
info@avaccess.com
Specifications
Technical
Input Video Port 1 x USB-C In; 1 x HDMI In; 1 x LAN, 10/100/1000Mbps
Ethernet; 1 x WLAN
Input Video Signal
•
HDMI: HDMI 1.4, HDCP 1.4
•USB-C: DisplayPort 1.1, HDCP 1.4
•LAN/WLAN: H.264
Input Resolutions
HDMI:
640x4808, 800x6008, 1024x7688, 1280x7688, 1280x8008,
1280x10248, 1360x7688, 1366x7688, 1440x9008,
1400x10508, 1600x12008, 1680x10508, 1920x12008,
720x4808(480p), 720x5766(576p), 1280x7205(720p30),
1280x7206(720p50), 1280x7208(720p60), 1920x10802
(1080p24), 1920x10803(1080p25), 1920x10805(1080p30),
1920x10806(1080p50), 1920x10808(1080p60),
3840x21605(2160p30)
LAN/WLAN: Up to 1920x10805(1080p30)
Note: The input resolution support for LAN or WLAN may
vary according to the specific BYOD protocols and devices.
1 = at 23.98 Hz, 2 = at 24 Hz, 3 = at 25 Hz, 4 = at 29.97 Hz, 5 =
at 30 Hz, 6 = at 50 Hz, 7 = at 59.94 Hz, 8 = 60 Hz
Output Video Port
1 x HDMI
Output Video Signal
HDMI 1.4, HDCP 1.4
Output Resolutions
720x4808(480p60), 720x5766(576p60), 640x4808,
800x6008, 1024x7688, 1280x10248, 1366x7688, 1440x9008,
1280x8008, 1680x10508, 1920x21605, 1600x12008,
1920x12008, 2560x14405, 2560x14408, 1280x7206
(720p50), 1280x7208(720p60), 1920x10806(1080i50),
1920x10808(1080i60), 1920x10802(1080p24), 1920x10803
(1080p25), 1920x10805(1080p30), 1920x10806(1080p50),
1920x10808(1080p60), 3840x21603(2160p25),
3840x21605(2160p30)
1 = at 23.98 Hz, 2 = at 24 Hz, 3 = at 25 Hz, 4 = at 29.97 Hz, 5 =
at 30 Hz, 6 = at 50 Hz, 7 = at 59.94 Hz, 8 = 60 Hz

Specifications
www.avaccess.com
16
info@avaccess.com
Audio
Input Audio Port
1 x HDMI; 1 x USB-C In; 1 x LAN; 1 x WLAN
Input Audio Signal RAW PCM 2.0, 16 bit, 32/44.1/48KHz sps
Output Audio Port
1 x HDMI
Output Audio Signal RAW PCM 2.0, 16 bit, 48KHz sps
Wi-Fi
Standard IEEE 802.11 a/b/g/n/ac
Frequency
Dual bands, 2.4~2.4835GHz, 5.0~5.8GH
Security WEP, TKIP, AES, WPA, WPA2
Control
Control Connector
1 x RJ45, 10/100/1000Mbps Ethernet
Control Method
LAN (Web UI)
General
Operating Temperature
0°C to + 45°C (32 to + 113 °F)
Storage Temperature
-20 to +70°C (-4 to + 158 °F)
Humidity
10% to 90%, non-condensing
ESD Protection Human-body Model:
±
8kV (Air-gap discharge)/
±
4kV (Contact discharge)
Power Supply
12V 2A DC
Power Consumption
19W (Max)
Device Dimensions
(W x H x D)
230mm x 25mm x 142.6mm / 9.1”x 0.98” x 5.6“
(Antenna not included)
Product Weight
0.68kg/1.5lbs

Web UI
www.avaccess.com
17
info@avaccess.com
Web UI
The Web UI designed for this device allows for basic controls and
advanced settings. It can be accessed through a modern browser,
e.g. Chrome, Safari, Firefox, IE10+, etc.
To get access the Web UI:
1. Connect the LAN port of the device to a local area network.
Ensure there’s a DHCP server in the network so that the device
can obtain a valid IP address.
2. Connect a PC to the same network as the device.
3. Input the device’s IP address in the browser and press Enter,
the following window will pop up. (See OSD section to easily
view the IP address.)
4. Input the password (default password: admin) and click Login
to enter the main page.

Web UI
www.avaccess.com
18
info@avaccess.com
The main page includes seven submenus: Wireless Setting, Output
Setting, Network Setting, Web UI Logon Password, Guide Screen
Change, Firmware Upgrade and Version Information.
Wireless Setting
UI Element
Description
Device Name
Input a name for the device.
This name also acts as the WiFi name
and the
receiver of Airplay and Miracast.

Web UI
www.avaccess.com
19
info@avaccess.com
UI Element
Description
Note: The name must be 1~20 characters in
length, including letters, numbers, “_” or “-” and,
space shall not at the beginning or end.
By default, it’s set as eShare W50.
WiFi
Password
Configure the WiFi password.
The name must be 1~20 characters in length,
including letters, numbers, “_” or “-”.
WiFi Band
• 5G: Configure the device ’s frequency band as
5GHz.
• 2.4G: Configure the device’s frequency band
as 2.4GHz.
By default, it is set as 5GHz. If your wireless devices
don’t support 5GHz Wi-
Fi, configures the
frequency band as 2.4G before connecting them
to the device.
PIN shown on
the screen
Enter a four-digit PIN code (0000~9999) to help
prevent users from accidentally connecting to an
unintended device and protect from an
unauthorized access.
• When the PIN code is set, it will appear on the
upper right corner of the display.
• If you don’t want to set the PIN code, you can
enter nothing here.
• Auto: When “Auto” is checked, the device will
randomly generate a four-digit PIN
in two
cases: a) the device switches to Guide Screen
for output; b) the device reboots.
By default, it’s set as blank.
Apply
Click to perform current settings.
Table of contents
Other AV Access Conference System manuals
Popular Conference System manuals by other brands

Polycom
Polycom VSX 3000 manual

Omron
Omron E3NW-CCL user manual

COMMUNICATIONS-APPLIED TECHNOLOGY
COMMUNICATIONS-APPLIED TECHNOLOGY ICRI/2PE Setup and operating procedures

Sony
Sony Ipels PCS-G50 Setup guide

TANDBERG
TANDBERG Codec C90, Codec C60, Codec C40 Administration guide

As Pool
As Pool NO STRESS user guide