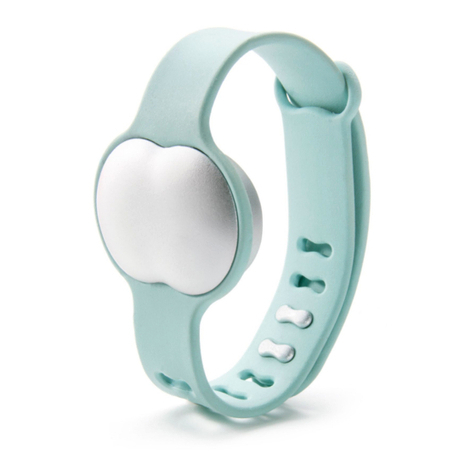
Ava Fertility User manual

Ava Fertility Tracker
User Manual
Version 5.0
©2016 AVA AG, all rights reserved. Ava and Ava logotype are trademarks
of Ava AG. All other trademarks are property of their respective owners.
Patent Pending.
Legal manufacturer: Ava AG, Räffelstrasse 26, 8045 Zurich, Switzerland
Not for contraceptive use.

2
Table of contents
Indications of use 3
Contents and compatibility 3
• What is included
• Mobile device compatibility
Geing started 4 – 5
• Charging Ava
• Signing up with the app
• Pairing Ava for the first time
Wearing Ava 6 –7
• Attaching the sensor pod to the bracelet
• Wrist placement
• Recording data
• Synchronize Ava with the app
Using the app 8 – 13
• Navigation & icon definition
• Dashboard
• Logging
• Calendar
• Health chart view
• Profile
• Pregnancy Mode
Specifications and other information 14
• Environmental conditions
• Water resistance
• Cleaning Ava
• Sizes
• Battery
• Disposal and recycling
• Return policy and warranty
Regulatory and safety notices 15
• Regulatory information

3Indications of use & Contents and compatibility
Indications for use
The Ava Fertility Tracker is for women who want to monitor their health for trying to
conceive or getting to know their bodies. It is for women with regular or irregular cycles
between 24 – 35 days. It is not for women with infertility issues.
Ava is not a contraceptive and cannot be used to prevent pregnancy.
Read more about Ava at: www.avawomen.com/welcome
Contents and Compatibility
What is included
1. Ava sensor pod
2. Ava strap
3. USB charging cable
1
2
3

4
Mobile device compatibility
Ava syncs with the following operating systems and devices:
• iOS 9.0 or later
• Android 5.0 or later
Getting Started
Aaching the sensor pod to the bracelet
Attach the sensor pod to the bracelet by aligning the front of the pod with
the braces of the band and pressing it into the strap from the underside.
Charging Ava
1. Connect Ava to power through the USB cable that is provided.
2. The USB cable can only be inserted into the Ava in (1) way. Please ensure you match
the USB cable head and align it with the corresponding trapezoid shape of Ava’s
USB port before inserting the cable.
3. Wait until the LED turns green (this will not take longer than 2 hours).
Getting started
1 32

5Getting started
Signing up with the app
Download the Ava app from the App Store.
Open the app and follow the instructions to create an account or log in.
All the information you provide is confidential.
See our Privacy Policy at: www.avawomen.com/privacy
and Terms of Service at: www.avawomen.com/terms-of-service
Pairing Ava for the first time
After you set up your account you will be asked to pair your Ava with the app.
Pair the Ava before you wear it for the first night. In order to do so, follow the
instructions on the screen:
• Turn on your phone’s Bluetooth
• Connect Ava to power through the USB cable.
The LED on your Ava should be flashing blue when the device is in pairing mode.
If you do not see this light, unplug the device from the charger and plug it again.
• After your device is recognized, tap “Pair Ava”
Your Ava is paired and ready to be used.

6
Wearing Ava
Ava is designed to be worn only while you’re sleeping.
Ava must be worn for at least four hours per night. After three hours of sleep, your
physiological signs become stable and accurate measurements can be taken.
If you wear your Ava for at least four hours but do not sleep, we will still show you your
physiological data but the data quality is poor so we will not consider it in our algorithm.
Wrist placement
To get accurate data, Ava should fit snugly on top of your wrist,
right below your wrist bone.
• Do not wear the device while it is connected to power
• Ava has been tested for biocompatibility and should not cause allergic reactions.
• If you have tendonitis, carpal tunnel syndrome, or other musculoskeletal disorders,
consult your doctor prior to use. If you feel any discomfort on your wrists while or
after wearing the product, please discontinue use.
Wearing Ava

7
Recording data
The device automatically detects that it is being worn and starts recording data.
When you start wearing the device you will see:
Green LED for five seconds, which means that the device has started recording and you
can go to sleep or…
Red LED that flashes every 10 seconds, which means that the memory of your Ava is full
or its battery is empty. In any case, connect your Ava to the power cord, connect it with
the app and wait for the green light to appear on your Ava.
Synchronize Ava with the app
When you wake up in the morning:
1. Connect the device to the power cable
2. Make sure that the Bluetooth on your mobile phone is enabled
and you are connected to internet.
3. Open the Ava app
4. Synchronization will take place automatically and after a few moments
you can see all the data of the previous night on your smartphone.
Since Ava records more than 3 million data points every night you should
synchronize every day to ensure that you get the most accurate prediction. Also, do not
forget to charge Ava during the day so that it will be ready to be used at night.
Wearing Ava

8
Using the app
Navigation & icon definition – iOS
Navigation Icons
Health chart view Calendar Logging
Dashboard Pregnancy information (in pregnancy mode of the app only)
Action Buons
Add sex Add period
Events
Predicted ovulation Recorded sex
Shading
Menstruation 121110 Predicted period
High and peak fertility 18
17 19
1615 Predicted high and peak fertility
Navigation & icon definition – Android
Navigation Icons
Health chart view Calendar Logging
Dashboard Pregnancy information (in pregnancy mode of the app only)
Navigation menu
Action Buons
I had sexAdd sex Add period
Using the app

9
Events
Predicted ovulation Recorded sex
Shading
Menstruation 121110 Predicted period
High and peak fertility 18
17 19
1615 Predicted high and peak fertility
Dashboard
On the dashboard, you can see Information about your menstrual cycle and today.
1. Cycle Information
2. Measurements for the day
3. Trend Indication – Comparison to last day
iOS Android
1
23
Using the app

10
Logging
You can log items during your cycle and see your logging pattern in your calendar and he-
alth view. Make sure you always log your period in order for Ava to work properly.
1. Add you period.
Spotting is not part of
your period but can
occur at any time
during your cycle.
2. Drag to navigate
through days.
Android
2
iOS
1
1. Press to create your
own customized log.
You can create up to
10 logs.
2. Swipe/Press to delete
a log from all records.
Android
2
iOS
1
Using the app
2

11
Calendar
The Calendar view features an extended overview of events recorded or predicted in your
menstrual cycle.
Health chart view
The Health chart view features detailed physiological parameter data for your nights in a
graphic view. You can also see your logs and how they occur over the time of one cycle.
You can see data values for a selected day. To get information on each parameter and
what change to look for in your cycle, click on the information button.
1. Period recorded
2. Sex recorded
3. Period predicted
Android
2
iOS
1
3
1. See previous cycle
2. See next cycle
3. Move left/right to
see more data values
for different days
4. See your logged items
5. Click for information
iOS
1
5
2
Android
3
4
Using the app

12Using the app
Profile
Edit your first or last name, password, preferences. Log out or delete your account.
Pregnancy mode
You can get detailed explanations about what to expect in each week of pregnancy. Track
your physiological parameters and countdown to your due date.
Dashboard
1. Change your status
for your use
2. Remove your
pregnancy from
your data.
1
2
1. Week count to due date
2. Trend Indication –
Comparison to last day
3. Click for information
1
3
2

13Using the app
Profile
Logging
1. Edit / adjust
1
1. Log and track
your weight
2. Click for information
1
2

14Specifications and other information
Specifications and other information
Environmental conditions
Operating temperature: 59oto 113oF (15oto 45oC)
Water resistance
Ava is not waterproof. Do not submerge it in liquids.
Do not shower or swim with your Ava.
Cleaning Ava
We recommend that you occasionally clean the sensors on your Ava to ensure that they
record the best possible signal quality. To do so use a dry cloth. Make sure not to scrape
the sensors with a wire brush or anything metal, since this can damage the plating.
Sizes
Ava is suitable for wrist sizes from 140 mm / 5.5 in. circumference to 200 mm / 7.9 in.
Baery
Ava’s battery is rechargeable and doesn’t have to be replaced.
The battery should last up to 2 years if stored in ambient temperature and is fully
charged every time before use.
In order to maximize Ava’s battery life keep the app up to date and wear Ava only
while you are sleeping.
Disposal and recycling
Ava is considered electronic waste and should be disposed of at your local electronic
equipment collection facility. Do not dispose of Ava with common household waste.
Return policy and warranty
For information visit: www.avawomen.com/terms-of-service

15Regulatory and safety notices
Regulatory and safety notices
Regulatory information
For information visit: www.avawomen.com/quality
Read, follow and keep this user manual and all safety instructions. Improper installation,
use or disposal of Ava could be hazardous to your health and put others at risk.
Still have questions?
Then visit our FAQs at www.avawomen.com/support
Other ways to keep up to date and get additional support:
Email us at support@avawomen.com
Like us on Facebook www.facebook.com/avabracelet
Ava AG
Räffelstrasse 26
8045 Zurich
Switzerland
Ava Science, Inc.
965 Mission St.
San Francisco, CA 94103
USA
2AAQS-ISP130301
No humidity
Caution pacemaker wearers
Not for children
Table of contents
Other Ava GPS manuals
Popular GPS manuals by other brands
LX
LX Cygni Tracker quick start guide
ADC
ADC ADCP-80-412 user manual

Qstarz
Qstarz eXtreme BT-Q818X Quick installation guide
Blackbird Technologies
Blackbird Technologies Blackbird Asset Tracker user guide

PC USA Corporation
PC USA Corporation iBT-GPS Bluetooth GPS Receiver user manual

SUNGOO
SUNGOO 43.01 user manual

