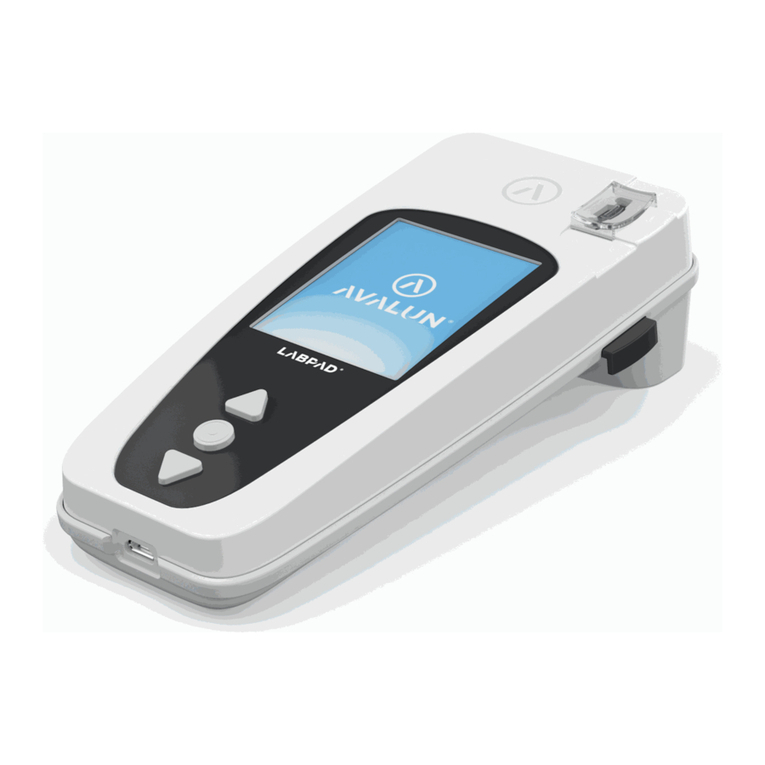
Avalun LabPad INR User manual

LabPad® INR
User guide
2017/01/01


3
En
English

4
Index
1 Introduction
1.1 Intended use
1.2 Measurement procedure
1.3 The LabPad®INR
1.4 Quality Controls
2 LabPad®INR overview
2.1 The device
2.2 Color screen
2.3 Power supply
2.4 The Tsmart®INR microcuvette
2.5 How to insert the microcuvette
2.6 How to discard the microcuvette
3 First use and general instructions for use
3.1 First use and initialization
3.2 Operating
3.3Powero
3.4 Full reset
4 Settings
4.1 Language
4.2 Date & Time format
4.3 Date & Time
4.4 Brightness
4.5Powero
4.6 Measurement unit
4.7 Therapeutic range for INR measurements
4.8 Memory management
5 Performing an INR test
5.1 Prior recommendation
5.2 Getting ready
5.3 Applying the blood drop onto the microcuvette
6
6
7
9
11
12
12
13
14
17
17
18
18
18
21
22
23
24
26
27
27
28
28
29
30
31
33
33
33
34

5
En
5.4 Performing a test and displaying result
5.5 Discarding the microcuvette
6 Retrieving saved results
6.1 Browsing the list of results
6.2 Reviewing results
6.3 Trend statistics of the INR range
7 Sharing results via Bluetooth
7.1Bluetoothconguration
7.2 Operating with Bluetooth
7.3 Result display with Bluetooth
8 Error messages
9 Troubleshooting
10 Storage and transportation
11 Cleaning
12 Warranty
13Technicalspecications
14 List of icons
15 List of symbols
38
39
41
41
41
42
43
43
47
47
48
54
56
56
57
57
58
59

6
1 Introduction
ThankyouforchoosingtheLabPad®INRfor yourINRmeasurement.
In order to use this device, you need to obtain the appropriate
microcuvettes: single-use Tsmart®INR from the Avalun Company.
The LabPad®INR is a self-test In-Vitro Diagnostic (IVD) device
designed to measure blood coagulation time and indicate INR
value (International Normalized Ratio), Prothrombin Time (PT)
and the Quick Time (QT).
Use of the LabPad®INR has been adapted for improved
monitoring of your oral anticoagulant treatment through type
vitamin K antagonists (VKA).
Note for healthcare professionals: the information in yellow
identiedwiththisiconisexclusivelyandspecicallyforyou.
You are recommended to read it before any use of the device.
Healthcare professionals
This user guide provides you with all the information you need
to operate this device optimally. Before using the device for
thersttime,pleasereadthisguidethoroughly.
Caution
1.1 Intended use
Caution

7
En
1.2 Measurement procedure
Before using this device, you must consult your physician in order
to be sure there is no contraindications to its use. Your physician
will provide a targeted therapeutic range with a low and a high
value. This therapeutic range can be saved in the device (see
section 4.7 Therapeutic range for INR measurements) to be
recalled when displaying results (see section 5.4 Performing a
test and displaying result). Your physician will also provide your
INR test frequency as well as what you should do in case the test
resultdeviatesfromthespeciedtherapeuticrange.
Use of an alternative method of measurement is recommended
in the event of a transition period with a heparinized treatment.
Youareadvisedatalltimestofollowyourphysician’sprescriptions
and advice. In case of doubt, consult your physician.

8
The single-use Tsmart®INR microcuvette contains a lyophilized
reagent made of thromboplastin. When the blood sample is
dropped on the microcuvette plate that has been previously
inserted in the device (see section 5 Performing an INR test), it
issuckedinbycapillarityandgetsmixedwiththereagent.The
coagulation reaction then begins.
The LabPad®INR initiates an optical analysis of the red cell
movements that freeze when the clot is formed inside the
microcuvette. The elapse time between blood drop and clot
makes it possible to calculate the INR, PT, or QT, thanks to an
algorithm.
After the test is performed, the used microcuvette is discarded
and the device is ready for a new test.
The test result is displayed on the device screen. The LabPad® INR
canbeconguredsothatthisresultisalsosharedviaBluetooth
toathird-partyapplicationrunningonasmartphoneforexample
(meaning an app download is required).

9
En
1.3 The LabPad®INR
Inthebox,youwillnd:
1) The LabPad® INR testing device
2) A battery charger including a power adapter and
a micro USB-B cable
3) A carrying bag
4) A user guide
5) A quick reference guide
1 2 3
5
4
Check that these elements are included; if not, contact your
reseller.
LabPad
®
INR
User guide

10
To ensure the proper operation of the device as well as your
own safety, please follow the instructions below.
• Use your LabPad®INRinalocationwithsucientlighting
and with ambient temperature between 15 and 32°C
(59 to 90°F).
• Use your LabPad®INR only when the relative humidity
level is under 85%.
• Toperformatest,placeyourdeviceonastable,at,and
vibration-free surface.
• Do not insert any object other than a Tsmart®in the
insertion area, including during cleaning.
• To eject the Tsmart® INR microcuvette use only the side
blue button.
• Do not drop the device; this may damage it and cause
malfunction.
• Carry your LabPad®INR in the carrying bag provided.
• Useexclusivelythebatterychargerprovided.Donotuse
a damaged battery charger.
• Follow the storage and cleaning instructions.
• Keep away from children.
If the device is used in a manner not specied by this user
guide, the protection provided by the device may be impaired.
Operating conditions and precautions for safe use

11
En
See section 5 Performing an INR test for specic
recommendations.
Healthcare professionals
1.4 Quality Controls
The smart meter LabPad®INR is a technologically advanced
device that runs several Quality Controls automatically before
performing a test.
When a problem that could prevent the test from being
performed occurs, an error message is displayed on the device
screen. The standard error message is “Error XX”, XX being the
error reference number (see section 8 Error messages).
This message is associated with the icon
Refer to section 9 to solve the problem (see section 9
Troubleshooting).
TheexpirydateoftheTsmart®INR microcuvette is controlled with
an autotest when inserted in the LabPad®INR. Its temperature
is also regulated during measuring in order to ensure optimal
conditions for biological reactions.
Control of the Tsmart®INR microcuvette’s expiry date can
be carried out properly only if the date & time have been
congured beforehand (see section 3 First use and general
instructions for use).
Operating conditions and precautions for safe use
Caution

12
2 LabPad®INR overview
2.1 The device
The LabPad®
Color screen
Tsmart ® insertion area
Tsmart ® eject button
Micro USB port
Browse buttons
Manufacturer, IVD, CE, symbols for instructions
Product reference number, serial number, bar code
Validation button
12:24
John Smith 12:24
2,1
3,2 2.3
smart
INR
.0
.0
2016/01/01
Eject Tsmart
2017/01/01

13
En
12:24
Bluetooth connection indicator
Time Battery charge indicator
How the user interface works:
The green triangular buttons are for browsing the
pages upwards or downwards.
The center power button is for conrming the
selection.
Note
Pressing the center power button for more than 2 seconds is
alsousedtoswitchthedeviceon,switchitoandaccessthe
setting menu (see section 3 First use and general instructions
for use).
2.2 Color screen
Status bar

14
INR
2,9
04/21
Insert Tsmart for new test
Display area
Message area
Current date
Main display
2.3 Power supply
The LabPad®INR can be operated on battery or
from an electrical power supply. For the latter,
connect the provided cable to the micro USB
port located on the lower part of the device
and the battery charger (power adapter) to a
power supply. The provided cable complies
with CEI 61010 standard.
Contextual
information area
Insert Tsmart for new test
2017/01/01

15
En
75% 50% 25%100%
According to the battery charge level, the indicator on the upper
right part of the screen is fully white, 75%, half or 25% white.
The indicator is red when the LabPad®INR does not have enough
battery power to perform a test. Quickly plug it in to a power
supply.
To recharge the battery, connect the
provided cable to the USB port located
on the lower part of the device and the
battery charger to a power supply.
The electrical socket must be installed
close to the device and be easily
accessible in order to be able to unplug
quickly the battery charger in case of
emergency.
The battery is fully charged when the indicator on the upper right
part of the LabPad®INR screen is fully white. Device autonomy is
between 40 and 70 tests, or 3 months without use.
To check the battery status during charging, press the center
power button.
4h
Battery indicator

16
The icon with the lightening symbol means the battery is
charging.
Note
It is advised not to store the device when the battery is low.
When the battery is totally empty, saved data are not lost but
thedevicemustbeconguredagain(see section 3.1 First use
and initialization).
When a red battery is displayed full-screen,
it means the battery charge is critical and
thedevicewillautomaticallyswitcho.
Quickly plug it in to a power supply.
Note
Whatever the battery charge, it is always possible to perform
an INR test by plugging the device in to a power supply.

17
En
The Tsmart®
2.4 The Tsmart®INR microcuvette
2.5 How to insert the microcuvette
Do not use the side blue button to insert the microcuvette.
Broad curved plate on which
blood drop is deposited
Central micro channel that
contains the reagent, where the
blood drop is sucked in
Datamatrix that contains all the information
required to perform the INR test as well as the
expiry date (see section 1.4 Quality Controls )
Please refer to the microcuvette instructions for use that contain
all information for an optimal use.
Caution
« Click»

18
2.6 How to discard the microcuvette
The side blue button releases the Tsmart®
INR for discarding after use (see section
5.5 Discarding the microcuvette).
3 First use and general instructions for
use
3.1 First use and initialization
Whenusingforthersttime,pressthecenterpowerbutton.The
LabPad®INR starts with “welcome” and begin the initialization
process. You will be able to change the language just after this.
Or
• When you use the LabPad® INRforthersttime,plugit
in power supply or charge the battery beforehand for at
least one hour.
• Do not insert any Tsmart®INR before initialization is
complete.
Caution

19
En
2) Select the desired operating language
1) The LabPad® INR starts
4) Set date & time. Format is AAAA/MM/
DD for year, month and day.
If you set the wrong date, you can
correct it through the “Settings” menu
(see section 4 Settings).
12:24
John Smith
Set date
2017/01/01
Use and OK
AAAA/MM/DD
Configuration
12:24
John Smith
LabPad
Continue the initialization process using the triangular
buttons to browse up or down and the center power
buttontovalidateandgotothenextstep.
12:24
Configuration
Language
LabPad vX.X
Italiano
Français
English
12:24
John Smith
LabPad
LabPad vX.X
Welcome
3) Once the operating language is set, that will make the device
start again in case of change, read carefully the instructions of
use displayed successively on the screen. Press “Continue” to go
tothenextsteps.

20
Once completed, the start screen is displayed and the device
conguresitself.
12:24
John Smith
LabPad
12:24
John Smith
Configuration
Time format
24h format
Use and OK
12:24
John Smith
Configuration
Set time
00 : 05
Use and OK
LabPad vX.X
12:24
John Smith
Thank you for choosing the LabPad
Initialization in progress
2017/01/01
12:24
Welcome
Table of contents
Other Avalun Medical Equipment manuals
Popular Medical Equipment manuals by other brands

Bowa
Bowa ERGOeco Instructions for use

Sirona
Sirona SIROLaser Xtend operating instructions

Mediana
Mediana HeartOn A16 Series Operator's manual

Cardinal Health
Cardinal Health Disposable Neonatal Blood Pressure Cuffs Directions for use

Focal Meditech
Focal Meditech Dowing user manual

Siemens
Siemens MAMMOMAT Novation DR Installation and startup