Avaya Sonorous Instruction Manual
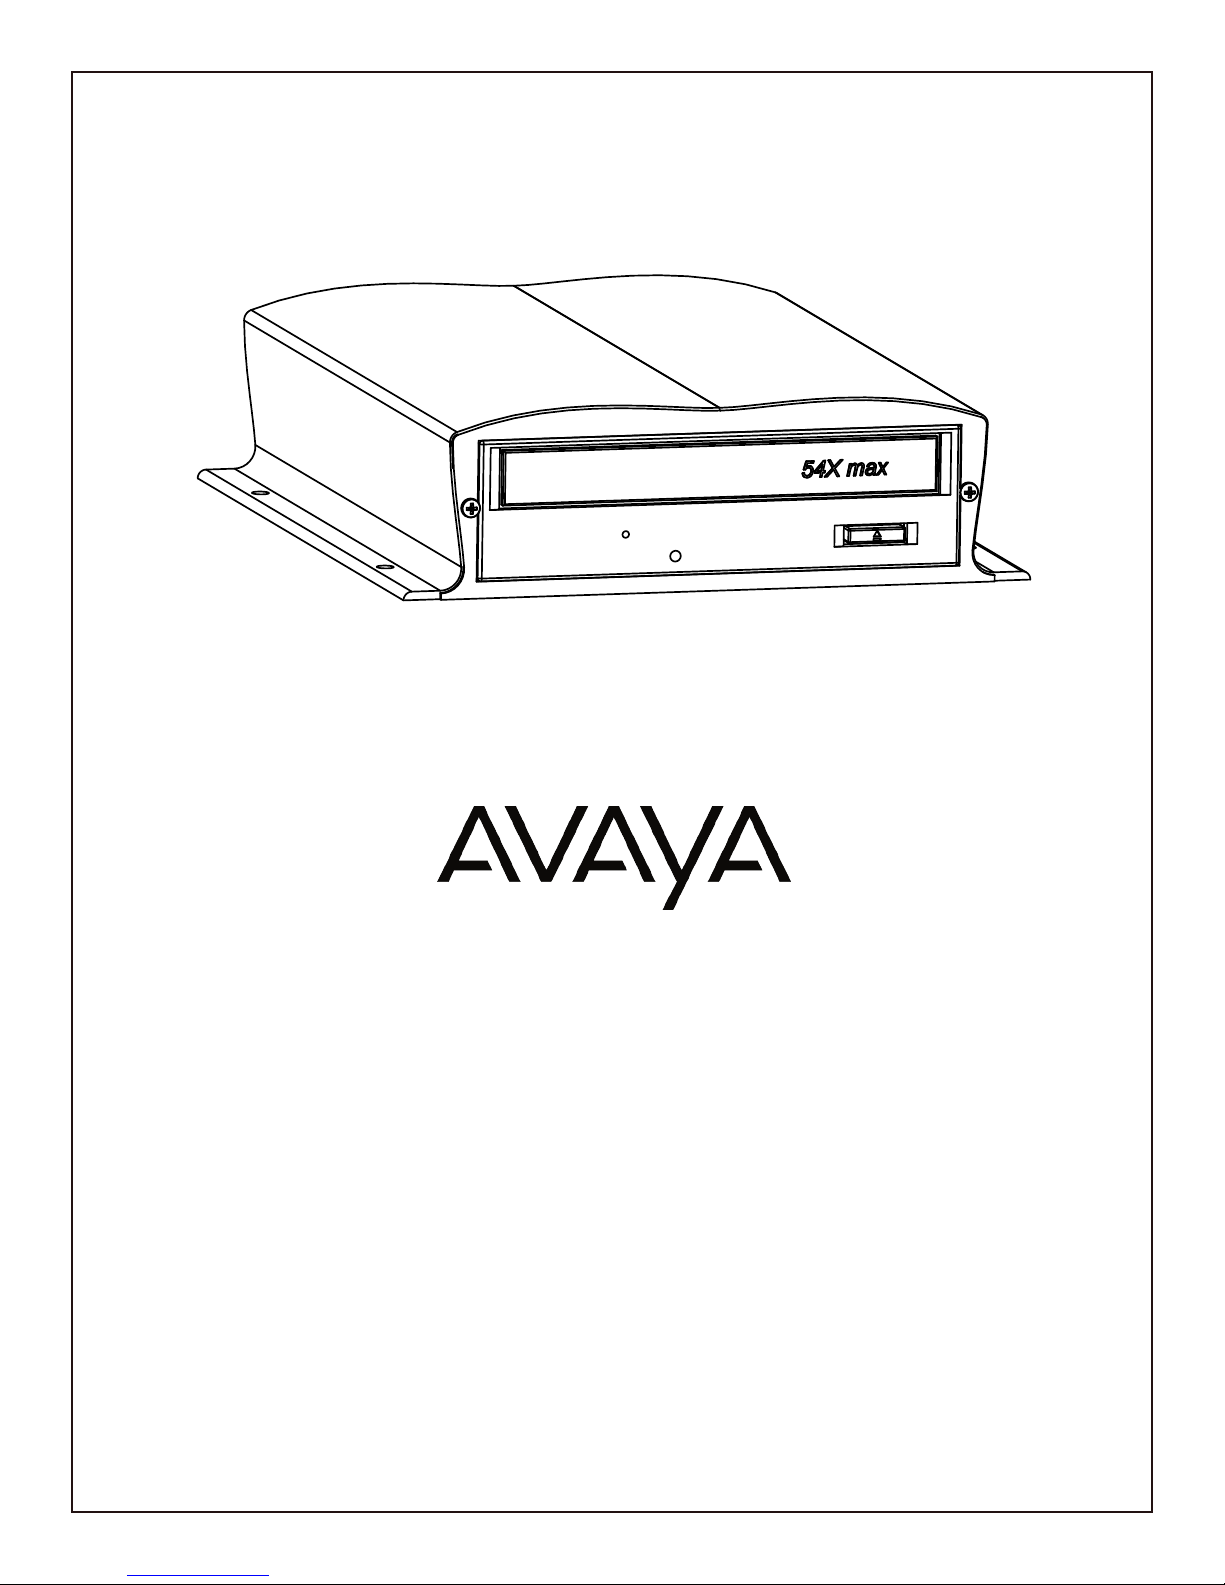
Sonorous
by
Installation & User Manual
Magic On Hold
720 Brooker Creek Blvd., Ste. 215
Oldsmar, FL 34677
800.584.HOLD (4653)
Fax: 727.785.7659
http://magiconhold.com


Index:
Introduction ........................................................................................................................
Sonorous Layout Summary...............................................................................................
Installation .......................................................................................................................
Loading Files ...................................................................................................................
CD Formatting and Creation .............................................................................................
Troubleshooting ...............................................................................................................
Specications ..................................................................................................................
Warranty & FCC ....................................................................................................................
3
3
4
5
6
7
8
9
11
Introduction:
The Sonorous is a state-of-the-art digital audio recording and playback device designed to provide a continuous-
play audio source for message-on-hold, background music, or any other audio application where high-quality
audio playback is required. The audio program is loaded from a standard MP3 burned CD using a pure digital-to-
digital transfer into a high-density ash memory le system. After audio is loaded, the CD can be removed and
the audio is played from its 8Ωor 600Ωoutput jacks on the rear of the unit.
Unpacking and Inspection:
Before you begin installation, unpack and verify that you have all the correct parts.
(1) Sonorous
(1) 15VDC @ 1.67A power supply
(1) Instruction manual and sample audio on CD ROM
(1) RCA to RCA cable
(1) 1/8˝ to RCA adapter
(2) Wall mount screws
(4) Rubber feet
If you are missing any of these parts STOP and call your dealer.

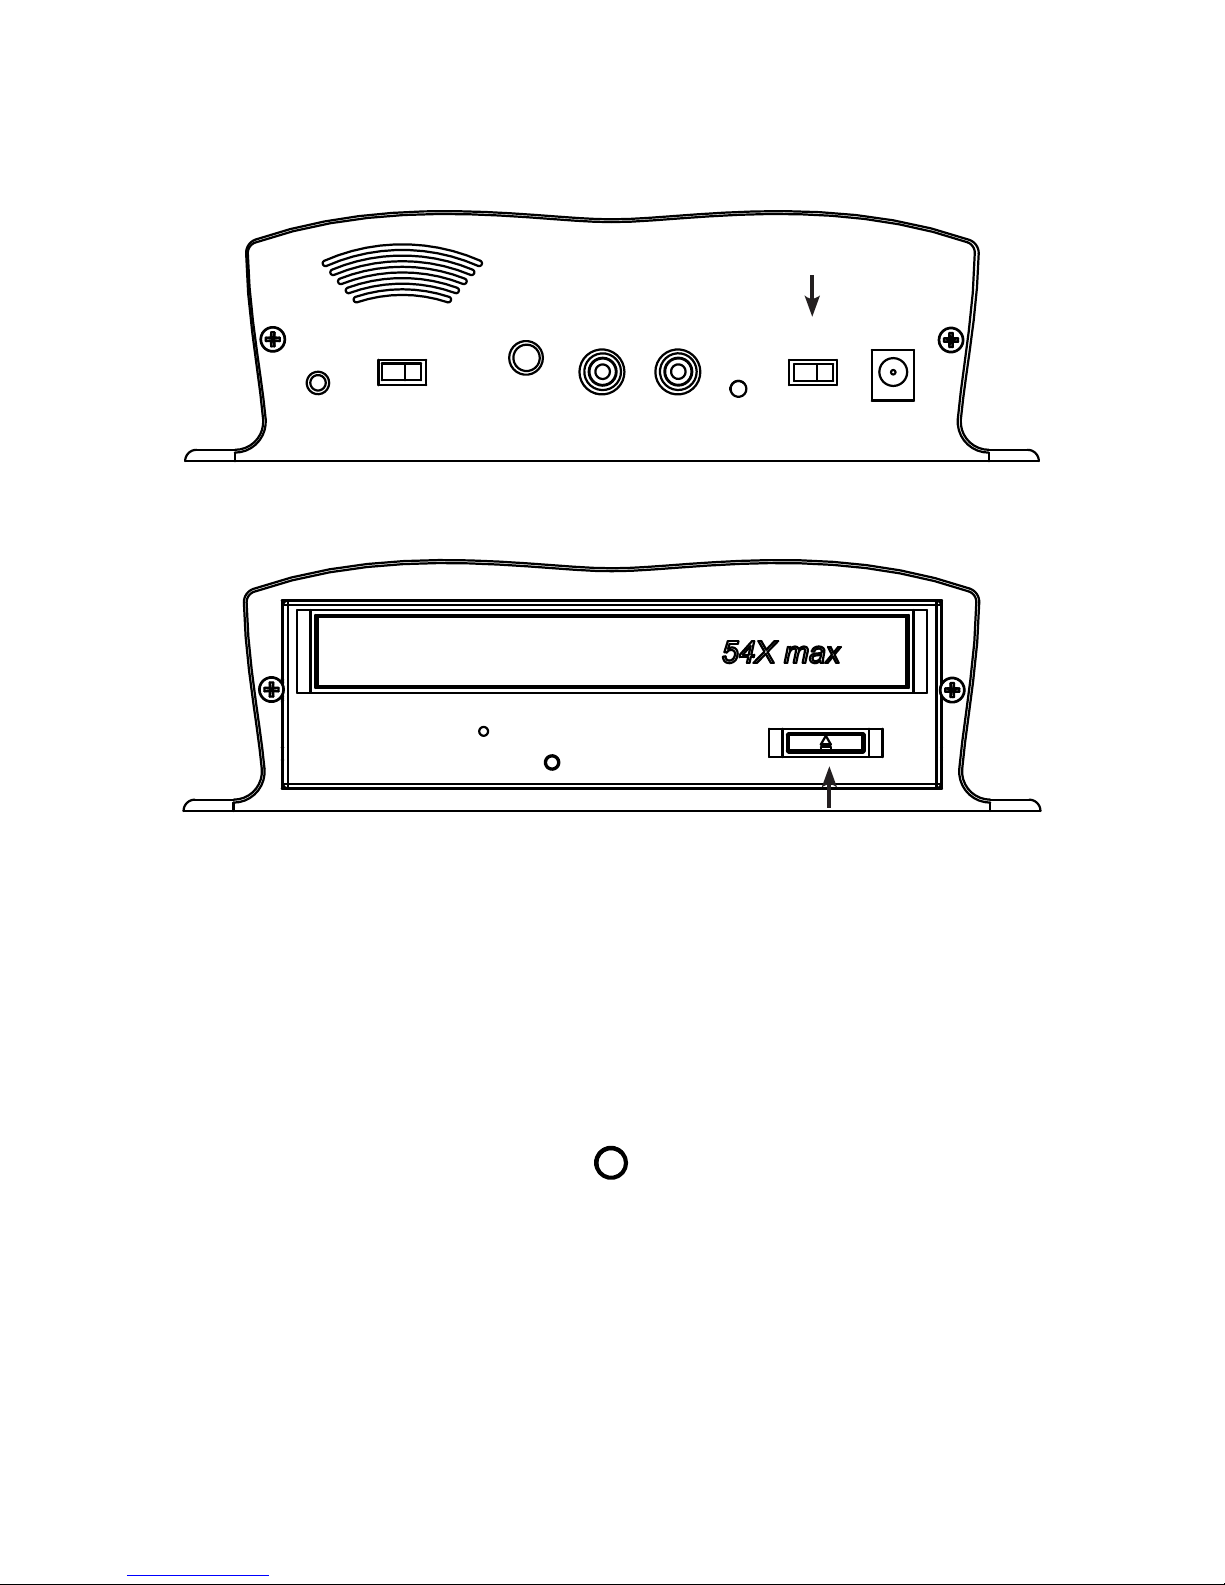
Sonorous Layout Summary:
Front of Unit
EJECT - This button opens/closes the CD ROM tray.
Rear of Unit
RESET - The RESET button clears audio stored on memory when held during power up. Note: Audio is
automatically erased when changing CD media.
SPEAKER - The SPEAKER switch can be turned ON and OFF to monitor audio. The switch has no effect on the
audio OUTPUT connections. Switch should normally be kept OFF.
VOLUME - This pot is used to control the output level of the stored messages. Volume up is clockwise, volume
down is counter-clockwise.
OUTPUT - These RCA jacks supply the audio output to a MOH port, PA system or speaker.
STATUS - The STATUS indicator is a multi-colored LED that will indicate the current operation of the unit.
POWER - Use this switch to turn the unit ON and OFF.
15VDC - This is where the supplied 15VDC @ 1.67A power pack is connected.
4
EJECT
POWER
15VDC
1.67A
ON
OFF
STATUS
SPEAKER
ON
OFF
RESET
VOLUME
OUTPUT
8Ω 600Ω

5
Installation :
Step 1: Wall or shelf mount the unit. Screws and rubber feet are supplied in the accessory kit.
Step 2: Verify that the power switch on rear of unit is set to OFF. Attach the included power pack to a wall or
power strip receptacle, then attach the other end to the jack on the rear of the unit labeled 15VDC.
Step 3: If connecting unit to an amplier make sure it is turned OFF for this part of the installation.
Step 4: Connect a RCA cable (supplied in the accessory kit) to the OUTPUT jack on the rear of the unit. Depending
upon the required impedance use either the 8Ω or 600Ω output RCA jack. Connect the other side to an MOH port,
PA system or speaker.
Step 5: Turn the power switch on rear of unit to the ON position. After the unit initializes the STATUS LED on the
rear of unit will turn either SOLID GREEN if a message has been pre-loaded and is playing, or BLINK GREEN
if no message is present. This process may take up to 30 seconds.
Step 6: If a message needs to be loaded then follow the loading instruction in this manual.
Step 7: Slide the SPEAKER switch located on the rear of the unit to the ON position. This speaker is for verifying
audio playback and testing purposes only – DO NOT use this for setting the OUTPUT volume level!
Step 8: If any ampliers or monitors were turned OFF during installation turn them back ON now.
Step 9: Adjust the volume level pot labeled VOLUME on the rear of the unit in conjunction with the monitor or
ampliers master volume to achieve a balanced but not over driven audio level.
Step 10: Slide the SPEAKER switch to the OFF position and installation is complete.
POWER
15VDC
1.67A
ON
OFF
STATUS
SPEAKER
ON
OFF
RESET
VOLUME
OUTPUT
8Ω 600Ω
OR
Wiring Diagram
6
Loading Audio Files to Sonorous:
Step 1: Verify that the unit has power and is turned on. If the unit is just being turned on allow about 30 seconds
for it to initialize before going to next step.
Step 2: Press the EJECT button on the front of the unit.
Step 3: Place a CD with MP3 les (formatted as a DATA CD, not an AUDIO CD) in the tray.
Step 4: Press the EJECT button or lightly push the drawer to close it.
Step 5: The Sonorous will load the audio les from the CD to it’s internal ash memory. While loading the
STATUS LED will change from BLINKING ORANGE to a SOLID GREEN. If an invalid CD is encountered the
Sonorous will automatically open the drawer and the STATUS LED will be BLINKING RED.
Step 6: Once completed the CD can be left in the unit or removed.
POWER
15VDC
1.67A
ON
OFF
STATUS
SPEAKER
ON
OFF
RESET
VOLUME
OUTPUT
8Ω 600Ω
EJECT
POWER
15VDC
1.67A
ON
OFF
STATUS
SPEAKER
ON
OFF
RESET
VOLUME
OUTPUT
8Ω 600Ω

7
CD Formatting and Creation:
Since there are many different methods used to burn CD these instructions should be used as a guide.
Burning CD:
Step 1: Take a standard MP3 le and drag it over to the CD-ROM icon or folder to be burned.
Step 2: Burn the le to the CD as a DATA CD.
Step 3: Once le is burned always try it in a Sonorous unit before shipping.
Audio File Type:
The Sonorous utilizes a MONO le format. If a STEREO le is utilized it must be converted to MONO.
Multiple Files:
If multiple les are being burned to the CD it is good practice to edit the audio before hand so there is a small amount
of fade-in and fade-out. Adding these fades will give the audio playback better continuity between messages.
If les are required to be played back in a certain order then number them using a 3-digit number. For example:
100testle.mp3, 101testle.mp3, 102testle.mp3, etc.
Sonocrypt :
The Sonocrypt feature is beyond the scope of this Users Manual. If Sonocrypt is utilized please contact your
dealer for more information.
Technical Notes:
Windows XP - Make sure DATA CD is selected when asked. The CD is burned using a CDFS (CD File System)
and is compatible with all versions of Sonorous.
Windows Vista - Make sure LIVE FILE SYSTEM (DATA CD) is selected when asked. The CD is burned using a
UDF (Universal File System) and is only compatible with Sonorous v2.0 and above. CD burned using this method
and used in a Sonorous v1.0 will not work.
3rd Party Programs - Most 3rd part programs allow a DATA CD to be burned with the CDFS formatting. Using
the CDFS formatting system is the best and most reliable method since it is compatible with all versions of
Sonorous.

8
Troubleshooting:
Problem Possible Reason
Status LED - OFF Power on rear of unit OFF
Power pack not plugged in or on a switched outlet
Status LED - SOLID GREEN Unit is playing audio le
Status LED - BLINKS GREEN SLOW No audio on unit
Status LED - BLINKS GREEN FAST Unit ran out of memory while loading audio (but still will play the
les that did successfully load)
Status LED - BLINKS ORANGE Unit is loading les from CD ROM
Unit is formatting le system
Status LED - BLINKS RED Files are not valid
CD not valid (must be DATA, not AUDIO CD)
Trying to play les on an encrypted unit
Playback in wrong order Check naming of les
Skipping over les File not compatible with unit
Popping audio File was encoded using too high of a bit-rate
File incompatible with unit
File audio starting too close to beginning of le
Note: Some audio editors embed album art or cover art into the MP3 les.
Some of these les may not be compatible with Sonorous.

9
Sonorous Specications:
Audio Decoding
MP3 (MPEG-3) audio playback
8K to 128Kbps bit rate
16KHz to 48KHz sample rate
Memory Type
High Density NAND Flash
Memory Capacity
16MB (Standard), 512MB (Optional)
File Capacity
Up to 512 les (depending on size of les)
Audio Output
RCA jack, 6V p-p @ 8Ω, 3v p-p @ 600Ω
Message Loading
CD ROM formatted as DATA CD (CDFS and UDF le systems supported)
Message Playback
Continuous
Power Requirements
15VDC @ 1.67A, typical
Environmental
0°C to 50°C, 5% to 95% relative humidity, non-condensing
Size
2.25" x 7.50" x 8.75" (H x W x D)
Shipping Weight
5 pounds

10
Table of contents
Other Avaya Recording Equipment manuals


