Table of Contents
Table of Contents......................................................................................................................................................…………………….................2
Safety Information............................................................................................................................................................……………………..........3
DivX Certification………………………………………………………………………………………………………………………………………………..4
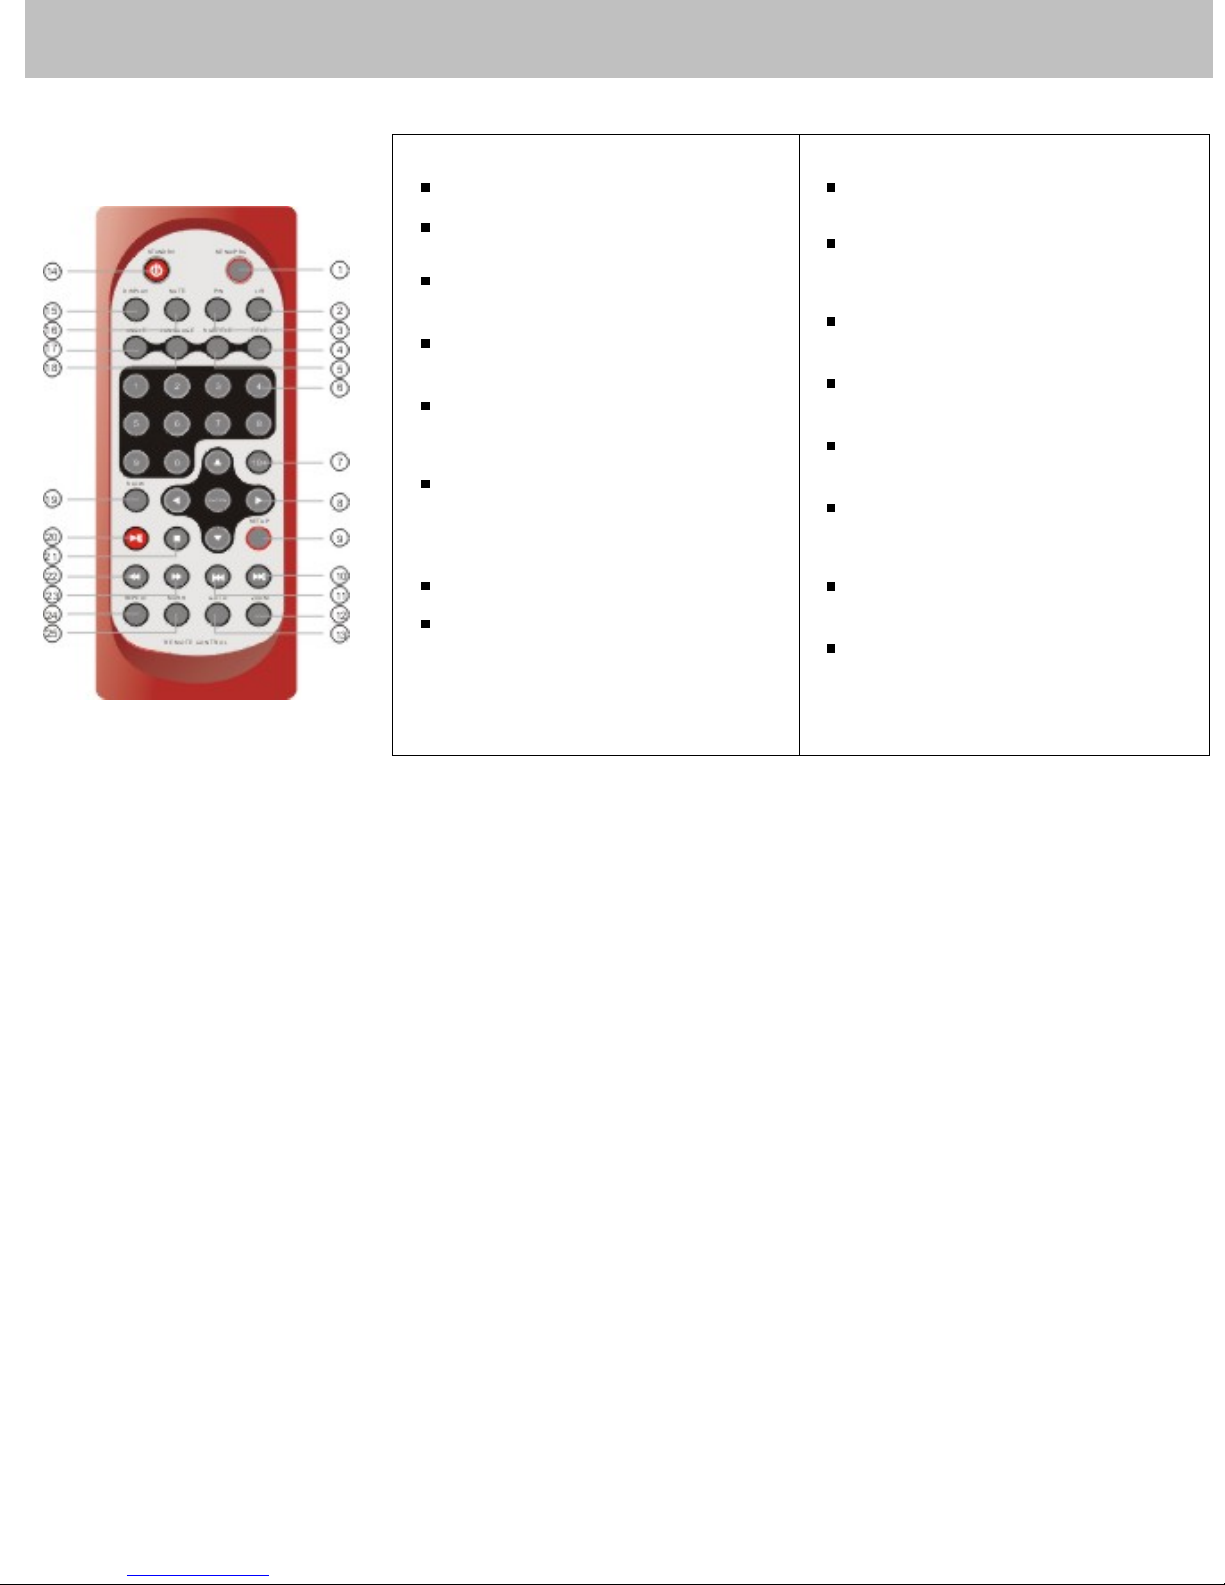
Remote Control..................................................................................................................................................................……………………........5
Description....................................................................................................................................................................……………………..............6
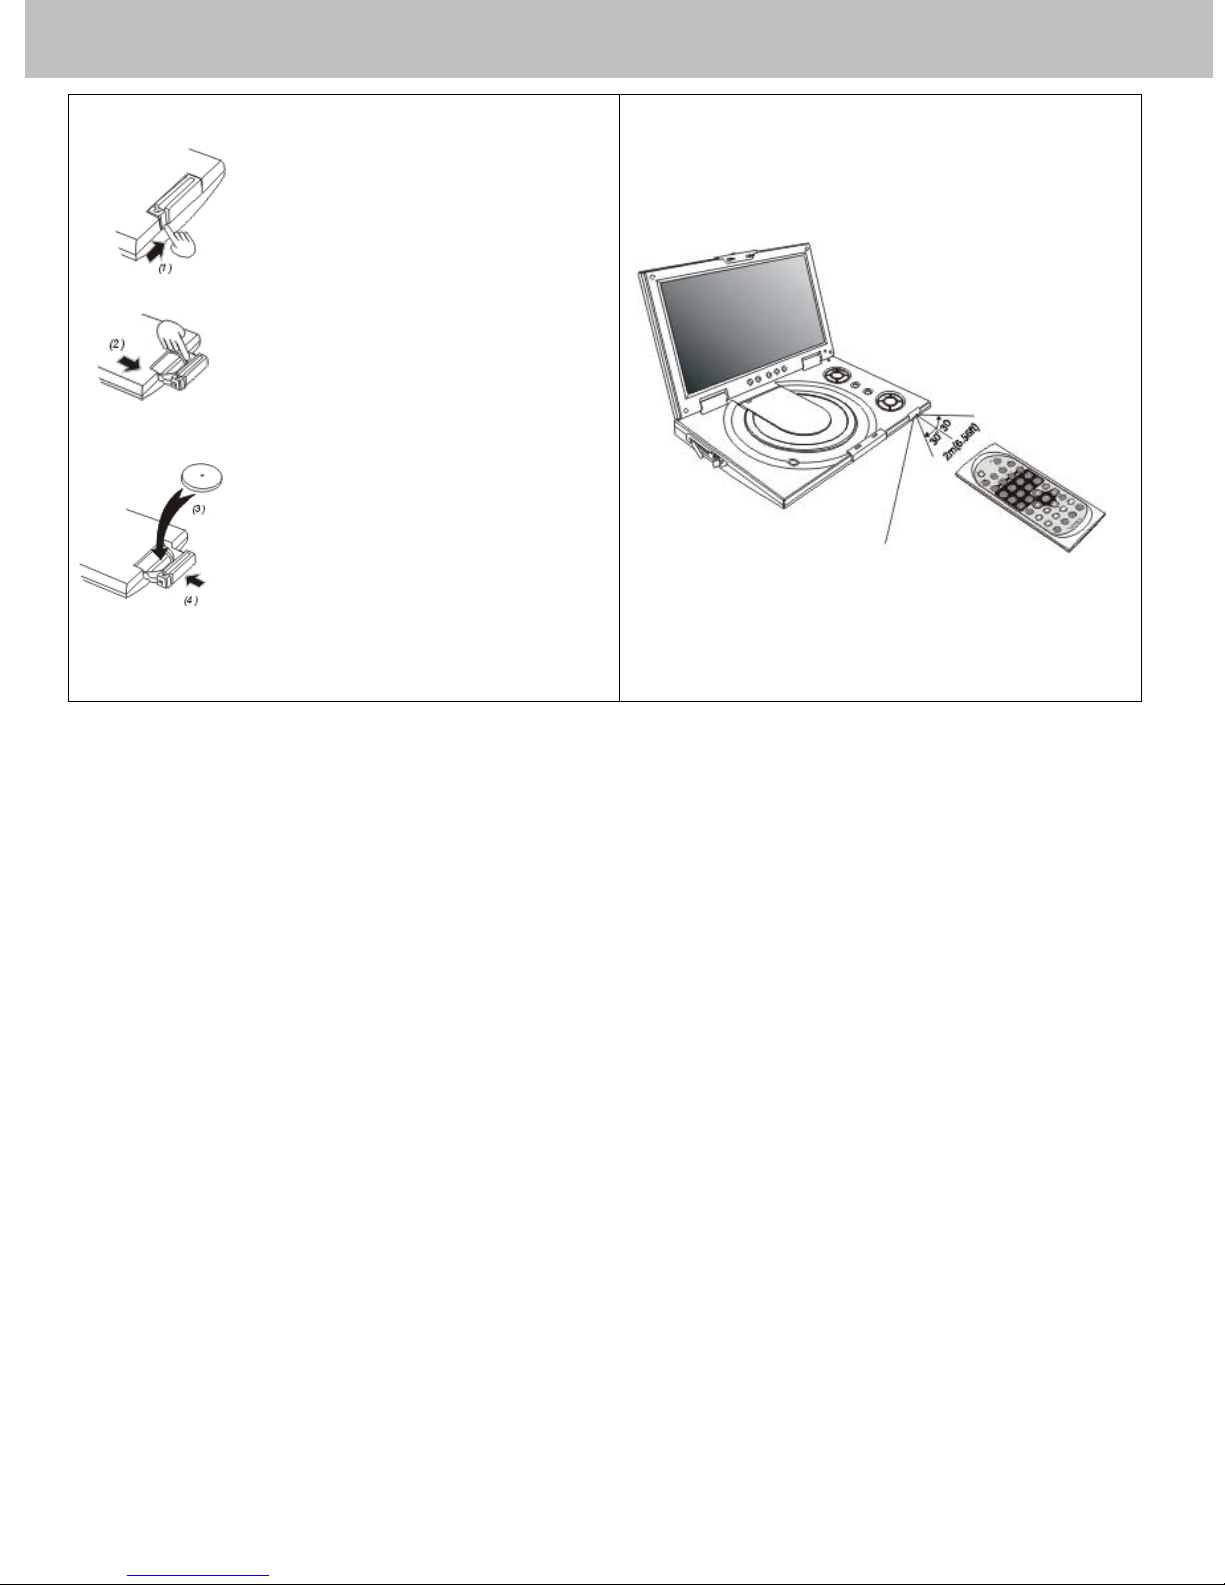
Using the Remote Control............................................................................................................................................……………………..............7
Connecting Earphones to the DVD Player..................................................................................................................…………………...................8
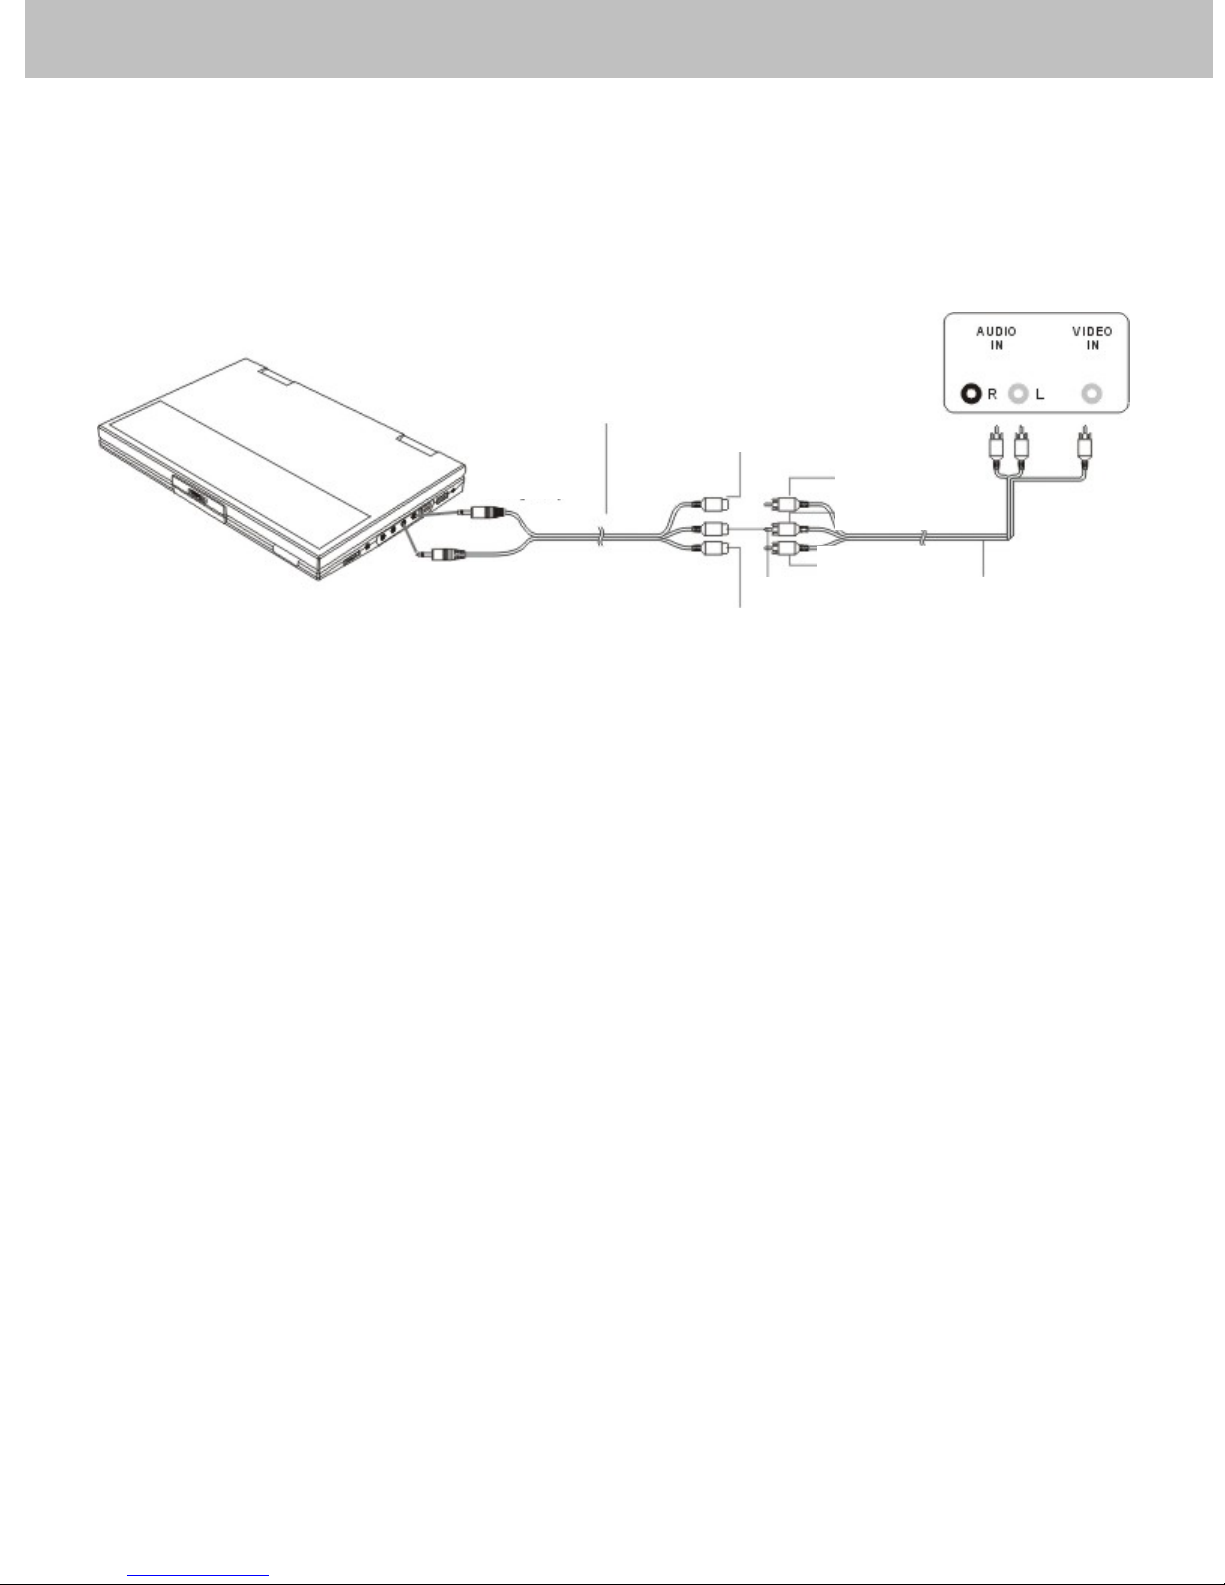
Connecting to an External Component ......................................................................................................................…………………...................9
Connecting to a TV.....................................................................................................................................................……………………...............10
Connecting to a Stereo Component............................................................................................................................…………………..................11
Using Card Reader....................................................................……………...........................................................................................................12
Using USB Port .........................................................................……………..........................................................................................................13
Using the AC Adaptor...................................................................................................................................................…………………….............14
Using the Battery Pack.................................................................................................................................................…………………................15
Cautions in Using Battery Pack.......................................................................................................................................………………….............16
Installing Carrying Bag/Car Harness Kit (Optional Accessory)...................................................................................………………......................17
Playing a Disc..........................................................................................................................................................…………………................18-22
Playing an MP3 or Regular Audio CD...................................................................................................................………………...........................23
Playing Picture CD.....................................................................................................................................................…………………...................24
Setting TV system, Screen Saver, TV type (4:3/16:9), Password, Rating, Default,DivX(R) VOD.............................…………..........................24-26
Setting Language for OSD, Voice, Subtitle, Menu.....................................................................................................……………….......................27
Setting Audio output.................................................................................................................................................……………….........................28
Setting Video for Brightness, Contrast, Hue, Saturation..............................................................................................……………….....................29
Adjusting the LCD Screen..............................................................................................................................................……………..…….............30
Troubleshooting...........................................................................................................................................................…………….....…............31-32
Specifications.............................................................................................................................................................…………………...….............33