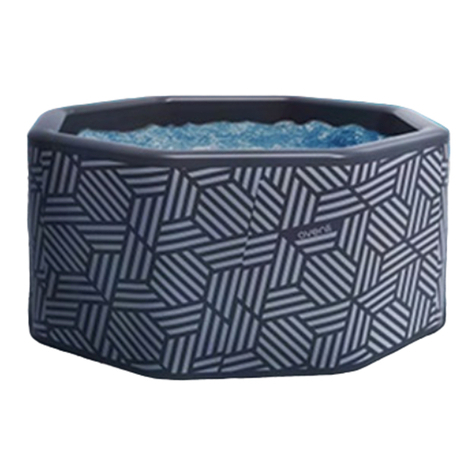
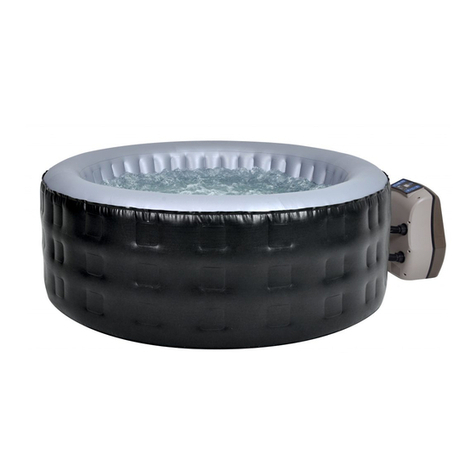
avenli LL17606USV21 User manual

SPA
Installation and user’s manual
Read carefully and keep it for later reference
For Customer Service Contact:
PoolSupplies.com
1-800-356-3025

US
2 3
SPA Installation and User’s Manual
Read Carefully and keep it for later reference
IMPORTANT SAFETY INSTRUCTIONS
WARNING
Carefully read, understand, and follow all information in this user manual before installing and
using the spa.
These warnings, instructions, and safety guidelines address some common risks of water
recreation, but they cannot cover all risks and dangers in all cases. Always use caution, common
sense, and good judgment when enjoying any water activity. Please read carefully and keep for
future reference.
For your own safety and that of your product, make sure to following the safety precautions
below. Fail to follow the instruction may result in serious injury, property damage or death.
Improper installation or operation will void the warranty.
When using this electrical equipment, basic safety precautions should always be followed,
including the following:
(a)A green coloured terminal or a terminal marked G, GR, Ground, Grounding, or the
symbol is located inside the supply terminal box or compartment. To reduce the risk of electric
shock, this terminal must be connected to the grounding means provided in the electric supply
service panel with a continuous copper wire equivalent in size to the circuit conductors
supplying this equipment.
*IEC Publication 417, symbol 5019.
(b) At least two lugs marked «BINDING LUGS» are provided on the external surface or on the
inside of the supply terminal box or compartment. To reduce the risk of electric shock, connect
the local common bonding grid in the area of the hot tub or spa to these terminals with an
insulated or bare copper conductor not smaller than No.6 AWG.
within 3 m of the SPA or hot tub shall be bonded to the equipment grounding bus with copper
conductors not smaller than No.6 AWG.
are closely supervised all times.
2. A wire connector is provided on this unit to connect a minimum 8 AWG (8.4 mm2) ,6 AWG
(13.3mm2) solid copper conductor between this unit and any metal equipment, metal enclosures
of electrical equipment, metal water pipe, or conduit within 5 feet (1.5 m) of the unit.
electrical cord. Locate the cord where it will not be damaged by lawn mowers, hedge trimmers
and other equipment. Connect to a grounded, grounding type receptacle only.
plug).The GFCI must be tested before each use. With the product operating, open the service
door. When the product stops operating, this merely indicates that the door is equipped with an
electrical interlock. Next, push the test button on the GFCI and close the service door. The product
should not operate. Now open the service door, push the reset button on the GFCI and close the
service door.The product should now operate normally. When the product fails to operate in this
thorized access by children. To avoid accidents, ensure that children cannot use this spa unless
they are supervised at all times.
ration.Never use a worn or damaged cover: it will not provide the level of protection required to
prevent unsupervised access to the spa by a child. Always lock the spa cover after each use.
7. DANGER – Risk of Electric Shock. Install at least 5 feet (1.5 m) from all metal surfaces. As an
alternative, a spa may be installed within 5 feet of metal surfaces if each metal surface is perma
nently connected by a minimum 8 AWG (8.4 mm2) ,6 AWG (13.3mm2) solid copper conductor to
the wire connector on the terminal box that is provided for this purpose.
telephone, radio or television within 1.5m (5 feet) of a spa tub. Do not use the spa when it is
raining,thundering or lightning.
children and when spa use exceeds 10 minutes. The water in a spa should never exceed 40°C
(104°F). Water temperatures between 38°C(100°F) and 40°C(104°F) are considered safe for a
healthy adult.

US
4 5
IMPORTANT SAFETY INSTRUCTIONS
early months of pregnancy, pregnant or possibly pregnant women should limit spa water
temperatures to 38°C(100°F).
rate thermometer since the tolerance of water temperature regulating devices varies.
with the possibility or drowning.
system problem, or diabetes should consult a physician before using a spa.
may induce drowsiness while other medication may affect heart rate, blood pressure, and
circulation.
adapters or converter plugs to connect the unit to electric supply; provide a properly located outlet.
Portable whirlspa baths and swimming spas with incorporated heating elements must be
a tripping current of 10mA.
having a rated residual operating current not exceeding 30mA.
must be inaccessible to occupants in the spa.
so that they cannot fall into the spa.
Residential electrical connection box must be located safely with a distance of at least 2m away
from the spa.
This appliance can be used by children aged from 8 years and above and persons with reduced
physical, sensory or mental capabilities or lack of experience and knowledge if they have been
given supervision or instruction concerning use of the appliance in a safe way and understand the
hazards involved. Children shall not play with the appliance. Cleaning and user maintenance shall
not be made by children without supervision.
To reduce the risk of child drowning, supervise children all times. Attach and lock spa cover after
each use.
People with infectious disease should not use a spa or hot tub.
To avoid injury exercise care when entering or existing the spa or hot tub.
Water temperature in excess of 40°C(104°F) may be injurious to your health.
Never use a spa or hot tub alone or allow others to use the spa alone.
Do not use a spa or hot tub immediately following strenuous exercise.
Do not put the spa under 4°C(39°F) environment in order to avoid freezing if there is still water in
the spa.
Do not turn on the spa when the water is frozen.
Never pour water with a temperature higher than 40°C(104°F) into the spa directly.
Always unplug this product from the electrical outlet before removing, cleaning, servicing or
making any adjustment to the product.
Never jump or dive into a spa or any shallow body of water.
Do not attempt to plug in or unplug this product while standing in water or when your hands are
wet.
from the spa to avoid any damage.
Do not add bath oil or bath salt to the spa water.
not be supplied through an external switching device, such as a timer, or connected to a circuit
that is regularly switched on and off by the utility.
HEALTH
HEALTH
WARNING

US
6 7
3 persons 4 persons
Model 17283US
Capacity 3 persons 4 persons
Dimension (outer) Ø165cm x 70cm
Dimensions (inner)
Water capacity 686 L (181 gal) 800 L (211 gal)
Power supply
Max heat temperature 40°C 40°C
cETLus cETLus
Ambient temperature : 20°C
1. SPECIFICATIONS
that this appliance may not be treated as household waste. Instead it shall be handed over to the applicable collection point for the recycling of electrical
and electronic equipment. Disposal of the appliance shall be carried out in accordance with the local environment regulations for waste disposal.
Ensure to check all parts are present:
2. PACKAGE LIST
2.1. Package list
liner
Caps
GFCI
Pump unit
Repair kit
Ari valve
Top cover
Filter cartridge
ground cloth
Filtration cartridge support
Pump unit connectors
Couverture
Couverture
Couverture
Couverture
Couverture
Couverture
Couverture
6 persons
17286US
6 persons
1200 L (317 gal)
40°C
cETLus
5 persons
17654US
5 persons
19 70 cm
(
154 x 154 x 70 cm
(60.6″ x 60.6″ x 27.6″)
800 L (211 gal)
40°C
cETLus
Model
4 persons
4 persons
148x148x65cm
(58.3”x58.3”x25.6”)
(45.3”x45.3”x25.6”)
560L(148gal)
110-120V,60Hz,1380W
104 F
cETLus
33.8-35.6 F/h
115x115x65cm
LL17606USV21/LL17606USV41
Capacity
Dimension(outer)
Dimensions(inner)
Water capacity
Power supply
Max heat temperature
Test certificate
Heating efficiency
Ambient temperature 68 F

US
8 9
WARNING: The GFCI plug must be tested before each use.
Do not use if GFCI test fails and see chapter 6.1.
3.1. Site selection
Place in a clean environment Ensure its levelUse a sun cover
WARNING : Before proceed to installation your spa, please make sure that the
selected location meets the following conditions :
• A level place in order to avoid any defect, hernia or leakage.
• Wide enough to support the spa and its pump unit.
•
• Sheltered from the sun and bad weather.
• Clean and free from sharp objects.
• Devoid of aggressive vegetation on the ground.
Failure to comply with these rules may result in property damage or personal injury.
3. INSTALLATION
1. Insert the plug into the power outlet.
2. Press the <<RESET>>button,the indicator light turns red.
3. Press the <<TEST>>button,the indicator light turns off.
4. Press the <<RESET>>button,the indicator light turns red.
The GFCI works properly.
3.3. Assembling
ground cloth.
1) Place the ground cloth in the
chosen location. spa.
pump on the socket .
10 minutes. Ensure that the spa is
12) Ensure that the drain caps are
the spa
13) Fill the SPA with 10 cm of water.
9) Connect the unit pump to the spa
using the 3 connectors to screw.
Ensure the icons on the pump and the
spa match up
then screw the cartridge onto the lower
suction connection joint.
6) Connect the pump unit then press
located in the back of the pump unit.

US
10 11
The temperature units selector changes the temperature units from Celsius de
grees to Fahrenheit degrees.
1 degree at a time. The temperature could be set between 30°C to 40°C (86°F to
104°F).
To lock or unlock the control panel, press the Lock button and hold 3 seconds.
Lock the control panel when you are away to prevent other people come to
change your settings..
Press the massage button to activate the bubble massage system, the green
indicator light turns on. It can be turned off by pressing it again.
Note :
- The massage system will stop automatically after 30 minutes of operation. Re-activate the mas-
sage function by pressing the massage button again.
4. USAGE
4.1. Control panel
4.2. Functions
Filtration
Temperature
Decrease Button
Temperature
Increase Button
LED Display
Massage Button
Lock Button Temperature
units indicator
Temperature
units
selector
Heat Button
changed every 7 days, or until they become discolored.
Note:
turn on at same time
The pump does not stop heating until the current water temperature reaches the
set temperature; and the heating system will restart after the current water tem
perature drops 2°C below the set temperature automatically.
Maximum heating temperature: 40°C (104°F)
Important :
Note :
4.3. Spa cover and security
After each use, the control panel must be locked and the spa must be coated with its
top cover and it must be attached to the base protector with the safety buckles.
Each safety buckles has a lock system ; closed buckle, the latch in up position locks
the buckle, the latch in down position unlocks the buckle.
The top cover keeps the heat from the water and secures the spa.

US
12 13
5.1. Water maintenance
WARNING : Bad spa water quality can harm your health.
CAUTION: Please use chemicals properly. Quality problems caused by overuse
and improper use do not apply to our warranty.
Depending on the frequency and conditions of use:
Use a water test kit to control the parameters of the water before using the spa, or at
least once a week.
Use disinfection products for the spa. The treatment products should be used with
caution and it is imperative to refer to their instructions.
Damage resulting from improper use of treatment products is not covered by warranty
(overdose, shock treatment, ...).
1. Water balance
The water balance (pH) must be maintain between 7 and 7.4.
2. Water Sanitation
separately).
5. MAINTENANCE
function.
1.
from the case.
2.
3.
5.2a Disinfection
Water Sanitation:
If water is heavily polluted you should not use spa.
Seek professional advice and guidance before doing this.
Attention:
Detergent residues and dissolved solids from bathing suits and chemicals may build
up on the spa walls, Use soap and water to clean the walls and rinse thoroughly with a
garden hose using a direct powerful waterspray.
5.3. Drainage and storage
Drainage
1 Check the stopper on the bottom of the spa and the drain cap.
2Unscrew the drain cap.
3Remove the stopper on the bottom of the spa. Completely drain all water from the
spa.
Storage
5Press the bubbling button to blow out the water inside the jet holes. Unplug the
6Use a towel to wipe off the spa, dry 24 hours.
7
8Fold the spa.
It is recommended that store the SPA in its original package in a warm dry place.
5.4. Repair kit
Little holes or puncture can be repaired with the repair kit included and glue reserved to
spa liner.
1. Find the leak.
2. Thoroughly clean the area surrounding the leak.
3. Cut a piece of repair material in round shape, which should be larger than the dam
aged area.
4. Apply adhesive to the underneath side of the patch and around the area to be re
paired.
to dry. After patch has dried, apply glue around the edges for a complete seal (dry 4
1
5
2
6
3
7 8

US
14 15
Here are some useful tips to help you to diagnose and rectify common problems.
Reference
recirculated back into the spa from the heater unit.
Problem Cause Solution
Control panel
screen does not
operate
Check power source
Power failure
power of the pump unit.
Call for service if it does not reset
SPA pump does not
heat properly
Temperature set is too low Set to a higher temperature
Filter Cartridge is dirty Clean or Replace the cartridge (see chapter 5.2)
Too low water level Fill water to minimum water level
Heating element defective Call for service
Bubble massage
system does not
work
Pump is overheating Cut off the power and wait until the pump has cooled.
activated Press the bubble button to reactivate
Malfunction of the pump unit Call for service if it does not reset
not work
Filter Cartridge is dirty Clean or Replace the cartridge (see chapter 5.2)
Inlet and outlet blocked Clean the inlet and outlet
Air inside the pump Fill water to minimum water level
Malfunction of the pump unit Call for service if it does not reset
Pump leakage
Adaptor seal improperly Replace the seal in the right position
Water leakage from pump body Check the pump body, call for service
Spa spa leakage Spa spa is torn or punctured Use provided repair kit (see chapter 5.4)
Water is not clean Filter Cartridge is dirty Clean or Replace the cartridge (see chapter 5.2)
Change the spa water completely
Improper water treatment Refer to the chemical manufacturer’s instructions
CHG FIL
6. TROUBLE SHOOTING
6.1. Troubleshooting
7. WARRANTY
If the screen displays an error code “Ex”, please refer to the table below.
E3, E4, E5, E6 error code
If error code is still displayed on the control Box, please do the following instrutions :
1 - Check that the water line is between the high and low limits.
3 - Unscrew and clean the 2 nozzles (Entry and exit of water) inside the spa and remove wastes if necessary (Neaf, hairs, fur,
skin...)
foreign matter.
Cut the spa again electrically for 5 minutes and re-connect it, if the error code is still displayed on the control box please contact
the Service Center.
7.1. Error code
Code Situation Problem Cause Ss olutions
E1 Not heating Not
heating properly.
Wrong temperature
control sensor.
Temperature control sensor short
circuit or open circuit. Contact service center.
E3 Not heating
properly.
High water tempera-
ture indicator. (113°F).
water is between 2°C~44°C (36°F~111°F)
· Cut off the power then remove the pump.
After that clean the scale on the in/outlet.
·If this does not solve the problem, refer
to the box below
E4
All functions do
not work, buzzing
warn.
Low water tempera-
ture indicator.
The pool water is lower than 2°C
(36°F).
water is between 2°C~44°C (36°F~111°F)
·If this does not solve the problem, refer
to the box below
E5
All functions do
not work, buzzing
warn.
High water tempera-
ture indicator. (122°F).
-
cian to reset the thermal cutout described
in next paragraph.
·If this does not solve the problem, refer
to the box below
E6
Not heating and
Buzzing warns.
Water pressure is
not big enough to
activate heating.
·Inlet or outlet on inner wall are
blocked.
·Filter cartridge is too dirty.
·Pool water does not reach mini-
mum water level.
·Do not release air from pump
Pump is wrong”
·Clean inlet and outlet
·Add water to reach water level
·Do air release as outlined again
·If this does not solve the problem, refer
to the box below

16
Avenli products have been inspected and found free of defects prior to leaving the factory.
Avenli warrants this product against defects in material and workmanship for a period of time,
1 year for the pump and 6 months for the liner,unless local law has special requirement.
tation of the original proof to purchase to ascertain the date. During the warranty period,
ment products or repaired parts will be warranted for only the unexpired portion of the
original warranty.
Shipping cost policy
The return of defect parts to the authorized service center is at the charge of the owner.
Warranty policy
This limited warranty does not apply to any defect resulting from negligence, accident,
misuse, or other reason beyond Avenli’s reasonable control, included but not limited to:
normal wear and tear, negligence or failure to follow the product instructions, improper
or inadequate maintenance; connection to improper power supply; chemical water
This warranty is valid only in the country of purchase in such countries where Avenli
Warranty service outside the country of purchase is limited to the terms and conditions
of the corresponding warranty in the country of service. Where the cost of repairs or
replacement is not covered by this warranty, Avenli will advise the owners and the cost
shall be charged to the owner.
This warranty only applies to the original purchaser and terminates upon any transfer of
ownership.
service center.
your Avenli product. Avenli will not be liable for results of cost of workmanship from
unauthorized service person.
name, valid email address, date of purchase, serial number and Item number. Please des
7.2. Warranty
PoolSupplies.com
1-800-356-3025
This manual suits for next models
1
Table of contents
Other avenli Hot Tub manuals
Popular Hot Tub manuals by other brands

CalderaSpas
CalderaSpas CalderaSpas Utopia Series owner's manual

anko
anko SS-601A user manual

CalderaSpas
CalderaSpas CANTABRIA owner's manual

Dimension One Spas
Dimension One Spas HYDRO SPORT Installation and owner's guide

Bestway
Bestway Lay-Z-Spa Maldives HydroJet Pro manual

Dimension One Spas
Dimension One Spas Nautilus Specifications