Aversky Technology WR1001 User manual

Aversky Technology Co., Limmited
Wireless Travel Router Portable Access Point/
User's Manual
Model number: WR1001

1 Profile
1.1 Abstract
The wireless AP WP1001 with the smart, streamline and cute appearance
apply to work in the family, hotel, bar and dormitory which integrates suchfunctions
as wireless AP, PPPoE AP and USB wireless network card, and it also provide you
a relaxed wireless environment any time.
The wireless AP is compliant with the wireless standard IEEE802.11b/g and
supports by the MIMO technology, and it reaches a wireless transmission rate of
54Mbps, supports the Flow Control Protocol IEEE802.3x and Flow Control for
high-speed data transmission, and performs the function to change the wireless
network SSID, channel or password byprogramming.
There is a small slide switch on the frame of AP whichdesigned as a shift key
between wireless AP and wireless network card to confirm these two functions.
1.2 Agreement of Network Parameters
Compliant with the standards of IEEE 802.11g and IEEE 802.11b
Support USB1.1 and USB2.0
Support USB general commands, class commands, and custom commands
Support USB Suspend Mode for low power consumption
Compatible with the protocol IEEE802.3u
Support the Flow Control Protocol IEEE802.3x
Compatible with the protocols of IEEE802.11
Support the WEP encryption function of IEEE802.11
A wireless transmission rate of 54Mbps, supported by MIMO technology
With the Easy-to-use configuration and monitoring program
Support wireless roaming technology to ensure efficient wireless connection
Compatible with OS: Windows 2000/XP/XP64/7/Vista/Vista64
/Android/win CE/Mac

2 Product Specifications
2.1 Technical Specifications
Standards and Protocols IEEE 802.11g
IEEE 802.11b
PPPOE CSMA/CA
Bus Type USB1.1, USB 2.0
Antenna Type Built-inAntenna
Working Frequency Range 2.4~2.4835GHz
Transmission Rate 11g: 54/48/36/24/18/12/9/6M (self-adapting)
11b: 11/5.5/2/1M (self-adapting)
Working Channel Channel3, 6, 9, 11
Spread Spectrum Technology DSSS (Direct Sequence Spread Spectrum)
Data Modulation OFDM/CCK/16-QAM/64-QAM
Sensitivity @PER
54M: -68dBm@10% PER
11M: -85dBm@8% PER
6M: -88dBm@10% PER
1M: -90dBm@8% PER
RF Power 20dBm (Max.)
LED Indicator Power/LAN/WLAN
Reset Key Long press for over 3s to clear the password you've
set.
AP/WIFI Shift Key Shiftbetween wireless AP and wireless network
card
Power Adapter 5V500mA
Dimension 86*56*20 mm
Weight 50g
Accessories Adapter, USB Cable,
Environmental Conditions Working Temperature: 0ºC~40ºC
Storage Temperature: -40ºC~70ºC
Working Humidity: 10%~95% (no condensation)
OS Compatible Windows 2000/XP/XP64/7/Vista/Vista64/CE/Android/Mac
Net Cable, Manual, CD
3 Operating Instructions
3.1
Wireless AP Mode---built your own wifi network
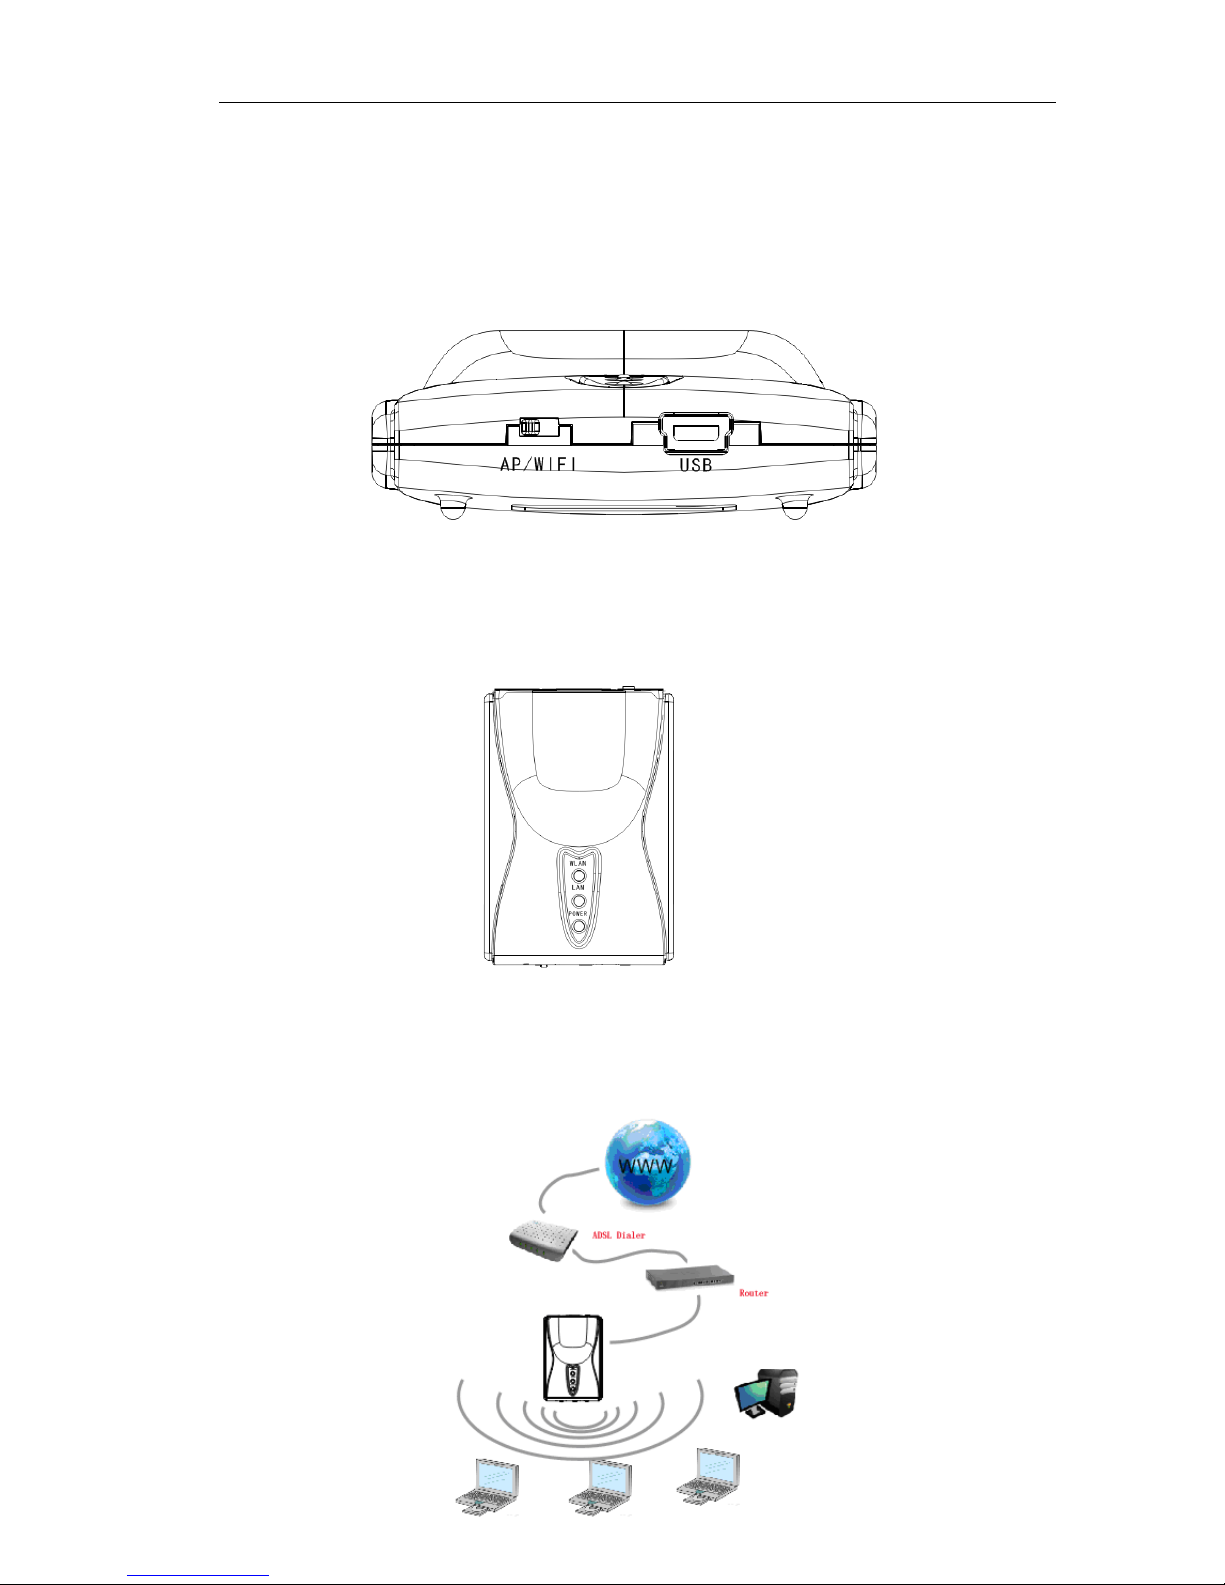
A) the button
[AP/Wi-Fi] is located at
“AP”
as below:
B)
C1:
Make sure
Supply power with DC adaptor to mini USB port of the device; You
will see the power indicator is remaining on and WLAN indicator
is twinkling (try to reconnect if not).
Connect this device to your LAN with network cable, you will see the LAN
indicator twinkling.
C2: Connect the attached network cable with the LAN interface of the
ADSLMODEM to wireless network, with the LAN indicator twinkling. Although
the wireless network is already connected, it only indicates the connection
between the computer and WP1001. You must dial up to get online to the
wireless network. If done that, then youcan get online to the wireless network.
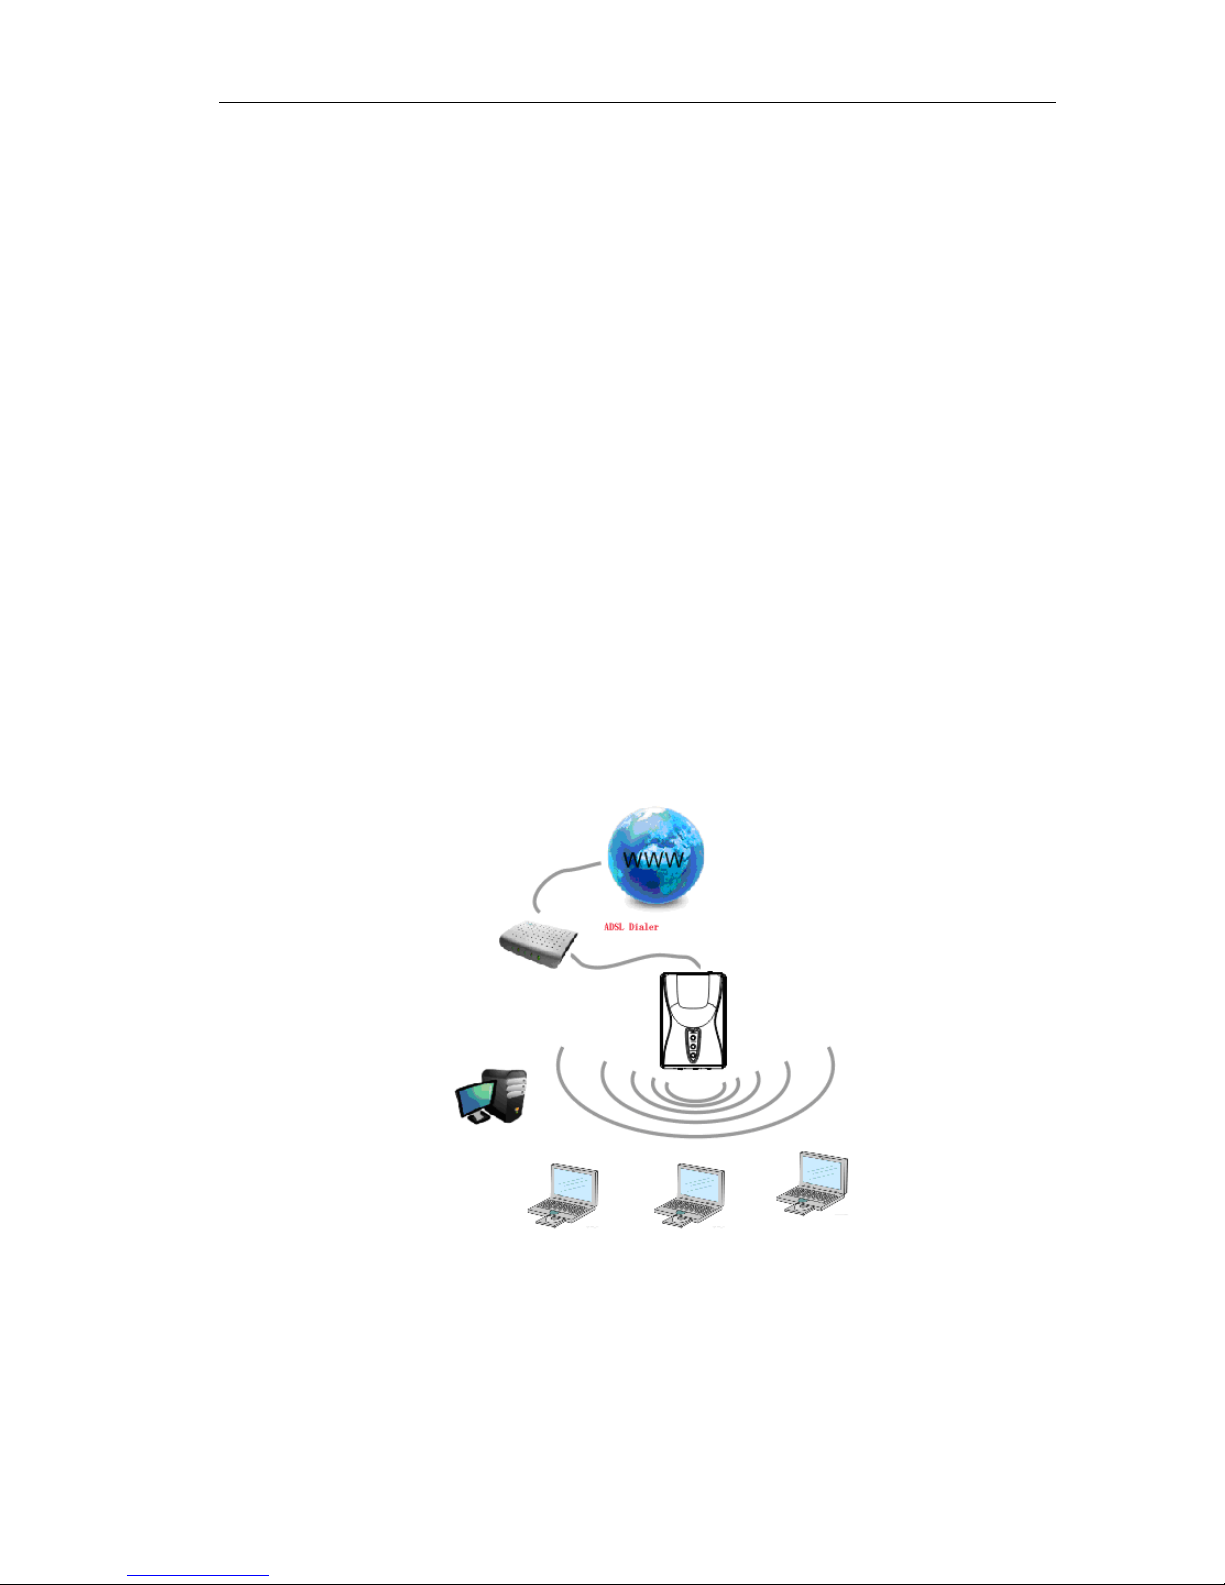
Congratulations
and get online wirelessly with your laptop, cell phone (with wifi), iPad, E-book,
Internet radio...just go enjoy it without any more setting! Except three reasons:
1, Very few people will connect this device directly to modem, but incase if you
2, If you want to set a password for the wifi net, please following chapter "D"
are, please following the chapter "C2" below.
You already done the setting now, you can find the AP name "Supereal-*****"
3, You want use this device as an USB wireless network card, see chapter 3.2

Dialing up to connect the network as above, with the window “Connection
--Broadband Connection”, please enter the use r name and password
provided byyour ISP and then click Connect
to get online.
D) Safety Control
1. Use the attached network cable to connect WP 1001 with
the
computer, and also connect the power adaptor ; insert the attached compact
and
CD to your CD-ROM driver, copy the folder "AP Software" to your computer,
double click the Application "SWU" in this folder
2. Refresh the SWU page, and you will see "SuperReal-******"which
means WP1001 working properly.
3. Tick optional box “Change Name” and input a new name in the longer
box to change the SSID of the wireless network (“SupeReal-”is not subject to
anychange).
4. Tick optional box “Change Password” and input a new password
comprising with 5 digits. The default password is null. If you forget your
password, please long press the key [RESET] more than 3s to restart the
device, and will clear the password has been set before and getting it back to
null. Then you canset a new password again.
5. Tick the box before “Change Channel”, and you can select a relatively
idle channel.
The settings above will not be changed under a new environment. Just
leave them there unless you forget the password.
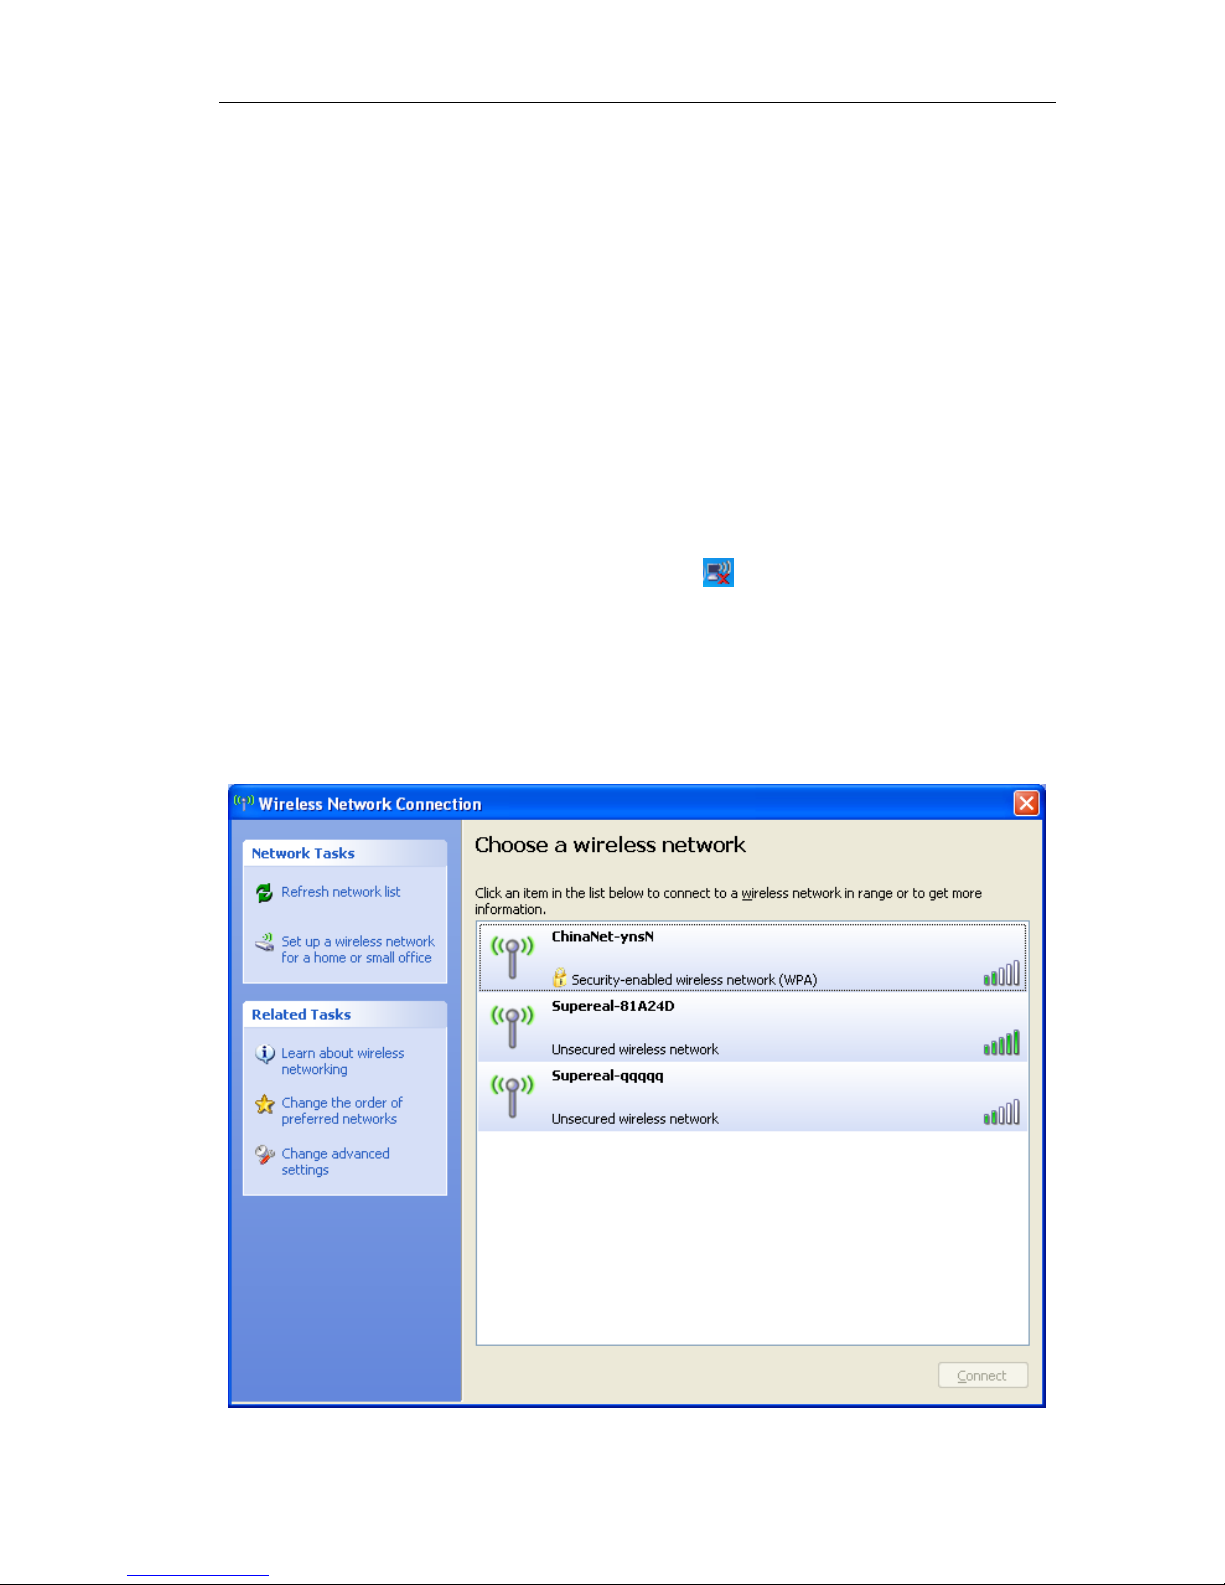
E) Click the wireless network icon “ ” on the bottom right corner of
the desktop to enter the page “
Wireless Network Connection”,
refresh the networks list to find “SupeReal-******” with the safety wirel
ess network , click “Connect”to enter a new window, input the new pa
ssword in “Network Key”, confirm the new password again, and then cl
ick “Connect “to get online with your personal safety wireless network.


3.2 USB
wireless network adaptor mode
A)
the key [AP/ Wi-Fi] is located at Wi-Fi
as below:
B)
C)
Install the Ralink Wireless LAN Driver from the attached
CD , and
WP1001
will service as wireless network card.
Make sure
Connect the device to your computer with USB cable
For users who want to use it as wireless net card for computer:

Annex
1. What are wireless signals affected by?
1) Walls in the house with a limited space are the major barriers, as WLANapplies the wireless
microwave frequency band. The key feature of microwave is nearly linear transmission, with
terrible diffraction ability. Therefore, the wireless device behind the barrier receives weak
signals or even no signal.
2) Physical barriers not only obstruct the wireless microwave signals, but also absorb the
electromagnetic energyto generate weak current for leakage. So the floor with reinforced fabric
is the major metal barrier for wireless signals in the house. It is almost impossible for the
wireless signal to penetrate this barrier. Even if so, the signal is too weak.
3) The working frequency compliant with the standard IEEE 802.11b/g ( 2.4GHz). Most
industrial equipments support this working frequency, like microwave oven, Bluetooth device,
cordless telephone, or refrigerator. In case of any strong magnetic filed nearby, the wireless
network will be disturbed.
4) When two or more wireless devices work in the same environment, there could be channel
conflicts or wireless signal cross-talks.
5) Such strong signal interference sources as radio transmitter, welding machine, electric car or
high-voltage power transformer within 100m away from the wireless device or cable network
may also greatly interfere with the wireless signals or devices.
6) The weather may influence the wireless signals outdoor. Wireless signals are usually
weakened obviously in stormy or cloudy days and transmitted farther in sunny days.
2. Howcan we improve the signal transmission quality?
1) Select the best location to lay the wireless AP as described below:
First, it should be high enough to overcome the barriers and reduce the dead signal area.
Second, it should allowdirect signal transmission without walls acting as barriers. It is better
that the wireless AP is visible to the wireless client in your room.
2) Change the channel to reduce wireless cross-talks. Note: There should be at least 5
channels between your wireless signal transmitting channel and other people’s.
3) Reduce the interference from household appliances to smooth the signals. Lay the wireless
AP away from those appliances.
3. Preparation of Peer-to-peer (or Cross) Network Cable
1) Hold RJ45 (crystal head) to keep its clips downward, flat side upward, head outward, and
opening towards you. Then we number the 8 holes from left to right respectively 1, 2, 3, 4, 5,
6, 7, and 8.
2. Unpack one end of the twisted-pair jacketed and take any two strands (there are four strands)
out of the four (one strand in orange white and orange, and the other in green white and
green). Insert the four wires into the hole 1, 2, 3, and 6 of RJ45 in order, thereinto, 1+2 in a
strand (1: orange white; 2: orange) and 3+6 in the other strand (3: green white; 6: green).
Unpack the other end of the twisted-pair jacketed and take out two strands (there are four
strands) exactly same as the previous two. Insert the four wires into the hole 1, 2, 3, and 6 of
RJ45 in order, thereinto, 1+2 ina strand (1: green white; 2: green) and 3+6 inthe other strand
(3: orange white; 6: orange). That is, the second end is connected in a reverse way. All wires
form two overlapped crosses. (The hole 4, 5, 7, 8 are respectivelyfor wires in blue, blue white,
brown white, and brown, with two ends connected in the same way).
Table of contents


