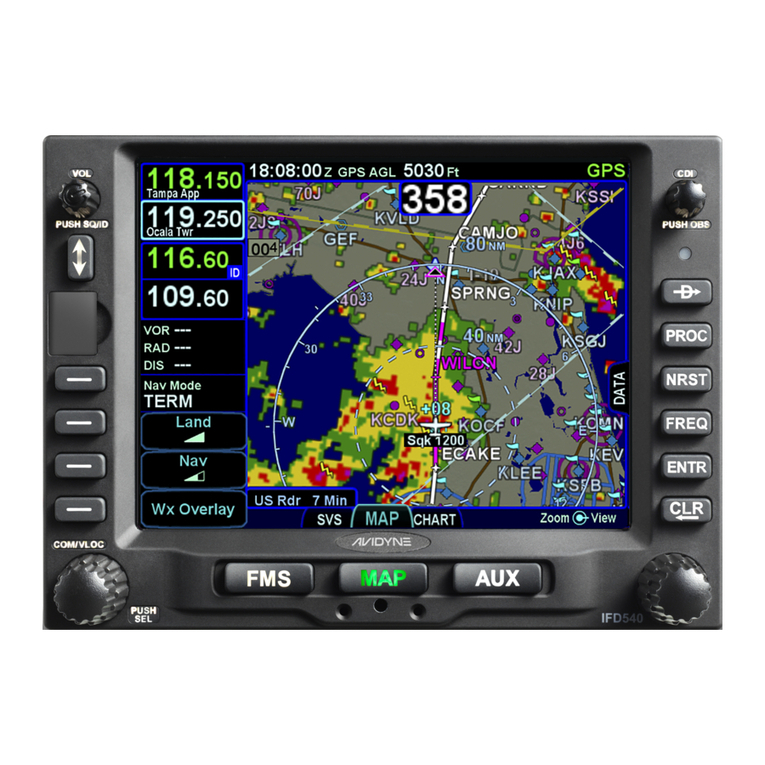
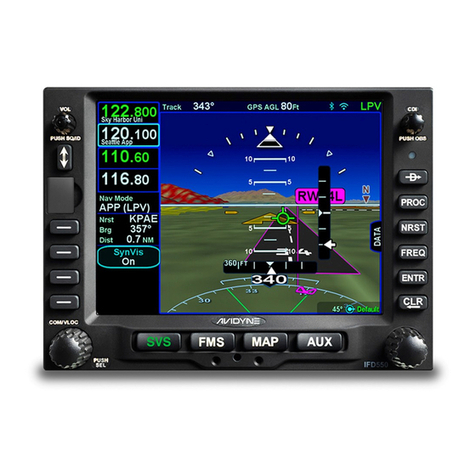
Avidyne IFD540 User manual

avidyne.com | 800.AVIDYNE
QUICK REFERENCE
IFD540
FMS/GPS/NAV/COM

QUICK REFERENCE IFD540
avidyne.com | 800.AVIDYNE 32
1
2
3
4
5
6
7
8
9
10
11
12
13
14
15
16
Volume/Power/
Squelch Knob
CDI Nav Source
Active Waypoint
Standby Frequency
Active Frequency
Frequency Swap
(flip-flop)
Direct To
Procedure
Nearest
Frequency
Enter (select)
Clear (delete)
FMS Knob (context-
sensitive: scroll, zoom/
push to select)
Line Select Keys
(LSK)
COM/NAV Manual
Tuning Knob (Push for
NAV & Transponder)
Page Function Keys
(two-way rocker)
FMS, MAP, AUX
To start an FMS edit, either:
1. Press the 8ENTR function key,
2. Push the 6bottom right knob, or
3. Tap the screen in the same field twice.
To move your cursor, either:
1. Turn the 6FMS knob (the outer ring scrolls through each box,
whereas the inner ring scrolls through the fields of each box), or
2. Utilize hybrid touch by tapping the screen on a waypoint
or in the blank space between waypoints.
Overview Diagram
113
141516
6
12
11
10
9
8
7
2
4
5
3

1
1 2 3
2 3
TAB TAB
QUICK REFERENCE IFD540
avidyne.com | 800.AVIDYNE 54
FMS Flight Plan Introduction
Following power-
on, the first time the
“FPL” tab of the FMS
page is accessed,
an empty flight plan
page is presented with
the origin waypoint
pre-populated.
We recommend to tap
the “Map” side tab to
view the moving Map
display while entering
your flight plan.
The origin will be the
closest airport to the
current GPS position,
or the airport from the
previous power down
if GPS position has
not locked on yet.
This FMS uses a database of published airways to quickly build
long flight plans. Here’s how: When a flight plan waypoint is a valid
airway entry point, a dropdown list of available airways appears.
Scroll to the desired exit point, and all intermediate intersections
along that airway are automatically populated into the flight plan.
Inserting a Waypoint
To add a waypoint
to your flightplan,
tap the empty
space where your
cursor is below
‘Origin.’ The IFD
will present a
new waypoint
with a suggested
identifier (powered
by Geofill™).
Use the right
knobs or tap
the identifier
to display
the QWERTY
keyboard in
order to enter
the waypoint
identifier.
Push the right
knob, press
ENTR, or tap
the ENTR key
on the QWERTY
keyboard to
enter the new
waypoint into
the flight plan.

Direct-To Operation
Press the Direct-To
button to display a
green Direct-To dialog
box pre-populated
with a logical waypoint
(powered by Geofill™).
11
22
3
To enter a dierent
waypoint, tap the data
field in the top dialog
box. The QWERTY
keyboard appears for
you to enter the desired
waypoint identifier.
To approve, tap the
‘Activate’ dialog box to
select. Pressing ENTR
or the right knob can
also be used to confirm.
TAB TAB
avidyne.com | 800.AVIDYNE 7
QUICK REFERENCE IFD540
6
Selecting an Approach
To display the
Approach field of the
next destination, press
the “PROC” Function
key.* This will display a
dropdown list of available
published approaches.
*Pressing the “PROC” Function key a second time will move the cursor
over the Arrival field and present a drop down list of available published
arrivals. Each subsequent press of the “PROC” key will step through all
following destination airfield approaches/arrivals in the flight plan, and
wrap back around to the origin. When the drop down box appears over
the intended data field, tap the desired procedure to add to the flight plan.
To select the desired
Approach, twist
the FMS knob to
scroll, then push to
select, or tap the
highlighted selection.

Selecting a Departure
To begin the process of
selecting a departure
procedure, tap on
the Origin box to
select. A ‘Departure’
field will appear.
Tap the ‘Departure’
field. A dropdown
list of available
departure procedures
will be displayed.
Select a departure
procedure and
push ENTR.
Entering a Hold
To enter a hold,
tap below the
waypoint of
interest to display
a drop down
list of options.
A holding
pattern is
added to the
flight plan,
populated with
either standard
or published
hold data.
To edit the hold,
hide the map,
then touch the
field to be edited
(turn direction,
leg length,
inbound course).
1 2 3
1 2 3 4
Near the
top of the list,
select “Hold at
<waypoint
name>” and
push the FMS
knob to select.
TAB TAB
QUICK REFERENCE IFD540
avidyne.com | 800.AVIDYNE 98

Activate a Stored Route
Saving the Flight Plan
Once you have
entered a Flight
Plan that you
would like to save
for future use go
to the route tab
on the FMS page.
TAB TAB
1 2 3 4
Highlight current
route then
select Copy in
the bottom left
of the screen.
You have now
saved the Flight
Plan as a route
for future use.
Select ‘Back
to Route List.’
The route will
now be one of
your saved route
selections.
To activate a route
from the stored routes
list, tap the desired
route to select.
1 2
To activate, press the
“Activate Route” LSK or
touch-screen button.
QUICK REFERENCE IFD540
avidyne.com | 800.AVIDYNE 1110

COM Radio Tuning
Activate the
frequency.
Once the desired
frequency has
been tuned in
to the standby,
press the flip-flop
button to make
it the active
frequency.
The Emergency COM Frequency, 121.5 kHz, can be quickly
tuned into the Active com slot by pressing and holding flip-
flop button for approximately three (3) seconds.
Radio Tuning can be accomplished through 3 dierent methods. Nav radio tuning can be accomplished through 3 dierent methods.
1 12 23 3 44
Twist the COM/
NAV knob. Use
the inner knob to
adjust KHz and
the outer knob
to adjust MHz.
Use the COM/NAV
knob. Push the
knob to display
NAV frequencies.
Then, twist the
inner knob to
adjust KHz and
the outer knob
to adjust MHz.
Touch the standby
frequency field
to display the
numeric keypad.
Then enter the
desired frequency.
Touch the standby
frequency field
to display the
numeric keypad.
Enter the desired
frequency.
Press the FREQ
button. Select
the desired
frequency.
Touch the
standby
frequency,
then “ABC…”
to display
the QWERTY
keyboard. Type
the identifier
of the VOR
(powered by
GeoFill™).
Activate the
frequency.
Once the desired
frequency has
been tuned in
to the standby,
press the flip-
flop button
to make it the
active frequency.
NAV Tuning
avidyne.com | 800.AVIDYNE 13
QUICK REFERENCE IFD540
12

IFD100 iPAD App
Avidyne IFDs are the only GPS Navigators in GA oering
both built-in Bluetooth® and Wifi. With that, all of our IFDs
oer a Wifi connection to Apple iPads® with the Avidyne
IFD100 iPad® app. This app doesn’t just mirror the functions
of your IFD, but acts as an additional instance of an IFD.
Download the FREE
IFD100 companion app
from the App Store.
Search ‘Avidyne IFD100.’
Decluttering the Map
To select the preferred level
of map feature density,
press the “Land” and/or
“Nav” LSK or on-screen
buttons. The specified level of
detail will remain consistent
across all map pages.
For Tech Support and Training
information, see back cover.
TAB:
avidyne.com | 800.AVIDYNE 15
QUICK REFERENCE IFD540
14

avidyne.com | 800.AVIDYNE
PILOT SUPPORT
888.723.7592
Mon-Fri: 8:00AM–5:00PM EDT / 1200-2100 UTC
visit: techsupport.avidyne.com
email: pilotsupport@avidyne.com
AFTER HOURS TECHLINE™
877.900.4264
PILOT TRAINING
avidynetraining.com
©2019 Avidyne Corp. All Rights Reserved. Last updated 02/19
QUICK REFERENCE IFD540
Other manuals for IFD540
3
Table of contents
Other Avidyne Car Navigation System manuals