6
WWW.AVIOMAC.COM AVIOMAC 70 TWIN (IDM)
STARTING PROCEDURE
PRIMING
1. Before starting the engine, it is
useful a priming procedure. Make
sure that the AT coil is switched off
by activating the kill switch or
grounding the black/white wire.
2. With the ignition turn off, speed
up completely, close the coche
plate and swing the propeller
several time. This will draw fuel
into the carburettor. Continue
swinging until you see fuel drip out
of the carburettor.
CAUTION: do this procedure only
when the carburettor is facing
downward.
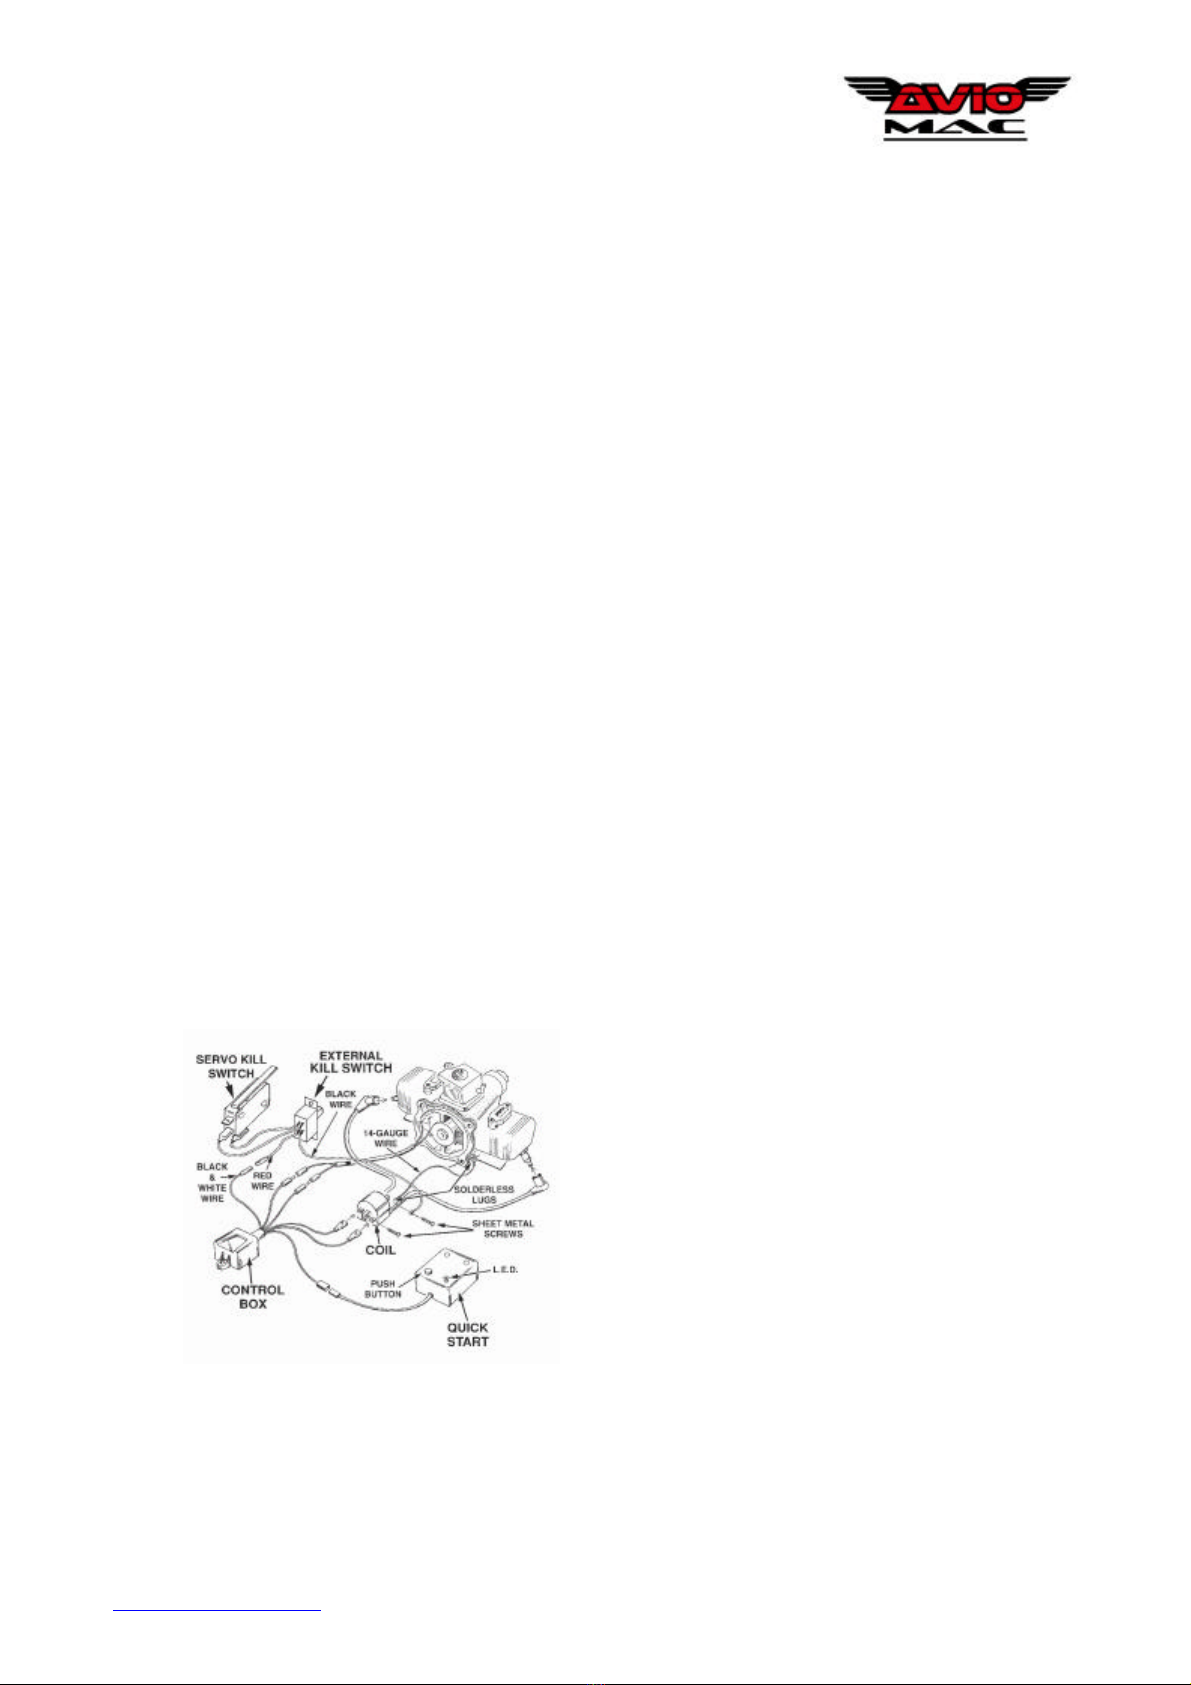
HAND STARTING
1. Connect the Easy Starter into
the connector of the ignition
control box. Press the button
on the Easy Starter and make
sure that the red LED lights.
2. Open the coche plate, speed
up slightly, deactivate the kill
switch and make sure that the
aircraft is restrained or
someone hold it. Flip the
propeller until the engine starts.
If the engine does not start,
repeat priming procedure until it
starts.
NOTE:Always turn the Easy Starter off
before you disconnect it from your
aircraft, otherwise electric shock and
damages on the ignition can occur.
ELECTRIC STARTER
If you use an electric starter, Easy Starter
is not necessary. Follow the same
starting procedure and of course do not
connect the Easy Starter.
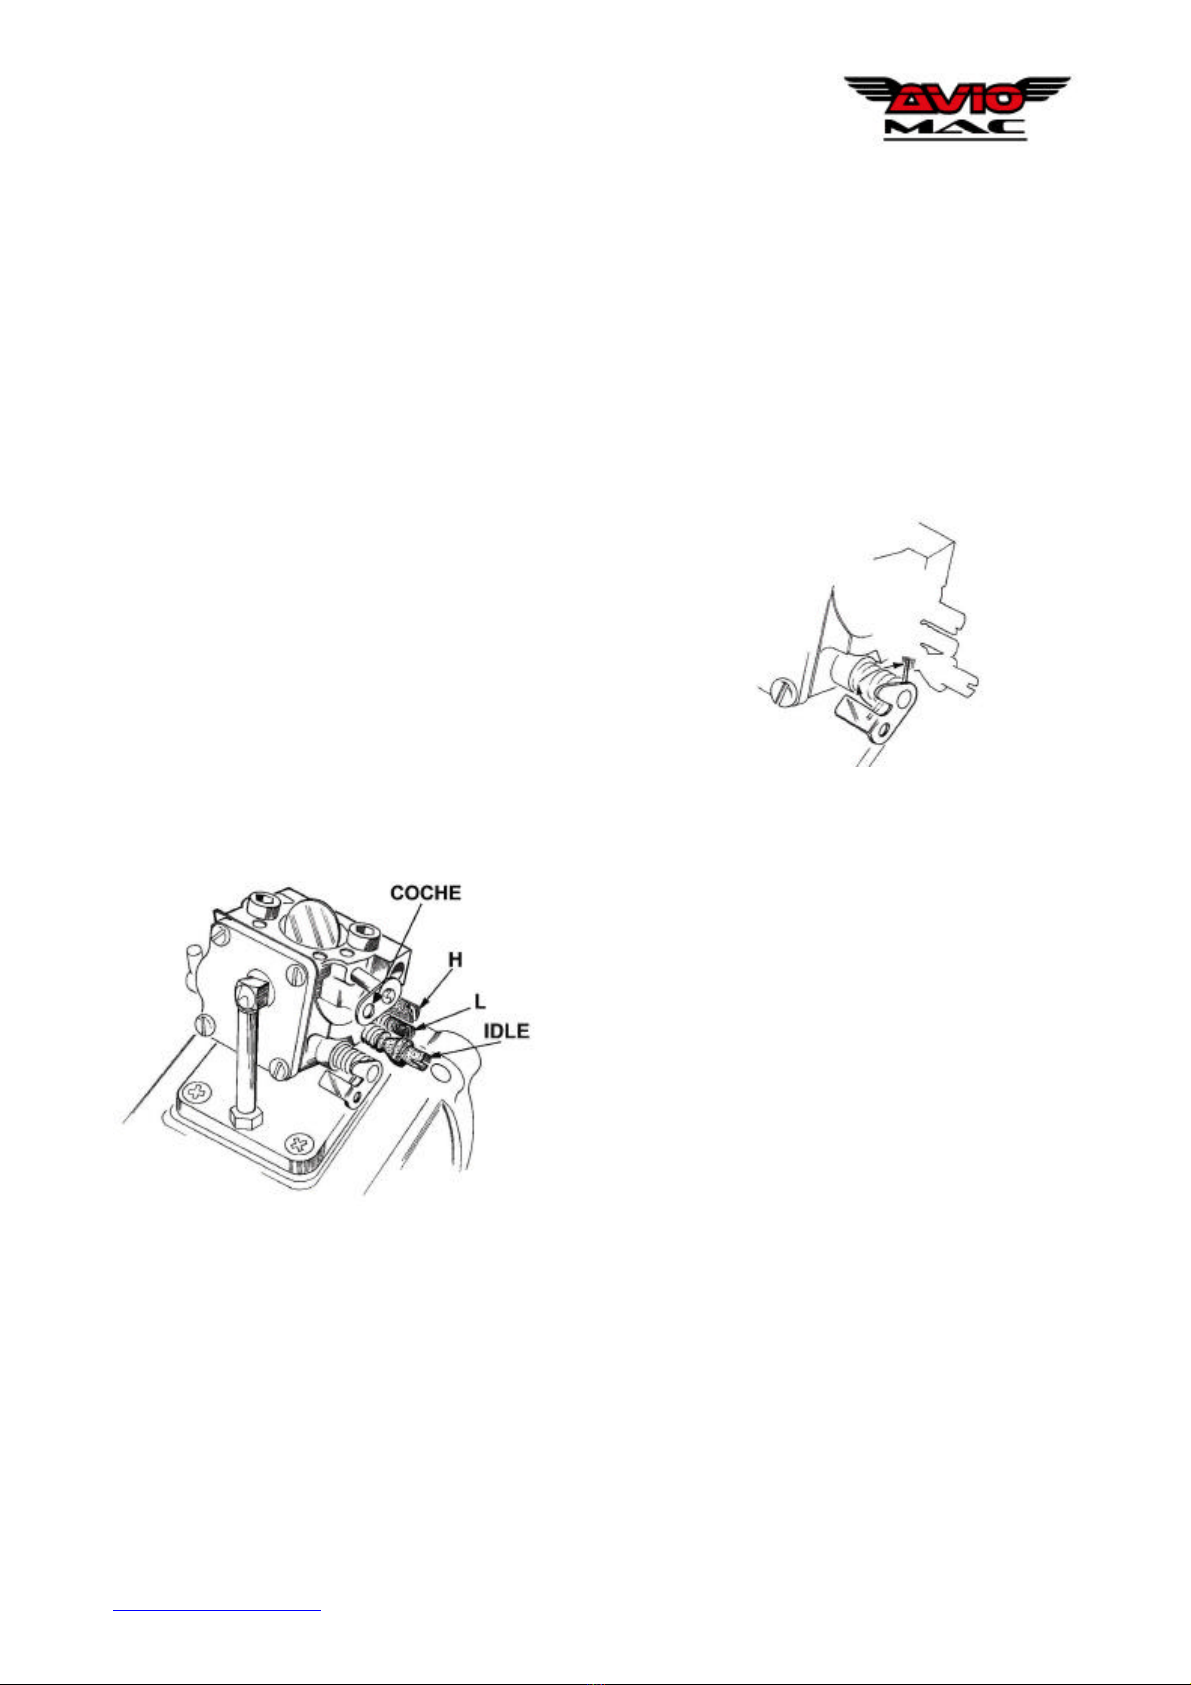
CARBURATION
Let the engine warming up for first 30
seconds before tune or speed up. The
carburation begin with the tuning of low-
speed needle (L) and then it is followed
by the tuning of high-speed needle (H).
Low-speed needle adjustment: if the
engine coughs, the mixture is too rich, so
turning it in a 1/16 turn at a time until the
engine does not go better. If the engine
does not accelerate from the idle, the
mixture is too lean. Turning low-speed
needle out a 1/16 turn at a time.
High-speed needle adjustment (H):
After you have adjusted the low-speed
needle (L) is the moment to tune up the
high-speed needle (H). Speed up
completely. If the engine drops RPM it
means that your mixture is too rich.
Screw clockwise the high-speed needle
(H) for 1/16 turn at time until the engine
work well. Tune the high-speed needle
(H) to allow the engine to reach maximum
RPM, then turn it out until the engine
reduce by 50-100 RPM. This will
guarantee a carburation not too lean and
a longer life for the engine.
Recheck and eventually adjust the low-
speed needle adjustment (L).