manuals.online logo
Brands
  1. Home
  2. •
  3. Brands
  4. •
  5. Avisoft
  6. •
  7. Measuring Instrument
  8. •
  9. Avisoft UltraSoundGate Series User manual

Avisoft UltraSoundGate Series User manual

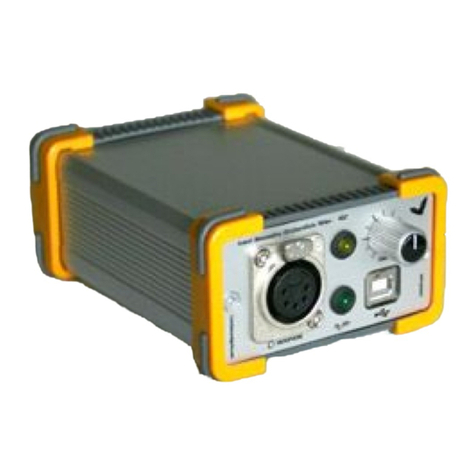
Components of the UltraSoundGate 116He
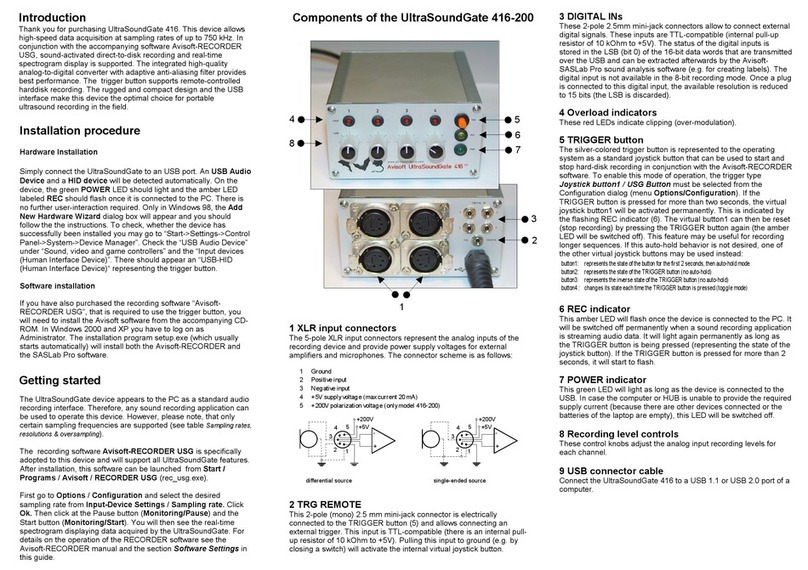
1 XLR input connector
The 5-pole XLR input connector represents the analog inputs of the
recording device and provide pow er supply voltages f or external
amplifiers and microphones. The connector scheme is as follow s:
2 USB 2.0 interface
REC indicator
This amber colored L D w ill flash once the device is connected to
the PC. It w ill be sw itched of f once the R CORD R USGH
sof tw are is running the in the monitoring mode. In this mode, the
R C L D indicates w hether the R CORD R softw are is recording
the incoming data onto disk.
4 POWER indicator
This green L D indicates that the unit is connected to the USB
pow er supply.
5 GAIN control knob
This control knob adjusts the analog input recording level.
6 TRG button
This button can control the .w av f ile recording process in the
R CORD R sof tw are. To enable this mode of operation, one of
the f ollow ing Trigger source options must be selected from the
configuration dialog box:
3
1
2
5
4
6
1
2
3-
+
differential source
45
+200V
+5V
1
2
3-
+
single-ended source
45
+200V
+5V
Introduction
Thank you for purchasing Avisoft UltraSoundGate 116He. This
bus-pow ered USB device supports single-channel high-speed
data acquisition at sampling rates of up to 300 kHz.
The accompanying recording sof tw are Avisof t-R CORD R USGH
provides either continuous or triggered direct-to-disk recording
w ith real-time spectrogram displays.
Getting started
The supplied R CORD R USGH softw are can be launched from
Start / All Program s / Avisoft Bioacoustics / RECORDER
USGH. On the first program start, the conf iguration dialog box w ill
be launched automatically (otherw ise it is available f rom Options /
Configuration). Select the desired Sam pling rate from the
Input Device Settings section and click at Ok . Then click at the
Pause button (Monitoring/Paus e) and the Start button
(Monitoring/Start). You w ill then see the real-time spectrogram
displaying the incoming signals. For details on the operation of the
R CORD R sof tw are see the Avisoft-R CORD R manual and the
section RECORDER USGH Software Settings in this guide.
USG TRG button auto hold : Pressing the button for more than 2 seconds will activate an
auto hold mechanism (the recording continues after releasing the button and will stop once
the button is pressed again). If the button is pressed for less than two seconds, it will only
record as long as the button is being pressed.
USG TRG button : The software will record as long as the button is pressed.
USG TRG button inversed : The software will record as long as the button is not pressed
(or as long as the external TRG signal is not active (logic high)).
USG TRG button toggled : The software will start recording once the button is pressed
and continues until the button is pressed again.
Specifications
Number of channels 1
ADC type Delta-Sigma architecture w ith
integrated adaptive
anti-aliasing filter
Resolution 16 bit or 8 bit
Sample rates [kHz] 300, 250, 214, 187.5, 166.6, 150,
125, 100, 75, 62.5, 50
Frequency response (-3dB) 20 Hz - 120 kHz
Input sensitivity (max trim) -43.2dBV = -41 dBu = 6.9 mVrms
Input sensitivity (min trim) -3.2dBV = -1 dBu = 0.69 Vrms
Gain adjustment potentiometer 40 dB continuous range
Input impedance 50 kOhm
Analog input connector female XLR-5 socket
Computer interface USB 2.0, isochronous high-
speed
mode
Supply current
(draw n from the USB) 185 mA
Physical dimensions (W/H/D) 63 x 33 x 170 mm
Weight 220 g
Avisof t Bioacoustics e.K.
Schönf ließer Str. 83
16548 Glienicke/Nordbahn
Germany
Phone: +49 (0)33056 426086
Fax: +49 (0)33056 426087
w w w .avisoft.com
w w w .ultrasoundgate.com
1 Ground
2 Positiv e input
3 Negativ e input
4 +5V s upply v oltage (max current 20
mA)
5 +200V polarization v oltage
Installation procedure
First install the R CORD R USGH softw are either from the supplied
sof tw are installation media (navigate to the subfolder RECORDER
USH and run setup.exe) or from the Avisoft Bioacoustics
w ebsite (w w w .avisoft.com/dow nloads.htm or directly
w w w .avisoft.com/R CORD R USGH.exe). This installation
program w ill install both the R CORD R USGH application
(rec_usgh.exe) and the required device drivers (usgh_xx16h.inf,
usgh.sys) for the UltraSoundGate xx16H devices. When the
installation procedure has completed, the UltraSoundGate unit can
be connected to the computer. The device should then be detected
as “Avisoft-UltraSoundGate 116H” and the pre-installed driver
should be finally activated.
Under some circumstances it might happen that the silent
installation of the device driver fails. If that happens, navigate to
the Windows Control Panel > Hardware and Sound > Device
Manager and right-click at the entry Other devices > Avisoft
UltraSoundGate 11 H and select the Update Driver Software...
option. The click at Browse my computer for device driver software,
click at Browse and navigate to the folder C:\Program Files
(x8 )\Avisoft Bioacoustics\RECORDER USGH\Drivers and finally
click at Next. The completed device driver installation w ill then look
like this:
User's Guide Model 116He
RECORDER USGH Settings
The conf iguration dialog box can be launched from the menu
Options/Configuration... or through the button
The input sample rate can be selected from the Input Device
Settings section. Available sample rates are 300, 250, 214,
187, 166, 150, 125, 100, 75, 62 and 50 kHz.
The Buffer setting determines the USB transfer buffer size
on the PC. Shorter durations w ill provide low real-time
spectrogram display latencies but might lead to erroneous
USB transfers under certain conditions.
Enable band-pass m ode At a f ew sample rates (50, 62.5, 75,
150, 187.5, 200 and 250 kHz), the A/D converter can be configured
for a special band-pass mode in w hich the analog input bandw idth
ranges f rom fs/2 to f s instead of the normal mode from 0 to fs/2.
This option can be advantageous for monitoring applications that
require minimal .WAV files sizes. Note that the frequency scale of
the resulting .WAV files w ill be reversed.
Turn on the polarization voltage This option activates the
internal 200V polarization voltage generator of the UltraSoundGate
XX16H devices and must be activated w hen using the CM16/CMPA
microphones.
Ignore GetOverlappedRe sult error By def ault, the
GetOverlapped Result error message w ill stop the
monitoring/recording process. If this option is activated, the
monitoring procedure w ill be immediately restarted, w hich is
desired in long-term monitoring applications.
TRG out m ode This option has no eff ect on the model 116He.
Monitor unders am pling ratio This list box allow s to select the
desired undersampling ratio of the acoustic monitoring output (5)
from 2 to 30 in steps of tw o. The internal D/A converter w ill be
clocked at a rate that is equal to the selected input (A/D converter)
sample rate divided by the selected ratio. The resulting output
sample rate is displayed behind the ratio (= xxx Hz). For instance,
if you have selected an input sample rate of 250000 Hz and an
undersampling ratio of 10:1, the resulting output sample rate w ill be
25000 Hz. All input signal components above the Nyquist
frequency (half of the output sample rate = 12500 Hz) w ill be
folded dow n to the range betw een zero and the Nyquist
frequency. For instance, a 30 kHz input signal w ill appear at the
monitor output at a f requency of 5000 Hz.
The Settings... button in the Input Device Settings section
launches the Advanced USGH Device Settings dialog box
that provides several additional device-specific options:
Enable m aste r/slave m ode for synchronizing se veral
devices This option has no effect on the model 116He.
Activate slave m ode for this device IThis option has no
eff ect on the model 116He.
Enable low pow er m ode The A/D converter chips can
optionally be operated in a pow er-saving mode that w ould
increase the battery life in mobile laptop-based systems. The
low -pow er mode slightly degrades the dynamic range
performance.
Enable autom atic offse t com pens ation If activated, this
option removes potential DC offset voltages from the input
signal.
Sound-activated recording can be arranged by selecting the
Trigge r source option level of this channel.
The Pre-trigger duration should be kept as short as possible. Long
pre-trigger settings can lead to data transmission errors if the
sample rate and the number of channels is high.
In order to simplify the operation of the Avisoft-R CORD R
sof tw are in the field, a link to RECORDER USGH may be added to
the Window s Startup folder (Start->All Programs->Startup).
Additionally, the A visoft-R CORD R option
M onitoring Autostart should be activated. This arrangement
w ill start the monitoring process automatically after booting the
laptop (the UltraSoundGate device must be attached to the USB
port prior to booting Window s).
Please refer to the users guide or the online help system for
further details on the Avisof t-R CORD R sof tw are.

This manual suits for next models

1

Other Avisoft Measuring Instrument manuals

Avisoft ULTRASOUND GATE User manual

Avisoft

Avisoft ULTRASOUND GATE User manual

Avisoft UltraSoundGate 416-200 User manual

Avisoft

Avisoft UltraSoundGate 416-200 User manual

Avisoft UltraSoundGate 116Hnb User manual

Avisoft

Avisoft UltraSoundGate 116Hnb User manual

Avisoft UltraSoundGate Series User manual

Avisoft

Avisoft UltraSoundGate Series User manual

Popular Measuring Instrument manuals by other brands

Knick Stratos Pro A201CONDI user manual

Knick

Knick Stratos Pro A201CONDI user manual

Bio Instruments TIR-4T-V quick start guide

Bio Instruments

Bio Instruments TIR-4T-V quick start guide

Jenquip EC10 Handbook

Jenquip

Jenquip EC10 Handbook

CHEMetrics V-3000 Operator's manual

CHEMetrics

CHEMetrics V-3000 Operator's manual

Acrel ADL400 Installation and operation instruction

Acrel

Acrel ADL400 Installation and operation instruction

Umarex Laserliner Quadrum manual

Umarex

Umarex Laserliner Quadrum manual

LaserLiner MultiWet-Master Compact Plus operating instructions

LaserLiner

LaserLiner MultiWet-Master Compact Plus operating instructions

NanoSense EP5000M installation manual

NanoSense

NanoSense EP5000M installation manual

Velleman DTO6234N user manual

Velleman

Velleman DTO6234N user manual

Lutron Electronics YK-2005LX manual

Lutron Electronics

Lutron Electronics YK-2005LX manual

Sola HORIZON GREEN BASIC operating instructions

Sola

Sola HORIZON GREEN BASIC operating instructions

ABB Aztec 600 manual

ABB

ABB Aztec 600 manual

Anritsu VectorStar ME7838D quick start guide

Anritsu

Anritsu VectorStar ME7838D quick start guide

Lutron Electronics DT-2234BL Operation manual

Lutron Electronics

Lutron Electronics DT-2234BL Operation manual

SICK GM700-02 operating instructions

SICK

SICK GM700-02 operating instructions

Sibata AQUAB AQ-201 Operation manual

Sibata

Sibata AQUAB AQ-201 Operation manual

senva EM Pulse Series installation instructions

senva

senva EM Pulse Series installation instructions

Heathkit V-4 user manual

Heathkit

Heathkit V-4 user manual

manuals.online logo
manuals.online logoBrands
  • About & Mission
  • Contact us
  • Privacy Policy
  • Terms and Conditions

Copyright 2025 Manuals.Online. All Rights Reserved.