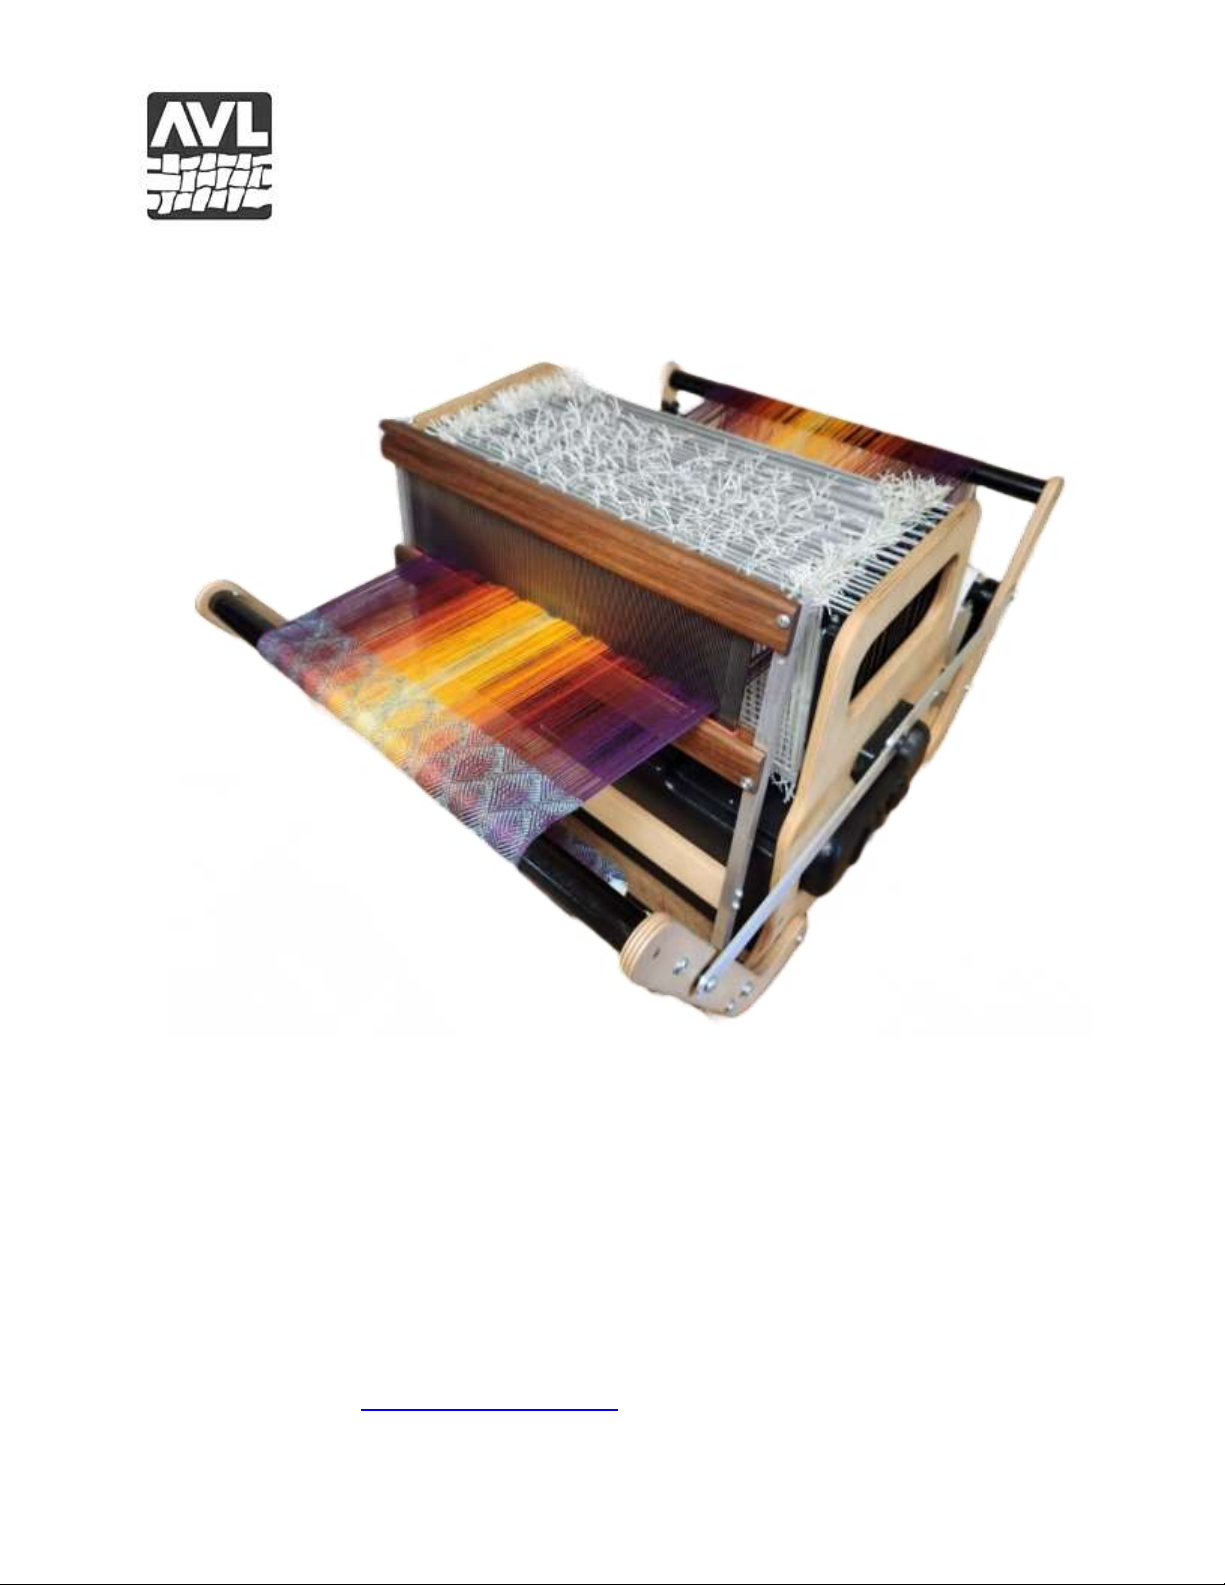
5
desktops, laptops, tablets and even phones with sufficiently large screens. Since AVLDrive is already
installed on the Little Weaver, installation is not needed.
If using the USB connection point between your loom and device, a USB driver may need to be
downloaded and installed from the AVL website: https://avllooms.com/apps/help-center under MANUALS
& DOWNLOADS > Downloads.
AVLDrive allows only WIF format weaving design files. WIF is the universal “weaving interface file” format
that was developed in the 1990s and is supported by nearly all weaving design software. For a small
membership fee, a large WIF library can be accessed at handweaving.net.
First Time Starting Up Your Loom
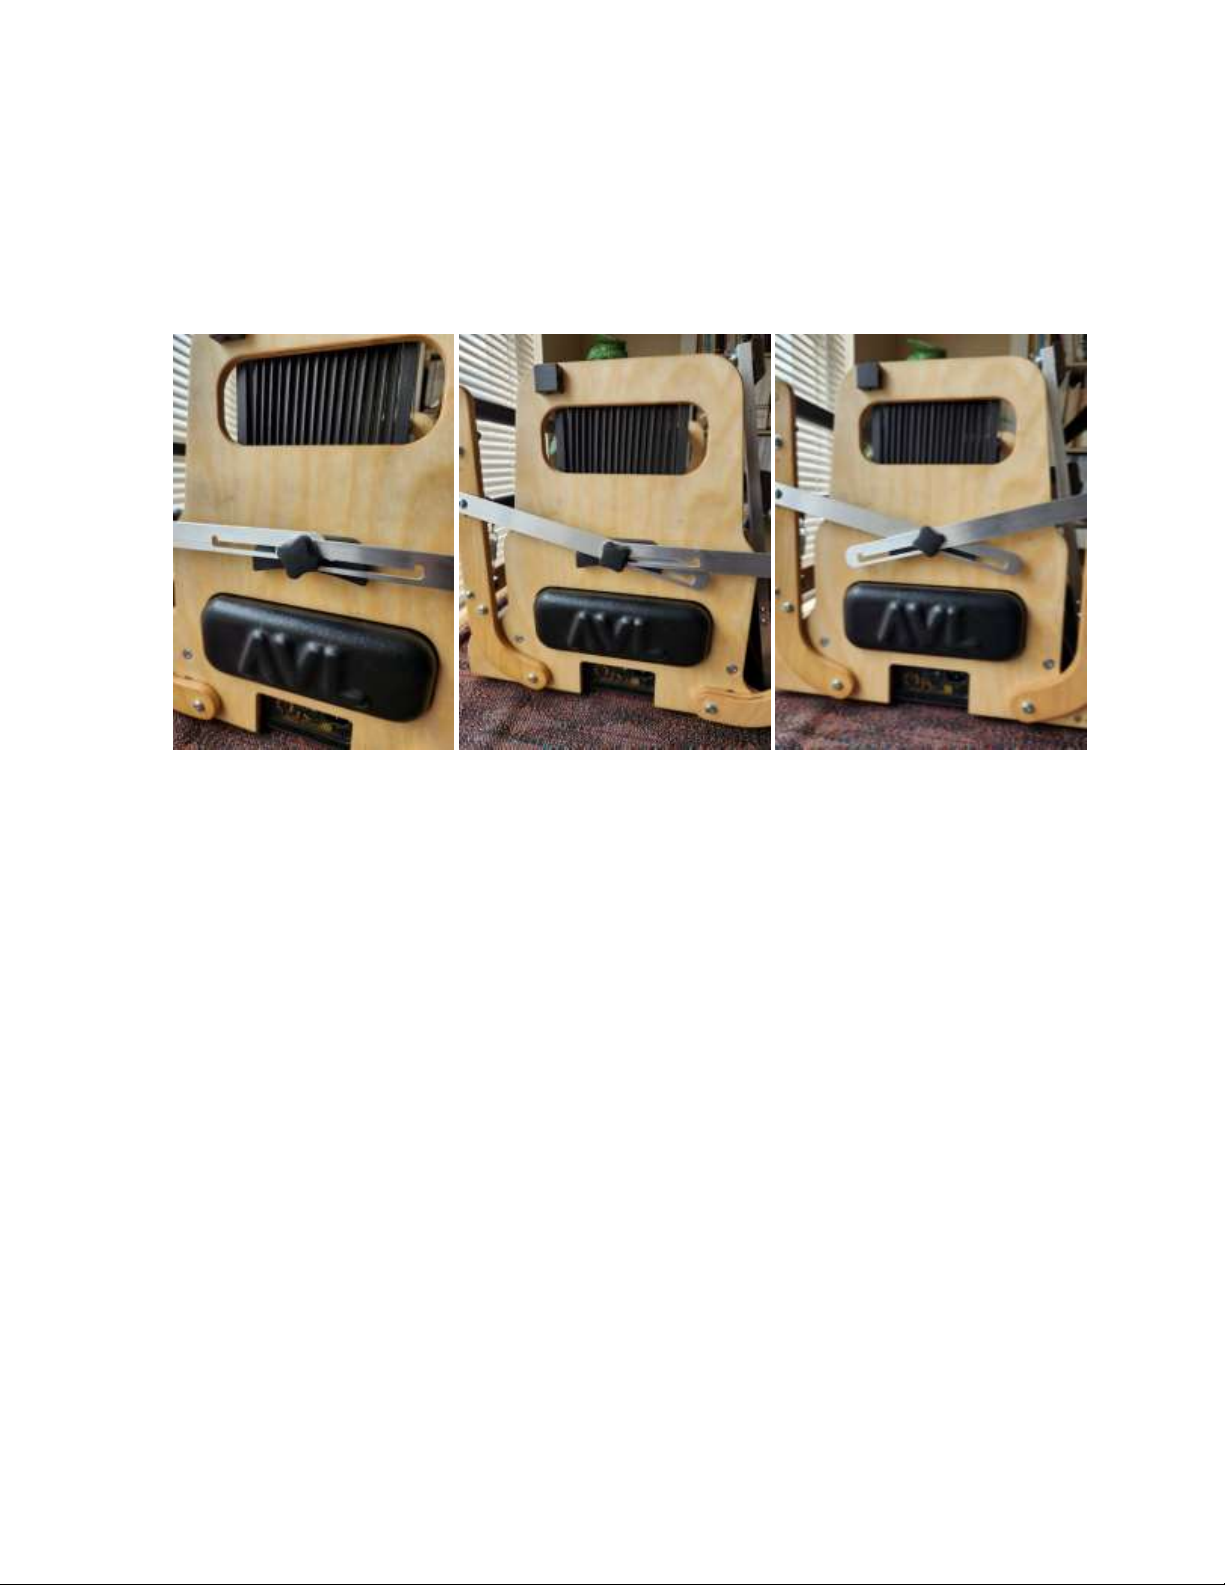
To run your loom, plug in the power cord and select the ‘On’position for the power switch. Little Weaver
requires approximately two minutes to boot up. Watch the Light Emitting Diodes (LEDs) on the front panel
under the beater. During the boot up sequence, all the LEDs will come on (except for the Error LED) for
approximately 45 seconds, turn off, and then Power & Network LEDs will power back on. Now, your Little
Weaver is ready.
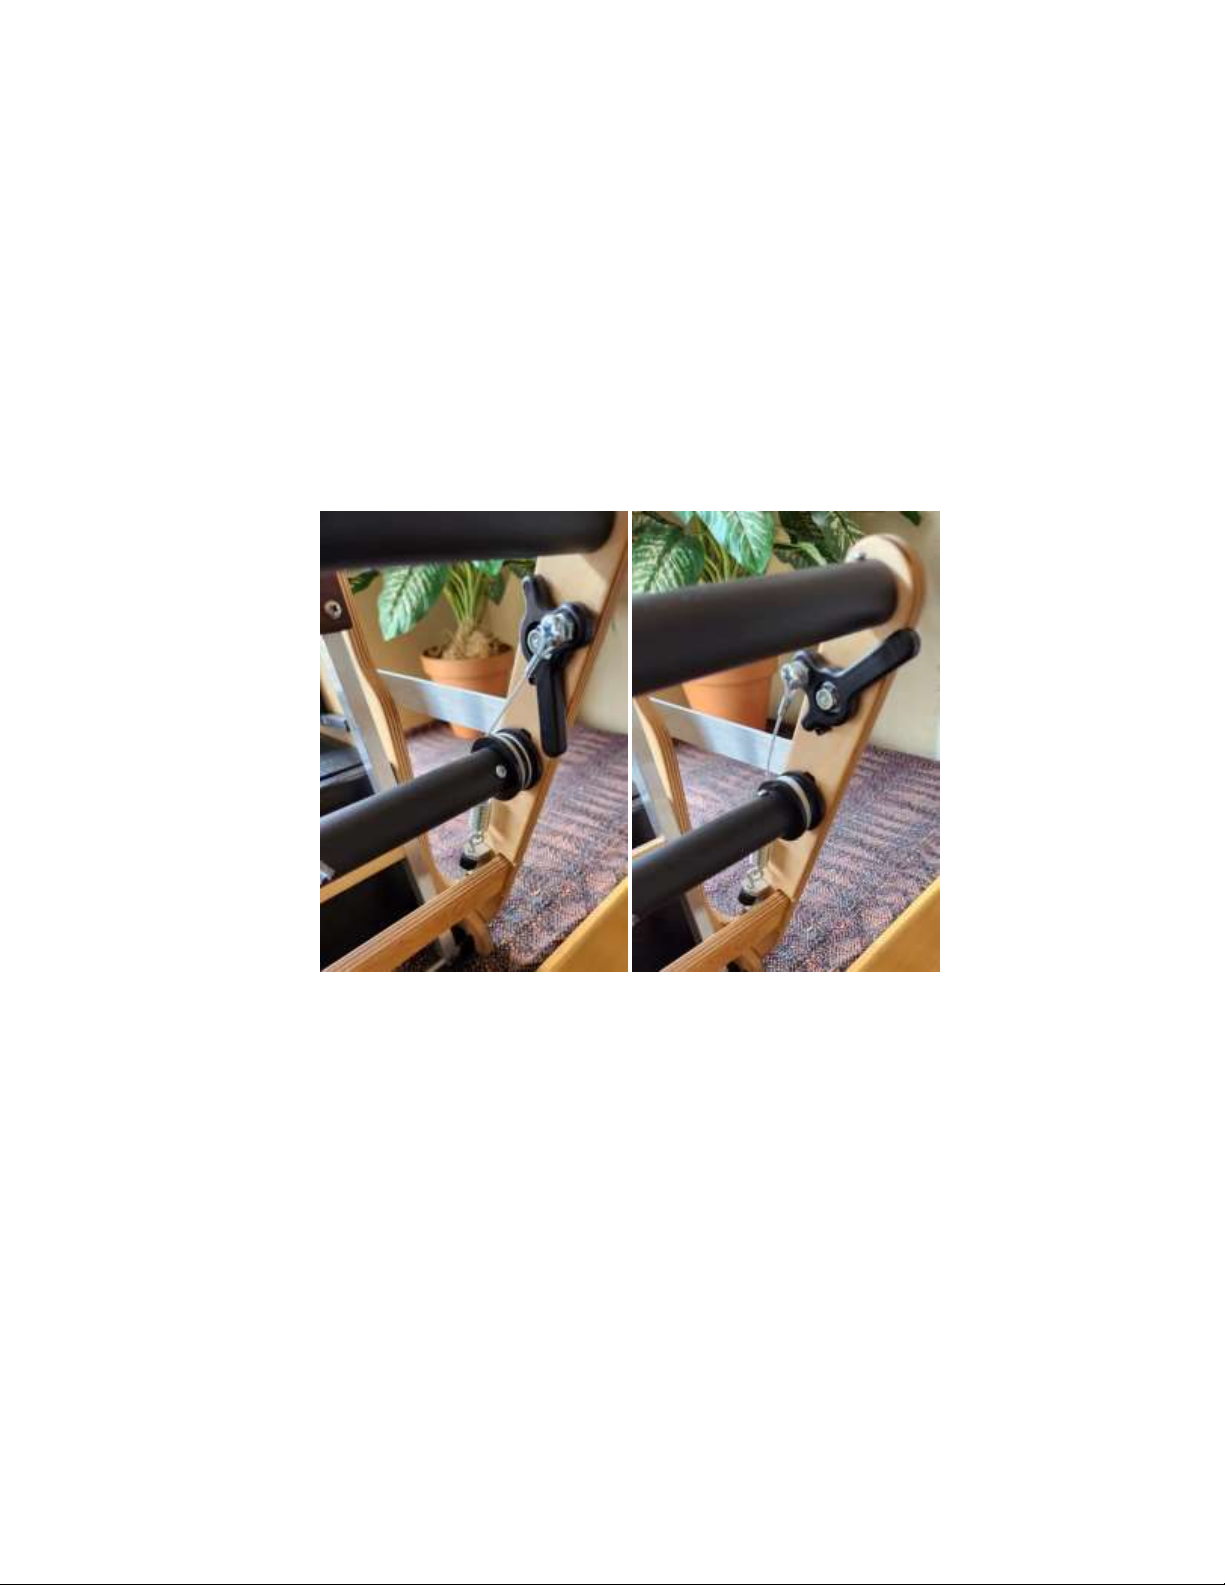
There are two options for connecting to your Little Weaver for the first time: USB or wirelessly using Wi-Fi
direct or LAN.
USB
Connect the supplied USB cable between your Little Weaver and computing device, open a browser and
type 192.168.6.2 into the URL line for a device running the Mac OS, or 192.168.7.2 for every other device
(including Windows), and then hit enter. If a connection is made, the green COM LED will light and
AVLDrive will pop up on your screen. If an error message appears noting no connection made, install the
USB driver from the AVL webpage noted above in the Software section.
WiFi Direct and LAN
The Network LED color indicates to which WiFi type your Little Weaver is configured in AVLDrive. Green
indicates WiFi-direct is active and your Little Weaver is broadcasting its own WiFi SSID signal. Red indicates
that the WiFi-LAN is active and your Little Weaver is connected to your local WiFi router. When the
Network LED is flashing red, Little Weaver is attempting to connect to a router. If it fails to connect, Little
Weaver will automatically switch to WiFi-direct mode.
To connect via WiFi-direct, find Little Weaver’s WiFi signal on your computing device’s WiFi connection
menu. The id will typically be AVL_XXXXX where XXXXX is your Little Weaver’s serial number. Your Little
Weaver’s serial number can be found on the AVL plate on the side of the loom. Select it and type in the
passphrase CompuDobby5. Next, open your browser and enter the 192.168.16.2 in the URL line to open
AVLDrive. If a connection is made, the green COM LED will light and AVLDrive will pop up on your screen.
Using WiFi-LAN requires that Little Weaver be configured to connect to your local WiFi router. This
requires opening AVLDrive via USB or WiFi-direct, accessing the Network tab, enabling local router
connection, typing in your local WiFi router’s passphrase, and then selecting Restart network. If Little
Weaver logs onto your local WiFi router, the Network LED will light up red. Once Little Weaver is
connected, AVLDrive will provide instructions for restarting itself. And again, if a connection is made, the
green COM LED will light and AVLDrive will pop up on your screen.
Opening a Weaving File
In AVLDrive select the File tab. Your loom will come with a test file, which can be used to test the loom. Or,
use the File menu to access and download WIF files to the loom.