manuals.online logo
Brands
  1. Home
  2. •
  3. Brands
  4. •
  5. AvonSynth
  6. •
  7. Recording Equipment
  8. •
  9. AvonSynth Quad VC Glide User manual

AvonSynth Quad VC Glide User manual

The AVS-GLIDE-1
Quad
VC Glide
User Guide
Thank you for purchasing from AvonSynth
Congratulations on your purchase of a brand new AvonSynth AVS-Glide-1
Quad VC Glide Eurorack Module. We trust that it will both serve and
inspire you as you create beautiful music with it for years to come.
In order to get the most out of your module, please ensure that you read
this User Guide in its entirety so that you fully understand all of its
functionality, and that you follow all necessary safety directions during use.
Included in the Box
Page 1 of 3
1 x Quad VC Glide Module 1 x 10 pin to 16 pin
flat-cable power cord
4 x M3 Mounting Screws 4 x Nylon Washers
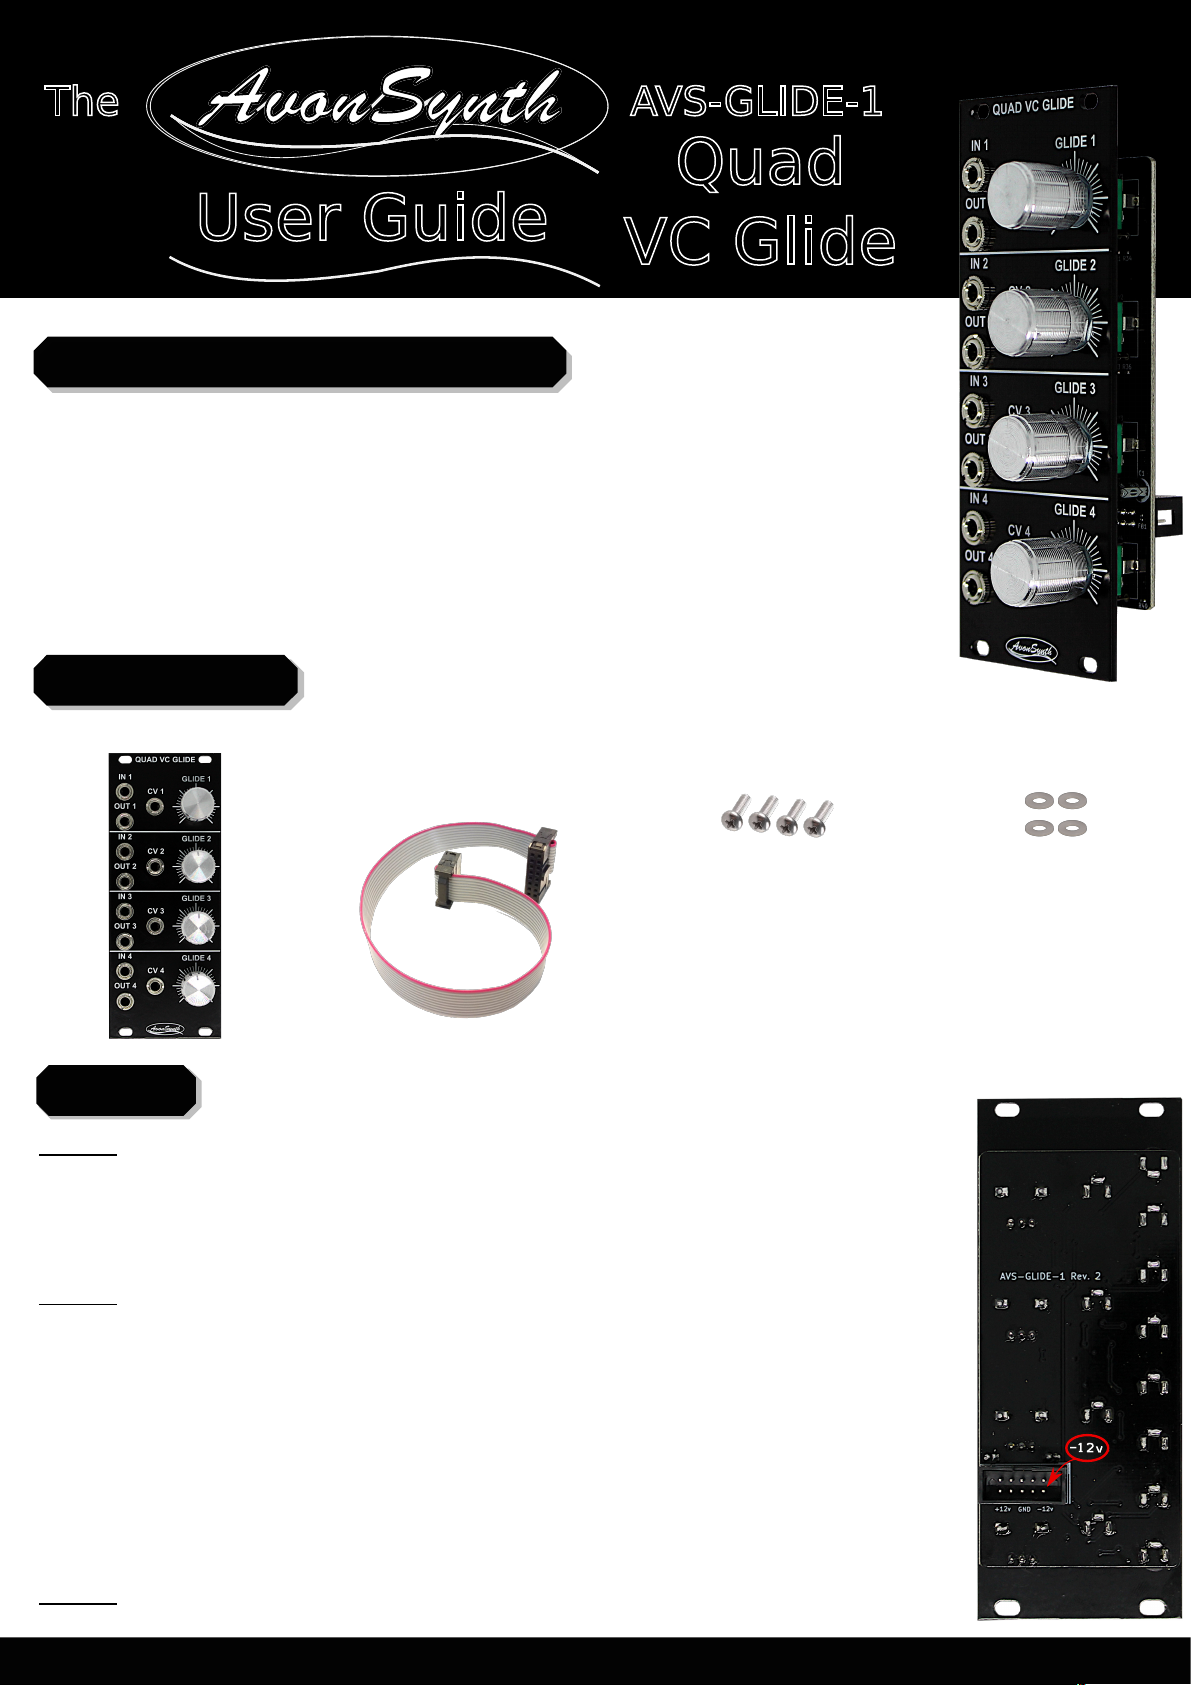
Installation
Step 1: Power your system off. Place the module in your Eurorack-compatible
rack in any convenient position. Affix the module to your rails using the
included mounting screws and nylon washers. Neglecting to use these
washers may result in unnecessary marking of the unit.
Step 2: Triple check the polarity of the power connector before connecting
the power cord to your power supply. Ensure that the -12v line marked on the
back of the module connects to the same end of the flat-cable that also
connects to the -12v line on your power supply. While AvonSynth
modules use shrouded connectors that make this process safer and more
reliable, some systems do not conform to this polarity standard, so careful
checking is always necessary. Connecting the module with incorrect polarity
can result in irreversable damage done to the module which cannot be
covered by warranty.
Step 3: Power up your system and start patching!
www.AvonSynth.com
Step 1: Power your system off. Place the module in your Eurorack-compatible
rack in any convenient position. Affix the module to your rails using the
included mounting screws and nylon washers. Neglecting to use these
washers may result in unnecessary marking of the unit.
Step 2: Triple check the polarity of the power connector before connecting
the power cord to your power supply. Ensure that the -12v line marked on the
back of the module connects to the same end of the flat-cable that also
connects to the -12v line on your power supply. While AvonSynth
modules use shrouded connectors that make this process safer and more
reliable, some systems do not conform to this polarity standard, so careful
checking is always necessary. Connecting the module with incorrect polarity
can result in irreversable damage done to the module which cannot be
covered by warranty.
Step 3: Power up your system and start patching!
The
User Guide
Features & Specifications
Fully Analogue Quad VC Glide
10 HP wide (50.5mm), 20mm deep
Four Independent Glide Circuits, each Voltage Controllable
Current consumption: +12V 29ma, -12V 25ma
30ms to 1.5s glide over 1 octave at 1V/Oct
Perfect companion for AvonSynth MIDI-to-CV module
V/Oct Input
CV Input
Glide Output
Glide Behaviour
+10v
0v
-10v
+1v
0v
-1v
0v
1v
Glide Time
AVS-GLIDE-1
Quad
VC Glide
-1v
Glide Time
Description of Functionality
Page 2 of 3
This is where the CV that you would
like to glide is plugged in. This is
commonly a 1V/Oct signal such as
from a keyboard or MIDI to CV Module.
Input
Output
This is where the glided signal is
output. This would traditionally be
sent to control the pitch of a VCO for
a classic 'portamento' effect.
CV
Glide Knob
This CV input makes the glide time
slower or faster when a positive or
negative voltage respectively is applied.
This is averaged with to the setting of the
corresponding Glide knob.
This knob controls the glide time of
its channel. When turned anti-clockwise,
the glide time is shorter and the
portamento effect less dramatic. When
turned clockwise the glide is longer
and more obvious.
All four channels of the module
operate independently and work
in the same way.
By adding a negative CV to a channel
while the Glide knob is in the leftmost
position, it is possible to acheive a glide
that is shorter than the lowest knob value.
The same is true conversely at the top
end of the range, however when the
knob in the rightmost position, a high
level CV can cause the Glide to
'wrap around' and trend downward again.
The
User Guide
AVS-GLIDE-1
Quad
VC Glide
Warranty & Support
Page 3 of 3www.AvonSynth.com
Safety Precautions
Please use this module in accordance with the following safety guidelines in order to
maximize the life of the module and ensure warranty from AvonSynth.
This product is covered by AvonSynth's warranty for one year from the manufacturing date.
Within this timeframe, any manufacturing defect will be repaired or replaced by AvonSynth.
Damage caused to the product due to not following the safety precautions above,
unauthorized modification of the hardware, or misuse such as subjecting the unit to reverse
or excessive voltages will void this warranty.
If you have any concerns about your AvonSynth hardware, please get in touch via
info@AvonSynth.com to discuss any issues. We will do our best to assist you in getting your
hardware operating correctly, and if necessary, we will provide an RMA (Return Merchandise
Authorization) to send back the unit for inspection. Any postal costs incurred in this process
will be the responsibility of the customer. Please do not send back merchandise before
receiving this authorization.
o
o
Keep water and other conductive liquids and materials away from this module.
It is not water proof, or even water resistant. Exposure to these can cause
short-circuits that can render the equipment unusable.
Be sure to keep this equipment in an environment with an ambient
temperature above -20 C and below +50 C. Excessively hot or cold
temperatures can be damaging to the electronic circuits used.
Modules with exposed circuit-boards are delicate. Take the utmost care when
handling and transporting this equipment, making sure not to subject it to
excessive forces. Ensure that the module is installed correctly while being
transported and that the original packing materials are used when sending
the module anywhere by post.

This manual suits for next models

1

Other AvonSynth Recording Equipment manuals

AvonSynth X-FADE User manual

AvonSynth

AvonSynth X-FADE User manual

AvonSynth AVS-LFO-1 User manual

AvonSynth

AvonSynth AVS-LFO-1 User manual

AvonSynth AVS-LFO-2 User manual

AvonSynth

AvonSynth AVS-LFO-2 User manual

Popular Recording Equipment manuals by other brands

Extron electronics EBP 108 RAAP Button Panel Setup guide

Extron electronics

Extron electronics EBP 108 RAAP Button Panel Setup guide

National Instruments FieldPoint FP-1000 Note to Users

National Instruments

National Instruments FieldPoint FP-1000 Note to Users

Extron electronics RGB 112xi Specification sheet

Extron electronics

Extron electronics RGB 112xi Specification sheet

ORQA FPV.PLAY user manual

ORQA

ORQA FPV.PLAY user manual

4ms Spectral Multiband Resonator Firmware Installation

4ms

4ms Spectral Multiband Resonator Firmware Installation

National Instruments VXI-AT2022 Getting started

National Instruments

National Instruments VXI-AT2022 Getting started

Sequential 800 operating manual

Sequential

Sequential 800 operating manual

Dynacord DRP 10 user manual

Dynacord

Dynacord DRP 10 user manual

ADT A1-ETHERNET instruction manual

ADT

ADT A1-ETHERNET instruction manual

Paso P8083-R Instructions for use

Paso

Paso P8083-R Instructions for use

Radio Shack Modem I TRS-80 owner's manual

Radio Shack

Radio Shack Modem I TRS-80 owner's manual

SolarEdge SMI-35-3C-01 installation guide

SolarEdge

SolarEdge SMI-35-3C-01 installation guide

TeleEye GX624 quick start guide

TeleEye

TeleEye GX624 quick start guide

Hear Technologies switch back M8RX user guide

Hear Technologies

Hear Technologies switch back M8RX user guide

Crystal Vision TAD202 user manual

Crystal Vision

Crystal Vision TAD202 user manual

A&D GX-A Series instruction manual

A&D

A&D GX-A Series instruction manual

Brainworx Engl E646 VS Plugin Manual

Brainworx

Brainworx Engl E646 VS Plugin Manual

aci 6N1-ISO Installation & operation instructions

aci

aci 6N1-ISO Installation & operation instructions

manuals.online logo
manuals.online logoBrands
  • About & Mission
  • Contact us
  • Privacy Policy
  • Terms and Conditions

Copyright 2025 Manuals.Online. All Rights Reserved.