pg. 6
AVProConnect ~ 3518 N Casco Ave. Sioux Falls, SD 57104 ~ 1.877.886.5112 ~ +1.605.274.6055 ~ Support@avproconnect.com
General Operation
Method 1 –Use as a 4x1 AUHD Switch where content is above 10.2 GBPS and content will be sent
to one HDR Display or Projector via HDMI cable.
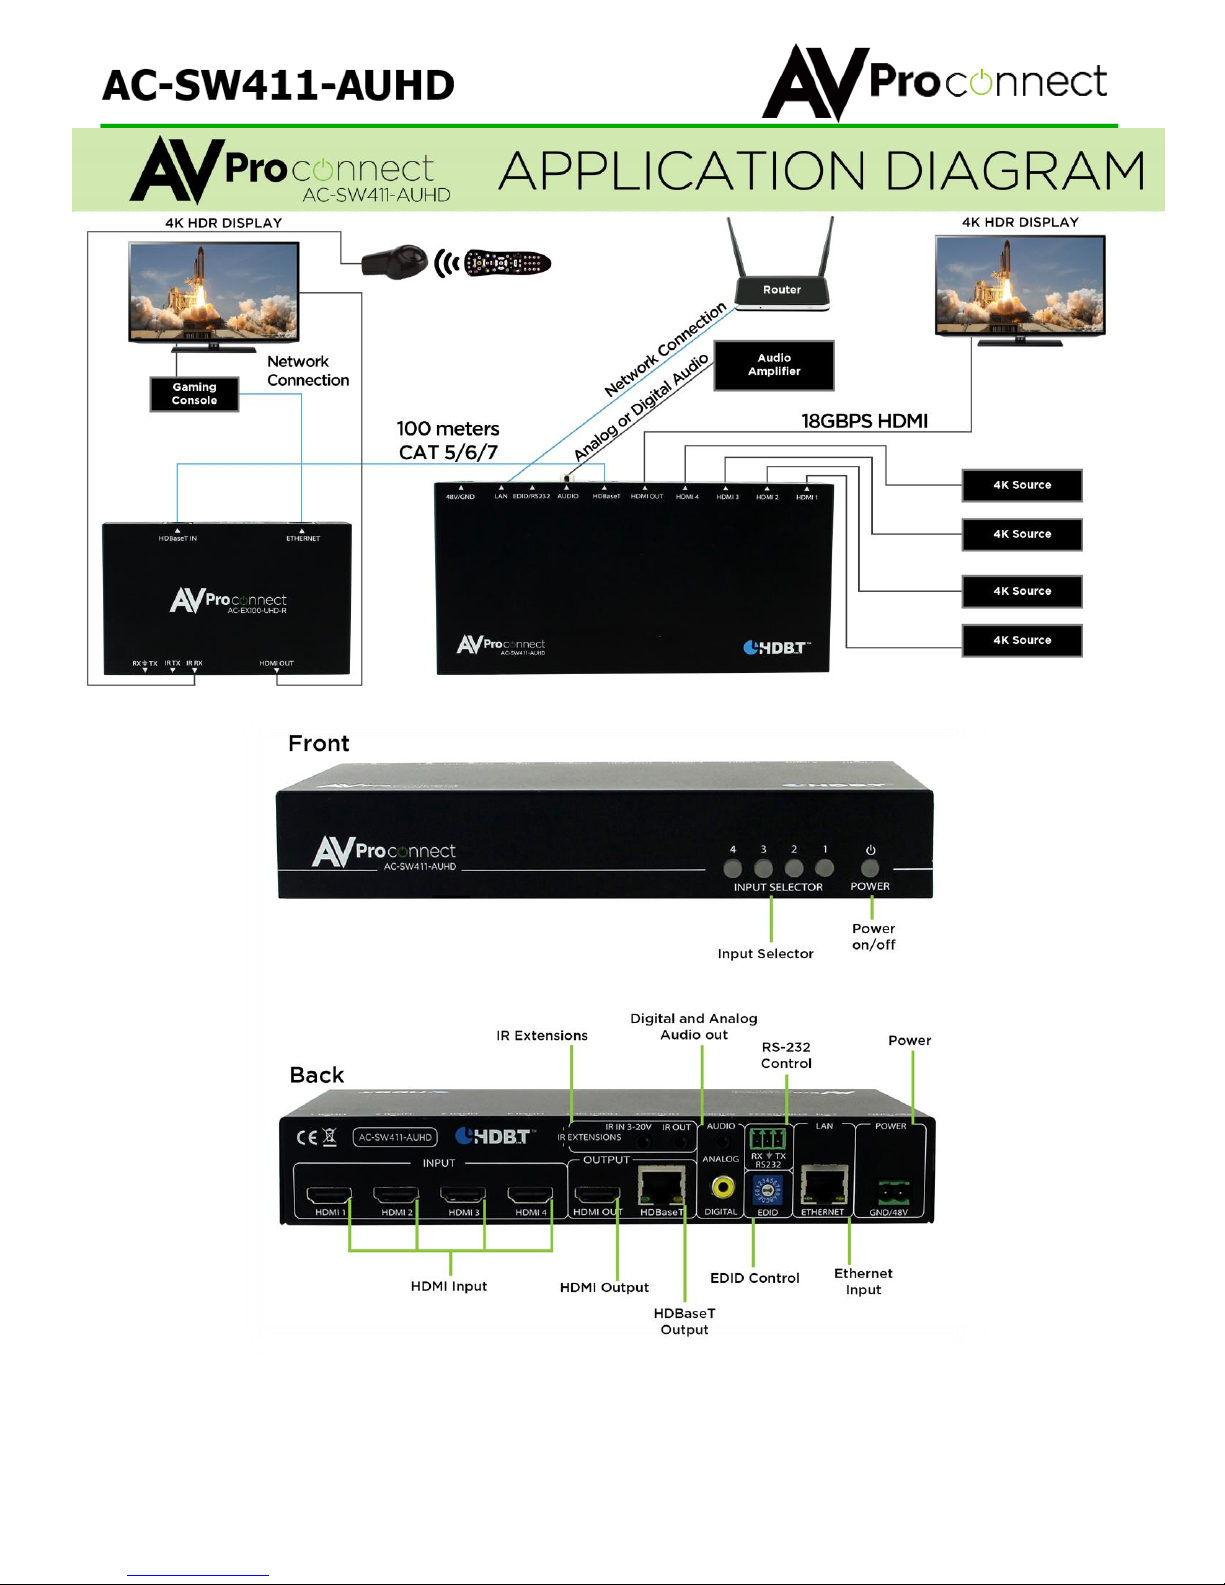
Connect up to four 4K60 (or lower) sources to the SW411 HDMI ports
Connect one HDMI cable between the SW411 HDMI out port to an HDR Projector or Display
(max is about 15M as of this writing)
Connect RJ45 cable to internet access point or directly to setup computer.
Connect either analog 3.5 stereo or SPDIF digital coax to amplifier or AVR
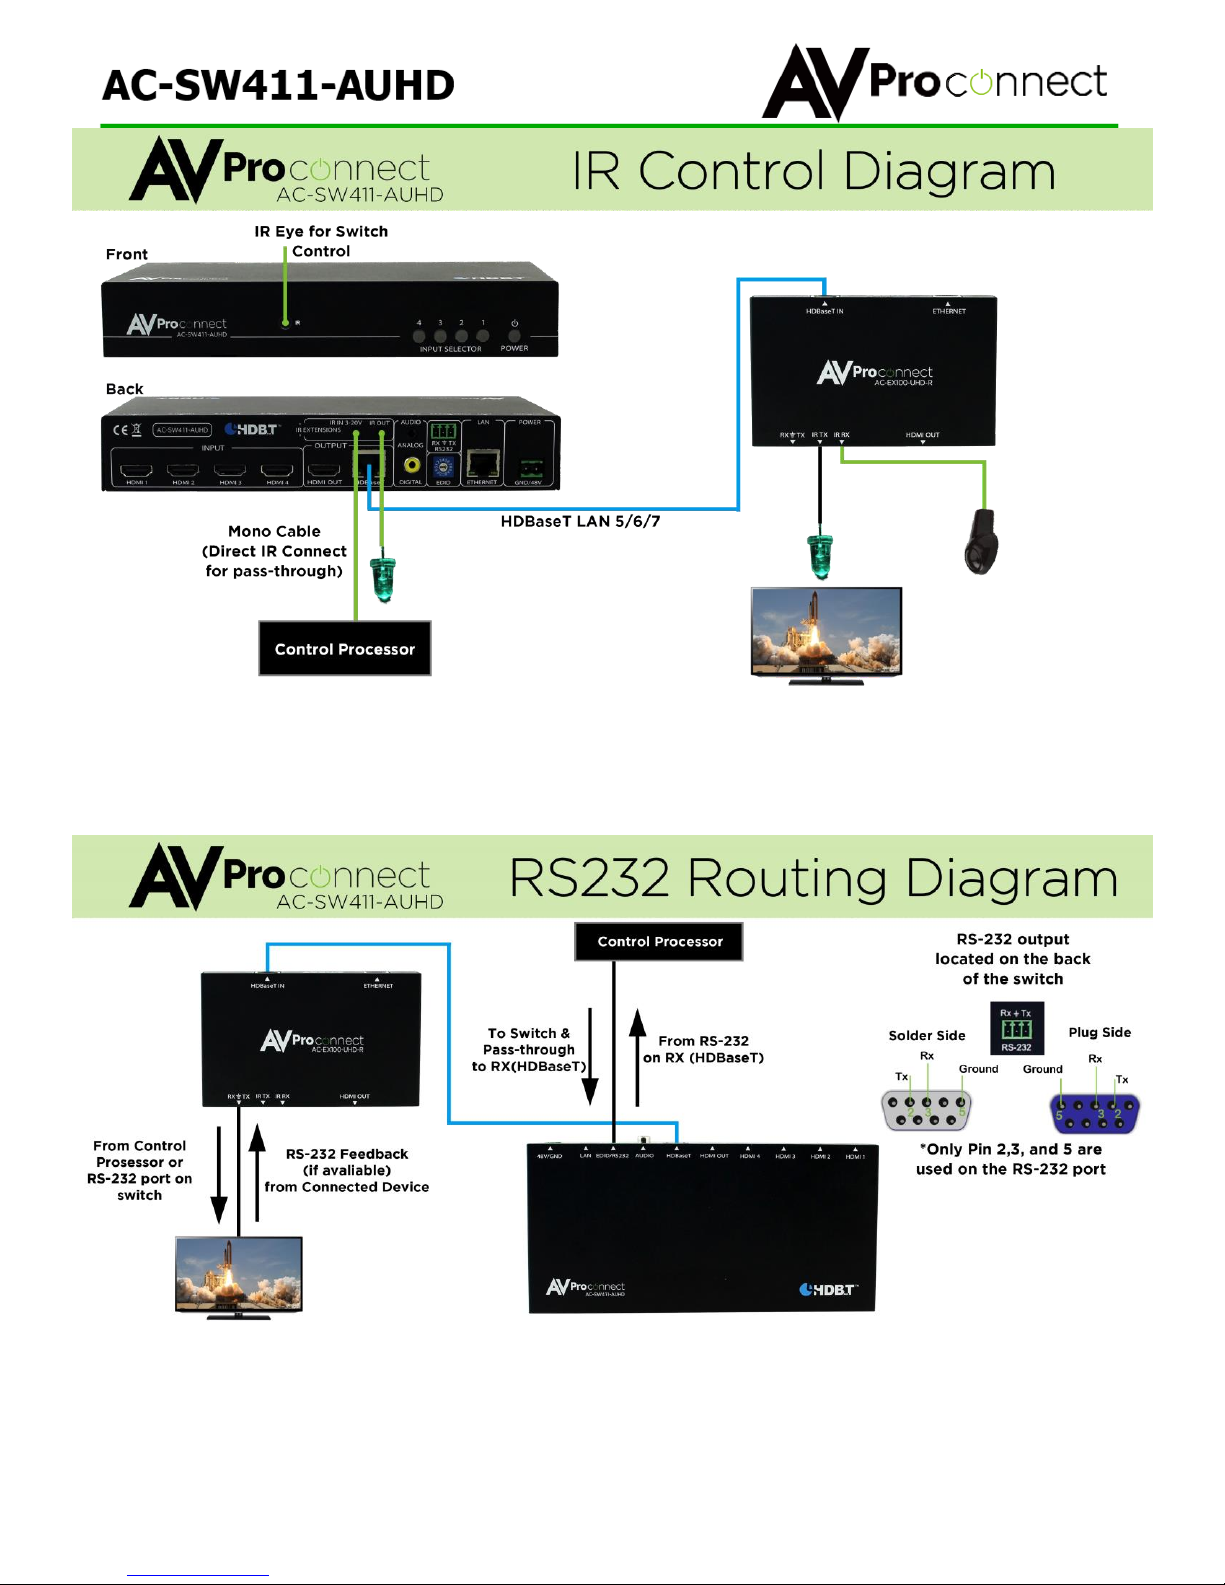
Connect IR Receiver (eye) to IR in port for using remote control
Out of the box if no setup or configuration is done and the supplied remote control is used you should
be able to switch between the 4 sources. You can also use the front panel buttons to switch sources.
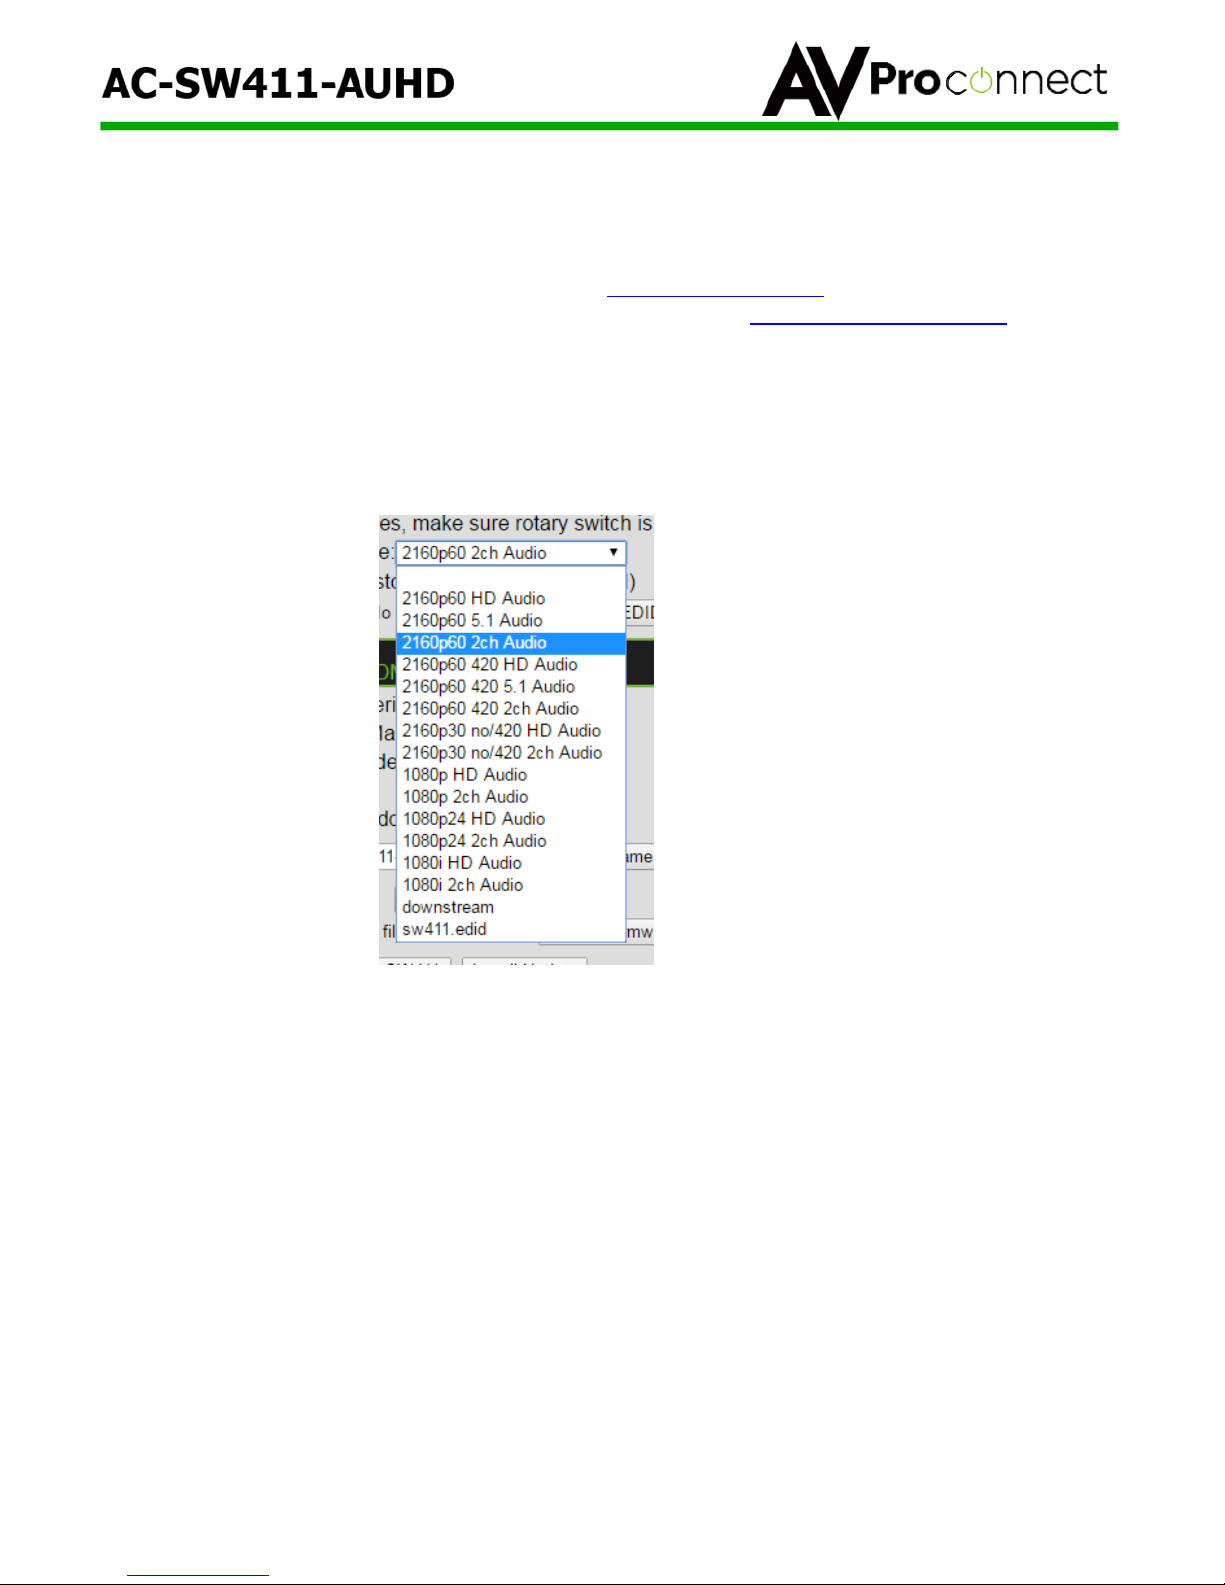
If one of more of the sources do not come up check cables and connections first, then refer to EDID
management section to customize settings.
Note: The HDBaseT port in inactive/not functional in this setup since the content is above 10.2 GBPS
Method 2 –Use as a 4x1+1 Switch where content will be under 10.2 GBPS (via EDID Management
or native to the source) and a Display will be connected locally and a projector or display will be
connected remotely (on a ceiling or…)
Connect up to four 4K60 4:2:0 (or lower) sources to the SW411 HDMI ports (if the sources are
capable of operation above 10.2 GBPS that is not a problem, via EDID the maximum signal
that can pass through the system will be selected automatically).
Connect one HDMI cable between the SW411 HDMI out port to an 4K Projector or Display
(max is about 15M as of this writing)
Connect a single CAT5e or higher cable between the HDBaseT port on the SW411 and the
HDBaseT port on the EX100 (Receiver)
Connect HDMI cable between EX100 and remote display or projector
Make IR, RS232 and LAN connections as required for the application –IR for using remote to
control the sources, bi-directional RS232 for connection into a 3rd party controller, and LAN for
Web GUI access or as a spare LAN port for a SMART TV or a third party controller.
Connect RJ45 cable to Internet access point or directly to setup computer. If connected to
Internet access point the connection is shared at the extender and acts as a simple router.
Connect either analog 3.5 stereo or SPDIF digital coax to amplifier or AVR
Connect IR Receiver (eye) to IR in port for using remote control
Out of the box if no setup or configuration is done and the supplied remote control is used you should
be able to switch between the 4 sources. You can also use the front panel buttons to switch sources.
If one of more of the sources do not come up check cables and connections first, then refer to EDID
management section to customize settings. On the remote side (at RX) all ports are now active and
available.