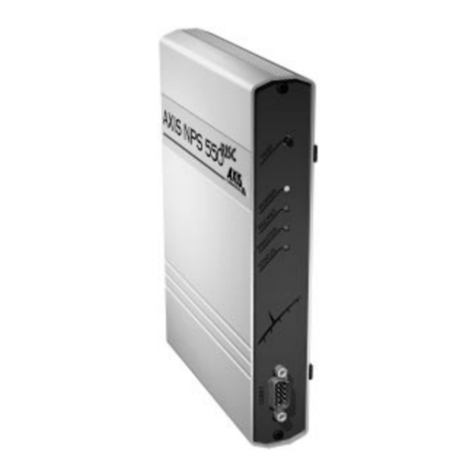
Axis 5800 User manual

AXIS 5800+ Mobile 1
AXIS 5800+ Mobile
Quick Installation Guide
BLUETOOTH™ is a trademark owned by its proprietor and used by Axis Communications AB under license

Regulatory Information AXIS 5800+ Mobile
2
Regulatory Information
Tested to comply with FCC Standards FOR HOME OR OFFICE USE.
This product must be installed and used in strict accordance with the instructions given in the user documentation. The AXIS
5800+ complies with the following radio frequency and safety standards:
Industry Canada (IC) Canada - - This device complies with RSS 210 of Industry Canada
EU Declaration of Conformity Europe - This device complies with the requirements of the
R&TTE Directive 1999/5/EC with essential test suites as per standards:
EN 60950 Safety of Information Technology equipment, ETS 300 328 Technical requirements for
radio equipment and ETS 300 826 General EMC requirements for radio equipment
Electromagnetic Compatibility (EMC) USA - This equipment generates and radiates radio frequency energy and if not
installed and used in accordance with the instruction manual, may cause interference to radio communications. It has been
tested and found to comply with the limits for a Class A computing device pursuant to Subpart B of Part 15 of FCC rules,
which are designed to provide reasonable protection against such interference when operated in a commercial environment.
Operation of this equipment in a residential area is likely to cause interference in which case the user at his own expense will
be required to take whatever measures may be required to correct the interference. Shielded cables should be used with this
unit to ensure compliance with the Class A limits.
Liability - Every care has been taken in the preparation of this manual; if you detect any inaccuracies or omissions, please
inform your local Axis office, which can be found on the cover of this document. Axis Communications AB cannot be held
responsible for any technical or typographical errors and reserves the right to make changes to the product and manuals
without prior notice. Axis Communications AB makes no warranty of any kind with regard to the material contained within
this document, including, but not limited to, the implied warranties of merchantability and fitness for a particular purpose.
Axis Communications AB shall not be liable nor responsible for incidental or consequential damages in connection with the
furnishing, performance or use of this material.
Axis’ Trademarks - NetPilot, ThinWizard.
Other Trademark Acknowledgments - Adobe Acrobat Reader, Apple, Bluetooth, Ethernet, EtherTalk, IBM, LAN Manager,
LAN Server, Macintosh, Microsoft, Novell NetWare, OS/2, OS/400, AS/400, TokenTalk, UNIX, Windows, are registered
trademarks of the respective holders.
Safety Notices - Take some time to read through the safety notices before installing the AXIS 5800+ Mobile. Please observe
all safety markings and instructions when using this product.
Caution! - must be observed to avoid loss of data or damage to your equipment.
Important: - must be observed to avoid operational impairment.
Do not proceed any of the above notices, until you have fully understood the implications.
Support Services - Should you require technical assistance, please contact your Axis dealer. If your questions cannot be
answered immediately, your Axis dealer will forward your queries through the appropriate channels to ensure you a rapid
response.
If you are connected to the Internet, you can find on-line manuals, technical support, software updates, application software,
corporate information, etc. at http://www.axis.com/techsup/
AXIS 5800+ Quick Installation Guide Rev 1.0
Part No: 19072 Date: March 2002
Copyright © Axis Communications AB, 2002
AXIS 5800+ Mobile Table of Contents 3
Table of Contents
Regulatory Information . . . . . . . . . . . . . . . . . . . . . . . . . . . . . . . . . . . . . . . . . . . . . . . . . . . .2
Overview . . . . . . . . . . . . . . . . . . . . . . . . . . . . . . . . . . . . . . . . . . . . . . . . . . . . . . . . . . . . . . .4
Connecting the Hardware . . . . . . . . . . . . . . . . . . . . . . . . . . . . . . . . . . . . . . . . . . . . . . . . . .5
Automatic IP address assignment . . . . . . . . . . . . . . . . . . . . . . . . . . . . . . . . . . . . . . . . . . . . .6
Manual IP address assignment . . . . . . . . . . . . . . . . . . . . . . . . . . . . . . . . . . . . . . . . . . . . . . .7
Setting the IP address using AXIS IP JumpStarter . . . . . . . . . . . . . . . . . . . . . . . . . . . . . .7
Setting the IP address using ARP . . . . . . . . . . . . . . . . . . . . . . . . . . . . . . . . . . . . . . . . . .8
Configuring a Printer . . . . . . . . . . . . . . . . . . . . . . . . . . . . . . . . . . . . . . . . . . . . . . . . . . . . . .9
Installing Printers in Windows 2000/XP . . . . . . . . . . . . . . . . . . . . . . . . . . . . . . . . . . . . .9
Installing Printers in Windows 95/98/NT/Me . . . . . . . . . . . . . . . . . . . . . . . . . . . . . . . . .10
Installing a printer in UNIX/Linux . . . . . . . . . . . . . . . . . . . . . . . . . . . . . . . . . . . . . . . . .11
Installing a printer in Mac OS X . . . . . . . . . . . . . . . . . . . . . . . . . . . . . . . . . . . . . . . . . .12
Management and configuration . . . . . . . . . . . . . . . . . . . . . . . . . . . . . . . . . . . . . . . . . . . . .13
Using a Standard Web Browser . . . . . . . . . . . . . . . . . . . . . . . . . . . . . . . . . . . . . . . . . . .13
Using AXIS ThinWizard . . . . . . . . . . . . . . . . . . . . . . . . . . . . . . . . . . . . . . . . . . . . . . . . .14
Wireless Printing - Technical Specifications . . . . . . . . . . . . . . . . . . . . . . . . . . . . . . . . . . . .15
Wireless Printing from a Laptop . . . . . . . . . . . . . . . . . . . . . . . . . . . . . . . . . . . . . . . . . . . . .16
How to Print . . . . . . . . . . . . . . . . . . . . . . . . . . . . . . . . . . . . . . . . . . . . . . . . . . . . . . . .17
Wireless Printing from an Ericsson Mobile Phone . . . . . . . . . . . . . . . . . . . . . . . . . . . . . . . .18
Troubleshooting . . . . . . . . . . . . . . . . . . . . . . . . . . . . . . . . . . . . . . . . . . . . . . . . . . . . . . . .19
Resetting the Print Server . . . . . . . . . . . . . . . . . . . . . . . . . . . . . . . . . . . . . . . . . . . . . . . . .20
Features . . . . . . . . . . . . . . . . . . . . . . . . . . . . . . . . . . . . . . . . . . . . . . . . . . . . . . . . . . . . . .21

Overview AXIS 5800+ Mobile
4
Overview
This guide covers Windows (95, 98, NT, Me, 2000, XP), UNIX/Linux and Macintosh over
TCP/IP for cable networks and instructions for wireless printing over Bluetooth™ Wireless
Technology.
For installation instructions covering NetWare, OS/2 and Windows over
NetBIOS/NetBEUI and IPX/SPX, see the AXIS 5800+ User’s Manual, available from the
AXIS Network Product CD and the Axis web site at www.axis.com.
The instructions in this guide apply to AXIS 5800+ Mobile print servers with firmware
version 6.30 and above.
Note:
Hardware Inventory
Unpack and check all the items using the following check list. Contact your dealer if
anything is missing or damaged. All packing materials are recyclable.
The instructions in this guide are based on settings found in a new and unconfigured
AXIS 5800+. To establish this status in a previously configured AXIS 5800+, you can
perform a factory default. See Resetting the Print Server on page 20 for instructions.
Hardware Model Part Number
Print Server AXIS 5800+ Mobile 0156-001-01
Power Supply Country PS-F
part no. PS-H
part no.
PS-F and PS-H are
interchangeable Europe 18424 19108
UK 18425 19109
Australia 18428 19111
USA / Japan 18480 19110
Korea 19112
Media Title Part Number
CD AXIS Network Product CD 19114
Printed Materials AXIS 5800+ User’s Guide 19072
Optional accessories Description Part Number
Cables Parallel Printer Cable 13360
Centronics to Mini-centronics Cable 16453
Ribbons Self-adhesive velcro ribbons 13282 & 13283

AXIS 5800+ Mobile Connecting the Hardware 5
Connecting the Hardware
1. Make sure that the printer is switched off and that the power supply is disconnected from
the AXIS 5800+ Mobile.
2. Locate the serial number, found on the underside label of the AXIS 5800+, and write it
down. Example: Ser. No. 00408C1802FB
3. Connect your printer(s) to the print server’s LPT1 or LPT2 port using a printer cable. Make
sure the
Bluetooth
antenna is pointing upwards.
4. Connect your AXIS 5800+ to your network (Ethernet Connector), using a twisted pair
category 5 cable.
5. Switch on your printer(s) and make sure it is ready for use.
6. Connect the power supply to the AXIS 5800+. The Network Indicator will start flashing
when the print server is correctly connected to the network.
7. Wait 1 minute and press the test button once. A test page will be printed on the
connected printer, keep it handy during the installation. The test page will show the IP
address of the print server.
AXIS Network Product CD
The AXIS Network Product CD includes AXIS Utilities Software, Product Software, White
Papers, User Documentation, etc. It is compatible for use within all of the supported Axis
computing environments.
Notes:
• All documents presented on the CD are in PDF format.
• If Adobe Acrobat Reader 3.0 or higher is not installed on to your system, you can download
Acrobat Reader from the AXIS Network Product CD or Adobe’s web site at
http://www.adobe.com.
Ethernet Connector
10 base T & 100 base TX
Test Button
Power Supply Connector
Network Indicator
Power Indicator
Bluetooth Antenna
LPT1 LPT2

Automatic IP address assignment AXIS 5800+ Mobile
6
Automatic IP address assignment
If you are working in a Windows network that uses dynamic IP address assignment, your
print server will obtain an IP address automatically when you connect it to the network.
Follow the instructions on this page to verify the IP address:
All methods are enabled by default.
1. Open a Web browser (e.g. Internet Explorer or Netscape).
2. In the Web browser’s Location/Address field, enter the print server’s IP address (Internet
address), found on the test page printed in Connecting the Hardware on page 5, and
press Enter.
3. If the Network Print Server web page appears in your Web browser, the IP address was
set automatically when you connected the AXIS 5800+ to your network. Proceed to
Configuring a Printer on page 9.
4. If the Network Print Server web page does not appear, you need to set the print server’s
IP address manually using one of the methods described in Manual IP address assignment
on page 7.
Notes:
Methods Server Platforms Comments
Windows UNIX Mac OS X
RARP X X Downloads the IP Address to each device automatically
BOOTP X X Similar to RARP, although can operate on the entire network.
DHCP XXXAutomatic but temporary assignment of IP addresses.
Auto-IP XXXAutomatic but temporary assignment of IP addresses.
• Use a Web browser with JavaScript support
• The AXIS 5800+ supports WINS (Windows Internet Name Service), which is recommended when set-
ting the IP address using DHCP in Windows environments.
• If you are working in a WINS/DDNS network, you can log in to the print server’s web pages using its
default host name: In the Web browser’s Location/Address field, enter the default print server name
AXISxxxxxx(xxxxxxare the last six digits of the serial number, found on the print server’s underside
label). Example: If the serial number is 00408C1802FB, type AXIS1802FB and press Enter.
• DHCP, RARP and BOOTP can be used to set the IP address in UNIX, see the AXIS 5800+ User’s Manual
for details.
• If you are working in a network that does not use dynamic IP address assignment, refer to Manual IP
address assignment on page 7 to assign an IP address to the print server manually.
• See the AXIS 5800+ User’s Manual for installation instructions in a NetBIOS/NetBEUI environment.
The User’s Manual is available from the AXIS Product CD and the Axis web site at www.axis.com

AXIS 5800+ Mobile Manual IP address assignment 7
Manual IP address assignment
To establish communication with the TCP/IP network, an IP Address must be assigned to
your AXIS 5800+. Choose an appropriate method from the table below:
Note:
Setting the IP address using AXIS IP JumpStarter
Use IP JumpStarter to set the IP address. Download IP JumpStarter from the AXIS Network
Product CD or the Axis web site at www.axis.com and install it on your workstation.
1. Select the required server from the serial number list in the IP JumpStarter dialog
window.
2. From the Server menu, select Set IP Address.
3. Click the radio button that corresponds to your choice of IP setting method.
4. Click OK to save your settings.
5. Enter the server root password (by default set to pass), and click OK.
6. The AXIS 5800+ will appear in the list with the assigned IP address.
7. To access the print server’s web pages, highlight the AXIS 5800+ in the list and select
Server Home Page from the Server menu.
Note:
Methods Server Platforms Comments
Windows UNIX Mac OS X
AXIS IP
Jumpstarter XAn Axissoftware tool that setsthe IP address of each device. Refer to
Configuring a Printer on page 9.
ARP X X X Requires the IP address for each new device to be downloaded indi-
vidually. Cannot be used over routers.
Refer to Setting the IP address using ARP on page 8
If you are using host names, you can map a unique host name to the IP address. Refer to your
system manuals for instructions on how this is performed on your system.
If your print server does not appear in the serial number list, refer to the online AXIS IP JumpStarter
help files or the AXIS 5800+ User’s Manual which is available from the AXIS Network Product CD or
the Axis web site at www.axis.com

Manual IP address assignment AXIS 5800+ Mobile
8
Setting the IP address using ARP
Refer to the appropriate section below to assign an IP address to your AXIS 5800+ using
ARP:
Windows 95, 98, NT, Me, 2000, XP
Open a Command Prompt and enter the following syntax:
The host will return reply from 192.168.3.191, or a similar message. This indicates that
the address has been set and that communication is established. You are now ready to
print using FTP or Reverse Telnet.
UNIX, Mac OS X
Open a Terminal and enter the following syntax:
The host will return psname is alive, or a similar message. This indicates that the address
has been set and that communication is established. You are now ready to print using FTP
or Reverse Telnet.
Notes:
Syntax Example
1.
2.
3.
arp -s <Internet address> <Ethernet address>
ping <Internet address>
arp -d <Internet address>
arp -s 192.168.3.191 00-40-8c-10-00-86
ping 192.168.3.191
arp -d 192.168.3.191
Syntax Example
1.
2. arp -s <host name> <Ethernet address> temp
ping <host name> arp -s psname 00:40:8c:10:00:86 temp
ping psname
• The Ethernet Address is the same as the serial number, found on the print server’s underside
label. Enter the Ethernet Address in the same format as in the example above.
• The ability to set the IP address with arp and ping will only be enabled the first ten minutes
after re-booting the print server.
• When you execute the ping command for the first time, you may experience a significantly
longer response time than usual.
•Thearp command varies between different UNIX systems.
• You need root privileges on your UNIX system in order to execute the arp command and run
axinstall (refer to the AXIS 5800+ User’s Manual for more information).
• Some BSD type systems expect the host name and serial number in reverse order. Furthermore
IBM AIX systems will require the additional argument ether.
Example: arp -s ether <host name> <Ethernet Address> temp

AXIS 5800+ Mobile Configuring a Printer 9
Configuring a Printer
Follow the instructions to make network printers ready for printing in Windows,
UNIX/Linux and Macintosh. In some cases, you need to install printing software. The
software is available from the AXIS Network Product CD and the Axis web site at
www.axis.com
Refer to the table below for the appropriate method:
Before you start:
Installing Printers in Windows 2000/XP
Use the standard Windows method for adding a printer in Windows 2000/XP:
Go to Start | Settings | Printers and click the Add Printer icon to start the Add Printer
Wizard. Select the appropriate radio button:
•Local printer - If you are connecting directly to the print server (peer-to-peer
printing), select Local Printer and click Next. Click the Create a new port radio
button and select Standard TCP/IP Port from the list. Follow the Add Standard
TCP/IP Port Wizard to complete the installation (You need to know the IP address of
your print server and the model of the connected printer).
•Network printer - If your print server has already been installed by the administrator
on another computer, select Network printer and click Next. Follow the instructions
in the Add Printer Wizard to complete the installation.
If you need additional instructions, please refer to the relevant sections in the AXIS 5800+
Mobile User’s Manual which is available from the AXIS Network Product CD or the Axis
web site at www.axis.com
Proceed to Management and configuration, on page 13 for information on supported
management and configuration tools.
Operating Systems Methods
Windows 2000/XP Installing Printers in Windows 2000/XP on page 9
Windows 95/98/Me/NT Installing Printers in Windows 95/98/NT/Me on page 10
UNIX/Linux Installing a printer in UNIX/Linux on page 11
Mac OS X Installing a printer in Mac OS X on page 12
To establish communication with the TCP/IP network, you must assign an IP address to your AXIS
5800+ Mobile. Refer to Automatic IP address assignment on page 6.

Configuring a Printer AXIS 5800+ Mobile
10
Installing Printers in Windows 95/98/NT/Me
AXIS Print Monitor is the recommended tool to use for network printing in Windows
95/98/NT/Me. It allows Axis Network Print Servers to be connected in the same simple
fashion as a local printer port and once installed, it is automatically initialized upon
system startup.
Note:
1. Install the AXIS Print Monitor software which can be downloaded from the AXIS Network
Product CD or from the Axis Communications web site at http://www.axis.com
2. Go to Start | Settings | Printers and click the Add Printer icon to start the Add Printer
Wizard.
3. Select My Computer in the first dialog and click Next.
4. Click Add Port and select AXIS Port from the list and click OK.
5. Continue to follow the instructions in the Add Printer Wizard to complete the
installation using the AXIS Port Monitor online help files.
If you need additional information, refer to the AXIS 5800+ User’s Manual which is
available from the AXIS Network Product CD or the Axis web site at www.axis.com.
Proceed to Management and configuration, on page 13 for information on supported
management and configuration tools.
For peer-to-peer printing, AXIS Print Monitor must be installed on all printing clients, while it is only
necessary to install it on the server for client-server printing.

AXIS 5800+ Mobile Configuring a Printer 11
Installing a printer in UNIX/Linux
The axinstall script is an installation and management utility for Axis print servers. With
this automatic installation script, the printer connected to the Axis print server will appear
as though it is directly connected to the host print spooler. If you want to integrate your
AXIS 5800+ Mobile into your host spooler, you can use the Axis installation script
axinstall, or perform a manual integration.
Download axinstall to your host:
1. Open a Terminal and log in to the AXIS 5800+ Mobile by typing:
2. Enter root as the default user id and pass as the default Administrator password.
3. Enter the following command to download the
axinstall
script:
When downloading axinstall, make sure you use the ascii transfer mode.
4. Make the axinstall script executable.
5. Enter the following command to install the AXIS 5800+ Mobile using the
axinstall
script.
Follow the instructions that appear when the script has started.
Note:
If you need additional instructions, please refer to the relevant sections in the AXIS 5800+
Mobile User’s Manual which is available from the AXIS Network Product CD or the Axis
web site at www.axis.com
Proceed to Management and configuration, on page 13 for information on supported
management and configuration tools.
ftp <host name> or ftp <IP address>
get axinstall
sh axinstall
LPRng is not supported by axinstall

Configuring a Printer AXIS 5800+ Mobile
12
Installing a printer in Mac OS X
This section describes setting up your AXIS 5800+ for printing in the Macintosh
environment (Mac OS X).
Note:
1. Select Print Center from the Applications | Utilities folder.
2. Click Add Printer...
3. From the Printer List dialog, select LPR Printers using IP.
4. Enter the IP address or Host name of your AXIS 5800+.
5. Select Use Default Queue on Server or enter LPT1 or LPT2 in the Queue Name field.
6. Select an appropriate printer driver for your printer or, if is not available in the list, select
Generic. You can also browse for a printer driver on your computer or network by
selecting Other... from the list.
7. Click Add to complete the installation.
If you need additional instructions, please refer to the relevant sections in the AXIS 5800+
Mobile User’s Manual which is available from the AXIS Network Product CD or the Axis
web site at www.axis.com
Proceed to Management and configuration, on page 13 for information on supported
management and configuration tools.
For installation descriptions on older versions Mac OS, refer to the AXIS 5800+ User’s Manual which
is available from the AXIS Product CD or the Axis web site at http://www.axis.com

AXIS 5800+ Mobile Management and configuration 13
Management and configuration
The following table shows the management and configuration tools that are available for
the AXIS 5800+ Mobile.
Note:
Using a Standard Web Browser
Axis print servers have built-in web pages that can be accessed via a standard web
browser. Log in to the print server’s web pages to modify the settings.
Follow the instructions below to access the web pages of your AXIS 5800+ Mobile:
1. Enter the print server’s IP address (or host name) in the Location/Address field of your
Web browser. Press Enter
2. The Printer Overview page will appear. Click the admin button to access the
Administration Web pages. You will be prompted for a password.
3. Enter the default user name root and the default password pass. Click OK.
Protocols Operating Systems Configuration/Management methods
TCP/IP Windows 95/98/NT/Me/2000/XP
UNIX, Mac OS X WebBrowser,AXISThinWizard, FTP, Telnet,
SNMP, HP Web JetAdmin
IPX/SPX NetWare AXIS NetPilot, HP JetAdmin, Novell Utilities
NetBIOS/NetBEUI Windows 95/98/NT/Me/2000/XP
OS/2 AXIS NetPilot
Please refer to the AXIS 5800+ Mobile User’s Manual for a comprehensive description of the
supported configuration and management tools.

Management and configuration AXIS 5800+ Mobile
14
AXIS 5800+ Mobile Network Print Server - Printer Overview page
Using AXIS ThinWizard
The AXIS ThinWizard management tool allows you to manage and upgrade multiple
ThinServer products. You can find, monitor and upgrade your Axis print servers remotely
in any TCP/IP network using a standard Web browser.
Install AXIS ThinWizard on a designated server in your network. The AXIS ThinWizard
software is available on the AXIS Network Product CD, but can also be downloaded from
the Axis web site at http://www.axis.com/
Follow the instructions below to use AXIS ThinWizard:
1. Start a Web browser from a client in your network.
2. Enter the IP address or the host name of the server, where you installed AXIS ThinWizard.
3. Enter the user id and the password and click the Log in button.
4. The AXIS ThinWizard interface appears. Select a network group from the list. If the list is
empty, you must first create a group. In that case, just click the Network Groups button
and follow the instructions.
For more information, please refer to the AXIS ThinWizard on-line help.
Print Server’s
IP address
help
root
pass
admin
button

AXIS 5800+ Mobile Wireless Printing - Technical Specifications 15
Wireless Printing - Technical Specifications
Windows
AXIS Wireless Printing Utility supports:
Windows 98SE, Me, NT4 (service pack 6), 2000 (service pack 2), XP
See AXIS Wireless Printing Utility on page 16 for more information.
Other Platforms
The AXIS 5800+ Mobile supports all clients supporting any of the Bluetooth printing
profiles (HCRP, OPP, SPP, APP) listed below.
Bluetooth
The AXIS 5800+ Mobile complies with Bluetooth version 1.1
Bluetooth Profiles
The following implementations of Bluetooth user models are supported:
•HCRP - Hard Copy Cable Replacement Profile
•OPP - Object Push Profile
•SPP - Serial Port Profile
•APP - AXIS Print Profile (Axis proprietary)
Information is transmitted using the global Bluetooth 2.4 GHz ISM band
Note:
This section describes the requirements for wireless printing from a laptop or mobile phone. Printing
from HCRP, SPP or OPP Bluetooth 1.1 compliant clients ispossible but is not described here. Refer to the
user documentation of your client for information.

Wireless Printing from a Laptop AXIS 5800+ Mobile
16
Wireless Printing from a Laptop
System requirements
•Windows 98SE, Me, NT SP6, 2000 SP2 or XP
Hardware requirements
•Toshiba laptop with integrated
Bluetooth
support -or -
Laptop with
Bluetooth
support and client software supporting the HCRP profile - or -
Laptop with a
Bluetooth
PC Card (Motorola, Toshiba, IBM, Dell or NEC) Please refer to
the
Bluetooth
PC Card manual for installation and usage instructions.
Software requirements
•
Bluetooth
drivers from Toshiba version 1.02.09 or later - or -
Bluetooth
Software Suite version 1.09 or later
•AXIS Wireless Printing Utility version 1.20 or later
All Axis software and upgrades are available free of charge from the AXIS Product CD or
from the Axis web site at www.axis.com
Note:
AXIS Wireless Printing Utility
AXIS Wireless Printing Utility is a software tool for locating and printing to Axis wireless
print servers.
1. Download AXIS Wireless Printing Utility from the AXIS Network Product CD or from the
Axis web site at www.axis.com
2. Install AXIS Wireless Printing Utility on your laptop.
A default printer object, Axis Wireless Printer, will be automatically installed on your
laptop with a standard PCL 3 driver that is supported by most Laser-type printers.
Note:
As the AXIS 5800+ Mobile supports SPP (Serial Port Profile), you can also send a print job using
any standard SPP client.
If you have a printer that does not support PCL 3, you need to add a printer using the standard
Add Printer Wizard and connect the printer to the Axis Wireless Port. (See the AXIS Wireless
Printing Utility help file for more information)

AXIS 5800+ Mobile Wireless Printing from a Laptop 17
How to Print
1. From any Windows application (e.g. Word), select File | Print.
2. Select AXIS Wireless Printer and click OK.
3. AXIS Wireless Printing Utility will automatically start searching for wireless print servers.
The very first time AXIS Wireless Printing Utility is used, it will search for
Bluetooth
printers and display the units that were detected in the area. These printers will then be
saved and show up the next time you want to print.
4. To perform a new search (for instance in a new environment) click the Refresh button in
the AXIS Wireless Printing Utility main window.
5. Select a printer from the list and click Print.
The AXIS Wireless Printing Utility main window
Notes:
Note:
• You can always print to a selected printer during an on-going search.
• If you perform a search while a specific printer is busy printing a print job, that specific printer
will not show up in the list.
• In AXIS Wireless Printing Utility, the AXIS 5800+ default name will be AXISXXXXXX (xxxxxx are
the last six digits of the print server’s serial number, found on its underside label.
•IfAxis Wireless Printer doesn’t show up in the Printer list, you need to create it. See the AXIS
Wireless Printing Utility Help (from Start | Programs) for instructions.
• The print server’s Administrator can assign new names to the items displayed under "Name" by
logging into the print server: admin | This Print Server | General | Print Server Name.
As the AXIS 5800+ Mobile supports SPP (Serial Port Profile), you can also send a print job using any
standard SPP client.
Refresh button
DefaultBluetooth
Print Server name
Help

Wireless Printing from an Ericsson Mobile Phone AXIS 5800+ Mobile
18
Wireless Printing from an Ericsson Mobile Phone
Hardware requirements
• Ericsson mobile phone equipped with
Bluetooth
™ Wireless Technology e.g.
Ericsson R520, Ericsson T68, Ericsson T39
Printer Port
• Use the print server’s LPT1 port on a PCL4 printer for wireless printing from
a mobile phone
Printing
• Refer to the user documentation of your mobile phone for information on how to send
print jobs wirelessly
Note:
This section describes the requirements for wireless printing from a laptop or mobile phone. Printing
from HCRP, SPP or OPP Bluetooth 1.1 compliant clients is possible but is not described here. Refer to the
user documentation of your client for information.

AXIS 5800+ Mobile Troubleshooting 19
Troubleshooting
Check the following if you experience problems when trying to print:
•Makesurethe
Bluetooth
antenna of the AXIS 5800+ Mobile print server is pointing
upwards for best performance.
•
Bluetooth
Wireless Technology must be enabled on your print server - this function is
enabled by default. To enable/disable - browse to the internal web pages of your AXIS
5800+ Mobile print server. Click admin | Network settings | Detailed view | Bluetooth.
Make sure the
Bluetooth
Enabled "Yes" radio-button is selected.
• When printing from a mobile phone, make sure you are printing to a PCL4 printer. Refer
to your printer manufacturer to check that you are using a PCL4 printer.
• When printing from a mobile phone, make sure that the printer is connected to the AXIS
5800+ Mobile LPT1 port. Refer to Connecting the Hardware on page 5 for information on
the location of the LPT1 port on the print server.
• Make sure that the
Bluetooth
devices are located within 10 meters (approx. 30 feet) from
each other, closer if there are solid objects in between.
• Make sure that your printer is connected to the correct printer port of the AXIS 5800+
Mobile. Go to admin | Network settings | Detailed view | Bluetooth and make sure the
physical port you have chosen to print from is selected: LPT1 or LPT2 for printing from a
laptop and LPT1 for printing from a mobile phone.

Resetting the Print Server AXIS 5800+ Mobile
20
Resetting the Print Server
Follow the instructions below to reset the AXIS 5800+ parameters to the default values
(Factory Default):
Important:
1. Remove the external power supply to switch off the AXIS 5800+.
2. Press and hold down the test button, while you plug the external power supply back in.
Continue to hold down the test button, until the network indicator begins to flash at one
second intervals. This should take at least 5 seconds.
3. Release the test button and wait until the network indicator flashes at least five times.
4. Press and hold the test button again until the network indicator remains constantly lit.
5. Restart the AXIS 5800+ by disconnecting and reconnecting the external power supply.
The print server is now reset to the factory default settings.
A Factory Default will reset the internal settings of the print server to default and should be performed
with caution. All parameters except Node Address (NODE_ADDR), Internet Address (IP_ADDR) and
DHCP enabled or disabled (DHCP_ENABLE.) are reset.
Other manuals for 5800
1
Table of contents
Other Axis Print Server manuals

Axis
Axis AXIS 570 User manual

Axis
Axis OfficeBasic USB Wireless User manual

Axis
Axis 1650 Manual

Axis
Axis 5570e User manual

Axis
Axis 540 series User manual

Axis
Axis Print Server 5470e User manual

Axis
Axis 27978R1 User manual

Axis
Axis Stylus Color 740 User manual

Axis
Axis M7014 User manual

Axis
Axis 540 series User manual