Axis StorPoint HD User manual


Preface
AXIS StorPoint HD 1 User’s Manual
Preface
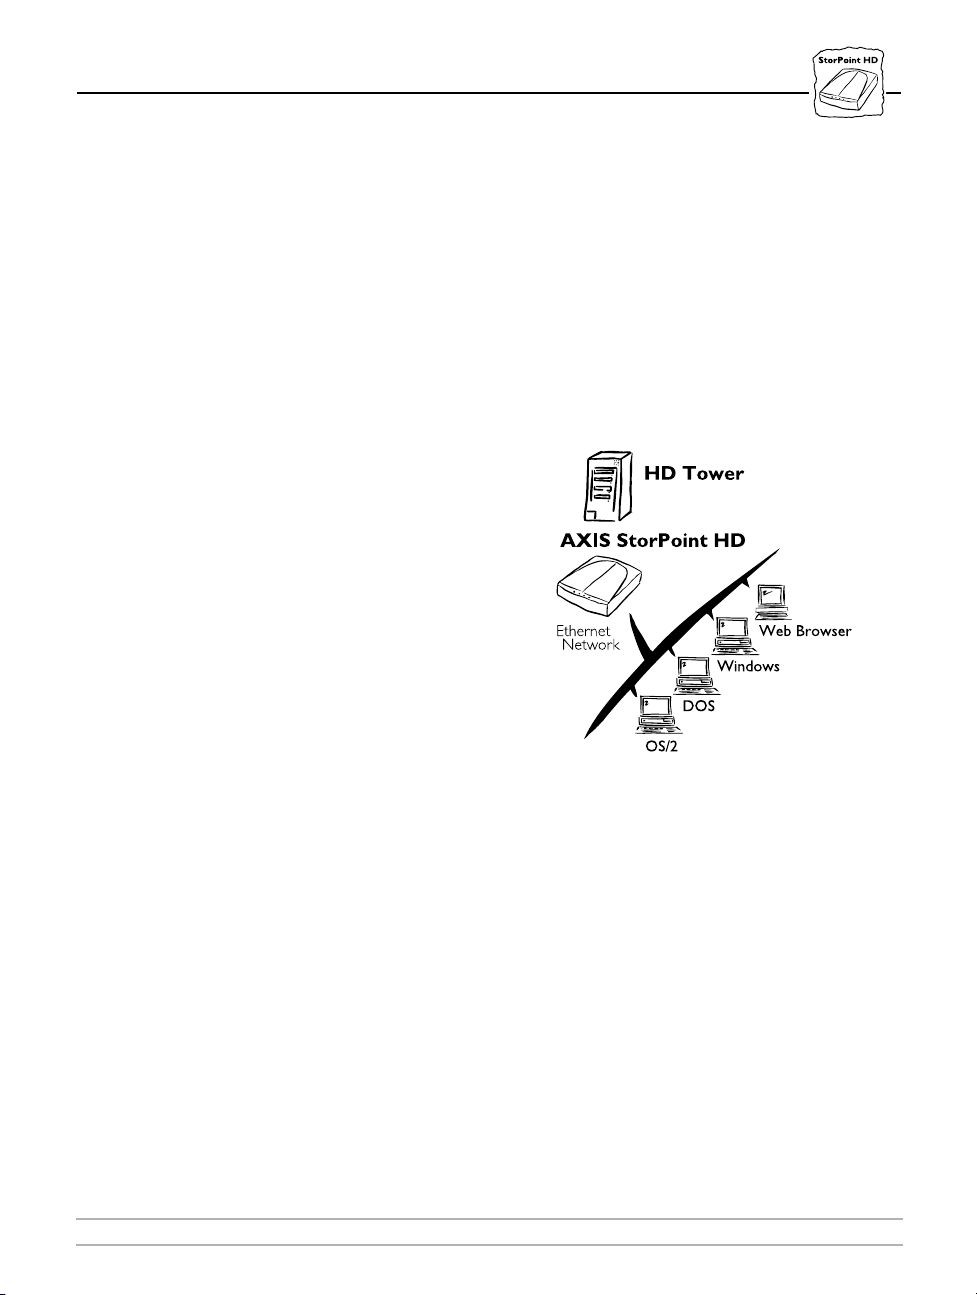
Thank you for purchasing an AXIS StorPoint HD. This product is developed to make the storage
and retrieval of information available to all users on an Ethernet network.
About Axis
Axis Communications is dedicated to provide innovative solutions for network connection of
computer peripherals and is a leader in its field. Since the start in 1984, it has been one of the
fastest growing companies in the market. The headquarters are located in Lund, Sweden, with
subsidiaries in Beijing, Boston, Hong Kong, London, Paris, Shanghai, Singapore and Tokyo.
Axis Communications has a distributor network operating in more than 60 countries world wide,
marketing five product lines:
Network Storage Servers Multi-protocol Storage Servers provide a flexible and cost efficient
solution to network storage. The AXIS StorPoint HD is available as a stand alone, a tower
module and as a self-contained total solution with four Jaz drives. All models are Ethernet
versions.
Network CD-ROM Servers Multi-protocol CD-ROM servers provide a flexible and cost
efficient solution for sharing CD-ROMs across the network. The AXIS StorPoint CD is available
as standalone and tower module in both Ethernet and Token Ring versions. Additionally the
tower module is available in both a 100Mbit and dual SCSI version.
Network Print Servers Axis’ high-performance multi-protocol printer servers allow users to
share printers regardless of platform or network speed. With both Ethernet, Fast Ethernet and
Token ring support, AXIS printer servers feature easy installation and Web management,
Windows based NetPilot utility and easy upgrade with FLASH memory. The 570 models enables
IBM mainframe and AS/400 applications to print native SNA.
Internet Camera Servers The AXIS NetEye 200 Internet Camera attaches directly to an
Ethernet network and supports TCP/IP and Internet related protocols, acting as a Web server.
The AXIS NetEye 200 allows users to take and view snapshots and even reconfigure camera
settings over the network or Internet using a standard Web browser.
IBM Mainframe and S/3x – AS/400 Printer Interfaces These products include a wide
range of plug-in interfaces and standalone products such as the AXIS Cobra+, AXIS 330/370
Cobra, AXIS HP MIO, the AXIS AFP IPDS-to-PostScript converter and the AXIS AFP
MIO/IOP IPDS-to-PCL converters.

Preface
AXIS StorPoint HD 2 User’s Manual
About this Manual
This manual applies to the standalone version AXIS StorPoint HD, the HD tower modules
AXIS StorPoint HD/4 and the AXIS StorPoint HD/T, with software release 1.00 and to
subsequent releases until otherwise notified.
This manual is also available in electronic on-line format, together with more information at the
Axis Web site.
The manual consists of six sections and additional appendices:
1. Introduction – The AXIS StorPoint HD, how it works, where to use it and the main
features.
2. Basic Installation – How to connect your AXIS StorPoint HD to the network and how to
connect Iomega Jaz drives to your server.
3. Network Configuration – How tointegrateAXISStorPoint HDin yournetworkenvironment.
4. Accessing Networked Jaz drives – How to access Jaz drive data.
5. Security Management – How to manage the access control functions.
6. StorPoint HD Configuration – How to configure the AXIS StorPoint HD.
Every care has been taken in the preparation of this manual; if you detect any inaccuracies or
omissions, please inform us at the address on the back cover. Axis Communications AB cannot be
held responsible for any technical or typographical errors and reserves the right to make changes
in this manual and to the product without prior notice.

Preface
AXIS StorPoint HD 3 User’s Manual
Electromagnetic Compatibility (EMC) Notices
USA This equipment generates, uses, and can radiate radio frequency energy and if not installed and used in accordance with the
instruction manual, may cause interference to radio communications. It has been tested and found to comply with the limits for a
Class A computing device pursuant to Subpart B of Part 15 of FCC rules, which are designed to provide reasonable protection against
such interference when operated in a commercial environment. Operation of this equipment in a residential area is likely to cause
interference in which case the user at his own expense will be required to take whatever measures may be required to correct the
interference. Shielded cables should be used with this unit to ensure compliance with the Class A limits.
Europe This digital equipment fulfils the requirements for radiated emission according to limit B of EN55022/1994 and the
requirements for immunity according to EN50082-1/1992 residential, commercial and light industry. (Compliance is not valid for
unshielded network cables.)
Trademark Acknowledgments
IBM, AIX, OS/2, OS/2 Warp, Novell, NetWare, Netscape, Apple, Macintosh, LAN Server, LAN Manager, DOS, Microsoft,
Windows, Windows for Workgroups, Windows NT and Windows 95, Internet Explorer, Netscape Navigator, Iomega and Jaz are
registered trademarks of the respective holders.
AXIS StorPoint HD User’s Manual Revision 1.0
Part No: 15544 Dated: June 1997
Copyright © Axis Communications AB, 1996-1997

Preface
AXIS StorPoint HD 4 User’s Manual

Table of Contents
AXIS StorPoint HD 5 User’s Manual
Table of Contents
Section 1 Introduction . . . . . . . . . . . . . . . . . . . . . . . . . . . . . . . . . . . . . . . . . . . . . . . . . . 7
The AXIS StorPoint HD . . . . . . . . . . . . . . . . . . . . . . . . . . . . . . . . . . . . . 7
How it Works . . . . . . . . . . . . . . . . . . . . . . . . . . . . . . . . . . . . . . . . . . . . . 8
Where to Use it . . . . . . . . . . . . . . . . . . . . . . . . . . . . . . . . . . . . . . . . . . . 9
Features and Benefits . . . . . . . . . . . . . . . . . . . . . . . . . . . . . . . . . . . . . . 10
Section 2 Basic Installation . . . . . . . . . . . . . . . . . . . . . . . . . . . . . . . . . . . . . . . . . . . . . . 11
Unpacking . . . . . . . . . . . . . . . . . . . . . . . . . . . . . . . . . . . . . . . . . . . . . . . 11
Step 1 - Installing StorPoint HD/T in a Tower . . . . . . . . . . . . . . . . . . . 13
Step 2 - Connecting Jaz Drives to the StorPoint HD . . . . . . . . . . . . . 15
Step 3 - Connecting the StorPoint HD to the Network . . . . . . . . . . . 17
Section 3 Network Configuration . . . . . . . . . . . . . . . . . . . . . . . . . . . . . . . . . . . . . . . . 19
Microsoft and IBM Network Operating Systems . . . . . . . . . . . . . . . . . 20
TCP/IP . . . . . . . . . . . . . . . . . . . . . . . . . . . . . . . . . . . . . . . . . . . . . . . . . . 20
Section 4 Accessing Networked Jaz Drives . . . . . . . . . . . . . . . . . . . . . . . . . . . . . . . . . 25
The StorPoint HD File System . . . . . . . . . . . . . . . . . . . . . . . . . . . . . . . 26
Access Points . . . . . . . . . . . . . . . . . . . . . . . . . . . . . . . . . . . . . . . . . . . . 30
Microsoft and IBM Network Operating Systems (SMB) . . . . . . . . . . . 31
Web browsers (HTTP) . . . . . . . . . . . . . . . . . . . . . . . . . . . . . . . . . . . . . 43
Section 5 StorPoint HD Configuration . . . . . . . . . . . . . . . . . . . . . . . . . . . . . . . . . . . . . 47
Configuration using a Web Browser . . . . . . . . . . . . . . . . . . . . . . . . . . 48
AXIS WinPoint Installation . . . . . . . . . . . . . . . . . . . . . . . . . . . . . . . . . . 51
Configuration using AXIS WinPoint . . . . . . . . . . . . . . . . . . . . . . . . . . . 53
Configuration using a Text Editor . . . . . . . . . . . . . . . . . . . . . . . . . . . . 55
Section 6 Security Management . . . . . . . . . . . . . . . . . . . . . . . . . . . . . . . . . . . . . . . . . . 57
StorPoint HD Access Rights . . . . . . . . . . . . . . . . . . . . . . . . . . . . . . . . . 58
Security Management using a Web Browser . . . . . . . . . . . . . . . . . . . . 62
Security Management using AXIS WinPoint . . . . . . . . . . . . . . . . . . . . 66
Security Management using a Text Editor . . . . . . . . . . . . . . . . . . . . . . 68
Security Management in Microsoft and IBM Network Environments . 71

Table of Contents
AXIS StorPoint HD 6 User’s Manual
Appendix A Troubleshooting . . . . . . . . . . . . . . . . . . . . . . . . . . . . . . . . . . . . . . . . . . . . . . 73
Diagnostics . . . . . . . . . . . . . . . . . . . . . . . . . . . . . . . . . . . . . . . . . . . . . . 74
The Front Panel Indicators . . . . . . . . . . . . . . . . . . . . . . . . . . . . . . . . . . 76
Errors when Accessing the StorPoint HD . . . . . . . . . . . . . . . . . . . . . . 78
Jaz Disk Software will not run . . . . . . . . . . . . . . . . . . . . . . . . . . . . . . . 78
Restoring Factory Default Settings . . . . . . . . . . . . . . . . . . . . . . . . . . . . 79
Appendix B The Config File . . . . . . . . . . . . . . . . . . . . . . . . . . . . . . . . . . . . . . . . . . . . . . . 81
Appendix C Updating the Software and Extending the Memory . . . . . . . . . . . . . . . . . . . 83
Appendix D Technical Specifications . . . . . . . . . . . . . . . . . . . . . . . . . . . . . . . . . . . . . . . . . 85
Appendix E How To Contact Axis . . . . . . . . . . . . . . . . . . . . . . . . . . . . . . . . . . . . . . . . . 87

Section 1: Introduction
AXIS StorPoint HD 7 User’s Manual
Section 1 Introduction
The AXIS StorPoint HD
The AXIS StorPoint HD connects Iomega Jaz drives to Ethernet
networks. All users on the network can share the information and
storage capabilities of any Iomega Jaz Disk inserted into a connected
drive.
Standalone version The standalone version, the AXIS StorPoint HD, is available in an
Ethernet version. Up to 7 Iomega Jaz drives can be connected via its
SCSI connector.
HD Tower module
versions
The AXIS StorPoint HD/T has the same functionality as the
standalone version, but the enclosure and connectors are designed to
allow it to plug into a Iomega tower. The AXIS StorPoint HD/4 is a
self-contained tower system consisting of one StorPoint HD and four
Iomega Jaz drives.
AXIS StorPoint HD/T
AXIS StorPoint HD AXIS StorPoint HD/4
StorPoint HD
(Standalone)
StorPoint HD/T
(Tower module)
StorPoint HD/4
(Tower module)
Ethernet yes yes yes
Max. directly
connected drives 77 4

Section 1: Introduction
AXIS StorPoint HD 8 User’s Manual
How it Works
The AXIS StorPoint HD is connected as a node in an Ethernet
network. To the network the StorPoint HD acts as a file server. This
means that it is independent of other file servers, i.e. the
communication takes place directly between the network client and
the StorPoint HD. This results in high performance, reliability and
independence of other equipment.
The file server independent approach makes the installation quick and
convenient. In most environments the physical connection to the
network is the only installation required prior to starting work with
the StorPoint HD. No software needs to be installed on clients or file
servers. Your computer will see the StorPoint HD as another network
file server, and it is accessed using the standard commands used in
your network operating system.
AXIS WinPoint utility software allows you to easily locate and manage
your StorPoint HDs; it is available from the AXIS web site.
The StorPoint HD also supports the HTTP protocol, which means
that it can be reached on the Internet/intranet using a Web browser,
e.g. Netscape Navigator or Microsoft Internet Explorer. This means
that the administration of the StorPoint HD can be carried out from
any workstation environment using a Web browser.
At the Axis Web site, http://www.axis.com/, you can download more
advanced technical information. You can also download on-line
manuals and the latest versions of the StorPoint HD software and
software utilities. Alternatively your Axis dealer will provide you with
the assistance or information you require.
AXIS StorPoint HD is covered with a best-of-breed warranty and
service program. If you take advantage of the Axis User Group free
membership you can obtain a 5 year warranty, free software upgrades
and support. In the USA and Canada there is also a 24 hour unit
replacement service and a 90 days money back guarantee. Access to the
Axis User Group is via the StorPoint HD home page, or see the Axis
Web site for more details.
World
Wide
Web

Section 1: Introduction
AXIS StorPoint HD 9 User’s Manual
Where to Use it
The AXIS StorPoint HD can be used simultaneously from Windows,
OS/2, DOS, and Internet/intranet. It supports SMB over
NetBIOS/NetBEUI, and SMB over NetBIOS/TCP/IP. It also
supports HTTP over TCP/IP which means that the server can be
reached from any environment using a Web browser.
With the Microsoft and
IBM network systems
The StorPoint HD is
easily accessed using
the SMB protocol.
In Internet/Intranet
Environments
The StorPoint HD is
accessed from Web
browsers in any
environment using HTTP
over TCP/IP.

Section 1: Introduction
AXIS StorPoint HD 10 User’s Manual
Features and Benefits
File Server
Independence
The StorPoint HD comes pre-installed with all the network
functionality required. It does not rely on intermediate
communication with a file server.
Ease of Use The StorPoint HD is designed to be as easy as possible to install and
use. It uses SMB, so there is no need to learn any special software to
access the server.
Flexibility It simultaneously supports Microsoft and IBM Network Operating
systems, and Internet/intranets. StorPoint HDs can connect Iomega
Jaz drives and towers.
Web Server
Functionality
Being a Web server means that it can be accessed from any Web
browser, e.g. Netscape Navigator, MS Internet Explorer, etc. The
support includes configuration, management and disc access.
Speed By using a 32 bit RISC processor and cache memory expandable up to
32 Mbytes, throughput of up to 1050 kbytes/s.
Security Hard Disk access can be restricted by setting up password protection.
It is also possible to limit the number of simultaneous users of any
Hard Disk to comply with license agreements.
Maintenance New software can easily be downloaded via the network to the
StorPoint HD’s Flash memory.
Network
Management
The StorPoint HD supports the Simple Network Management
Protocol, SNMP. Management can also be done from a Web browser.

Section 2: Basic Installation
AXIS StorPoint HD 11 User’s Manual
Section 2 Basic Installation
Unpacking
Unpack and inspect all parts for damage. Contact your dealer if
anything is missing. All packaging materials are recyclable.
The standard delivery contains the following:
❏StorPoint HD:
❏AXIS StorPoint HD User’s Manual (Part no: 15544).
❏AXIS StorPoint HD Quick Installation Guide (Part no: 15542).
❏AXIS Product Guide (Part no: 14412).
❏AXIS User Group registration leaflet (Part no:15119).
Included with the standalone version StorPoint HD only:
❏Power supply (12V DC):
Included with the tower module StorPoint HD/T:
❏4 screws (StorPoint) plus 2 screws & washers (Connection board).
❏Ribbon cable.
❏Network connection board.
Optional accessories:
❏SCSI-2 to 50 pin Centronics style cable (Part no: 14259).
❏SCSI-2 to SCSI-2 cable (Part no: 14260).
❏PLD (Needed for memory expansion) (Part No. 15296).
Part no: StorPoint HD StorPoint HD/T StorPoint HD/4
Ethernet 0077-1 0078-1 0078-2
Part no: PS-C Part no: PS-C
Europe 14235 USA 14256
UK 14236 Japan 14257
Australia 14258

Section 2: Basic Installation
AXIS StorPoint HD 12 User’s Manual
The standalone version AXIS StorPoint HD.
To install, follow step 2 to 3 outlined on the following pages.
The tower plug-in module AXIS StorPoint HD/T.
To install, follow step 1 to 3 outlined on the following pages.
The tower module AXIS StorPoint HD/4
To install, follow step 3 outlined on the following pages

Section 2: Basic Installation
AXIS StorPoint HD 13 User’s Manual
Step 1 - Installing StorPoint HD/T in a Tower
The AXIS StorPoint HD/T is intended to be installed in standard
tower systems. The dimensions of the StorPoint HD/T are the same as
for standard drives, i.e. 5.25 inch half-height.
If not already installed when delivered, follow the steps below:
1. Prepare the tower system for the installation, e.g. by removing the
chassis.
2. Record the serial number of the StorPoint HD/T. You will need this
number during the network configuration described in “Section 3
- Network Configuration”. The number is found on the underside
label of the server.
3. Slide the StorPoint HD/T into the tower.
4. Fix the StorPoint HD/T with the four screws supplied. Use the
upper or lower holes depending on typeof tower and mounting. See
figure below.
Caution 0❏The length of the screws must not exceed 0.2 inch (5 mm). If they
do, the internal components of the StorPoint HD/T may be
damaged.

Section 2: Basic Installation
AXIS StorPoint HD 14 User’s Manual
5. Attach power to the StorPoint HD/T. The power connector is a
standard PC 4 pin power connector (12 and 5 V DC), as shown in
the picture below. Hence, the power supply available in the tower
system can also be used to supply the StorPoint HD/T.
6. Connect the external network connector board to the StorPoint
HD/T using the ribbon cable. The external board includes both
network connectors and the Push button, as shown in the picture
below.The boardisintendedtobemounted onthe backofthe tower
system. The mounting plate on the board fits into the standard
Centronics cut-out available on most towers.
Step 2 - Connecting Jaz Drives to the StorPoint HD
Up to 7 SCSI Jaz drives can be serviced by a single StorPoint HD. The
drives are connected using the appropriate SCSI cable, which must be
ordered separately.
Power supply connector
External network connector board
(Ethernet version shown)

Section 2: Basic Installation
AXIS StorPoint HD 15 User’s Manual
Before you begin •Standalone version only: Make sure that the power supply (PS-C,
12 V DC) included in the delivery is marked with the correct
mains voltage.
• Always make sure the power is not connected to the StorPoint
HD or any of the Jaz drives when making changes to the SCSI
chain. The SCSI bus may be damaged if you connect or
disconnect any units when the power is on.
Connecting the
StorPoint HD
1. Connect the SCSI cable to the SCSI connector on the StorPoint
HD.
2. Connect the SCSI cable to the Jaz drive(s).
3. Set the SCSI address of the Jaz drive(s). Each connected drive must
have a unique SCSI address. SCSI addresses 0 through 6 may be
used. Seethe Jaz drive documentation forinstructions on how to set
the address. The SCSI address of the StorPoint is 7 and cannot be
changed. The Dual SCSI version has two separate buses with
addresses 0 through 6 available on each.
SCSI The SCSI bus allows seven Jaz drives to be connected to
the StorPoint HD. Each unit on the SCSI bus must have
a unique SCSI address. To work properly, the bus has to
be electrically terminated at both ends.
SCSI connector
(StorPoint HD)
SCSI connector
(StorPoint HD/T)

Section 2: Basic Installation
AXIS StorPoint HD 16 User’s Manual
4. Connect a SCSI terminator to the last drive in the SCSI chain. All
other external Jaz drives must not be terminated. For instructions,
see the Jaz drive documentation. The StorPoint has built-in SCSI
termination which is always switched on, therefore the server must
be physically located at the end of the chain.
The SCSI bus must be electrically terminated at both ends.
5. Power up the StorPoint HD.
Standalone version only: First connect power to all Jaz drives and
switch them on. Then connect the external power supply to the
StorPoint HD.
HD tower module only: Simply switch the power on to the whole of
the HD tower.
The StorPoint HD indicators will flash during power-on and self-test.
When the STATUS indicator stops flashing and remains unlit, the
StorPoint HD is ready for use.
Now, continue with Step 3 on the next page to connect your
StorPoint to the network.
Axis StorPoint HD server
termination on.
Not terminated Not terminated Last drive terminated

Section 2: Basic Installation
AXIS StorPoint HD 17 User’s Manual
Step 3 - Connecting the StorPoint HD to the Network
Before you begin • Make sure that your network is ready to accept a new node.
• Any network configuration should always involve the Network
Administrator.
Ethernet The standalone Ethernet version of the AXIS StorPoint HD is
equipped with 10baseT and 10base2 connectors.
The HD tower module, on the other hand, is equipped with 10baseT
and AUI connectors, which means that 10base2, 10base5 or optical
fibre connectivity is achieved by using an external transceiver.
Network connectors
Network connectors
Power supply
connector
(Ethernet version shown)

Section 2: Basic Installation
AXIS StorPoint HD 18 User’s Manual
Connecting to
your Network
To connect the StorPoint to your network follow these steps:
1. Turn off the StorPoint, i.e. unplug the power supply.
2. Connect the network cable to the appropriate connector.
3. Power up the StorPoint HD.
Standalone version only: First connect power to all Jaz drives and
switch them on. Then connect the external power supply to the
StorPoint HD.
HD tower module only: Switch on the HD tower.
The basic installation is now completed. Proceed with the
configuration according to sections 3, 4, 5 and 6

Section 3: Network Configuration
AXIS StorPoint HD 19 User’s Manual
Section 3 Network Configuration
This section contains configuration information for the following
operating system environments:
• Microsoft & IBM Network Operating Systems . . . . . . . .page 20
• TCP/IP . . . . . . . . . . . . . . . . . . . . . . . . . . . . . . . . . . . . . .page 20
Note: ❏To use the StorPoint in the TCP/IP environment you must first
set its IP address. This can be done from within the TCP/IP
environment, as described on page 20, or by using AXIS
WinPoint, see “Setting the StorPoint’s Internet Address using AXIS
WinPoint” on page 54.
Other manuals for StorPoint HD
1
This manual suits for next models
2
Table of contents