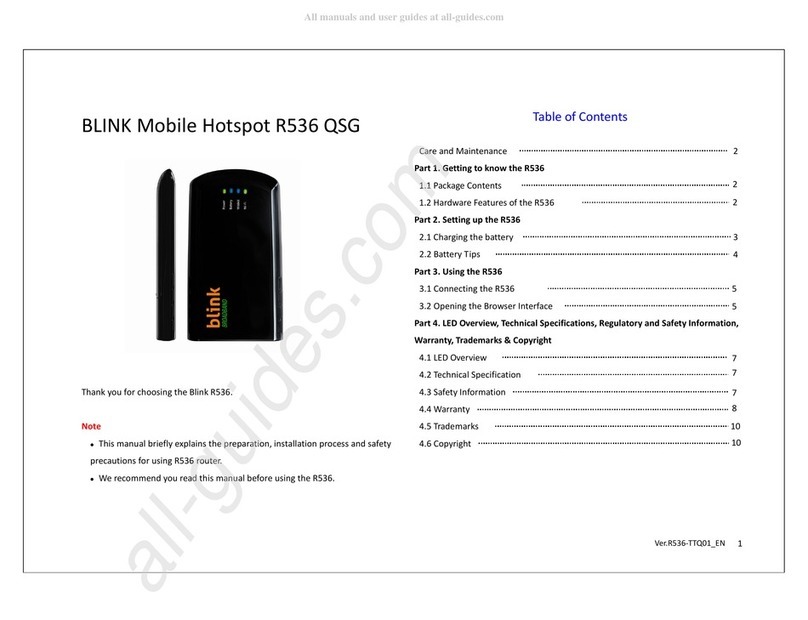
B-Link R536 User manual

Page 1 / 28 R536 _TTUG01_EN
BLINK Mobile Hotspot R536 User Guide
Blink R536 User Guide
http://www.blinkbroadband.tt
Version 1.0 / 12.14.2010
ⓒ 2010 BLI K . BLI K and the logo are trademarks of BLI K. Other marks are the property of their respective
owners.
Table of Contents
Intro . . . . . . . . . . . . . . . . . . . . . . . . . . . . . . . . . . . . . . . . . . . . . . . . . . . . . . . . . . . . . . . . . . . . . . . . . . . . . . . . . . . 2
Part 1: Using the R536 . . . . . . . . . . . . . . . . . . . . . . . . . . . . . . . . . . . . . . . . . . . . . . . . . . . . . . . . . . . . . . . . . . . . 2
Charging the R536 Device. . . . . . . . . . . . . . . . . . . . . . . . . . . . . . . . . . . . . . . . . . . . . . . . . . . . . . . . . . . . . . . . 2
Opening the rowser Interface. . . . . . . . . . . . . . . . . . . . . . . . . . . . . . . . . . . . . . . . .. . . . . . . . . . . . . . . . . . . 2
Home . . . . . . . . . . . . . . . . . . . . . . . . . . . . . . . . . . . . . . . . . . . . . . . . . . . . . . . . . . . . . . . . . . . . . . . . . . . . . . . . . . 8
WiMAX . . . . . . . . . . . . . . . . . . . . . . . . . . . . . . . . . . . . . . . . . . . . . . . . . . . . . . . . . . . . . . . . . . . . . . . . . . . . . . . . .8
Status . . . . . . . . . . . . . . . . . . . . . . . . . . . . . . . . . . . . . . . . . . . . . . . . . . . . . . . . . . . . . . . . . . . . . . . . . . . . . . .9
Configurations. . . . . . . . . . . . . . . . . . . . . . . . . . . . . . . . . . . . . . . . . . . . . . . . . . . . . . . . . . . . . . . . . . . . . . . . 9
Network. . . . . . . . . . . . . . . . . . . . . . . . . . . . . . . . . . . . . . . . . . . . . . . . . . . . . . . . . . . . . . . . . . . . . . . . . . . . . . . .10
Local Network. . . . . . . . . . . . . . . . . . . . . . . . . . . . . . . . . . . . . . . . . . . . . . . . . . . . . . . . . . . . . . . . . . . . . . . . 10
Network Address Server . . . .. . . . . . . . . . . . . . . . . . . . . . . . . . . . . . . . . . . . . . . . . . . . . . . . . . . . . . . . . . . .11
WiFi. . . . . . . . . . . . . . . . . . . . . . . . . . . . . . . . . . . . . . . . . . . . . . . . . . . . . . . . . . . . . . . . . . . . . . . . . . . . . . . . . . . 11
Status. . . . . . .. . . . . . . . . . . . . . . . . . . . . . . . . . . . . . . . . . . . . . . . . . . . . . . . . . . . . . . . . . . . . . . . . . . . . . . . 11
asic . . . . . . . . . . . . .. . . . . . . . . . . . . . . . . . . . . . . . . . . . . . . . . . . . . . . . . . . . . . . . . . . . . . . . . . . . . . . . . . 12
Secure Profile . . . . . . . . . . . . . . . . . . . . . . . . . . . . . . . . . . . . . . . . . . . . . . . . . . . . . . . . . . . . . . . . . . . . . . . 14
Trusted MAC Filtering . . . . . . . . . . . . . . . . . . . . . . . . . . . . . . . . . . . . . . . . . . . . . . . . . . . . . . . . . . . . . . . . 14
Advanced . . . . . . . . . . . . . . . . . . . . . . . . . . . . . . . . . . . . . . . . . . . . . . . . . . . . . . . . . . . . . . . . . . . . . . . . . . . . . .15
Firewall . . . . . . . . . . . . . . . . . . . . . . . . . . . . . . . . . . . . . . . . . . . . . . . . . . . . . . . . . . . . . . . . . . . . . . . . . . . . 15
Traffic Control . . . . . . . . . . . . . . . . . . . . . . . . . . . . . . . . . . . . . . . . . . . . . . . . . . . . . . . . . . . . . . . . . . . . . . . 17
Management. . . . . . . . . . . . . . . . . . . . . . . . . . . . . . . . . . . . . . . . . . . . . . . . . . . . . . . . . . . . . . . . . . . . . . . . 19
Firmware Upgrade. . . . . . . . . . . . . . . . . . . . . . . . . . . . . . . . . . . . . . . . . . . . . . . . . . . . . . . . . . . . . . . . . . . .20
Help . . . . . . . . . . . . . . . . . . . . . . . . . . . . . . . . . . . . . . . . . . . . . . . . . . . . . . . . . . . . . . . . . . . . . . . . . . . . . . . . . . 21
Part 2: Warranty . . . . . . . . . . . . . . . . . . . . . . . . . . . . . . . . . . . . . . . . . . . . . . . . . . . . . . . . . . . . . . . . . . . . . . . .21
Part 3: FAQ. . . . . . . . . . . . . . . . . . . . . . . . . . . . . . . . . . . . . . . . . . . . . . . . . . . . . . . . . . . . . . . . . . . . . . . . . . . . .23
Part 4: lossary. . . . . . . . . . . . . . . . . . . . . . . . . . . . . . . . . . . . . . . . . . . . . . . . . . . . . . . . . . . . . . . . . . . . . . . . .25

Page
2
/
28
R536
_
TTUG01
_EN
Thank you for choosing the link R536 portable router.
This device doesn’t need wires, cables, or software to
configure it through your Web browser.
This guide describes the browser Interface that allows you to configure the R536. For information about setting up
your device, device maintenance and care, etc., consult the printed Quick Start Guide that came with your device.
We recommend you read this manual before using the R536.
Part 1
Using the R536
C arging t e R536 Device
Note
The battery should be fully charged before using the R536 for the first time. We recommend an initial charge time
of approximately 3 hours. When fully charged, a solid green light will appear in ‘Battery’ display on the device.
A
red
or orange light indicates you need to re-charge. Included in your R536 package is an USB Power Adapter.
Opening t e Browser Interface
How to Connect to the R536
1. Turn on the R536 and ensure your WiFi is enabled on your PC or laptop. You can view your available wireless
networks by going through the control panel, network connections or system tray (lower right hand corner of your
screen).
2. Select “ LINK XXXX” as your wireless network.

Page 3 / 28 R536 _TTUG01_EN
Note
The last 4 digits, ‘XXXX’ of the SSID are the last four digits of your MAC address. You can find the MAC address of
your R536 on the label under the battery.
3. Click Connect.
The default security for the R536 is WEP 64-bit. The default security key is “12345”. Enter “12345” to continue
connecting to the R536. If you would like to change this security setting after you have activated your device, see
the WiFi > Security setting of this document for changing security settings.

Page 4 / 28 R536 _TTUG01_EN
4. When connected to the R536 you will see the connection as ‘ LINK_R536 XXXX’ – as shown below.

Page
5
/
28
R536
_
TTUG01
_EN
5. efore proceeding, ensure your wireless connection properties are set to ‘Obtain an IP Address Automatically’
Please right-click on your wireless network, select properties as shown below, then TCP/IP properties as shown in
the second image below.

Page
6
/
28
R536
_
TTUG01
_EN

Page
7
/
28
R536
_
TTUG01
_EN
6. Next, open your web browser to http://192.168.5.1 or http://WIMAX_AP.hotspot This will bring you to the web
user interface of the R536.

Page 8 / 28 R536 _TTUG01_EN
Click Login button and type the User name and Password. Default is admin/admin.

Page 9 / 28 R536 _TTUG01_EN
Your R536 uses a browser interface to configure the device.
The browser interface lets you:
View the status of aspects of your network.
Set up Security Configuration, MAC filtering, Port filtering, and DMZ etc.
Set up a hotspot to up to five connections to your device without having to share your network name and
network key.
Home
The Home screen is the first screen you see after logging in to the browser interface. It is the main point
of entry for all your work in the browser interface. The menu bar runs horizontally along the top of the browser
interface. It shows how many users or WiFi embedded devices are connected. It also displays information about
your device’s connection strength and battery level.
WiMAX
The WiMAX menu allows you to set up.

Page
10
/
28
R536
_
TTUG01
_EN
Status
The R536 comes pre-configured with the information required to connect to the TSTT mobile network.
It will not normally require any additional configuration to the basic settings unless you are using the device behind
a corporate firewall, and this may require the appropriate proxy server settings to be modified.
The WiFi Status displays the following information:
Network Name (SSID)
Security Profile in use
The device’s IP address and MAC Address
Configurations
When enabled, ‘Auto Connection’ will connect to the network automatically when it’s turned on.
Network

Page
11
/
28
R536
_
TTUG01
_EN
Local etwork
Ex)
This Local Network gives you following status information:
IP address and mask of the wireless browser interface
MAC Address of the device
URL Address in use
You can change the URL Address and click Apply.
Now, you can open the web browser with
http://192.168.5.1 or http://blinkmobile.hotspot.
etwork Address Server

Page
12
/
28
R536
_
TTUG01
_EN
This menu allows you to select or modify DHCP Server and DHCP IP Range.
DHCP Server: Enabling the DHCP server allows the device to automatically assign a local IP address to a new
device joining your network (such as a wireless printer or an additional laptop). When the DHCP
server is disabled, you will have to assign static IP addresses to all devices on your network.
WiFi
The WiFi menu allows you to view status information for your WiFi network and mobile hotspot router.
Status
The WiFi Status menu gives you following status information:
Network Name (also known as SSID)

Page
13
/
28
R536
_
TTUG01
_EN
Security profile in use
Users(clients) currently connected to the device
MAC Address and IP address.
Basic
This menu allows you to modify Network Name and Secure Profile.
Network Mode: The type of wireless networking you are currently using. You can choose either mode among
802.11b only, 802.11g only, 802.11b/g mixed mode. The default mode is 802.11b/g mixed mode.
Network Name (SSID) : You can change or input new Network Name (SSID). The default SSID is
LINK_R536 XXXX.
If you check Don’t broadcast SSID box, WiFi clients who try to access this link R536 WiMAX
mobile hotspot can not see this SSID.
Frequency (Channel) : The radio channel is divided into Auto and Manual. This should be usually set to Auto
and left unchanged. Available channels are Auto and 1 to 11.
Secure Profile : The type of security in use. The default Secure Profile is WEP-Secure (WEP-64bit).
You can modify(add/edit/delete) clicking View button right down side of the corner.

Page 14 / 28 R536 _TTUG01_EN
Click View button. The ‘WiFi Secure Profile Configuration’ window appears as below.
a. Click Add button to add new Profile Name.
Input new Profile Name you want and choose the Security Method and Encryption (Data encryption
mode).
After making the passphrase, click Apply.
Ex)
There’s new Secure profile that you made in asic Setup menu as below.
b. Click Edit button to edit the Secure Profile. Choose the Secure Profile that you want to edit and change
the Security Method. Make new passphrase you want and click Apply button.

Page 15 / 28 R536 _TTUG01_EN
Secure Profile
a. Click Add button to add new Profile Name.
b. Click Edit button to edit the Secure Profile.
c. Click Delete button to delete the Secure Profile that you made.
Trusted MAC Filtering
This allows you to limit access to your device to only those devices with a specified MAC address (a unique code
assigned to hardware such as network adapters).

Page
16
/
28
R536
_
TTUG01
_EN
Finding the MAC Address
The MAC Address is also known as a hardware or physical address for a device, usually a network adapter.
It consists of six pairs of numbers and letters (for example, 00:21:9 :1C:64:34). You can view the MAC address for
any device connected to the R536 device in the WiFi Clients section of the WiFi Status screen.
Note
When you enable this feature for the first time, ensure you add your wireless MAC first, then click Apply.
Advanced
Firewall
Port Filtering
Port filtering allows you to conserve bandwidth by preventing non-business applications from accessing the
internet, and to prevent applications such as online games from accessing the Internet.

Page 17 / 28 R536 _TTUG01_EN
a. Enter the application value in the Name, Port, and choose the Protocol. Click Add.
b. Select the rule you want to allow access to the Internet listed in the Rule List box. Click Update
.
VPN Passthrough
VPN Passthrough is required if you are going to connect to a VPN. (often required on corporate systems.)
Note
L2TP/IPSEC/PPTP: VP tunneling protocols.

Page
18
/
28
R536
_
TTUG01
_EN
Traffic Control
Port Forwarding
Port forwarding allows designated users or applications to reach specified servers, such as FTP and DNS servers,
on your computer. Also, some online games require incoming access to work properly.
a. Enter the value in the Name, Port, and Destination IP Address and choose the Protocol. Click Add.
b. Select the rule in the Rule List box. Click Update
.
DMZ
DMZ is a host on the internal network that has all ports exposed, except those ports otherwise forwarded. The
Mode is set to be enabled and enter the local static IP address.

Page
19
/
28
R536
_
TTUG01
_EN
You can check your IP address going to Start-Run as below.
Enter “ipconfig”. Input your IP Address in the DMZ Configuration box above and click Apply.

Page
20
/
28
R536
_
TTUG01
_EN
Management
You can create a new administrator’s name and password. Also you configure your device to apply ackup &
Restore , Power Saving, and Factory Default in this category.
Note.
When you change the default settings, keep you new information in a safe place.
Account
Create a new Administrator’s name and password. Click Apply.
ackup & Restore
The ackup Configuration allows you to backup your settings save to your PC, memory stick, CD, etc. And the
Restore Configuration allows you to restore previously saved/backed up settings.
Other manuals for R536
2
Other B-Link Wireless Access Point manuals
Popular Wireless Access Point manuals by other brands

Cisco
Cisco Aironet LAP1522 Hardware installation guide

Ruckus Wireless
Ruckus Wireless T710 Quick setup guide

Baicells
Baicells Nova442i installation guide

Watchguard
Watchguard AP125 Hardware guide

EnGenius
EnGenius EnStation5-ACv2 user manual

Weidmüller
Weidmüller Value Line IE-WL-VL-AP-BR-CL-EU Hardware installation guide