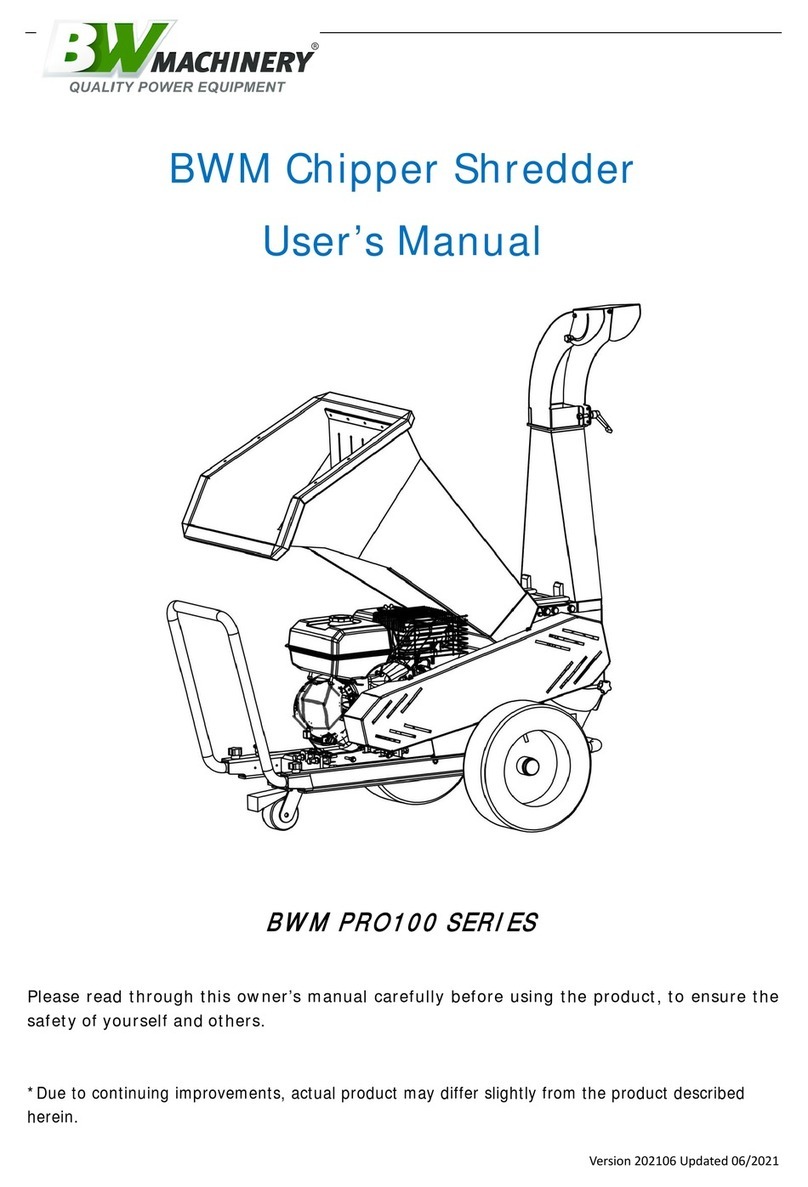
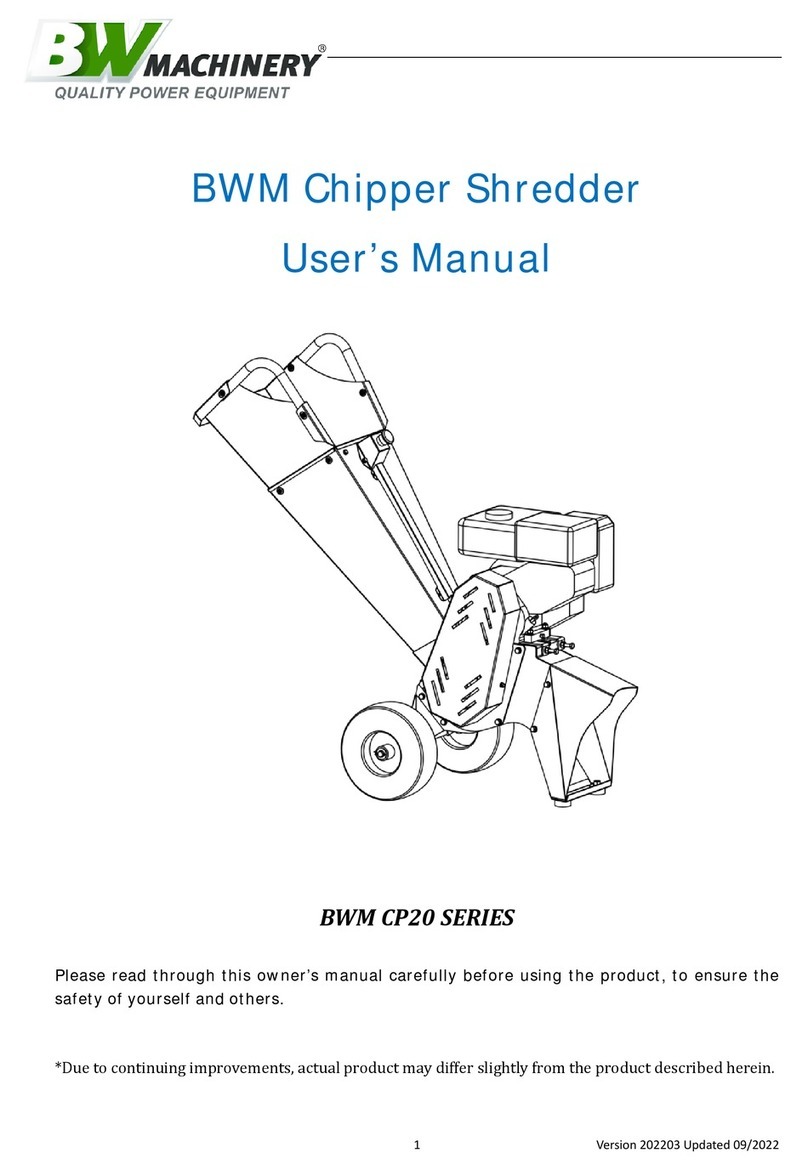
B.W. Machinery BWM PRO 100 Series User manual

Chipper Shredder
User’s Manual
BWM PRO 100 SERIES
Please read through this owner’s manual carefully before using the product, to insure the safety of yourself
and others.
*Due to continuing improvements, actual product may differ slightly from the product described herein.

Index
1. Safety Instructions ................................................................................. 1
2. Technical Features ................................................................................. 2
3. Installation Steps.................................................................................... 3
4. Operating Instructions........................................................................... 6
4.1 Starting Machine:.............................................................................. 6
4.2 Chipping:............................................................................................ 7
4.3 Emergency Button:............................................................................ 8
4.4 Blocking of The Rotor:...................................................................... 8
4.5 Stopping Machine: ............................................................................ 9
5. Basic Maintenance ................................................................................. 9
5.1 Lubricating Oil .................................................................................. 9
5.2 Chipper Parts Regularly Checking ............................................... 10
5.3 Changing the blades:....................................................................... 10
5.4 Changing engine oil:........................................................................ 11
6. Transport and Storage......................................................................... 11
7. Troubleshooting.................................................................................... 12
8. Spare Parts Diagram............................................................................ 13

BWM PRO 100 Series Manual Book V1.01
B.W. Machinery
1
1. Safety Instructions
1. The machine must not be used in any other way than described in the manual.
2. Use only original equipment and spare parts. If non genuine parts are used, there
is increased risk of danger.
3. When using the machine, you are responsible for any third party in the area where
the machine is in operation. Never use the machine in the presence of others,
especially children or animals.
4. Do not allow minors to operate the machine.
5. The machine may only be lent to users who are familiar with operating the
machine. Always keep the safety and operation manual attached with the
machine.
6. Do not remove or add other parts after finishing installing the machine, e.g.
removing the belt guard.
7. Check all the safety parts in their proper positions and remember to tighten all
bolts and nuts before starting the machine.
8. Choose a flat work place. Machine can only be used in the outdoors or in well
ventilated areas. It should be kept away from flammable and explosive objects.
9. When working with the machine wear close-fitting work clothes, sturdy work
gloves, eye protector, ear muffs, dust proof mask and anti-skid shoes .
10. Before and after using the machine, proper maintenance is necessary. This could
avoid some incidents, and extend the life of the machine.
11. Before using the machine, please read the carefully the instructions and
understand well.
Failure to comply with instructions could result in personal injury and/or damage to


BWM PRO 100 Series Manual Book V1.01
B.W. Machinery
2
product or property.
12. Safety labels
Read the instructions carefully before operating.
DANGER, pay attention to safety.
Keep hands away from the rolling parts.
Beware of cutting the fingers.
Keep a safe distance from the working machine.
Beware of objects thrown out of the machine.
2. Technical Features
Model: BWM PRO 100
Max. Chipping Capacity: 100mm
Chipping Fineness: Granulated detrital
Function: Chipping leaves, branches, crop straw and farming feeds and etc.
Max. Blade Speed: 2450rpm
Engine Type: OHV 4-stroke Briggs & Stratton or Honda

BWM PRO 100 Series Manual Book V1.01
B.W. Machinery
3
Displacement: 420cc
Max Output: 13HP/3600rpm
Fuel Volume:6.5L
Oil Volume: 1.1L (10W-30)
Starting System: Recoil (Optional electric start)
Fuel Type: Unleaded petrol
Efficacy: 1000-5000kg/h
Principal axis rotation direction: anticlockwise
Packing Size: 1180mm×750mm×1280mm
Attachment: User’s manual and toolkit
Note:
❖The above maximum chipping capacity data comes from the testing of chipping
bamboo with a 90% moisture content and paulownia with a 80% moisture content.
Due to the range raw materials to be chipped and the difference in hardness and
moisture content, the actual maximum chipping capacity may differ from the
above data.
❖The above blade maximum speed is achieved with the engine running at the
maximum output.
3. Installation Steps
Step1 —Wheels and Front support wheel ( make sure the bolts are bottom up)

BWM PRO 100 Series Manual Book V1.01
B.W. Machinery
4
Step2 —Handle assembly
Step3 —Feeding hopper assembly

BWM PRO 100 Series Manual Book V1.01
B.W. Machinery
5
Step4 —How to use lower output
- Take off the high output
- Cover the high output when it is moved. Put cover 4 and tighten the bolts 3
- Release knob 1 and open low deflector. screw off bolts 2. HOLD THE INSIDE

BWM PRO 100 Series Manual Book V1.01
B.W. Machinery
6
PLATE AND PULL UP, MAKE THE PLATE OFF THE POSITION PIN(5). THEN
PULL OUT THE BOTTOM SIDE.
if you want to use the high output for loading, you can close the low output in return.
In the process of installation, do not place hands or any other body parts within
a radius of cutter wheel rotary. Do not touch the blades with your hands or any
other body parts. Considering the heavy weight of the machine, please do not try to
install it by oneself in case of the possible injury. All bolts, nuts and washers have
been fixed on the machine in the factory, please remove them before assembly
and put back on the machine at the same locations.
4. Operating Instructions
4.1 Starting Machine:
❖Before starting the engine, make sure the correct engine oil is added first (see
chapter 5.4). Ensure the machine is on stable level ground.

BWM PRO 100 Series Manual Book V1.01
B.W. Machinery
7
❖Turn switch to ‘ON’ position.
❖Turn the choke lever to position and open the fuel valve.
❖Make sure emergency switch is off.
❖Pull the starting cord until the engine starts. Push the choke lever off.
❖Turn the throttle lever to fastest position. (must use highest speed while chipping)
❖If engine is hot, it is not necessary to use the choke when restarting.
4.2 Chipping:
Always wear gloves and safety goggles when using the shredder.
Make sure use highest speed while chipping, when chipping branches with a big
diameter, always feed the bigger ends into the chute first.
Advice: The hardness of the wood depends on the wood type, the time between
pruning and chipping and how dry the branches are. The machine performs best if the
branches are chipped right after pruning.
If the engine is slowing down while chipping, reduce the feeding rate of the branches.
Blunt blades may also be the problem. (see chapter 5.3 on how to change the blades)
If the machine becomes jammed, stop the engine immediately. Remove the blocked
materials and restart the engine. (see chapter 4.4)

BWM PRO 100 Series Manual Book V1.01
B.W. Machinery
8
4.3 Emergency Switch:
The emergency stop button is located on left side of chassis. Push the emergency stop
button by pressing the button and the engine will stop immediately. To release the
emergency stop button, turn the red button. Within half a turn, the button is released
(pump up)and you can restart the machine
4.4 Rotor Jammed:
The rotor may be blocked due to blunt blades, incorrect usage of emergency button
while chipping, machine not completely emptied before stopping the engine, or
engine has stopped due to overloading of the chipper with too much branches and etc.
Please follow the steps below to unblock the rotor.
❖Switch off the engine, and remove the feeding chute.
❖Remove the bearing cover holder from the bearing housing by loosening one bolt.
❖Turn the rotor shaft in counter clockwise direction by rotor spanner.
❖Use a branch or a stick to remove any blocked materials in the drum. Do not use
your hands.

BWM PRO 100 Series Manual Book V1.01
B.W. Machinery
9
4.5 Stopping Machine:
Make sure the machine is completely emptied before stopping the engine (otherwise
rotor may be jammed when using it for next time).
Tips: Keep the machine running for another 1-2 minute after feeding the last branch,
then turn the throttle lever slowly to the lowest position before stopping the engine.
5. Basic Maintenance
Allow the machine to cool down before making any inspections or any
maintenance. (If the machine is equipped with an electrical start system, remove the
key from the contact and disconnect the battery)
5.1 Lubricating Oil
The main shaft bearing needs lubricating oil. After a period of usage, it is necessary
to grease the bearing. How often to lubricate is determined by the environment and
the frequency of usage. The bearing needs to be greased after 50 hours of operation as
insufficient lubricating oil can damage the bearing.

BWM PRO 100 Series Manual Book V1.01
B.W. Machinery
10
5.2 Chipper Parts Regularly Checking
Check all the parts regularly (1-2 times a month) including bearing, blades, belt and
etc. Make sure the blades are sharp. Replace the blades as soon as the chipping
performance begins to deteriorate. Blunt blades will impact working efficiency and
cause damage to the machine.
5.3 Changing the blades:
❖Stop the engine (Put the on/off switch in the “off” position) and disconnect the
safety switch cable.
❖Remove the feeding chute. (Two people required)
❖Put a block of wood into the hole (see Fig.1). Pull the starter cord some more
until the rotor is blocked. Now it is safe to unscrew blade bolts. Always use
gloves when handling the blades.
❖Remove the blade anvil (see Fig.2).
❖Give a really good clean of chipper blades and anvil and make sure there is no
dirt.
❖Put anvil back to the chipper and screw on (make sure to keep anvil bolts loose as
you need to adjust it later).
❖Use thread locker on blade bolts (make sure you don't use too much, normally
just a small dip) and screw on the blades (make sure all bolts are tightened).
❖After installing the blades, check the gap between the blades and the anvil. The
gap should be no smaller than 0.5mm and not bigger than 1mm. (See Fig.3)
FIG 2
FIG 1
FIG 3

BWM PRO 100 Series Manual Book V1.01
B.W. Machinery
11
5.4 Changing engine oil:
Unscrew the bolt to drain the engine oil. Screw the bolt on and add new engine oil.
Tips:
For Honda GX390 model, add 1.1 litre (1100mL) of genuine Honda 10W30
engine oil.
For Briggs & Stratton 13.5HP model, add 1.1 litre (1100mL) of genuine Briggs &
Stratton SAE30 engine oil.
6. Transport and Storage
1. To move the machine around, grab onto the handle firmly and push or drag the
machine. Pay extra attention when moving around rough terrain or sloping areas.
2. To transport the unit, the discharge chute can be removed and the unit will fit into a
van or utility vehicle, tied in an upright position. Ensure the unit is never tipped to its
side when engine oil is filled as it can flood the engine.
3. For storage, keep the machine out of reach of children. Store the machine in a well
ventilated place. Drain the fuel into a petrol tank if not using is for an extended period
of time.

BWM PRO 100 Series Manual Book V1.01
B.W. Machinery
12
7. Troubleshooting
Problem
Solution
1
Engine cannot be started
Read the engine users’ manual, check the fuel
ON-OFF, see if it’s ON, check if gets enough
fuel and engine oil, check the emergency stop
button.
2
Engine stops midway
Check if the engine is stopped by overloading,
see if there is any blockage in the chipping
chute. Check the emergency stop button.
3
Rotor blocked
Stop the machine, and remove the chute and the
cap of bearing, turn the shaft of roller with a
spanner to clear the blocked material (see
chapter 4.4)
4
Strange noise
Stop the machine, check if the fastener got
loose, if not, let the professionals to check.
5
Blunt blades
Bring the machine to a servicing centre for
sharpening/replacement of blades. Or see
chapter 5.3
6
Damaged belt
Open the belt cover and change the belt.
7
Chipped material too coarse
Need to adjust blade anvil. The gap should be
no smaller than 0.5mm and not bigger than
0.95mm. (see chapter 5.3)

BWM PRO 100 Series Manual Book V1.01
B.W. Machinery
13
8. Spare Parts Diagram
No
Name
Qty
No
Name
Qty
1
Engine
1
17
Bolt M8 x 16
2
2
Engine pulley
1
18
Washer M8
6
3
Engine shaft bush
1
19
Knob M10
2
4
Anvil
1
20
Rotor latch
1
5
Belt cover
1
21
Bolt M6 x 12
1
6
Belt cover holder
1
22
Nylon locknut M6
2
7
Belt cover support
1
23
Spring washer M6
6
8
Belt cover back holder
2
24
Washer 6
10
9
Frame
1
25
Bolt M6×16
7
10
Pulley washer
1
26
Bolt M10×55
4
11
Handle
1
27
Hinge pin
2
12
Bolt M8×25
5
28
Large washer M8
2

BWM PRO 100 Series Manual Book V1.01
B.W. Machinery
14
13
Spring washer M8
7
29
Cushion block
4
14
Bolt M10×30
8
30
V-Belt
2
15
Nylon locknut M10
12
31
Nut
2
16
Washer M10
24
No
Name
Qty
No
Name
Qty
1
Bumper
1
12
Wheel
2
2
Circlip 20
2
13
Front wheel
1
3
Chassis
1
14
Wheel cover
2
4
Nut M10
8
15
Emergency switch cover
1
5
Washer M10
12
16
Emergency switch
1
6
Bolt M10×60
4
17
Knob
1
7
Spring washer M10
4
18
Connector
1
8
Bolt M10×30
4
19
Spring washer M6
2
9
Bolt M8×25
2
20
Bolt
2
10
Washer M8
2
21
Washer M6
2
11
Spring washer M8
2

BWM PRO 100 Series Manual Book V1.01
B.W. Machinery
15
No.
Name
Qty
No.
Name
Qty
1
Rotor housing
1
17
Washer pulley
1
2
Low output cover
1
18
Bolt M8 x 25
1
3
Low output deflector
1
19
Washer M8
9
4
Washer deflector
2
20
Bolt M6 x 16
4
5
Bearing
2
21
Spring washer M6
4
6
Bearing cover holder
1
22
Washer M6
4
7
Rotor housing cover
1
23
Bolt M10 x 25
8
8
Rotor
1
24
Spring washer M10
19
9
High output cover
1
25
Washer 10
21
10
Anvil
1
26
Bolt M8 x 16
8
11
Blade
2
27
Inner hex bolt M10 x 20
5
12
Blade bolts
10
28
Knob M10
2
13
Rotor protector
2
29
Washer M8
4
14
Bearing cover
1
30
Large washer M8
2
15
Rotor pulley
1
31
Circlip M30
1
16
Key 10×8×30
1
32
Bolt M10×16
6

BWM PRO 100 Series Manual Book V1.01
B.W. Machinery
16
No
Name
Qty
1
Hopper
1
2
Washer rubber flap
1
3
Rubber flap
1
4
Bolt M6 x 20
5
5
Washer M6
10
6
Nut M6
5
No.
Name
Qty
1
Output
1
2
Bolt M6×16
2
3
Washer M6
4
4
Lock nut M6
2
5
Deflector
1
8
Knob M6
1

BWM PRO 100 Series Manual Book V1.01
B.W. Machinery
18
Table of contents
Other B.W. Machinery Paper Shredder manuals