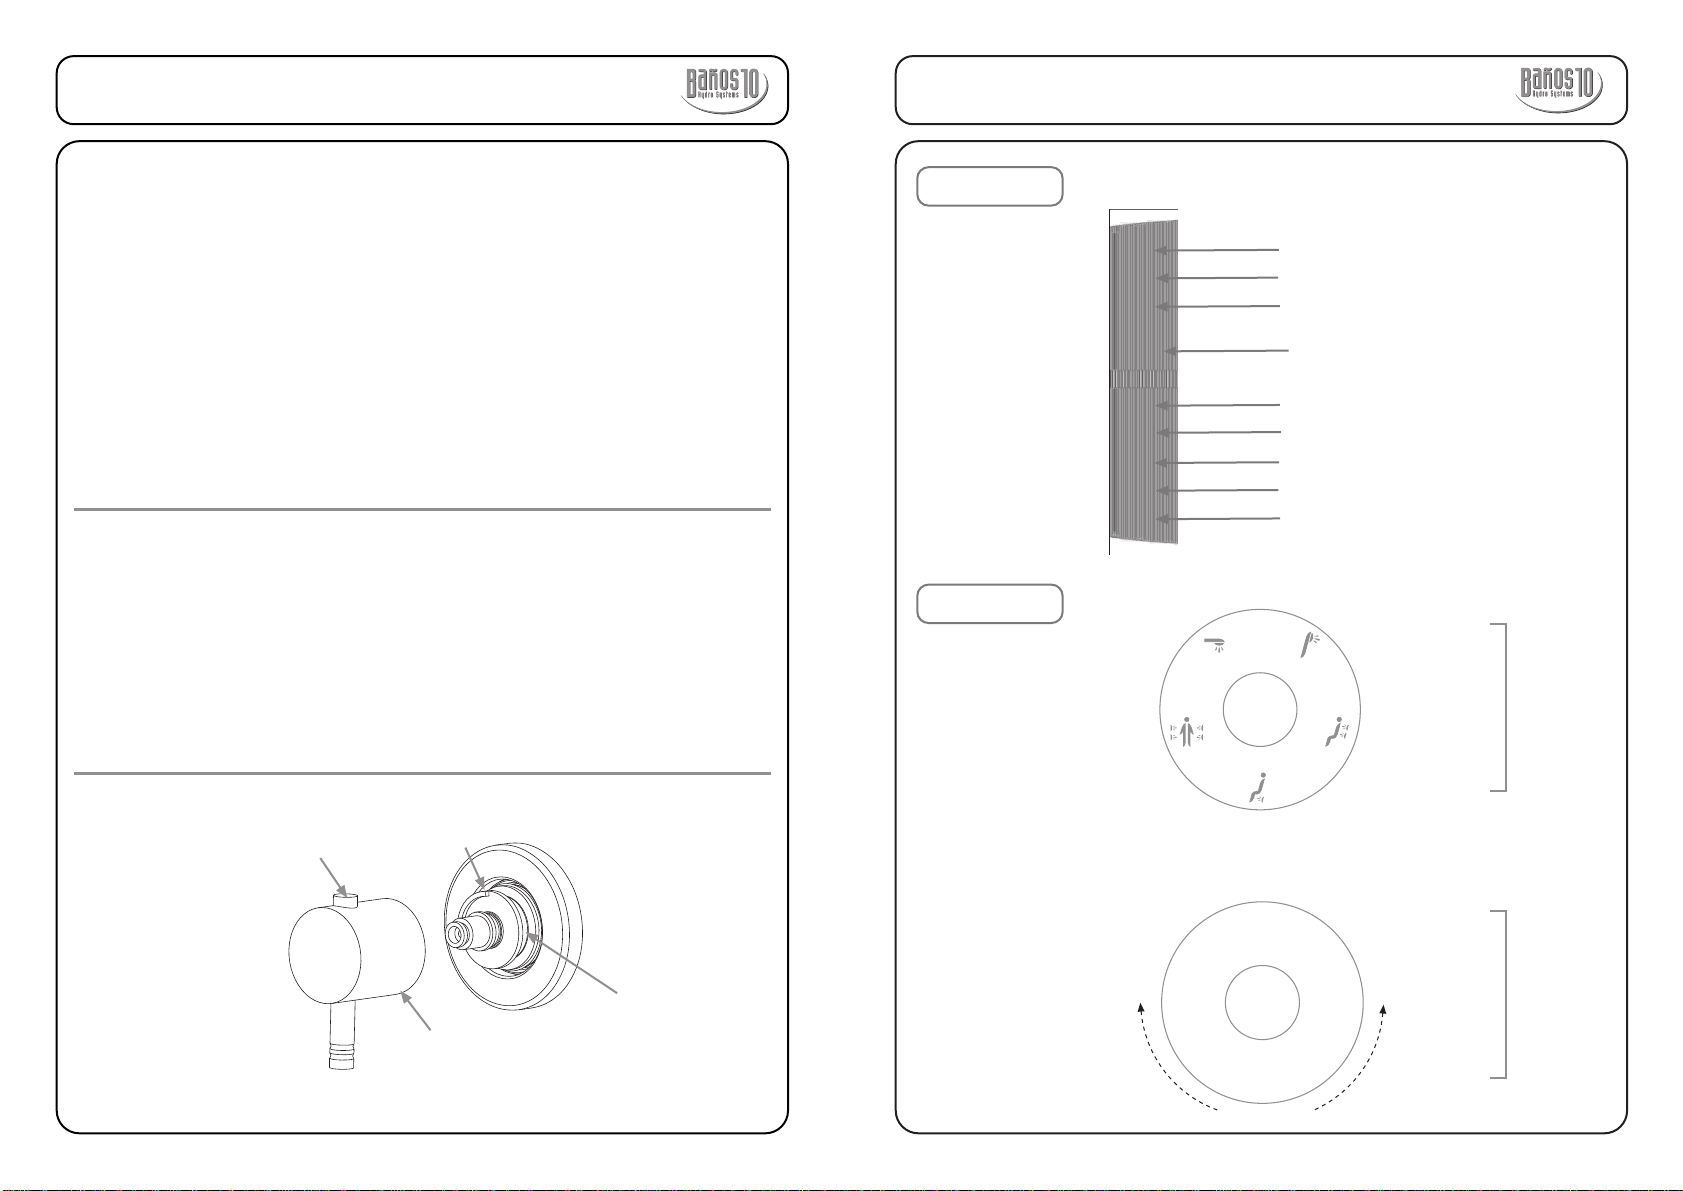
5. EXPLICACION DE LAS FUNCIONES
6. ANTES DE LA INSTALACIÓN
Este producto es de muy fácil instalación si se siguen fielmente las instrucciones
que le detallamos en los manuales de instalación.
Antes de conectar las tomas de agua de la cabina a la red de la vivienda, debe
sangrar las tuberías para eliminar las impurezas, tales como gravillas o
partículas metálicas que pueden obstruir con el tiempo la grifería y propiciar
su mal funcionamiento.
IMPORTANTE: Una incorrecta instalación del producto por olvido u omisión
del SANGRADO pertinente de las tuberías de agua, invalida la garantía y se
cobrará la intervención del Servicio Técnico al cliente.
Verifique la correcta conexión de las tomas de agua: para ello tenga en cuenta
que el latiguillo de agua caliente proveniente de la grifería esté conectado a
la salida de agua caliente de la instalación y el latiguillo de agua fría a la toma
de agua fría de la instalación. Si se intercambia la conexión de los latiguillos,
el mezclador termostático se averiará y será necesario sustituírlo (este tipo
de avería no está cubierto por la garantía).
NOTAS SOBRE EL CALENTADOR: Es indispensable que el calentador instalado
tenga un caudal mínimo de 15 litros/minuto para un correcto funcionamiento
y sea capaz de suministrar agua a 55ºC min.
Se aconseja que el calentador, teniendo un controlador de caudal y temperatura,
se posicione para un uso mayor de agua caliente y menor caudal.
Esto es necesario, sobre todo, cuando hay mucho recorrido desde el calentador
hasta la conexión con la grifería, pues repercute directamente sobre el tiempo
de respuesta desde que se manda la orden de abertura de agua caliente hasta
que ésta llega al mezclador termostático.
Cuando el calentador carezca del mencionado controlador de
caudal/temperatura, o bien éste no se comporte correctamente porque tiene
cierta antigüedad, puede presentarse el problema que la mezcla de agua
fría/caliente no se realice correctamente.
Esto es debido a que cuando la grifería termostática solicita agua caliente, el
calentador funciona al máximo hasta que la termostática cierra el consumo de
agua caliente (una de las ventajas de la termostática es el ahorro de agua
caliente) llegando a apagar la llama del calentador.
Para evitar el envío de flujos intermitentes de agua fría/caliente, es necesario
aumentar en el punto óptimo el regulador de caudal/temperatura del calentador.
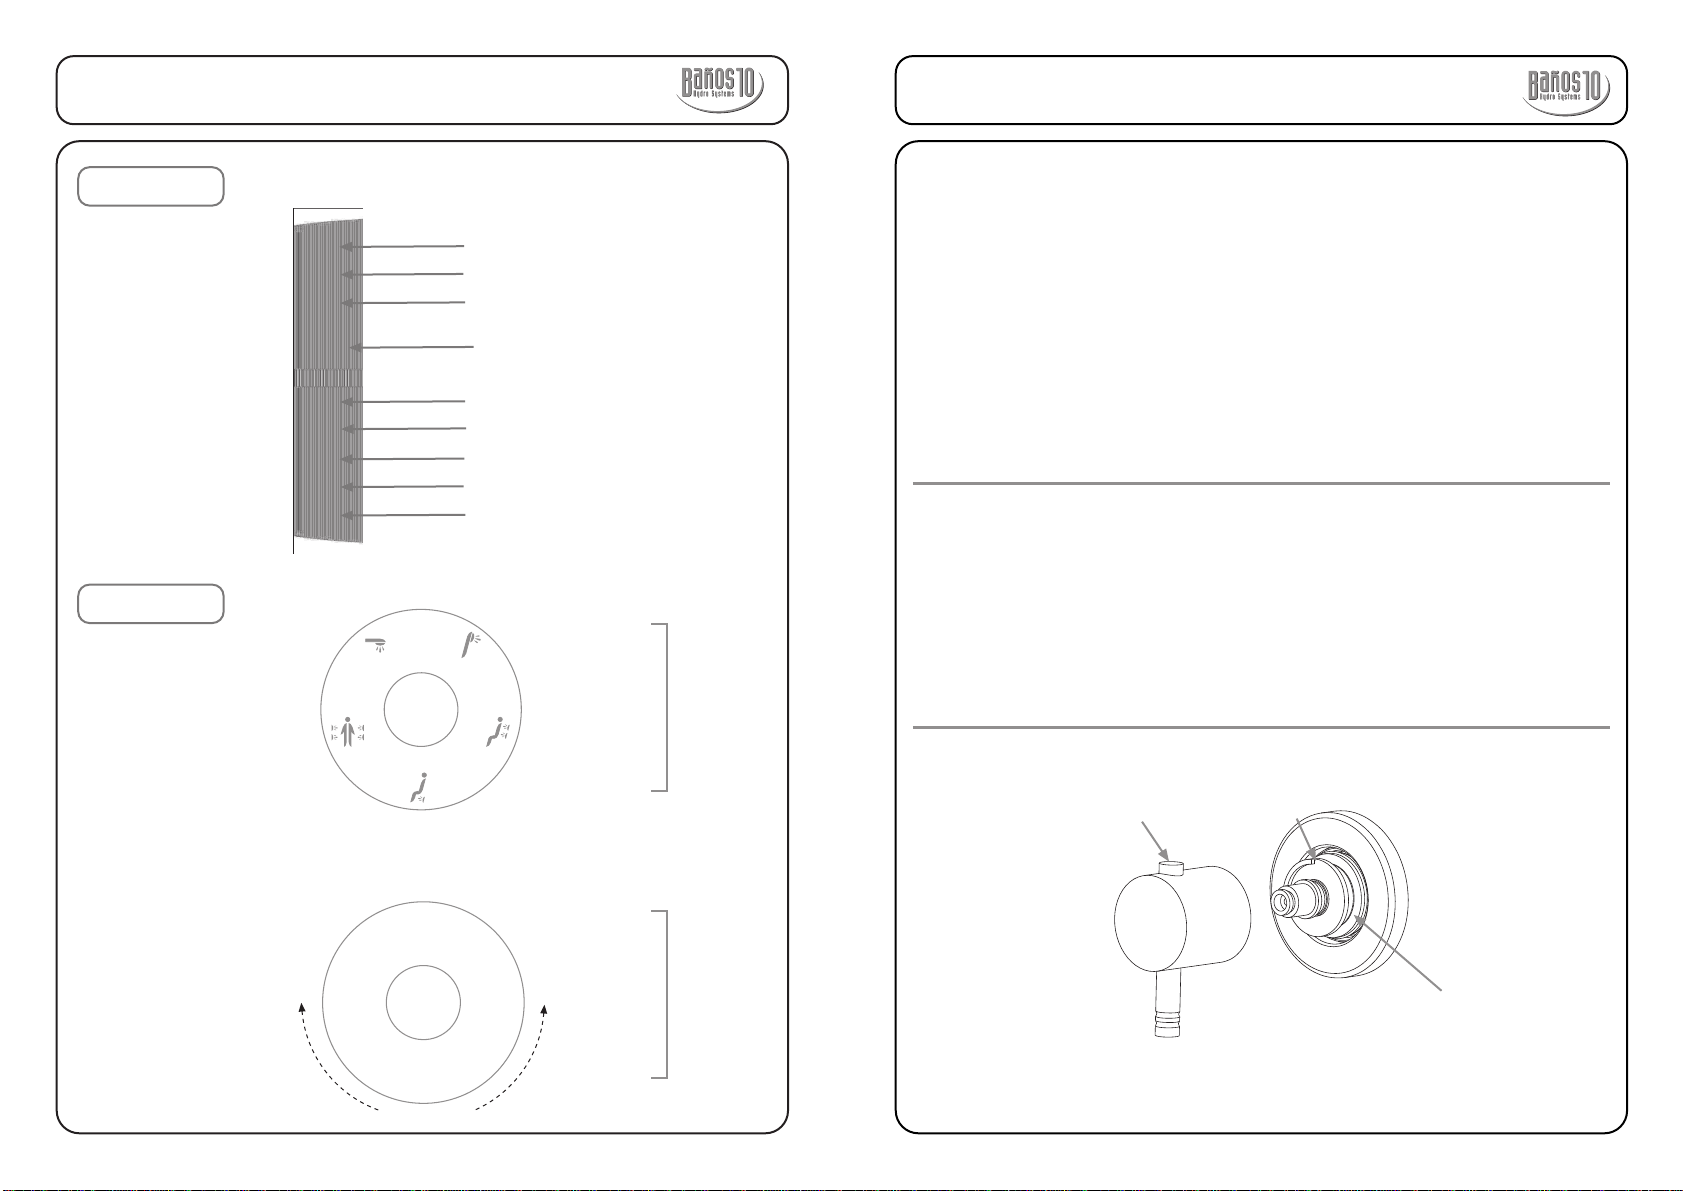
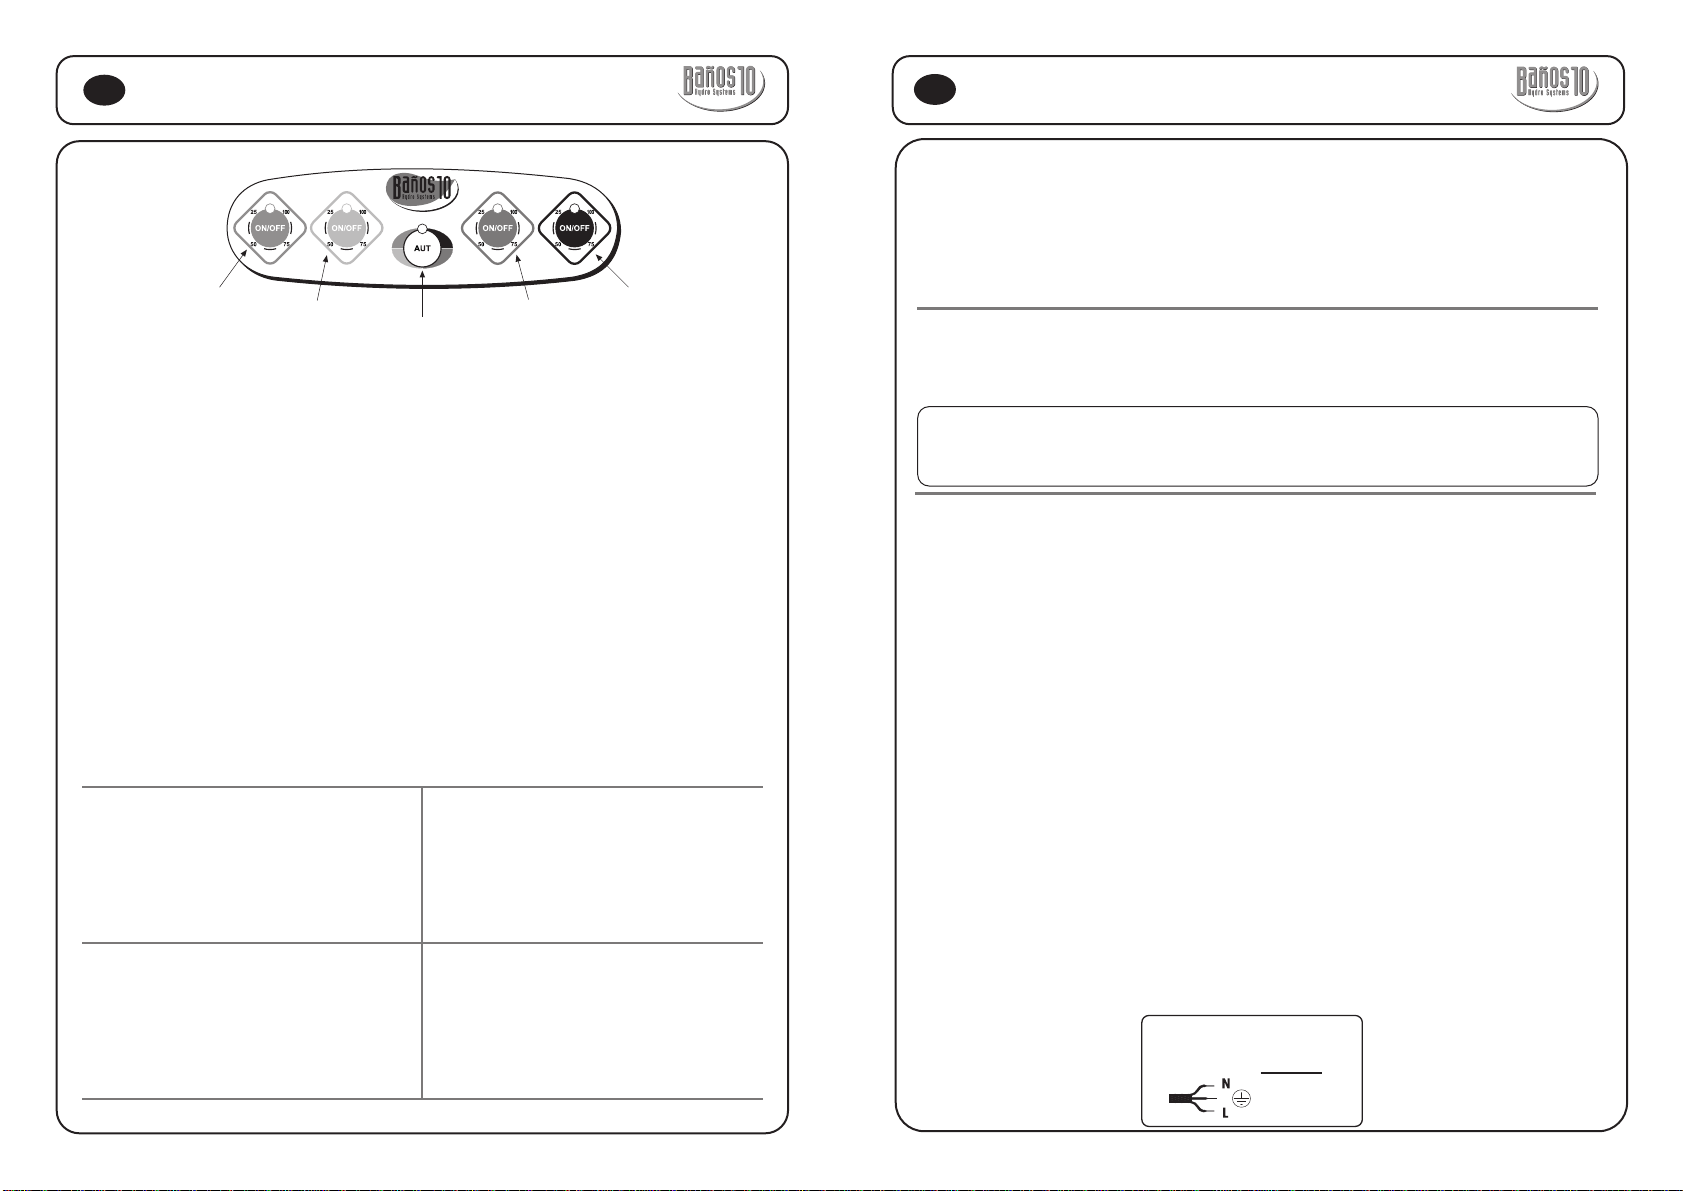
4. CONTROLS DESCRIPTION
1.- ON/OFF (Only in VITAL II system).
Press the button to turn on the unit. The screen is illuminated and it
marks environmental temperature. Pressing again the same button, the unit
is switched off.
2.- LIGHT (Only in VITAL II system).
Press the button and the light is activated. This function will be disabling
with a new pressing in the same button.
3.- VENTILATOR (Only in VITAL II system).
The extractor is activated once the button is pressed. This function
switched off after pressing again the same icon.
NOTE: This function must not be activated when sauna works.
4.- SAUNA / STEAM (Only in VITAL II system).
After one pressing over the icon , the sauna is connected.
In 2 minutes approximately the emission of steam begins inside the cabin
through the diffuser of steam. With a new pressing, this function will be
disconnected independently of the programmed time.
Once the function is switched on, we can program the temperature and the
time of sauna. For it, we must press over icon , the temperature appears
on first time and we can set it with the keys , which will increase or
decrease the temperature from 25º till 60º.
When we select the rigth temperature, we press again over and we
program the time, being the last value of the temperature the pre marked one
that sauna should get. With the same keys , we increase or decrease
the time of the bath
NOTE: The interruptions in the steam emission, during the sauna function are
owed to cold water recharges made by the equipment.
NOTA: Abstain to opening the doors of the cabin unnecessarily in order to
avoid important loses of heat.