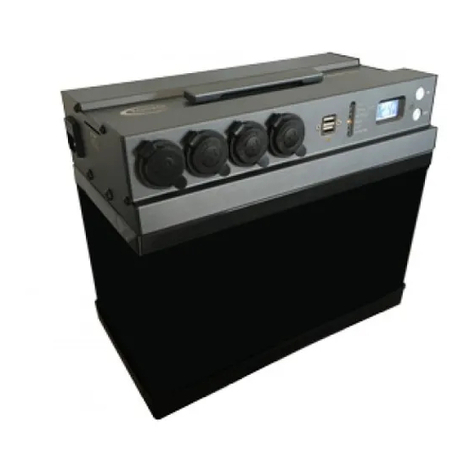
Baintech PowerTop Mounting instructions

1
Baintech PowerTop
User Operation Manual
This manual must be read in its entirety before operating the PowerTop and retained for future reference.

2
Contents
Part Identification ............................................................................................................................................................. 3
PowerTop...................................................................................................................................................................... 3
PowerTop Sockets......................................................................................................................................................... 3
PowerTop Sides............................................................................................................................................................. 3
Charging ............................................................................................................................................................................ 4
Internal Charger ............................................................................................................................................................ 4
Fast Charging................................................................................................................................................................. 4
Unregulated DC Supply Connection.............................................................................................................................. 5
Vehicle Connection ....................................................................................................................................................... 5
Load Connection ............................................................................................................................................................... 6
PowerTop Technical Information...................................................................................................................................... 7
Features ........................................................................................................................................................................ 7
Specifications ................................................................................................................................................................ 7

3
Part Identification
PowerTop
PowerTop Sockets
PowerTop Sides
IMPORTANT:
Do not block air vents on the side of
the unit
Ensure the PowerTop is mounted
upright
Ensure the PowerTop is only used in
a well-ventilated location
Ensure the PowerTop avoids contact
with water
Opening the PowerTop unit or
removing screws voids warranty

4
Charging
Battery isolator switch must be ON for charging.
Internal Charger
The PowerTop comes with an internal 5A charger. The
charger operates when the AC plug is connected into the
unit and the power switch is turned on.
Fast Charging
If you require faster charging we recommend using a 20A(maximum) charger suited for Gel batteries with the
following Voltage set points:
Bulk 14.8V
Float 13.7V
The external charger is to be connected to the Grey Anderson connector labelled 50A Battery Output.

5
Unregulated DC Supply Connection
If you want to connect a DC source that is unregulated, for example a 12V PV panel (36 Cell) without a regulator it
must be connected to the Red Anderson Connector input labelled Solar/External Charge.
The unit has a built in regulator that will stop the battery from being overcharged.
Vehicle Connection
If you want to connect a vehicle alternator output to the PowerTop connect a cable to the vehicle 12V output e.g.
connect to ciga plug or starter battery on one end of the cable, on the other end of the cable plug into the Blue
Anderson socket labelled Vehicle charge input. The vehicle voltage must be above 13.2V to charge the PowerTop
battery.
25A Max
25A Max

6
Load Connection
Battery isolator switch must be ON for load connections.
The Grey Anderson connector load output is protected by a 50A self-resettable thermal breaker. Maximum
recommended load as a guide is under 500W, dependent on ambient temperature.
Loads can also be connected to the following sockets:
Lockon Maximum load/Socket 10A
The Baintech LockOn socket system is designed to ensure your gear such as fridges stays connected on the roughest
trips. It’s easy to use –simply turn the plug clockwise and the locking mechanism engages, ensuring all your essential
gear can stay connected, even on the roughest treks. The connection is also water resistant with an o-ring ensuring
uninterrupted power
Engel Maximum load/Socket 10A
Ciga x 2 Maximum load/Socket 10A
USB Maximum load/Socket 2.3A
Sockets output are protected by a 20A self-resettable thermal breaker. Maximum recommended load across all
sockets as a guide is 200W, dependent on ambient temperature.
50A Max

7
PowerTop Technical Information
Features
12V 100Ah Gel battery
Top of unit made from Anodised aluminium
In-built 5A AC connected battery charger
In-built electronics (VCR) for accepting charge from vehicle input, for voltages above 13.2V
LCD voltmeter with LOW volt audio alarm buzzer
Battery isolator switch to power down the unit
Total five socket outlets
oUniversal USB Socket
oEngel Socket
oLockOn Socket
o2 x Ciga Sockets
oProtected by 20A thermal self-resettable breaker
6 led indicators:
oFLAT BATTERY
oMAINS
oBOOST
oFLOAT
oSOLAR/EXTERNAL
oVEHICLE
Fitted 3x 50A Anderson Connectors
oRed Solar/External (12V solar panel input can be unregulated)
oBlue Vehicle Charge Input connection
oGrey Load connection
Protected by 50A thermal self resettable breaker
Can be used for regulated output from a charger or solar charger to charge the battery
Specifications
Battery
100Ah 12V Gel Battery
In Built Battery Charger
5A 12V AC Charger
Vehicle input voltage for VCR
Above 13.5V
Volt Meter Alarm Level
11V
Socket Protection
20A Self-resettable Breaker
Grey Anderson plug (output) protection
50A Self-resettable breaker
USB Socket Output
5V 2.3A
Maximum Load across all sockets
200W
Dimensions (L x W x H)
330 x 175 x 275 mm
Weight
32kg
Warranty
12 months
Replacement parts are available after warranty period.
Opening unit voids warranty.
For standard warranty terms please visit http://www.baintech.com.au/warranty
Replacement battery available, please contact Bainbridge Technologies
This manual is subject to change please see Baintech.com.au for the latest manual (current V3)
Other manuals for PowerTop
2
Table of contents
Other Baintech Camera Accessories manuals