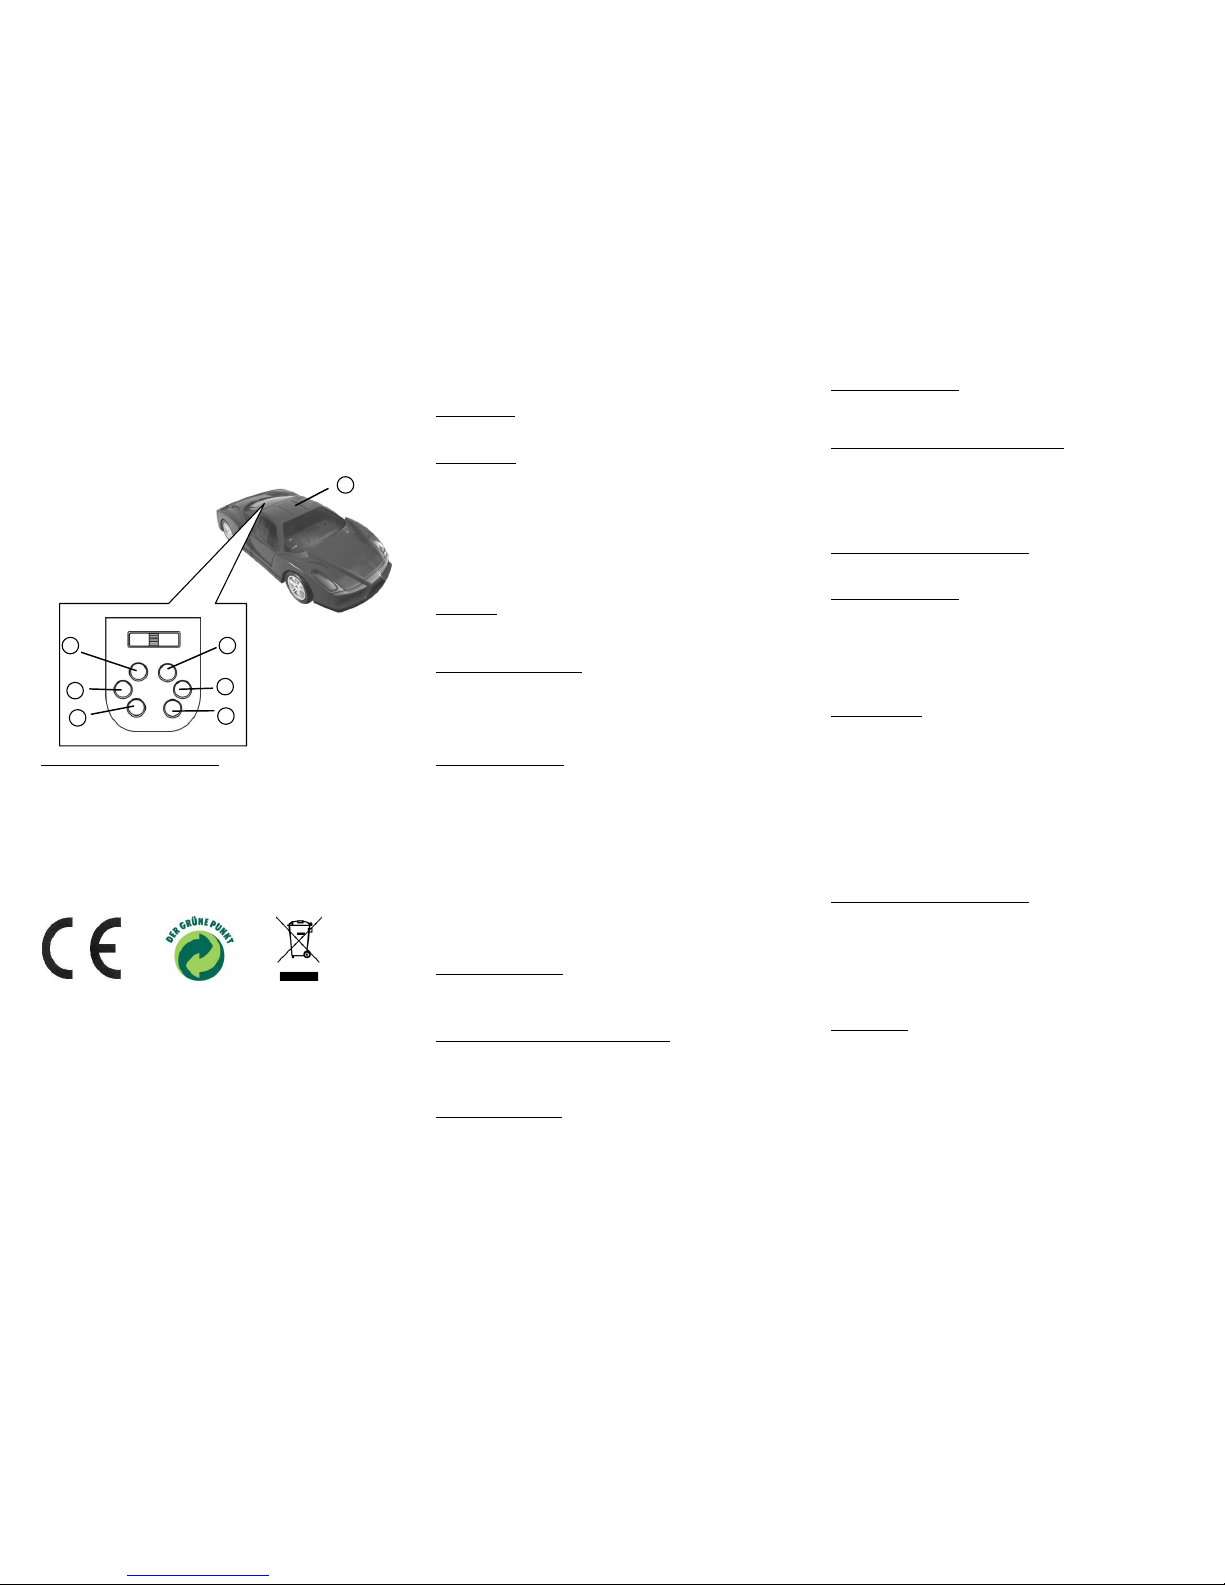
SETTING KNOBS & SWITCHES
1. RADIO ON/OFF BUTTON 5. HOUR/TU - BUTTON
2. AL 1/VOL - BUTTON 6. MIN/TU + BUTTON
3. AL 2/VOL + BUTTON 7. SLEEP/SNOOZE BUTTON
4. PRE/SET/M+ BUTTON
POWER SUPPLY
Please check that the mains electricity power supply is the same as
the AC rating indicated on the label on the base of the clock.
INSTALLATION:
This unit operates by AC mains power supply. It also has a built-in
battery backup facility, which keeps the electronics clock working in
the event of temporary power failure or disconnection from the
mains.
Place one 9 volt alkaline battery (type 522 or equivalent) into the
battery compartment (located in the bottom of unit) and connect
the corresponding terminals, (battery not included).
Plug the AC line cord to a CONVENIENT AC power outlet and switch it
on. The clock will flash on and off until it has been set correctly.
Flashing will also occur if the power supply is interrupted when no
battery is installed, or the battery is exhausted.
IMPORTANT
Do not install the clock where it can fall, or be pulled or pushed into
water. Never reach for an appliance after it has fallen into water.
Switch off at the power point and unplug immediately.
SETTING THE NORMAL TIME
Hold down the PRE/M+/SET BUTTON (4) until the clock display flash.
Press the HOUR/TU - BUTTON (5) until the correct hour is shown on
the clock display.
Press the MIN/TU + BUTTON (6) until the correct minute appear on
the clock display.
Press the PRE/M+/SET BUTTON (4) once to confirm the setting.
TO SET WAKE TO ALARM
Hold down the AL1/VOL- BUTTON (2) or AL/2/VOL + BUTTON (3) until
the clock display flash. The AL1/AL2 Buzzer light will switch on.
Press the HOUR/TU - BUTTON (5) until the correct hour is shown on
the clock display.
Press the MIN/TU + BUTTON (6) until the correct minute appear on
the clock display.
Press the AL1/VOL- BUTTON (2) or AL/2/VOL + BUTTON (3) once to
confirm the setting
The alarm will switch on automatically at the pre-set wake up time.
You can check the pre-set wake up time by pressing the AL1/VOL-
BUTTON (2) and/or AL/2/VOL + BUTTON (3) at any time.
NOTE: This pre-set wake-up time will remain or continue to be
restored in the time memory as long as the clock is connected to the
power supply, and the Alarm will switch on by itself at the same time
next day.
TO SET WAKE TO RADIO
Set the controls as for "Wake to Alarm" but press the AL1/VOL-
BUTTON (2) or AL/2/VOL + BUTTON (3) to select the Alarm sound
mode. The AL1/AL 2 Radio light will switch on.
The Radio will switch on automatically at the pre-set wake up time.
SNOOZE CONTROL AND TO STOP THE ALARM
Press the SLEEP/SNOOZE BUTTON (7) to stop the Alarm for a while,
however, it will repeat after 9 minutes.
If you do not need the Alarm, simply switch the ON/OFF SWITCH (1)
to “OFF” position.
TO OPERATE THE RADIO
Press the ON/OFF BUTTON (1) once.
Set the AL1/VOL- CONTROL (2) and/or AL2/VOL+ CONTROL (3) to
the desired level.
Set the HOUR/TU -CONTROL (5) and/or min/TU +CONTROL (6) to
select our favorite station.
To turn the radio off, press the ON/OFF BUTTON (1) once.
TO IMPROVE RECEPTION
In areas where the FM reception is weak, it is advisable to fully extend
the FM wire antenna and to tie something above the Radio for better
reception.
SAVING A RADIO STATION TO THE MEMORY
Set the radio to the desired station
Press and hold the PRE/M+/SET BUTTON (4) for approx. 1 second.
The display will flash. Press HOUR/TU - BUTTON (5) / MIN/TU +
BUTTON (6) to select a preset no. from P01 –P10. Press the
PRE/M+/SET BUTTON (4) once to store this radio station in the
memory.
Up to 10 FM radio stations can be stored in the memory.
TO LISTEN TO SAVED RADIO STATION
Press the RADIO ON/OFF BUTTON (1) once.
Press the PRE/M+/SET BUTTON (4) to select the stored radio station.
TO SET SLEEP TO RADIO
The Radio can be set to play a length of time, from 90 minutes to 10
minutes and then switch off automatically by following this
procedure;
Press the SLEEP/SNOOZE BUTTON (7) and select from 90 minutes to
10 minutes. The Radio switches on and will switch off automatically
at the pre-set sleep time
To switch off the Radio before the end of the registered sleep time,
simply press the ON/OFF BUTTON (1) once.
BATTERY BACKUP
By installing a 9 volt battery as described previously, the clock will
continue to operate in the event of a short temporary power failure or
temporary disconnection of the power cord.
The clock display will not light up, and the Alarm will not function
while the AC mains power supply is interrupted.
The battery backup system is useful for short, temporary power
failures. If main power is disconnected for longer duration, the
battery may become exhausted, or there may be some loss of timing
accuracy. When the battery is exhausted, it should be removed
from the set, to prevent damage from leakage.
If you do not wish to use the battery backup, the clock will operate
normally without a battery. However, if disconnected from the main
supply, the clock display will flash when the power is reconnected and
the clock must be reset as described earlier.
DISPOSAL AT END OF WORKING LIFE:
Discarded appliances and electronic devices often still contain
valuable materials, therefore do not throw them away, instead hand
them in to the store where you buy a new appliance or to your local
council recycling depot.
In accordance with the waste guidelines for electrical and electronic
equipment, this product must be disposed of separately. If you wish
to dispose of this product in the future, do NOT discard it with the
household waste, but hand it in at your local refuse collection depot.
ENVIRONMENT
In compliance with the directives on Waste Electrical and Electronic
Equipment, this product must not be discarded with domestic waste
but should be disposed of separately for recycling. If you wish to
dispose of this product in the future, do NOT throw it away with the
household rubbish but hand it in at a specially designated place, such
as your municipal domestic chemical waste depot.
Never throw empty batteries away, but deposit them in special
battery boxes or hand them in as domestic chemical waste at your
municipal depot.