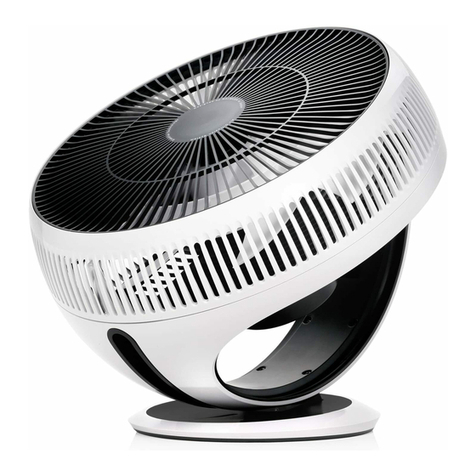
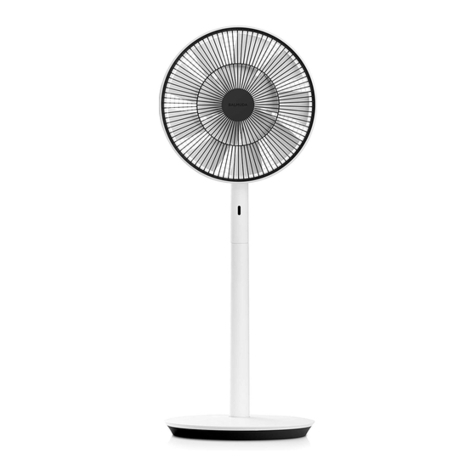
BALMUDA EGF-1600 Series User manual

The
Green
F
an
Instruction Manual
Electric Fan (for home use)
Warranty Included
EGF-1600 Series
Important
Thank you for purchasing The GreenFan.
Please be sure to read this manual,
especially “Safety Precautions” on pages 3-6 before using the product.
Also be sure to take note of content marked with a on individual pages.
This manual also includes the warranty.
Fill in the spaces for information such as date
and place of purchase, and keep this manual for future reference.

Important
Thank you for purchasing The GreenFan.
Please be sure to read this manual, especially “Safety Precautions” (P.3-6), before using the product.
Also be sure to take note of content marked with a [ ] on individual pages.
This manual also includes the warranty.
Fill in the spaces for information such as the date and place of purchase, and keep this manual in a safe place for future references.

Table of Contents
Product Specifications ‧‧‧‧‧‧‧‧‧‧‧‧‧‧‧‧‧‧‧‧‧‧‧‧‧‧‧‧‧‧‧‧‧‧ 20
Storing the Product ‧‧‧‧‧‧‧‧‧‧‧‧‧‧‧‧‧‧‧‧‧‧‧‧‧‧‧‧‧‧‧‧‧‧‧‧‧‧‧ 19
Warranty ‧‧‧‧‧‧‧‧‧‧‧‧‧‧‧‧‧‧‧‧‧‧‧‧‧‧‧‧‧‧‧‧‧‧‧‧‧‧‧‧‧‧‧‧‧‧‧‧‧‧‧‧‧‧‧‧‧‧ 27
Package Contents ‧‧‧‧‧‧‧‧‧‧‧‧‧‧‧‧‧‧‧‧‧‧‧‧‧‧‧‧‧‧‧‧‧‧‧‧‧‧‧‧‧‧‧‧‧‧‧‧‧‧‧ 7
Assembly of the Head Unit ‧‧‧‧‧‧‧‧‧‧‧‧‧‧‧‧‧‧‧‧‧‧‧‧‧‧‧‧‧‧‧‧‧‧‧‧‧‧ 8
Assembly ‧‧‧‧‧‧‧‧‧‧‧‧‧‧‧‧‧‧‧‧‧‧‧‧‧‧‧‧‧‧‧‧‧‧‧‧‧‧‧‧‧‧‧‧‧‧‧‧‧‧‧‧‧‧‧‧‧‧‧‧‧‧‧‧‧ 9
Using in the Short Size ‧‧‧‧‧‧‧‧‧‧‧‧‧‧‧‧‧‧‧‧‧‧‧‧‧‧‧‧‧‧‧‧‧‧‧‧‧‧‧‧‧‧ 10
Before Using
Operating Instructions ‧‧‧‧‧‧‧‧‧‧‧‧‧‧‧‧‧‧‧‧‧‧‧‧‧‧‧‧‧‧‧‧‧‧‧‧‧‧‧‧‧‧‧ 11
Manual Angle Adjustment ‧‧‧‧‧‧‧‧‧‧‧‧‧‧‧‧‧‧‧‧‧‧‧‧‧‧‧‧‧‧‧‧‧‧‧‧‧‧ 12
Automatic Oscillation Angle Setting ‧‧‧‧‧‧‧‧‧‧‧‧‧‧‧‧‧‧‧‧‧‧‧ 13
Using the Remote Control ‧‧‧‧‧‧‧‧‧‧‧‧‧‧‧‧‧‧‧‧‧‧‧‧‧‧‧‧‧‧‧‧‧‧‧‧‧ 15
Replacing the Batteries ‧‧‧‧‧‧‧‧‧‧‧‧‧‧‧‧‧‧‧‧‧‧‧‧‧‧‧‧‧‧‧‧‧‧‧‧‧‧‧‧‧‧ 16
Precautions on Using the Remote Control ‧‧‧‧‧‧‧‧‧‧‧‧‧ 16
Using the AC Adapter ‧‧‧‧‧‧‧‧‧‧‧‧‧‧‧‧‧‧‧‧‧‧‧‧‧‧‧‧‧‧‧‧‧‧‧‧‧‧‧‧‧‧‧‧ 17
How to Use
Maintenance ‧‧‧‧‧‧‧‧‧‧‧‧‧‧‧‧‧‧‧‧‧‧‧‧‧‧‧‧‧‧‧‧‧‧‧‧‧‧‧‧‧‧‧‧‧‧‧‧‧‧‧ 18
Safety Precautions ‧‧‧‧‧‧‧‧‧‧‧‧‧‧‧‧‧‧‧‧‧‧‧‧‧‧‧‧‧‧‧‧‧‧‧‧‧‧‧‧‧‧‧‧‧‧‧‧‧‧‧ 3
Special Cautions ‧‧‧‧‧‧‧‧‧‧‧‧‧‧‧‧‧‧‧‧‧‧‧‧‧‧‧‧‧‧‧‧‧‧‧‧‧‧‧‧‧‧‧‧‧‧‧‧‧‧‧‧‧‧ 4
Warning ‧‧‧‧‧‧‧‧‧‧‧‧‧‧‧‧‧‧‧‧‧‧‧‧‧‧‧‧‧‧‧‧‧‧‧‧‧‧‧‧‧‧‧‧‧‧‧‧‧‧‧‧‧‧‧‧‧‧‧‧‧‧‧‧‧‧‧ 5
Caution ‧‧‧‧‧‧‧‧‧‧‧‧‧‧‧‧‧‧‧‧‧‧‧‧‧‧‧‧‧‧‧‧‧‧‧‧‧‧‧‧‧‧‧‧‧‧‧‧‧‧‧‧‧‧‧‧‧‧‧‧‧‧‧‧‧‧‧‧ 6
Safety Precautions
Troubleshooting ‧‧‧‧‧‧‧‧‧‧‧‧‧‧‧‧‧‧‧‧‧‧‧‧‧‧‧‧‧‧‧‧‧‧‧‧‧‧‧‧‧‧‧‧‧‧‧‧‧‧ 21
Warranty and After-Purchase Service ‧‧‧‧‧‧‧‧‧‧‧‧‧‧‧‧‧ 23
Handling of Personal Information ‧‧‧‧‧‧‧‧‧‧‧‧‧‧‧‧‧‧‧‧‧‧‧‧ 23
Disposal of waste batteries and electrical and
electronic equipment ‧‧‧‧‧‧‧‧‧‧‧‧‧‧‧‧‧‧‧‧‧‧‧‧‧‧‧‧‧‧‧‧‧‧‧‧‧‧‧‧‧‧ 24
Customer Service ‧‧‧‧‧‧‧‧‧‧‧‧‧‧‧‧‧‧‧‧‧‧‧‧‧‧‧‧‧‧‧‧‧‧‧‧‧‧‧‧‧‧‧‧‧‧‧ 24
Troubleshooting
Table of Contents

3Safety Precautions
Safety Precautions
●In case of emergencies such as an earthquake or fire, immediately unplug and stop use of the product.
●This product is intended for home use only. Please do not use for any other purposes.
The following classifications indicate hazards or damage that could result from improper use.
Indicates possibility of death or serious injury.
Warning
Indicates possibility of minor injury or damage to houses,
property, etc.
Caution
The following symbols indicate precautions that must be followed.
Indicates actions that must not be
done. Indicates actions that must be done.
Please read the safety precautions and use the product correctly.
The cautions herein are intended to help you use the product safely and avoid injury and property damage.

Safety Precautions 4
Special Cautions
Do not disassemble or modify
the product. Doing so may
cause a malfunction, fire, or
electric shock.
Make sure curtains and the like
do not become entangled. Doing
so may cause a malfunction or
accident.
Be careful not to pinch yourself on
the moving parts or connection
parts.
Do not insert fingers or foreign
objects inside the Guard or
moving parts. Doing so may
cause injury.
Do not use any AC adapter other
than the one included. Doing so
may cause malfunction or fire.
Do not place the fan on uneven
or unstable surfaces. Injury or
malfunction may occur if the fan
falls over.
In the event of a malfunction,
discontinue use
and request an inspection.
To request an inspection of
your fan, contact the
BALMUDA Europe Service
Center (P. 24).

5Safety Precautions
Do not disassemble except for maintenance purposes.
Make sure the power supply to the AC adapter is 220-240 VAC.
Insert the power plug completely.
Failure to do so may cause fire or electric shock.
Do not use the cord or power plug if damaged or if incapable of being firmly inserted into the power outlet.
Doing so may cause fire, electric shock, or injury.
Doing so may cause a short-circuit, electric shock, or fire.
Do not damage, modify, bend, pull, twist, or bundle the cord.
Do not place heavy objects on top of or pinch the cord.
Unplug the product when not in use.
When unplugging the power plug from the power outlet, pull on the AC adapter and never pull on the cord.
Also, never allow dust to settle on the power plug.
Failure to do so may cause electric shock, electric leakage fire, or injury.
Doing so may cause a short-circuit, electric shock, or fire.
Do not operate without attaching the Fan or the Fan Guard.
Doing so may cause a short-circuit, electric shock, or fire.
Doing so may cause injury.
Do not allow water or foreign objects inside the product.
Do not touch the + or – terminals of the remote control battery to wires or other metal.
Do not transport or store with metallic necklaces, hair pins, etc.
Immediately unplug the power plug.
Intrusion of water or foreign objects may cause fire or electric shock.
Doing so may cause overheating, rupture, or ignition.
Warning

6
Safety Precautions
Do not use the product in the following places. Doing so may cause electric shock or fire.
• Near a gas stove or open flame • Near flammable gases • Near water or rain
Do not expose your body to the wind for an extended period of time.
Excessive decreases in temperature can be harmful to your health.
Do not plug in or unplug the product with wet hands.
Doing so may cause electric shock or injury.
Do not expose the product to water.
Water may cause short circuits or electric shock.
Do not use sprays or liquids on the product.
Inflammable sprays may cause fire or explosion.
Other sprays may damage the plastic or paint.
Do not allow children or individuals who require assistance to operate the product,
and do not place in a location accessible by young children.
Doing so may cause electric shock or injury.
Do not drop or subject the product to strong impacts.
Doing so may cause malfunction or damage.
Do not use or store in direct sunlight or locations with high temperatures or humidity.
Doing so may cause deformation, discoloration, or corrosion of the battery.
Stop use immediately if malfunctions such as overheating, irregular shape, or abnormal odors occur.
Failure to do so may cause overheating, explosion, fire, or corrosion of the battery.
Always unplug the product before performing maintenance.
Failure to do so may cause electric shock or injury.
Caution
Children shall not play with the appliance.
Cleaning and user maintenance shall not be made by children without supervision.
Doing so may cause electric shock or injury.
This appliance can be used by children aged from 8 years and above
and persons with reduced physical, sensory or mental appliance in a
safe way and understand the hazards involved.

7
Package Contents The number in the parentheses indicates the number of products.
Before Using
Guard Holder (1)
Motor Unit (1) Center Pole (1)
Front Fan Guard (1)
Fan (1)
Side Guard (1)
Base Unit (1)
Remote Control (1)
Button battery inside (1)
* Test battery
Fan Holder (1)
AC Adapter (1)
Instruction Manual/Warranty (1)
Unpacking the Fan Guard
Rotate the Front Fan Guard (①)
and pull (②) to remove.
②
①
①

8
Before Using
Assembly of the Head Unit
Fix the Side Guard to the Motor Unit with the
Guard Holder.
Attach the Front Fan Guard.
①Attach the Front Fan Guard onto
the Side Guard.
②Rotate the Front Fan Guard
until tight.
* Use thick gloves when performing steps and .
②
①
Secure the Fan using the Fan Holder.
1 2
2
3
3
* Using the fan with the Guard attached incorrectly is
extremely dangerous. Make sure the Guard is firmly
secured before use.
* Do not remove the Blade Caution Label attached to
the Fan.
* Match the Side Guard to the ●▲■ marks on the
Head Unit to attach.
* Be sure to note the orientation of the Fan when attaching.
Snap!
t
o
t
i
g
h
t
e
n
T
u
r
n
c
l
o
c
k
w
i
s
e
t
o
t
i
g
h
t
e
n
T
u
r
n
c
o
u
n
t
e
r
c
l
o
c
k
w
i
s
e
Blade Caution Label

9Before Using
Assembly
1
4Connect the AC adapter to an outlet.
* A beep will be heard if the AC adapter is connected correctly.
2
Insert the Center Pole
into the Base Unit.
Insert the assembled Head Unit
into the Center Pole.
3Connect the AC adapter plug.
Beep!
* No electric current flows through the shafts.
* Inserting the shaft will not be possible if the wrong hole is used.
* Make sure neither pole can be removed without pressing the Lock Release button.
* Insert firmly until a “Click!” can be heard.
Insert the thin
shaft into the
small hole.
Insert the thick
shaft into the
large hole.
Inserting the shaft joints into
the holes
Be careful not to pinch yourself when connecting the components.

Lock Release button Lock Release button
1Press the Lock Release button
to remove the Head Unit.
Remove the Center Pole while
pressing the Lock Release button
on the underside of the Base.
2
3Insert the Head Unit
into the Base Unit.
Using in the Short Size
This product can be used in the Tall Size as a stand fan,
or in the Short Size as a desk fan.
Re-Assembly
Tall Size Short Size
Be sure to remove the AC adapter before proceeding.
Snap!
* Inserting the shaft will not be possible
if the wrong hole is used.
* Make sure neither pole can be removed
without pressing the Lock Release button.
* Be careful not to pinch yourself when
connecting the components.
Insert firmly until a “Snap!” can be heard.
10
Before Using

11 How to Use
Turns power on/off
Power Button
Select air volume
Air Volume Button
Turns oscillation on/off
Oscillation Button
Select time to turn off
Off Timer Button
Operating Instructions
Air Volume Display
Off Timer Display
LED indicators
Indicates the air volume setting in green lights.
The air volume can be adjusted in 4 steps, from an
extra-gentle breeze for sleeping to a strong circulator
mode.
Indicates time to turn off (from left; 1, 2, 3, or 4 hours) in slow-blinking
green lights.
* This product is equipped with a 12-Hour Auto Off function that
automatically turns the power off after 12 hours with no operation.
This Auto Off function cannot be disabled.
* The LED indicators will dim after 1 minute if the fan is not operated.

12
How to Use
Manual Angle Adjustment
In addition to automatic oscillation, the oscillation angle of the fan can be adjusted up, down, left, or right by hand.
* Vertical adjustments are non-incremental.
19° upward
11° downward
* Do not move the fan beyond the above angles when manually adjusting the angle. Doing so may damage the fan.
* Make sure no children are in the vicinity when setting the oscillation angle. Failure to do so may lead to unintended
injury such as from the fan hitting the children in the head.
Non-incremental
adjustment
75° to the left 75° to the right
Signal Receiver

13 How to Use
Automatic Oscillation Angle Setting
The automatic oscillation angle of this product can be set as desired.
To set the angle, rotate the Head Unit to the left and right during automatic oscillation operation to set Point A and Point B. Once set,
the fan will oscillate automatically between Point A and Point B.
* The automatic oscillation angle is set to 80° when shipped from the factory.The setting will return to the factory default if the AC adapter is disconnected.
* During automatic oscillation operation or when setting the automatic oscillation angle, fan operation will stop if oscillation is prevented for a certain period of time.
This is a safety feature of The GreenFan. To release the safety feature, turn the power off and back on.
Example 1
①
The automatic oscillation angle can be set up to 150°.
1Press the Oscillation button to begin oscillation.
* Setting the automatic oscillation angle is possible only while the
fan is oscillating.
2With your hands on the Side Guard, quickly rotate the fan to set Point A.
* Point A can be set to either the left or the right.
Oscillation Button
Set Point A
Beep beep!
Quickly rotate the fan to the desired
position. Two beeps will be heard,
signifying that Point A has been set.

Quickly rotate the fan to the desired
position. Two beeps will be heard,
signifying that Point A has been set.
14
How to Use
* When the fan is turned off, the Head will move to the center automatically.
When the power is turned back on, automatic oscillation at the previously
set angle will begin.
* The minimum oscillation angle is 30°. If the angle between Point A and Point B
is less than 30°, the automatic oscillation angle will be set to 30°.
Point A
Set Point A
Beep beep!
Beep
beep!
②
Set automatic oscillation angle
Example 2 The automatic oscillation angle of this product
can be set as desired.
Set Point B
②
Beep beep!
Set automatic oscillation
angle
3After setting Point A, quickly rotate the fan to the desired position to
set Point B. When two beeps are heard, the automatic oscillation
angle has been set.
Visit the BALMUDA homepage for a video on how to set
the automatic oscillation angle.
http://www.balmuda.com/de
①Quickly rotate the fan to the
desired position. Two beeps
will be heard, signifying that
Point A has been set.
Set Point B

15
Using the Remote Control
How to Use
The buttons on the remote control enable the same operation as the buttons on the fan. (P. 11)
* The remote control is designed specifically for use
with The GreenFan.
* The distance and angle figures displayed above are for reference only.
* Point the signal emitter at the signal receiver on the fan to use the remote control.
Select air volume
Air Volume Button
Turns oscillation on/off
Oscillation Button
Select time to turn off
Off Timer Button
Signal Emitter
Turns power on/off
Power Button
Signal Receiver
Approx. 8m

Replacing the Batteries
16
How to Use
Read the following precautions on using the remote
control to ensure correct usage.
NOTICE
Pull while pressing on the latch.
* When replacing the button battery,
be sure to note the “+” and “–” sides
of the battery.
A battery is included inside the remote control when shipped from the factory.
Pull the insulating sheet in the direction indicated by the arrow to use the remote control.
• Be sure to follow local waste disposal sorting guidelines when disposing of
batteries. (Apply cellophane tape to the “+” and “–” sides of the battery
before disposal.)
• Corrosion from the battery may stain cloth, leather, furniture, flooring, or other
objects if coming into contact. Take sufficient care.
• If corrosion from the battery comes into contact with skin or clothing, rinse
immediately with clean water such as tap water. Failure to do so may
cause skin rash.
• If corrosion from the battery enters the eye, do not rub the eye and wash
thoroughly with clean water such as tap water, and seek medical attention
immediately. Corrosion may cause permanent damage to the eyes.
• Keep the remote control (specifically the battery) out of reach of children.
Contact a doctor immediately if the battery is ingested.
•
Do not allow the signal receiver on the fan to be directly exposed to sunlight or strong
light from lighting equipment. Operation may not be possible in such conditions.
• Do not obstruct the signal receiver. Any obstacles between the remote control and
the signal receiver on the fan will prevent operation via the remote control.
• Remove the battery from the remote control if the remote control will not be used
for extended periods. Failure to do so may cause the batteries to become corroded.
• Use only a button-cell battery (CR2025, 3 V) for the remote control.
• Replace the battery if the operation response of the remote control declines.
Face the “+”
side upward.
Remote control
Insulating sheet
Latch
②
①

17 How to Use
Using the AC Adapter
The Plug Unit on the BALMUDA Multi-Plug AC Adapter can be plugged into an outlet in four ways,
letting you choose the best fit for the outlet.
Press the PUSH button.
PUSH button
Slide and lift.
BALMUDA Multi-Plug AC Adapter
Removal Attachment
2
1
Up Right Down Left
Attach the plug
unit.
Slide in the Lock direction
until a “Click!” is heard.
2
1
Click!

18
Maintenance
BALMUDA recommends performing maintenance on the fan once every two weeks.
Rotate the Front Fan Guard (①) and
pull (②) to remove.
Refer to P. 10
“Re-Assembly”
for information
on disassembly.
Maintenance
123
Use diluted mild kitchen detergent with a soft cloth
or a sponge to wash the parts.
Parts That Can Be Washed
Wipe gently with a soft, dry cloth.
Parts That CANNOT Be Washed
OK NO
②
①
①
* After washing, dry the parts thoroughly before use.
* Never wash the following parts.
* Do not use organic solvents such as thinner or benzine,
cleansers, alkaline detergents, or alcohol.
T
u
r
n
c
l
o
c
k
w
i
s
e
t
o
l
o
o
s
e
n
T
u
r
n
c
o
u
n
t
e
r
c
l
o
c
k
w
i
s
e
t
o
l
o
o
s
e
n
* Use thick gloves when performing steps and .
12
When performing maintenance, be sure to disconnect the AC adapter before proceeding.

19 Storing the Product
Please store the product as shown below.
Packaging view from above
Storing the Product
12
34
Lock
• To prevent battery corrosion, remove the battery
when the remote control will not be used for
extended periods.
• Store in a cool location away from direct sunlight
with no high temperatures or humidity.
①
①
②⑥
⑤
③
④
③
②
④
⑤
⑥
Table of contents
Other BALMUDA Fan manuals

BALMUDA
BALMUDA EGF-3100 Series User manual

BALMUDA
BALMUDA GreenFan EGF-1400 Series User manual
BALMUDA
BALMUDA EGF-1200 Series User manual
BALMUDA
BALMUDA GreenFan Cirq EGF-3300 Series User manual
BALMUDA
BALMUDA The GreenFan EGF-1700 Series User manual

BALMUDA
BALMUDA GreenFan User manual

BALMUDA
BALMUDA GreenFan Cirq EGF-3100 Series User manual
Popular Fan manuals by other brands

Anslut
Anslut 014273 operating instructions

Lasko
Lasko S18601 user manual

ATD Tools
ATD Tools ATD-30330 owner's manual

Field Controls
Field Controls 46229000 manual

Litex Industries
Litex Industries UBW48ABZ4L installation guide

Home Decorators Collection
Home Decorators Collection YG683AP-PL Use and care guide