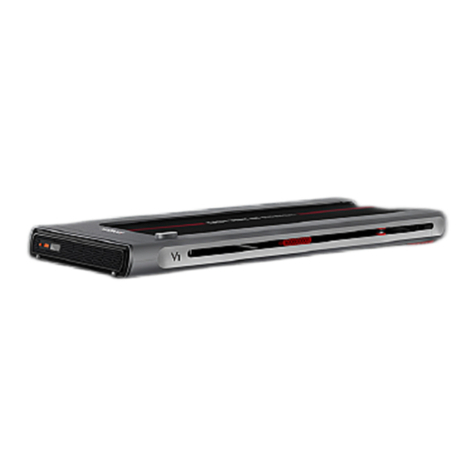
BanCon BC-T210 User manual

FOLDING
MOTORIZED
TREADMILL
www . onebancon. c o m
BC-T210
USER MANUAL
IMPORTANT! Please retain owner’s manual for maintenance and adjustment
instructions. For details regarding product warranty or if you have any
questions or problems, please contact [email protected].

CONTENTS
IMPORTANT SAFETY INSTRUCTIONS.........................1
IMPORTANT SAFETY INFORMATIONS........................2
IMPORTANT OPERATING INSTRUCTION...................3
NOTICE............................................................................4
COMPONENTS...............................................................5
ASSEMBLY INSTRUCTIONS..........................................6
MOVING INSTRUCTIONS..............................................9
LUBRICATING THE TREADMILL.................................10
PUTTING ON THE HEART RATE MONITOR..............11
MAINTENANCE INSTRUCTION..................................12
THE DISPLAY CONSOLE.............................................14
SPECIFICATIONS.........................................................19
TROUBLESHOOTING..................................................20
EXERCISE GUIDE..........................................................21
LIMITED HOME USE WARRANTY...............................23

01
IMPORTANT SAFETY INSTRUCTIONS
When using an electrical appliance, basic precautions should always be followed, including
the following:
Read all instructions before using this appliance.
DANGER - To reduce the risk of electric shock:
1. Always unplug this appliance from the electrical outlet immediately after using and before
cleaning.
WARNING - To reduce the risk of burns, fire, electric shock, or injury to persons:
1. The treadmill should never be left unattended when plugged in. Unplug from outlet when
not in use, and before putting on or taking off parts.
2. Do not operate under blanket or pillow. Excessive heating can occur and cause fire, electric
shock, or injury to persons.
3. Close supervision is necessary when this appliance is used by, on, or near children or
disabled persons.
4. Use this appliance only for its intended use as described in this manual. Do not use
attachments not recommended by the manufacturer.
5. Never operate this appliance if it has a damaged cord or plug, if it is not working properly, if
it has been dropped or damaged, or dropped into water. Return the appliance for examination
and repair.
6. Do not carry this appliance by supply cord or use cord as a handle.
7. Keep the cord away from heated surfaces.
8. Never operate the appliance with the air openings blocked. Keep the air openings free of lint,
hair, and the like.
9. Never drop or insert any object into any opening.
10. Do not use outdoors.
11. Do not operate where aerosol (spray) products are being used or where oxygen is being
administered.
12. Connect this appliance to a properly grounded outlet only.
13. The appliance is intended for household use.
CAUTION
To avoid injury, use extreme caution when stepping onto or off of a moving belt. Read
instruction manual before using.
SAVE THESE INSTRUCTIONS - THINK SAFETY!

IMPORTANT SAFETY INFORMATIONS
02
Thank you for selecting the BANCON BC-T210 Treadmill. We take great pride in producing this quality
product and hope it will provide many hours of quality exercise to make you feel better, look better,
and enjoy life to its fullest. For your safety and benefit, read this manual carefully before using the
equipment. It is your responsibility to ensure that all users of the equipment are informed of all
warnings and precautions. As a manufacturer, we are committed to provide you complete customer
satisfaction. If you have any questions, or find there are missing or damaged parts, please contact us
1. Before starting any exercise program, you should consult your physician to determine if you have
any medical or physical conditions that could put your health and safety at risk or prevent you from
using the equipment properly. Your physician’s advice is essential if you are taking medication that
affects your heart rate, blood pressure, or cholesterol level.
2. Be aware of your body’s signals. Incorrect or excessive exercise can damage your health. Stop
exercising if you experience any of the following symptoms: pain, tightness in your chest, irregular
heartbeat, shortness of breath, lightheadedness, dizziness, or feelings of nausea. If you do experience
any of these conditions, you should consult your physician before continuing with your exercise
program.
3. Keep children and pets away from the equipment. The equipment is designed for adult use only.
4. Use the equipment on a solid, flat level surface with a protective cover for your floor or carpet. To
ensure safety, the equipment should have at least 8 feet (240CM) of free space behind it and 2 feet
(60CM) on each side. Do not place the treadmill on any surface that blocks air openings. To protect the
floor or carpet from damage, place a mat under the treadmill.
5. Ensure that all nuts and bolts are securely tightened before using the equipment. The safety of the
equipment can only be maintained if it is regularly examined for damage and/or wear and tear.
6. Always use the equipment as indicated. If you find any defective components while assembling or
checking the equipment, or if you hear any unusual noises coming from the equipment during
exercise, discontinue use of the equipment immediately and do not use until the problem has been
rectified.
7. Wear suitable clothing while using the equipment. Avoid wearing loose clothing that may become
entangled in the equipment.
8. Do not place fingers or objects into the moving parts of the equipment.
9. The maximum weight capacity of this unit is 200 pounds (100 KG).
10. The equipment is not suitable for therapeutic use.
11. To avoid bodily injury and/or damage to the product or property, proper lifting and moving are
required.
12. Your product is intended for use in cool and dry conditions. You should avoid storage in extreme
cold, hot or damp areas as this may lead to corrosion and other related problems.
13. This equipment is designed for indoor and home use only; it is not intended for commercial use!

IMPORTANT OPERATING INSTRUCTION
03
1. Insert the power plug directly into the socket.
2. Read the manual before operating the equipment.
3. Changes in speed do not occur immediately. Set your desired speed using the adjustment keys on
the main console. The speed will increase gradually.
4. While on the treadmill, move with caution as distractions may cause you to lose balance and stray
from walking in the center of the belt which may result in serious injury.
5. This unit starts at a very low speed. To begin use, hold onto the handrails and stand on the side rails
while it starts up, then step onto the belt once it’s in motion.
6. Always hold the handrail when making changing settings.
7. A safety key is provided for emergency use. The treadmill will function only if the safety key is
inserted into the computer console. In case of emergency, remove the safety key to immediately stop
the belt and shut off the treadmill. The display screen will reset once the safety key is reinserted.
8. The console control keys are precisely set and require very little finger pressure to use. To avoid
damaging these keys, do not use excessive pressure when operating these controls.
9. This equipment is designed for adult use only! Children should not be allowed to use or play near
this equipment. When present, children should be supervised at all times by an adult.
10. Women who are pregnant or nursing should consult a physician before attempting to begin any
exercise program.
11. Always stay hydrated during and after exercise.
IMPORTANT NOTE:
This treadmill does come pre-lubricated, but it is recommended to lubricate your treadmill before the
first use. Please see page 10 for instructions on how to lubricate the treadmill.

04
NOTICE
This device complies with Part 15 of the FCC Rules. Operation is subject to the following two
conditions: (1) this device may not cause harmful interference, and (2) this device must accept any
interference received, including interference that may cause undesired operation.
NOTE: This equipment has been tested and found to comply with the limits for a Class B digital device,
pursuant to Part 15 of the FCC Rules. These limits are designed to provide reasonable protection
against harmful interference in a residential installation. This equipment generates, uses and can
radiate radio frequency energy and, if not installed and used in accordance with the instructions, may
cause harmful interference to radio communications. However, there is no guarantee that
interference will not occur in a particular installation.
If this equipment does cause harmful interference to radio or television reception, which can be
determined by turning the equipment off and on, the user is encouraged to try to correct the
interference by one or more of the following measures:
◆ Reorient or relocate the receiving antenna.
◆ Increase the separation between the equipment and receiver.
◆ Connect the equipment into an outlet on a circuit different from that to which the receiver is
connected.
◆ Consult the dealer or an experienced radio/TV technician for help.
Caution: The user is cautioned that changes or modifications not expressly approved by the party
responsible for compliance could void the user's authority to operate the equipment.
FCC Radiation Exposure Statement
This equipment complies with FCC radiation exposure limits set forth for an uncontrolled
environment. This equipment should be installed and operated with a minimum distance of 20cm
between the radiator and your body.
This transmitter must not be co-located or operating in conjunction with any other antenna or trans
mitter.

05
COMPONENTS
Main Frame
Item Qty Description Item Qty Description
1 1 Main Frame 5 1 Safety Key
2 1 IPAD Holder 6 1 Lubricant
3 2 Plum Screw Knob 7 1 User Manual
4 1 Power Cord
1
IPAD Holder Plum Screw Knob Power Cord Safety Key Lubricant User Manual
2 3 4 5 6 7

06
ASSEMBLY INSTRUCTIONS
STEP 1
Remove all the parts from the carton and lay the Main Frame on a flat level surface. Take out
Allen Wrench from the Right Upright Cover.
NOTICE: 2 persons will be needed to take out the equipment to avoid any accident.
Figure 1
STEP 2
Use Allen Wrench to loosen the Screw in the Left Upright Cover counter-clockwise 3 to 4
turns. Then, repeat on the other side. Raise the Uprights to the position as shown in Figure
2. Hold the Uprights and tighten screw in the Left Upright Cover at clockwise with Allen
Wrench. Then, repeat on the other side. Place Allen Wrench back to the Right Upright Cover
until the above is completed.
Figure 2

07
STEP 3
Lift Right Handrail in the direction of arrow as shown in Figure 3 to align with the screw
holes of Right Upright. Insert and tighten the Plum Screw Knob to secure the Right Handrail
on the Right Upright. Then, repeat on the other side.
Figure 3
STEP 4
Align IPAD Holder with the card slot on Console and press it down to the end to make sure
the IPAD Holder is in the right place.
Figure 4

08
STEP 5
The assembly is complete!
Figure 5
STEP 6
Insert Safety Key onto the yellow area on the Console. As shown in Figure 6.
NOTE:
Make sure the installations are completed according to the above requirements before
turning on power. Please read the relevant instructions carefully during operation.
Figure 6

09
MOVING INSTRUCTIONS
1. Make sure the treadmill stops running, turn off the power and unplug the power cord.
2. To tilt, lift the end of treadmill with both hands as shown in the figure.
3. The transportation wheels will touch the ground and move the treadmill to the desired position.
CAUTION:
◆ Before moving the treadmill, make sure the power cord has been unplugged, otherwise it may
cause damage to power cord and grounded outlet.
◆ To protect the wooden floor, it is not recommended to move on the wooden floor.

LUBRICATING THE TREADMILL
10
1. Gently push the treadmill on the side as shown and tilt it at an Angle of more than 45 degrees.
2. As shown in the picture, lift one side of the running strip by hand and pour the lubricating
silicone oil onto the running strip. Let the lubricating silicone oil flow to the other side of the
running strip until it flows into the middle of the running strip. Then lay the machine flat.When
starting up, walk slowly for a few minutes to allow the running belt to fully absorb the lubricating
silicone oil, and then you can speed up.
Note: add 30-35ml of oil each time. Do not overdo it.After oiling, wipe off any oil that drips
onto the side panels and the surface of the running band with a cloth.

PUTTING ON THE HEART RATE MONITOR
11
HEART RATE MONITOR SPECIFICATION
1. The transmission frequency is 5.3K Hz.
2. The transmission distance is 90cm.
3. Battery type: User-replaceable
CR2032(1Pc), 3V.
4. Battery life: Up to 10 months at ONE
HOUR A DAY.
COMPONENT
A. Sensor
B. Connection Belt
C. Transmitter
D. Battery Housing
E. Elastic Belt
HOW TO PUT ON HEART RATE MONNITOR
1. Wet the A (Sensor) and C (Transmitter) on the belt to create a strong connection between your
chest and the transmitter.
2. Insert one end of E (Elastic Belt) into the hole of B (Connection Belt).
3. Wear the heart rate monitor with the C (Transmitter) close to your chest.
4. Wrap the belt around your chest, and insert the other end of E (Elastic Belt) into the other hole
of B (Connection Belt)
REPLACING THE HEART RATE MONITOR BATTERY
Using a suitable coin to remove the cover and battery from the transmitter, insert the new battery
with positive side facing up then reseal the cover.
IMPORTANT NOTE!
◆ To get the real time data of your pulse, wet A (Sensor) and test the pulse again.
◆ Dispose batteries according to your state and regional guidelines. Please do not throw it into
fire or use as a toy for children.

MAINTENANCE INSTRUCTION
12
1.To better maintain your treadmill and extend the life of it, it is recommended that you turn off
the power after 2 hours of continuous use and let the machine rest for 10 minutes.
2.If the running belt is too loose, there will be skidding in running;If too tight, it may reduce the
motor performance and make the roller, running belt wear.When the running belt is tight enough,
you can lift both sides of the running belt off about 50-75mm by hand.
Adjustment of neutralization and tightness of running belt
In order for you to better use the treadmill and make the running function better you must adjust
the running belt to the best condition.
Running belt alignment:
• Place the treadmill on a level surface.
• Run the treadmill at a speed of about 2 MPH.
• If the running belt is tilted to the right, rotate the right adjusting bolt clockwise by 1/2 turn, and
the left adjusting bolt counterclockwise by 1/2 turn. Figure A.
• If the running belt is tilted to the left, rotate the left adjusting bolt clockwise by 1/2 turn and the
right adjusting bolt counterclockwise by 1/2 turn. Figure B
Figure A: running belt to the left Figure B: running belt to the right

13
Multi - wedge belt tightness adjustment
When you use the treadmill for a long time, the multiple wedges will become loose due to a
little wear or stretching. You must make appropriate adjustments to ensure safe use.
The judgment method is: in your normal running exercise when the foot falls on the running
board if you feel running with the occasional stop phenomenon, the running belt or the
multi-wedge belt is a little loose, must do further confirmation.
To determine which part is loose, remove the screws from the upper cover and allow the
treadmill to run at a speed of 0.6 MPH.(we recommend pressing the running belt with the
user's weight.)
A: If the instantaneous trample force can not make the running belt stop rotating, it indicates
that the multiple wedge belt, the running belt tightness is appropriate.
B: If you observe that the instantaneous pressure makes the running belt stop rotating, but
the multi-wedge belt and the front roller are still rotating, it means that the running belt is
loose and must be properly adjusted for safe use.(adjust the tightness of the running belt.
Read the MAINTENANCE GUIDE on the previous page.)
C: If you observe that the instantaneous trample force makes the running belt and the
multi-wedge belt stop rotating, but the motor is still rotating, it means that the multi-wedge
belt is a little loose, must do the appropriate adjustment to facilitate the safe use.
Adjustment Method
Step 1: Remove the screws from the front cover of the treadmill to remove the upper cover.
Step 2: Loosen (but do not remove) the four bolts that hold the motor base, and then adjust
the adjusting screw on the motor case with a wrench as appropriate. At the same time, flip
the multi-wedge belt between the motor shaft and the front drum gently by hand. If it is too
loose, you can flip the multi-wedge belt 100%. If it is too tight, you can turn the multi-wedge
band over at a very limited Angle; After adjustment, it is appropriate to be able to flip the
multi-wedge belt 80%. Please adjust the tightness of the multi-wedge band to the state that
it can flip 80%.
Step 3: Finally lock the motor base and install the protective cover.

THE DISPLAY CONSOLE
14
CONSOLE DESCRIPTION
Tips: please check the safety key before using the treadmill.
PULSE
PROGRAM START/PAUSE STOP
TIME CALORIES STEPS DISTANCE SPEED
MPH MPH MPH
DISPLAY
1. "Time/Calorie" window: the indicator light switches to display time and calories. At the start
countdown, "3", "2", and "1" are displayed. When displaying the exercise time, the forward timing
will be displayed in minutes: seconds from 0:00-59:59, and hours: minutes will be displayed when
the time exceeds 60 minutes. In the running state, the current calorie consumption value is
displayed. When counting forward, it will count down from 0-990. When counting backward, it
will count down from the set value to 0. When the countdown reaches 0, the treadmill will slow
down and stop running completely. Then enter the standby state.
2. "Steps/Distance" window: The indicator light switches to display distance and steps. When
displaying the number of steps, the forward step count is from 0-99999. Display the movement
distance, the forward count is from 0.0-99.99, after overflow, it will be cleared and count again,
and the reverse count will be decremented from the set value to zero. When the countdown
reaches 0, the treadmill will slow down and stop running, and it will enter standby after it stops
completely.
3. "Heart Rate" window: Displays the user’s heartbeat value. When the athlete wears a wireless
heart rate chest strap, the system can automatically detect the user’s heartbeat frequency and
display it in this window. The heartbeat value display range: 50-200 times /Minute. (The data is for
reference only and cannot be regarded as medical data).
4. "Speed" window: Display the current speed value of running state, the speed setting range:
0.5-7.5 MPH.

15
BUTTON FUNCTIONS
1. " PROGRAM ”: In the standby state, press this key to cycle to select "15:00", "1.0", "50",
"P1-P2-...-P8", (" 15:00" is the time countdown mode, "1.0" is the distance countdown mode, "50"
is the calorie countdown mode, and P1~P8 are the fixed program modes.)
2. " START/PAUSE " button: When the power is turned on and the safety lock is engaged, press this
button at any time to start the running of the treadmill. In the running state, press this key to
pause the exercise.
3. " STOP " button: This button can be used to stop the running of the treadmill and reset it during
exercise.
4. " SPEED SWITCH KNOB ": In countdown mode and fixed program, rotate the knob to adjust the
setting value. In the state of exercise, the rotary knob can be used to adjust the speed. The
adjustment range is 0.1 MPH each time, clockwise for acceleration, and counterclockwise for
deceleration. In the standby state, press the button in the middle of the knob to start the
treadmill. In the state of exercise, press the button in the middle of the knob to stop the treadmill.
5. " 2, 4, 6 SPEED " MPH, is the speed shortcut key: you can quickly set the speed.
MANUAL OPERATION
1. In the standby state, directly press the "start" button, the treadmill starts at a speed of 0.5 MPH;
other windows start counting forward from 0, and turn the knob to change the speed.
2. In the standby state, press the "PROGRAM" key to enter the time countdown mode, the "time"
window displays "15:00" and flashes, and the exercise time can be set by adding or subtracting
through the knob. The setting range is: 5: 00-9: 00.
3. In the time countdown mode, press " PROGRAM " to enter the distance countdown mode, the "
DISTANCE " window displays "1.0" and flashes, the distance can be added or subtracted through
the knob key, and the distance setting range is: 0.5—99.90 .
4. In the distance countdown mode, press the " PROGRAM " to enter the calorie countdown mode,
the " CALORIES " window displays "50" and flashes, and the calories can be added or subtracted
through the knob. The calorie setting range is: 10-990.
5. After selecting one of the three countdown modes, press the start button after the setting is
completed, the treadmill will start running after a delay of 3 seconds, and press the stop button
to stop the treadmill.

16
BUILD-IN PROGRAM
The system has 8 built-in programs: P1-P8. In the standby mode, press the " PROGRAM " key to
display "P1-P8" from the window. After selecting the favorite program, the "TIME" window
flashes at the same time; the preset time is displayed At 10:00, you can also turn the knob to set
the required exercise time, and then press the "Start" button to start the built-in program. The
built-in program is divided into 16 sections, each section of exercise time = set time/16. When
entering the next segment, the system will give 3 beeps, "Bi-Bi-Bi-", the speed of the system
changes with the change of the program segment, during which you can use the speed shortcut
key to change the speed, but it will be restored when the program enters the next segment. At this
speed, after running a program, the system will give out 3 beeps of "Bi-Bi-Bi", the treadmill will
slow down and stop running, and then enter the standby state after it stops completely.
Description: Each program divides the exercise time into 16 parts, and each time period has a
corresponding speed (unit: MPH).
P01
Walking Speed 1.2 2.5 3.1 3.1 3.7 3.7 4.3 4.3 4.3 4.3 3.7 3.7 3.1 2.5 1.8 1.2
P02
Jogging Speed 1.2 3.1 3.7 5.0 5.6 5.6 5.6 5.6 5.6 5.6 5.6 5.0 4.3 3.7 3.1 1.8
P03
Trail
running
Speed 1.2 2.5 3.7 3.7 5.6 6.2 6.2 5.6 3.7 3.7 5.6 5.6 5.6 4.3 3.1 1.8
P04
Varied pace
running
Speed 1.2 3.7 4.3 4.3 6.8 6.8 6.8 5.6 5.6 5.6 5.6 3.7 3.7 3.7 2.5 1.2
P05
Endurance
running
Speed 2.5 3.1 4.3 5.0 5.0 5.6 6.2 6.2 5.0 5.0 5.6 5.6 5.6 3.7 2.5 1.8
P06
Cardio
running
Speed 1.8 3.7 3.7 3.7 5.0 5.0 5.0 5.0 6.2 6.2 6.2 6.8 6.8 5.0 3.1 1.8
P07
Road
running
Speed 1.8 3.7 4.3 4.3 5.0 5.6 5.6 6.2 6.2 6.2 5.6 5.6 5.0 3.7 2.5 1.8
P08
Sprint Speed 1.2 3.7 3.7 5.6 5.6 6.8 6.8 6.8 6.8 6.8 3.7 3.7 3.7 3.1 2.5 1.2

17
RANGE OF VALUES
SAFETY KEY FUNCTION
Pull down the safety lock to emergency stop the running of the treadmill. The treadmill stops in
an emergency, all windows display "---", and the buzzer sounds "Bi, Bi, Bi" alarm 3 sounds; this At
that time, the treadmill cannot be started except for shutting down.
NO RUNNING MODE
In standby mode, press and hold the two buttons "PROGRAM" and "Speed 4" for 2 seconds to turn
on or off the unmanned running mode. In no running mode, if no one is detected in the machine
for 5 minutes, the machine will stop automatically. The no running switch mode displays "OFF" or
"ON", "OFF" means no running mode is off, and "ON" means no running mode is on. It is turned
on by default when no one runs.
SLEEPING MODE
This system has a power-saving function. In the standby mode, if there is no key command input
within 10 minutes, the system enters the power-saving mode, automatically turns off the display,
and presses any key to wake up the system again.
BLUETOOTH INTER-RING FUNCTION
In the standby state, the middle window displays the broadcast name of the Bluetooth speaker
"V1-xxxxx", and the Bluetooth speaker broadcast name can be connected through the Bluetooth
of the mobile phone. After connecting, the treadmill will give a voice prompt, and you can play
music through the mobile phone at this time. Please pay attention to control the size of the sound
on the mobile phone so as not to affect the quality of the sound.
Values Default Set Default Range Display
Time(second,minute,hour) 0:00 15:00 5:00-99:00 minute:0:00-59:59
hour:1:00-99:59
Speed(MPH) 0.0 0.5 0.5-7.5 0.0-7.5
Distance(mi) 0.0 1.0 0.5-99.90 0.0-99.99
Heart rate(time/minute) P N/A N/A 50-200
Calories(cal) 0.0 50 10-990 0-990
Step 0 N/A N/A 0 - 99999

18
TOTAL DISTANCE AND TOTAL TIME QUERY FUNCTION
In the standby state, press the "Stop" button and the "Speed 2" button for 3 seconds at the same
time to enter the total mileage and total time view, press the "Program switch" button to switch
to view the total time and total distance, press the "Stop" button to exit the view state.
NOTE:
1. Check whether the power supply is loaded before exercise; Check whether the safety key is
effective.
2. If there is an abnormal situation during the exercise, the safety key can be pulled off, and the
treadmill will quickly slow down to a stop; then put the safety key in, reset the equipment, and
wait for operation instructions.
3. If there is any problem with this machine, please contact us at [email protected].
ERROR CODE
Error Code Error Description Solution
“-” E0 Safety key falls off Put the safety key, or the core wire of the safety key
connected to the console is off
E1 Phase protection Check whether the three-phase power cord of the
motor is fully inserted in place
E2 Overload Over the maximum impact load, please use within the
maximum allowable weight
E3 Locked-rotor protection
Please check whether the running belt or the motor is
stuck; check whether the three-phase wire of the
motor is plugged in
E4 Hall signal is missing
(abnormal motor)
Please check whether the hall signal wire of the motor
is correctly and reliably connected
E5 Communication error Please check whether the communication wire
connecting the watch core is off or disconnected
E6 IPM module over
temperature
The controller works under overload for a long time
and the temperature is too high. Let it stand for a
period of time before using
E7 Over-voltage protection Please ensure that the maximum power supply of the
treadmill is below AC 130V
E8 Under-voltage
protection
Please ensure that the minimum power supply of the
treadmill is above AC 90V
Table of contents
Other BanCon Treadmill manuals