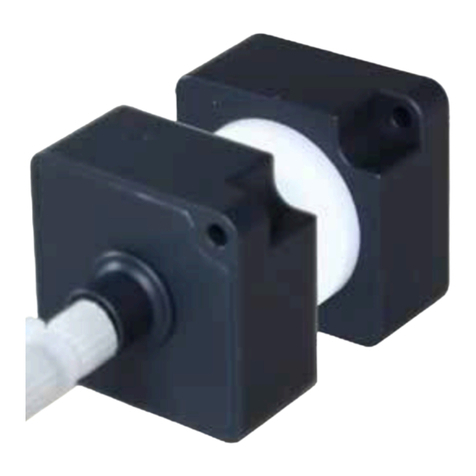
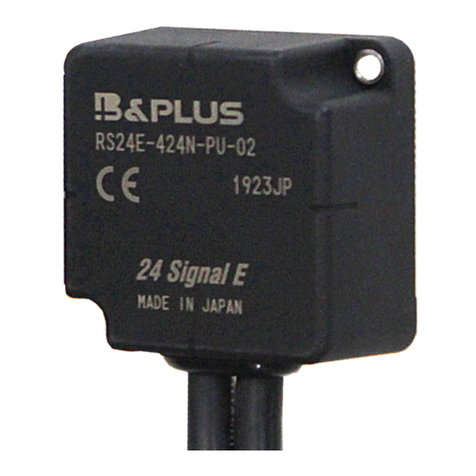
B&PLUS RCH08E-211-PU Series User manual

2018.01.05 T306A03G
[Function of Head part]
A base head supplies power 24VDC/max.2A to a remote head without physical
contact. A base head and a remote head transmit input/output signals each
other.
Outline of Remote System
Remote System is designed to operate many detector switches and
actuators by supplying power and transmitting bi-directional signals.
Construction of the system
Speciaction Measurment
75
75
30 90
90 30
45
phi 5.5
phi 10
depth 6
Base
Amplier
Base HeadRemote Head
Remote Amplier
Remote head Base head
Type Number RCH08T-211-PU_ _ RCH08E-211-PU_ _
Applicable
amplier
*
Input8+Output8 RC08T-011N(P)-000 RC08E-011N(P)-000、RC08EA-011N(P)-000
Input64+
Output32
RL64T-344N(P)-000 RL64E-333N(P)-000、RL64EA-355DN-000
RL64T-345N(P)-000 RL64E-366CL-000、RL64E-366EI-000
Operating distance 4 ... 9 mm / refer to the table below
Driving current 1 A ... 2 A / refer to the table
Driving voltage 24 V DC+/-1.5V -
Supply voltage -24 V DC +- 5%
Current consumption -=< 4 A
Operating temprature 0...+50 deg.C.
Protection class IP 67
Material Case Aluminum+Alumite-treated
Operating Surface
ABS+PBT
Cable Phi 7.8 2 x 1.25mm2+ 2 x 0.2mm2 + Shield/ PUR
RCH08E-211-PU-__
RCH08T-211-PU-__
The minimum bending radius for the
sensors are 50mm.
Remote System
User’s Guide
Attention for Installation
(Read this section thoroughly before installation.)
Before using the Remote Sensor, read this manual carefully.
During installation and operation, pay close attention to the safety aspect.
◆Ensure the power is switched off during installation or maintenance operations.
◆Use a regulated power supply, e.g. switch-model type.
Simpler power supplies, such as a full-wave rectication type,
will cause the permissible ripple rating to be exceed and may
cause malfunction.
◆Ensure correct connections by reference to the wiring diagram.
◆To avoid malfunction caused by induction noise, cable should
be kept apart from motor or other power cable.
◆Please do not face the output sensor to a metal at all times to avoid metal
overheating or damage of the components.
◆ When the unit keeps to be using under out-of-specication distance/center offset
/overload status for long time, it may be damaged by overheating.
(Former NIHON BALLUFF co., Ltd.)
Remote Coupler Sytem
Base head / Remote head
Base head : RCH08E-211-PU_ _
Remote head : RCH08T-211-PU_ _
Install
in order to avoid inuence of surrounding metal and mutual intererance,
keep minimum spacing as described below.
1) The cable length between a Head and a Amplier may not be longer than 10m/
Base head and Base amplier and 5m/Remote head and Remote amplier.
2) The cable shield must be grounded.
3)
The 0V & the shield must be connected on Amplier side.
Surrounding Metal Mutual intererance
Type code A B C D
RCH08□-... 50 45 45 300
[Supply voltage : 24V DC]
14
12
10
8
6
4
2
0
-15 -10 -5 0 5 10 15
X
Y
Drive current
≦1A
Drive current
≦2A
Transmitting Diagram Wiring to Amplier
【 Base part 】
【 Remote part 】
◆Wrong signal could be output when operating
distance or center offset is out of specication
range.
Operating distance
4 ... 9mm 6 ... 8mm
Center offset max.
≦±5mm ≦±3mm
Driving current ≦1A ≦2A
X:Center offset
Y:Operating distance
Y
X
(mm)
< Note >
Take measures so that
ambient temperature is not
over 50 degrees Celsius, for
RCH08 produces fever.
A
B C D
Remote Head
RCH08T-…
Base Head
RCH08E-…
Remote Head
RCH08T-…
Base Head
RCH08E-…
Remote Amplier
RC08T-…
Base Amplier
RC08E-…
Remote Amplier
RL64T-…
Base Amplier
RL64E-…
Brown Brown
Brown Brown
max.5m1)
max.10m1)
FG2)
FG2) FG2)
max.10m1)
* There is no terminal box of a shield in RL64E-333… .
After connecting a blue (0V) and shielded cable,
it connects with FG.
max.5m1)
+V
+24V +24V
+V
White
White
White White
SI
SI SI
SI
Black
Black
Black Black
SO
SO SO
SO
Blue Blue
Blue Blue
0V
0V 0V
Shield*
0V
Shield3)Shield3)
Shield3)Shield3)

Remote System
User’s Guide
Attention for Installation
(Read this section thoroughly before installation.)
Before using the Remote Sensor, read this manual carefully.
During installation and operation, pay close attention to the safety aspect.
ی(QVXUHWKHSRZHULVVZLWFKHGRႇGXULQJLQVWDOODWLRQRU
maintenance operations.
یUse a regulated power supply, e.g. switch-model type.
6LPSOHUSRZHUVXSSOLHVVXFKDVDIXOOZDYHUHFWL¿FDWLRQW\SH
will cause the permissible ripple rating to be exceed and may
cause malfunction.
یEnsure correct connections by reference to the wiring diagram.
یTo avoid malfunction caused by induction noise, cable should
be kept apart from motor or other power cable.
Mail:[email protected]Web:http://www.b-plus-kk.com
WirelessPowerSupplyby
Wiring diagram
Mar 24, 2017 No.T307603/E
Remote Coupler System
8+8 Signal Transmission type
【Function of each component】
Signal unit : Connects detector switches (max.8) and transmits
the detected signals to Remote amplifier.
Driving unit : Small motors, solenoid valves can be connected.
Remote amplifier: Provides power for Signal unit and Driving unit,also
passes detected signals from Signal unit to Remote
head.
Remote head : Supply power to Remote amplifier by means of
inductive coupling. Transmits the detected signal from
Remote amplifier to Base head, control signal from
Base head to Remote amplifier.
Base head : Supply power to Remote head by means of nductive
coupling. Transmits controll signal from Base
amplifier to Remote head, detected signal from
Remote head to Base amplifier
Base amplifier : Puts out detected signal from Output head to
controller, also sends power for operating of each
component. And transmits controll signal from
controller to Output Head.
Construction of the system
Dimension
: RC08E-011N-000
: RC08E-011P-000
Base Amplifier
Controller
Power unit
(24VDC)
Standard
switch
Small motor
Solenoid
Remote
amplifier
[Driving unit]
[signal unit]
Base
amplifier
Remote
head
Base
head
[Remote] [Base]
Detected sig.
Power supply(24VDC/max.2A)
Power supply
Power
supply
Detected sig.
Control signal
Signal
transmission
Control signal
Power supply
max.8 sig.
RC08E-011N-000(NPN type)
"+1...+8","-1...-8" of Terminal block ②,and "-1...-8" of Terminal block ③
are connected inside,each other.
RC08E-011P-000(PNP type)
8
8
51
5+
┵ሶบԘ ౝㇱ࿁〝
㨯㨯㨯㨯㨯
㨯㨯㨯㨯㨯
5+
㨯㨯㨯㨯
8
8
㔚Ḯജ
51
㨯㨯㨯㨯
㨯㨯㨯㨯㨯
㨯㨯㨯㨯㨯
㨯㨯㨯㨯㨯
+0
<10'
┵ሶบԙ
+0276
┵ሶบԚ
176276
Terminal block ②Terminal block ③
Terminal
block ①
Power supply
Internal
circuit
8
8
51
5+
┵ሶบԘ
┵ሶบԙ
+0276
ౝㇱ࿁〝
㨯㨯㨯㨯㨯
㨯㨯㨯㨯㨯 51
+0
<10'
┵ሶบԚ
176276
8
8
㔚Ḯജ
5+
㨯㨯㨯㨯 㨯㨯㨯㨯㨯
㨯㨯㨯㨯㨯
㨯㨯㨯㨯㨯
㨯㨯㨯㨯
Terminal block ②Terminal block ③
Terminal
block ①
Power supply
Internal
circuit
Input signal 8 signal ( Input : 8 )
Supp 24VDC +/-1.5V
ON voltage <=16V
OFFvoltage >=6V
Load current 7mA/1input
Leakage current <=1mA
Output signal 9signal(Output : 8,Inzone : 1)
Supply voltage 24VDC +/-1.5V
Residual voltage <=2.5V
Load current <=300mA
Leakage current <=0.08mA
Circuit protection
Short circuit protected
Input
Output
RC08E-011N-000
RC08E-011P-000
Specification of Base amplifer
Applicable Base head RCH08E-211-PU
Supply voltage 24V DC +/- 10%
Current consumption <=150mA(Not Head)
Switching frequency 100Hz
Installation DIN32/35mm rail
Terminal box Cable diameter 0.13...1.5mm2
specification
Stripping length 6mm
"+1...+8","-1...-8" of Terminal block ②,and "-1...-8" of Terminal block ③
are connected inside,each other.
㧗
2QYGTUWRRN[
㧰㧯㧞㧠㨂
㧙
$CUGCORNKHKGT
㧙5+㧗
٤٤٤
٤٤٤
٤٤٤
٤٤٤
٤٤٤
٤٤٤
٤٤٤
٤٤٤
+<
٤٤
٤٤
٤٤ ٤٤
٤٤ 8 8
٤٤
٤٤ 851 5+ 8
٤٤ ٤٤٤٤
٤٤
٤٤
51r
$.8
4%*'
9*5+
$-51
$08
I N P U T
1 2 3 4 5 6 7 8
O U T P U T
1 2 3 4 5 6 7 8
$CUGJGCF
Signal from external device Signal to external device
◆Total current consumption of signal unit and driving unit must not exceed the rated drive current.
Reduce the switches when the total current consumption exceeds the drive current.
70
110 38
- Terminal blocks were changed since the production in February 2009.
Terminal block ①
Terminal block ②Terminal block ③
◆Please note that the signal may become unstable (false
signal or chattering) when the transmission distance and the
center offset are outside the specification range.
◆The inzone signal is a preliminary signal for confirming that
the output signal is established within the specification range.
Please note that it does not guarantee signals output outside
the specification range.
This manual suits for next models
1
Other B&PLUS Accessories manuals


