Baofeng BF-F9V2+ User manual

fr
RECYCLED PACKAGING
www.baofengradio.us
DUAL BAND/
DUAL DISPLAY RADIO
Operating Manual
BF-F9V2+

i
PREFACE
Thank you for purchasing the BF-F9V2+ Amateur Portable Radio from Baofeng
Radio US, the official Baofeng distributor in the United States.
The BF-F9V2+ is a dual band/dual display radio made to combine extensive
functionality with unmatched reliability. This intuitive radio will help you deliver
secure, instant, and reliable communications with utmost efficiency. Please read
this manual carefully before you use the device. The information presented herein
will help you maximize the functionality and performance of your radio.

LICENSE/LEGAL INFORMATION
This work is licensed under the Creative Commons Attribution-ShareAlike 3.0 United
States License. To view a copy of this license, visit http://creativecommons.
org/licenses/by-sa/3.0/us/ or send a letter to Creative Commons, PO Box 1866,
Mountain View, CA 94042, USA. A summary of the license is below:
You are free to:
• Share—copy and redistribute the material in any medium or format
• Adapt—remix, transform, and build upon the material, for any purpose, even
commercially.
Under the following conditions:
• Attribution—you must give appropriate credit, provide a link to the license, and
indicate if changes were made. You may do so in any reasonable manner, but
not in any way that suggests the licensor endorses you or your use.
• ShareAlike—if you remix, transform, or build upon the material, you must
distribute your contributions under the same license as the original.
. No additional restrictions—you may not apply legal terms or technological
measures that legally restrict others from doing anything the license permits.

aAOF=ENB
www.baofengradio.us http://www.baofengradio.us www.foscam.us
Check out our other related products and affiliate companies:
Foscam
Foscam IP Cameras are part of a generation of advanced high quality remote monitoring
IP network cameras which are bridging the gap between powerful capabilities, ease
of use and affordability. The Foscam Indoor FI891OW and FI8918W as well as Outdoor
FI8904W and FI8905W Wireless IP Cameras arc designed to deliver live video and
audio to your computers over the local network or Internet via a web browser,
smartphone (e.g., Iphone/Blackberry) or third party video recording software (e.g,.
Blue Iris, WebcamXP, VLC, etc). With their self-contained and compact designs,
Foscam Wireless IP cameras allow you to remotely monitor your home, your kids,
and your place of work.
http://foscam.us
Amcrest
Amcrest security systems are part of a generation of advanced high quality remote
monitoring and video security systems which are bridging the gap between powerful
capabilities, ease of use and affordability. Amcrest security camera systems are designed
to record and deliver live video and audio to you anywhere in the world. With their
high quality and robust design, Amcrest security cameras allow you to securely monitor
your home, small business or medium to large enterprise.
http://amcrest.com
Accumed
AccuMed is part of a generation of advanced high quality health care products which
are bridging the gap between innovation, ease of use and affordability. The number
of health conscious consumers, are increasing exponentially every day, and AccuMed
is here to cater to all of them with our safe and effective medical products! Our varying
ranges of health care products provide benefits to everyone from the young, to the
young at-heart.
http ://accumed.com
67
3AOFEMJ
www.baofengradio.us http://www.baofengradio.us www.foscam.us
Table of Contents
Preface 2
License/Legal Information 3
S a f e t y I n f o r m a t i o n 7
F e a t u r e s a n d F u n c t i o n s 8
Getting Started 9
Initial Setup 9
W h a t ' s I n t h e B o x 9
A s s e m b l y 1 0
Charging and Battery Maintenance 12
Getting to Know the Radio 14
Radio Overview 14
T h e M a i n D i s p l a y 1 5
B a t t e r y L e v e l I n d i c a t o r 1 6
S t a t u s L E D 1 6
S i d e B u t t o n 1 — C a l l ( B r o a d c a s t F M a n d a l a r m ) 1 6
S i d e B u t t o n 2 - M O N I ( M o n i t o r a n d F l a s h l i g h t ) 1 6
V F O / M R - M o d e B u t t o n 1 6
A / B-Select Button 16
N u m e r i c K e y p a d 1 7
A c c e s s o r y J a c k 1 8
B a s i c U s e 1 9
P o w e r a n d V o l u m e 1 9

aAOHENE
www.baofengradio.us http://www.baofengradio.us www.foscam.us
Tab le of Contents
Making a Call 20
Channel Selection 20
A d v a n c e d T o p i c s 2 2
U s i n g t h e M e n u S y s t e m B a s i c U s e 2 3
U s i n g S h o r t c u t s 2 3
Scanning 23
Scanning Modes 23
Tone Scanning 24
Dual Watch / Dual Reception 25
DTMF 26
Selective Calling 27
C T C S S 2 8
D C S 2 9
1 7 5 0 H z T o n e B u r s t 2 9
Customization 30
Display 30
Power-On Message 31
Programming 32
Manual Programming 32
C o m p u t e r P r o g r a m m i n g 3 4
Radio to Radio Cloning 36
H o w - T o a n d S e t u p G u i d e s 3 7
Repeaters 38
aAOFENE
www.baofengradio.us http://www.baofengradio.us www.foscam.us
The device described in this Certificate is guaranteed for a period of TWO YEARS
from the date of sale to the final user. This Warranty Certificate is unique and not
transferable and may not be reissued. Substitution of the product, or any product
component thereof shall not extend the guarantee.
The warranty covers the replacement of all parts that are defective in materials or
components used in the manufacturing and/or assembly of the device.
The warranty does not cover any faults caused by accident, improper installation and
use, improper connection to a power source other than the included, or claims due
to deterioration in the external appearance of the device due to normal use, nor claims
pertaining to the amount or condition of the accessories packaged with the device.
Checking the accessories is the responsibility of the purchaser at the time of purchasing
the device.
The warranty does not cover rechargeable batteries even if they are part of the
equipment purchased as they are considered consumables. Any impairment must be
reported within a period of fifteen days from the date of purchase.
The warranty is voided when any of the following conditions are met:
1. Devices that have been manipulated by another or by anyone other than authorized
service provider.
2. Equipment and accessories in which the serial number has been altered, deleted,
filed, or in any way become unreadable.
3. Use of the product other than as intended.
To make use of the warranty, it is necessary to provide the dealer or any Authorized
Service Provider the following items:
1. The defective device.
2. Any accessories included with the device.
3. The Warranty Certificate, filled out in its entirety.
4. Original invoice/receipt clearly identifying the device and its date of purchase.
5. Description of any faults the device may have.
The warranty terms contained in this Certificate of Guarantee do not exclude, modify
or restrict the statutory rights of the buyer by virtue of the laws in force at the time
of purchase, but are added to them.
66

aA^ORENC
www.baofengradio.us http://www.baofengradio.us www.foscam.us
WARRANTY CERTIFICATE
Brand: Model no.: Serial no.:
Name of purchaser:
Address:
Seal and name of the dealer:
City: Zip code:
Province/State: Tel no.:
Date of purchase:
WARNING: Warranty is valid provided it is complete
and properly filled in legibly and clearly present the
seal and name of the dealer and have attached the bill
proof of purchase of equipment.
Please see conditions of warranty on the next page
SOURCES
Adapted from the following sources:
http://baofengradio.us/
http://www.miklor.com/uv5r/
http ://www. baofengradio .com/en/
SAOFEA/Z?
www.baofengradio.us http://www.baofengradlo.us WWW.foscam.US
Table of Contents
A u t o m a t i c N u m b e r I d e n t i fi c a t i o n ( A N I ) 3 8
A p p l i c a t i o n S p e c i fi c S e t u p 3 9
Commercial Radio Setup 39
A m a t e u r R a d i o S e t u p 3 9
Troubleshooting Guide 40
Menu Function and Description Chart 41
Menu Definitions 43
T e c h n i c a l S p e c i fi c a t i o n s 6 2
GENERAL 62
TRANSMITTER 62
RECIEVER 63
D C S T a b l e 6 4
C T C S S T a b l e 6 4
W A R R A N T Y C E R T I F I C A T E 6 5
S o u r c e s 6 5
R e l a t e d P r o d u c t s 6 6
F o s c a m 6 7
Amcrest 67
Accumed 67
65

aAOJFEistn
www.baofengradio.us http://www.baofengradio.us www.foscam.us
Safety Information
The following safety precautions should always be observed during operation, service,
and repair of this device:
•This device should be serviced by qualified technicians only.
• Do not modify or alter the radio for any reason.
• Use only BAOFENG supplied or BAOFENG approved batteries and chargers.
•Do not use a radio that has a damaged antenna. Contact with a damaged antenna
may result in a minor bum.
•Turn off the radio prior to entering any area with explosive and/or flammable
materials.
•Do not charge the battery in a location containing explosive and/or flammable
materials.
•Avoid electromagnetic interference and/or compatibility conflicts by turning off
the radio in any area where posted notices instruct you to do so.
•Turn off the radio prior to boarding an aircraft. Any use of a radio within an aircraft
must be in accordance with airline regulations or crew instructions.
•Turn off the radio prior to entering a blast area.
•For vehicles with air bags, do not place the radio on the air bag deployment area.
•Do not expose the radio to direct sunlight for extended periods of time, nor place
it close to any source of heat.
•When transmitting, hold the radio vertically with the microphone 3 to 4 centimeters
away from your lips. Keep the antenna at least 2.5 centimeters away from your
body when transmitting.
aA.Of=ENCS
www.baofengradio.us http://www.baofengradio.us www.foscam.us
CTCSS Table
N° Ton e(Hz ) N" ToncfHz) N° Tone (Hz) N° To ne( Hz) N° To n e(H z)
167.0 11 94.8 21 131.8 31 171.3 41 203.5
269.3 12 97.4 22 136.5 32 173.8 42 2(16.5
371.9 13 100.0 23 141.3 33 177.3 43 210.7
474.4 14 103.5 24 146.2 34 179.9 44 218.1
577.0 15 107.2 25 151.4 35 183.5 45 225.7
679.7 16 110.9 26 156.7 36 1S6.2 46 229.1
782.5 17 114.8 27 159.8 37 189.9 47 233.6
885.4 18 118.8 28 162.2 38 192.8 48 241.8
988.5 19 123.0 29 165.5 39 196.6 49 250.3
10 91.5 20 127.3 30 167.9 40 199.5 50 254.1
64

aAOf=ENE
www.baofengradio.us http://www.baofengradio.ui www.foscam.us
DCS Table
N° Code N" Code N° Code N° Code N° Code
1D023N 22 D131N 43 D251N 64 D371N 85 D532N
2D025N 23 D132N 44 D252N 65 D411N 86 D546N
3D026N 24 D134N 45 D255N 66 D412N 87 D565N
4D031N 25 D143N 46 D261N 67 D413N 88 D606N
5D032N 26 D145N 47 D263N 68 D423N 89 D612N
6D036N 27 D152N 48 D265N 69 D431N 90 D624N
7D043N 28 D155N 49 D266N 70 D432N 91 D627N
8D047N 29 D156N 50 D271N 71 D445N 92 D631N
9D051N 30 D162N 51 D274N 72 D446N 93 D632N
10 D053N 31 D165N 52 D306N 73 D452N 94 D645N
11 D054N 32 D172N 53 D311N 74 D454N 95 D654N
12 D065N 33 D174N 54 D315N 75 D455N 96 D662N
13 D071N 34 D205N 55 D325N 76 D462N 97 D664N
14 D072N 35 D212N 56 D331N 77 D464N 98 D703N
15 D073N 36 D223N 57 D332N 78 D465N 99 D712N
16 D074N 37 D225N 58 D343N 79 D466N 100 D723N
17 D114N 38 D226N 59 D346N 80 D503N 101 D73IN
18 DU5N 39 D243N 60 D351N 81 D506N 102 D732N
19 D116N 40 D244N 61 D356N 82 D516N 103 D734N
20 D122N 41 D245N 62 D364N 83 D523N 104 D743N
21 D125N 42 D246N 63 D365N 84 D526N 105 D754N
63
aA.OF=ENE
www.baofengradio.us http://www.baofengradio.us www.foscam.us
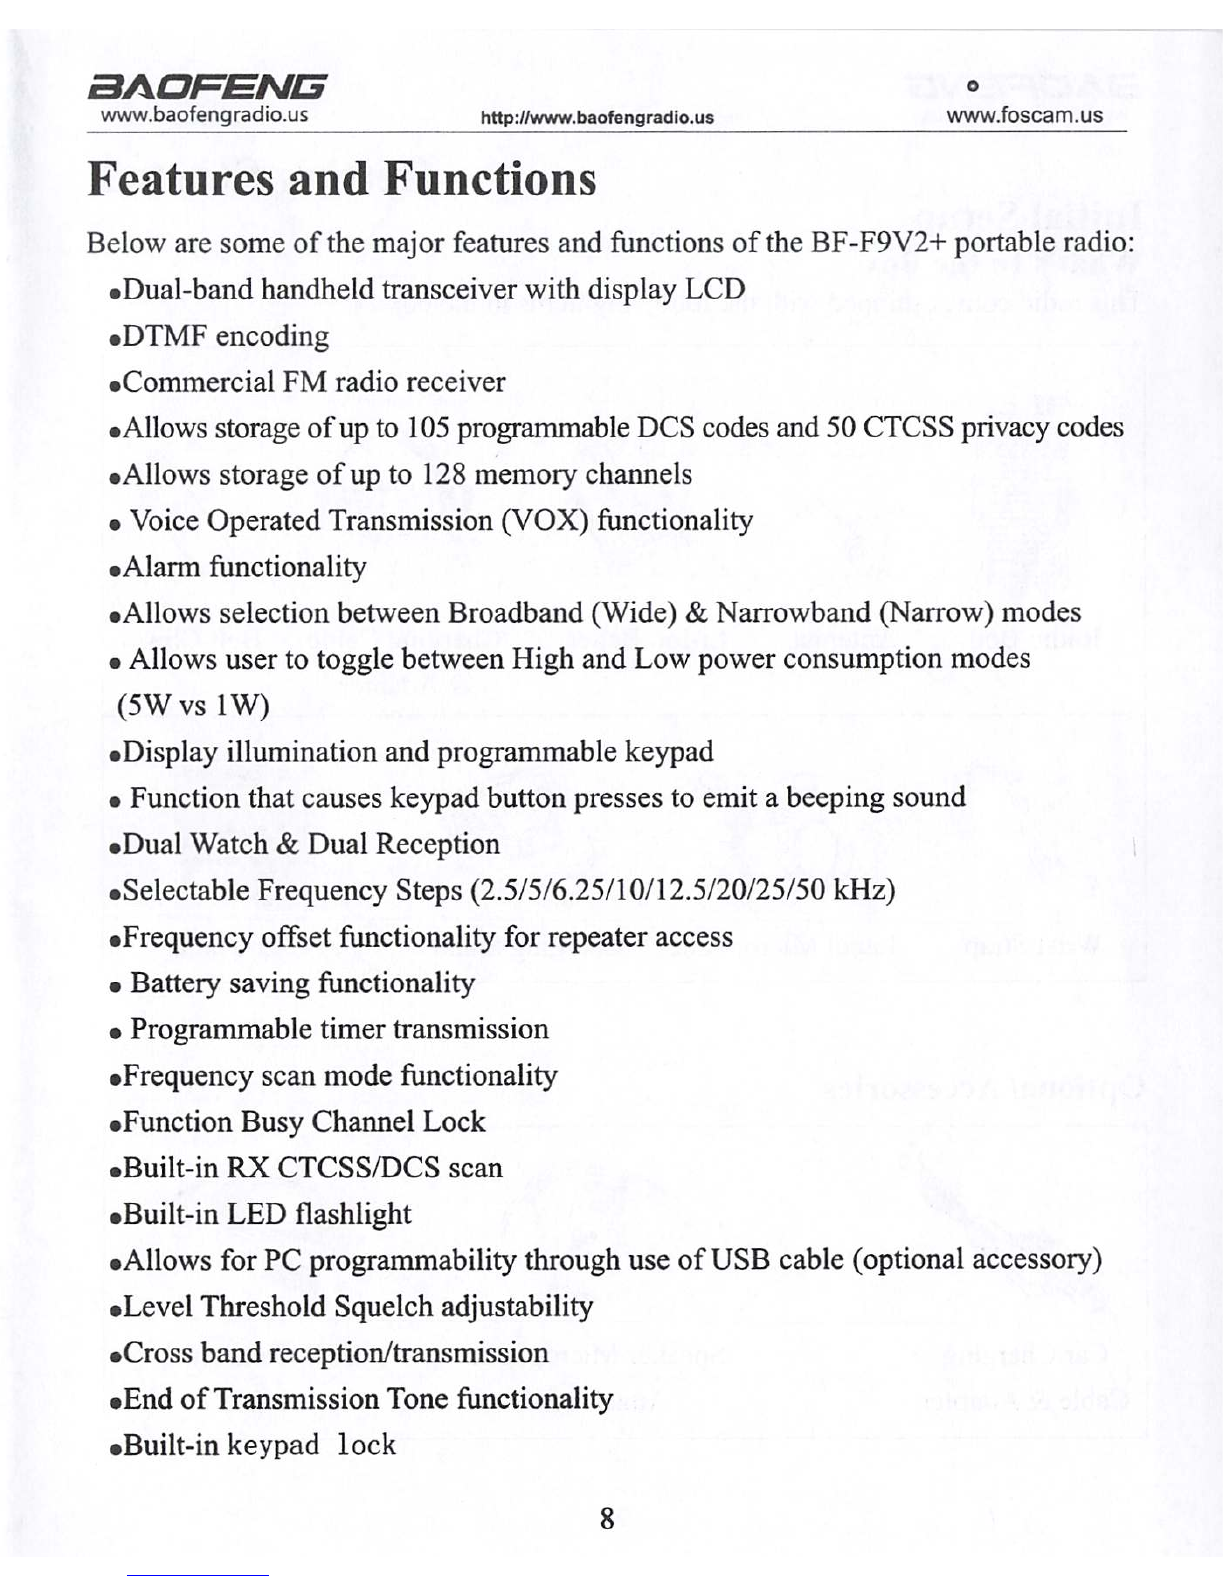
Features and Functions
Below are some of the major features and functions of the BF-F9V2+ portable radio:
•Dual-band handheld transceiver with display LCD
•DTMF encoding
•Commercial FM radio receiver
•Allows storage of up to 105 programmable DCS codes and 50 CTCSS privacy codes
•Allows storage of up to 128 memory channels
• Voice Operated Transmission (VOX) functionality
•Alarm functionality
•Allows selection between Broadband (Wide) & Narrowband (Narrow) modes
• Allows user to toggle between High and Low power consumption modes
(5Wvs 1W)
•Display illumination and programmable keypad
• Function that causes keypad button presses to emit a beeping sound
•Dual Watch & Dual Reception
•Selectable Frequency Steps (2.5/5/6.25/10/12.5/20/25/50 kHz)
•Frequency offset functionality for repeater access
• Battery saving functionality
• Programmable timer transmission
•Frequency scan mode functionality
•Function Busy Channel Lock
•Built-in RX CTCSS/DCS scan
•Built-in LED flashlight
•Allows for PC programmability through use of USB cable (optional accessory)
•Level Threshold Squelch adjustability
•Cross band reception/transmission
•End of Transmission Tone functionality
•Built-in keypad lock
8

aAOFENE
www.baofengradio.us http://www.baofengradio.us www.foscam.us
Getting Started
Initial Setup
What's In the Box
This radio comes shipped with the following items in the box:
Radio Body Antenna Li-Ion Battery Charging Cable Belt Clip
& Adapter
k
1
Wrist Strap Lapel Microphone Charging Stand User Maual
Optional Accessories
Car Charging
Cable & Adapter
Speaker Microphone USB Connectin
Attachment Cable
aAOFENE
www.baofengradio.us http://www.baofengradio.us www.foscam.us
Technical Specifications
GENERAL
Specification Value
Frequency Range (MHz) 65-108 (RX Only) 136-174 (RX/TX)
400- 480 (RX/TX)
Memory Channels 128
Frequency Stability 2.5ppm
Frequency Step (kHz) 2.5/5/6.25/10/12.5/25
Antenna Impedance 50 Ohm
Operating Temperature -20 "C to +60 "C
Supply Voltage 7.4
Consumption ^75mA (standby) 380mA (reception)
=S 1.4A (transmission)
Mode of Operations Simplex or Semi-Duplex
Duty Cycle 03 / 03 / 54 minutes (RX/TX / Standby)
Dimensions (mm) 58x 110x32
Weight (g) 214
RF Power 7W/4W/1W
Type of Modulation FM
Emission Class 16K * F3E (Wideband) / 1 IK * F3E (Narrowband)
Maximum Deviation =S + 5 kHz (Wideband) / s; +2.5 kHz (Narrowband)
Spurious Emissions =S60dB
Receiver Sensitivity 0.2 u V (at 12 dB SIN AD)
Intermodulation 60 dB
Audio Output 1000 mW
Adjacent Channel Selectivity 65 / 60 dB
62

aAOFENE
www.baofengradio.us http://www.baofengradio.us www.foscam.us
Menu Definitions
Menu Item Shortcut Description
ROGER 39 ROGER Beep: Sends an end-of-transmission tone to indicate
to other stations that the transmission has ended.
Availability: Global
Settings/Notes
OFF [0] | ON [1] Default: OFF Note:
Recommended setting is OFF
Menu Item Shortcut Description
RESET 40 RESET to Firmware Default Settings
Availability: Global
Settings/Notes
VFO [0] | ALL [1] Default: ALL
VFO: Resets all menus to firmware default and sets the [A] and [B] VFO frequencies
to firmware default.
ALL: Resets all menus to firmware default, sets the [A] VFO frequency to the VHF band
low limit and the [B] VFO frequency to the UHF band low limit, erases all channels
and programs channel 0 to 136.025 MHz and channel 127 to 470.625 MHz
61
aAOPENG
www.baofengradio.us http://www.baofengradio.us www.foscam.us
Assembly
Antenna
This device is fitted with a Male SMA connector. To
mount the antenna (Female SMA Connector), align
the two connectors and mm the antenna clockwise until
it stops.
•When installing the antenna, install it by holding the
base and turning.
•If an external antenna is used, ensure that the *SWR*
is about 1.5:1 or less to avoid damage to the transceiver's
transistors.
•Holding the antenna with your hand or wrapping the
outside may cause subpar operation of the transceiver.
• Never transmit from the device without an antenna.
Belt Clip
On the back of the radio, above the battery, there are
two parallel screws. Remove these and align them so
that they go through the holes on the belt clip as they
are screwed back into the radio body to securely affix
the belt clip.
Install the belt clip at the rear of the battery compartment
cover as shown in the figure to the right.
Do not use glue to affix the screws onto the battery
clip. Application of glue may cause damage to the
casing of the battery.
10

a/s.ai=ENE3
www.baofengradio.us http://www.baofengradio.us www.foscam.us
Getting Started
Battery
Before attaching or removing the battery make sure
the radio is turned off by turning the power/volume
knob all the way counter-clockwise.
Installation
To attach the battery, ensure the battery is parallel and
in good contact with the aluminum chassis. The battery
bottom is about 1 to 2 centimeters below the bottom
of the radio's body.
Align the battery with the guide rails on the radio
chassis and slide it upwards until it clicks into place.
The battery latch at the bottom locks the battery in
place.
Removal
Ensure the radio is off before removing the battery.
To remove the battery, press the battery release above
the battery pack and slide the battery downward.
After sliding the battery down a few centimeters, the
battery can be removed from the radio body.
External Headset
Plug the external micro-headset connector into the jack
of "SP & MIC" of the transceiver as shown in the
figure on the right.
11
aA.ar=ENC3
www.baofengradio.us http://www.baofengradio.us www.foscam.us
Menu Definitions
Menu Item Shortcut Description
RP-STE 36
RePeater - Squelch Tail Elimination: This function is used
eliminate squelch tail noise when communicating through a
repeater.
Availability: Global
Settings/Notes
OFF[0]| 1-10 Default: 5
Note: Requires use of a repeater utilizing this feature.
Note: Used with menu 37 Note: Recommended setting is OFF
Menu Item Shortcut Description
RPT-RL 37
RePeaTer - Retard Squelch Tail ELimination Tail Tone (X100
milliseconds): Length of time after [PTT] is released until STE
tail tone is transmitted
Availability: Global
Settings/Notes
OFF[0]| 1 — 10 Default: OFF
Note: Used with menu 36 Note: Recommended setting is OFF
Menu Item Shortcut Description
PONMSG 38 Power ON MeSsaGe: Controls the behavior of the display
when the transceiver is turned on.
Availability: Global
Settings/Notes
FULL [0] | MSG [1] Default: FULL FULL: Performs an LCD screen test at power-on
MSG: Displays a 2-line power-on message
Note: The power-on message must be edited with the Baofeng software
60

aAOFENE
www.baofengradio.us http://www.baofengradlo.us www.foscam.us
Menu Definitions
Menu Item
BAND
Shortcut
33
Description
BAND Selection: In VFO/Frequency mode, sets [A] or [B]
to the VHF or UHF band.
Availability: Availability: MR/Channel Mode (Read Only), VFO/Frequency Mode,
Separate VFO A & B Settings, Stored in Channel
Settings/Notes
VHF [0] | UHF [1] Default: VHF Note: When transitioning from VHF to UHF or from
UHF to VHF, the selected band's low frequency limit becomes the displayed frequency
(the original 'scratch' frequency is lost)
Menu Item
TDR-AB
Shortcut
34
Description
Transceiver Dual Reception - [A]/[B] Display Priority: When
enabled, priority is returned to selected display once the signal
in the other display disappears.
Availability: Global
Settings/Notes
OFF[0] | A [1] | B [2] Default: OFF Note: Requires menu item 7 to be enabled
Menu Item
STE
Shortcut
35
Description
Transceiver - Squelch Tail Elimination: This function is used
eliminate squelch tail noise between BF-F9V2+S that are
communicating directly (no repeater). Reception of a 55 Hz
or 134.4 Hz tone burst mutes the audio long enough to prevent
hearing any squelch tail noise.
Availability: Global
Settings/Notes
OFF [0] | ON [1] Default: ON
Note: When enabled and T-DCS is set to OFF the radio sends a 55 Hz tone for about
1/4 second when the PTT button is released.
Note: When enabled and T-DCS is not set to OFF the radio sends a 134.4 Hz tone for
about 1/4 second when the PTT button is released.
Note: Set to OFF before communicating through a repeater.
Note: Recommended setting is OFF.
aAORENCS
www.baofengradio.us http://www.baofengradio.us www.foscam.us
Charging and Battery Maintenance
Charging the Battery
Follow the steps below to set up and use the charger:
1. Plug the end of the power adapter into the charger base.
2. Plug the power adapter into an electrical wall socket.
3. Place the radio or battery in the charging slot on the charger.
4. Make sure the contact plates of the battery are making contact with the charger.
Ensure that the radio fits snugly into the dock. When the red LED stays on, the
radio is charging.
5. The radio is fully charged once the LED on the charger stays green. Please remove
the radio after it is fully charged to avoid over-charging the battery.
Charger LED Codes
Charging Status LED Indication
Standby (no-load) Red LED flashes while Green LED glows
Charging Red LED glows solidly
Fully Charged Green LED glows solidly
Error Red LED flashes while Green LED glows
59 12

aACH=ENE5
www.baofengradio.us http://www.baofengradio.us www.foscam.us
Getting Started
Battery Maintenance
The battery for the radio comes uncharged from the factory. Please charge it for at
least four to five hours before starting to use the radio.
•Use only batteries that are approved by the original manufacturer.
•Never attempt to disassemble the battery pack.
•Do not expose the battery to fire or intense heat.
•Dispose of batteries in accordance with local recycling regulations.
Prolonging the Life of the Battery
•Only charge batteries in normal room temperatures.
•When charging a battery attached to the radio, turn the radio off for a faster charge.
•Do not unplug the power to the charger or remove the battery and/or radio before
it has finished charging.
•Never charge a wet battery.
•Batteries wear out over time. If there is a considerably shorter operating time with
the radio, please consider purchasing a new battery.
•Battery performance is reduced when temperatures are below freezing. When working
in cold environments, it is recommended to keep a spare battery at hand, preferably
inside a jacket or in a similar location in order to keep the battery warm.
•Dust can interfere with the contacts on the battery. If necessary wipe the contacts
with a clean cloth to ensure proper contact with radio and charger.
Storage
Fully charge the battery before storing the device for a prolonged period of time in
order to prevent damage from over-discharge.
To avoid severe capacity degradation of the battery while in long time storage, please
cycle the battery at least every six (6) months.
Store the batteries in a cool and dry place, never above normal room temperatures.
In Case of Exposure to Water
If the battery has become wet, remove it from the radio, dry with a towel, and put it
in a plastic bag that contains a handful of dry rice. Tie the bag up and let it sit overnight.
The rice should absorb any remaining moisture in the battery.
13
aAOFENE
www.baofengradio.us http://www.baofengradio.us www.foscam.us
Menu Definitions
Menu Item Shortcut Description
RX-LED 30 Receive (RX) - Back Light LED Color: Display Illumination
Color
Availability: Global
Settings/Notes
OFF [0] | BLUE [1] | ORANGE [2] | PURPLE [3] Default: BLUE
Menu Item Shortcut Description
TX-LED 31 Transmit (TX) - Back Light LED Color: Display Illumination
Color
Availability: Global
Settings/Notes
OFF [0] | BLUE [1] | ORANGE [2] | PURPLE [3] Default: ORANGE
Menu Item Shortcut Description
AL-MOD 32 ALarm-MODE
Availability: Global
Settings/Notes
SITE [0] | TONE [1] | CODE [2] Default: TONE
SITE: Sounds alarm through the radio speaker only
TONE: Transmits a cycling tone over-the-air
CODE: Transmits ' 119' (911 in reverse?) followed by the ANI code over-the-air
Note: Recommended setting is SITE
58

aAOFENE
www.baofengradio.us http://www.baofengradio.us www.foscam.us
Menu Definitions
Previously Programmed Target Channel: The TX frequency of the target channel is set
to the [A] VFO frequency. The settings of the following menus are also saved into the
target channel. Uses for this can be to update a newly created 'simplex' channel into a
'repeater' channel or a 'cross-band' channel. Another use would be to add, change or
remove a TX DCS code or TX CTCSS tone.
Menu 12 - T-DCS: Digital Coded Squelch (DCS) - Transmit/Encode
Menu 13 - T-CTCS: Continuous Tone Coded Squelch System (CTCSS) - Transmit/Encode
Note: When the TX frequency differs from RX frequency, a '+-' is indicated in the status
display.
Note: TDR should be set to OFF when manually programming.
Note: It is recommended to check above menu settings to ensure no modifications from
previous programming are left over.
Menu Item Shortcut Description
DEL-CH 28
DELete/Erase Memory—Channel: This menu is used to erase
the programmed information from the specified channel (000
through 127) so that it can either be programmed again or be
left empty.
Availability: Global
Settings/Notes
000- 127 Default: 000
Menu Item Shortcut Description
WT-LED 29 Standby (WaiT) - Back Light LED Color: Display Illumination
Color
Availability: Global
Settings/Notes
OFF [0] | BLUE [1] | ORANGE [2] | PURPLE [3] Default: PURPLE
57
aAOFENE
www.baofengradio.us http://www.baofengradio.us www.foscam.us
Getting to Know the Radio
Radio Overview
1. Antenna
2. FlashlightCall Button
3. MONI Button (Monitor)
4. PTT Button (Push-To-Talk)
5. VFO / MR Button (Frequency Mode/ Channel Mode)
6. LED Indicator
7. Strap Buckle
8. Accessory Jack
9. A / B Button (Frequency Display Switch)
10. Band Button (Not Present on Recent Models)
11. Numeric Keypad
12. Speaker & Microphone
13. Battery Pack
14. Battery Contacts
15. Battery Remove Button
14

aAOFENES
www.baofengradio.us http://www.baofengradio.us www.foscam.us
The Main Display
Xlll LDS VOX +-RWfl<lsQl34[lIIE
75«C«C
25 "
CT ^m.
DCS
■■::... 75>OC
5T2T S .* ! ""■.
, W ■■■■■■ ■
Liimr aM ■.amm » . :..m25 *■•
The Baofeng BF-F9V2+ Display
Icon Description
188 Memory Channel
75/25 Least Significant Modifiers
CT CTCSS enabled
DCS DCS enabled
+ - Frequency Offset Shift Direction if Enabled
SDual Watch/Dual Reception if Enabled
VOX VOX Function if Enabled
RReverse Function if Enabled
NNarrowband Enabled
rJTTT Battery Level Indicator
O" Keypad Lock Function if Enabled
L Low Transmit Power Mode if Enabled
AT Active Band or Channel
Xiil Signal Strength Meter
15
aAOF=ENE
www.baofengradio.us http://www.baofengradio.us www.foscam.us
Menu Definitions
Menu Item Shortcut Description
OFFSET 26 Frequency Shift/OFFSET (MHz): Specifies the difference
between the TX and RX frequencies.
Availability: VFO/Frequency Mode, Stored in Channel
Settings/Notes
00.000 - 69.990 in 10 kHz steps Default: 00.600
Note: Used with menu 25 to access repeaters in VFO/Frequency mode
Note: Typical ham offsets are: VHF = 00.600 UHF = 05.000
Note: OFFSET is not required when storing repeater frequencies into channels
Menu Item Shortcut Description
MEM-CH 27
CHannel Programming: This menu is used to either create new
or modify existing channels (000 through 127) so that they
can be accessed from MR/Channel Mode. The behavior of
menu 27 changes depending on whether the target channel is
empty or has been previously programmed (see below).
Availability: VFO/Frequency Mode
Settings/Notes
000-127 Default: 000
Note: Programming must be done in [A] VFO
Empty Target Channel: The RX and TX frequencies of the target channel are set to the
[A] VFO frequency. The settings of the following menus are also saved into the target
channel. This essentially creates a fully operational simplex channel.
Menu 2 - TXP: Transmit Power
Menu 5 - WN: Wideband / Narrowband
Menu 10 - R-DCS: Digital Coded Squelch (DCS) - Receive/Decode
Menu 11 - R-CTCS: Continuous Tone Coded Squelch System (CTCSS) - Receive/Decode
Menu 12 - T-DCS: Digital Coded Squelch (DCS) - Transmit/Encode
Menu 13 - T-CTCS: Continuous Tone Coded Squelch System (CTCSS) - Transmit/Encode
Menu 17 - S-CODE: PTT-ID DTMF Code Selection
Menu 19 - PTT-ID: When to Send PTT-ID
Menu 23 - BCL: Busy Channel Lockout
56

aAORENO
www.baofengradio.us http://www.baofengradio.us www.foscam.us
Menu Definitions
Menu Item Shortcut Description
AUTOLK 24
AUTOmatic Keypad LocK: When ON, the keypad will be
locked if not used in 8 sees. Pressing the [POUND] button for
2 seconds will temporarily unlock the keypad.
Availability: Global
Settings/Notes
Note: When the keypad is locked, a 'ttO' symbol is indicated in the stams display
Note: The keypad lock only locks the buttons on the front face of the BF-F9V2+. It does
not lock the [CALL] button, the [PTT] button or the [MONI] button.
Menu Item Shortcut Description
T-CTCS 25 Frequency ShiFT— Direction: Enables access of repeaters in
VFO/Frequency Mode.
Availability: VFO/Frequency Mode, Stored in Channe
Settings/Notes
OFF[0] | + [1] | - [2] Default: OFF
OFF: TX = RX (simplex)
+: TX will be shifted higher in frequency than RX
-: TX will be shifted lower in frequency than RX
Note: When SFT-D is set to +, a '+' is indicated in the status display (VFO/Frequency
mode only)
Note: When SFT-D is set to -, a '-' is indicated in the status display (VFO/Frequency
mode only)
Note: Used with menu 26 to access repeaters in VFO/Frequency mode (+ and - only)
Note: SFT-D is not required when storing repeater frequencies into channels
55
aAOF=ENE
www.baofengradio.us http://www.baofengradio.us www.foscam.us
Getting to Know the Radio
Battery Level Indicator
When the battery level indicator has no black bars showing, it means the battery is
close to depletion. To warn the user of this, the radio will start beeping periodically
as well as flashing the backlight of the display, indicating that the battery needs to
be changed.
Status LED
The status LED has a very simple and traditional design. When a signal is received,
it turns green, when transmitting, it turns red, and is off when in standby.
Side Button 1- Call (Broadcast FM and alarm)
Press [CALL] momentarily to start the broadcast FM receiver. Another momentary
press turns the broadcast FM receiver off.
Press and hold to [CALL] activate the alarm function. Press again to turn it off.
Side Button 2-MONI (Monitor and Flashlight)
Press [MONI] momentarily to turn on the LED flashlight. Another momentary press
turns the flashlight off.
Press and hold [MONI] to monitor the signal. This will open up the squelch and permit
listening to the unfiltered signal.
VFO / MR- Mode Button
Pressing [VF0/MR] switches between Frequency (VFO) Mode and Memory (MR)
Mode. Memory mode is sometimes also referred to as Channel mode.
To save frequencies to channel memory the radio must be in Frequency (VFO) mode.
A/B-Select Button
The [A/B] button switches between A (upper) and B (lower) displays. The frequency
or channel on the selected display becomes the active listening and transmit frequency
or channel.
Note: To save frequencies to channel memory the radio must be set to use the A
display.
16

aAOFENE
www.baofengradio.us http://www.baofengradio.us www.foscam.us
Getting to Know the Radio
Numeric Keypad
The Baofeng BF-F9V2+ hand-held transceiver comes standard with a full numeric
keypad.
The numeric buttons have their secondary function printed on them. The JEM and
fffS buttons also have secondary functions, scan and keypad lock respectively.
Pound Button
In channel mode the [POUND] button also acts as a transmit power shortcut button.
While in channel mode, press [POUND] to change between High and Low transmit
power. Please note that the transmit power stored to memory for that channel is not
altered permanently, it affects only the current session. Switching to another channel
or another operating mode will reset transmit power to the setting stored in the channel's
memory.
Keypad Lock
The Baofeng BF-F9V2+ includes a keypad lock feature that locks out all buttons
except for the three on the side of the radio.
To enable or disable the keypad lock, press and hold the [POUND] button for about
two seconds. Automatic keypad locking can also be enabled through the menu so that
the radio automatically locks the keypad after ten seconds.
Star Button
A quick press of the [STAR] button enables the reverse function.
When listening to broadcast FM, a momentary press will start the scanning function.
Scanning in broadcast FM will stop as soon as an active station is found.
To enable the scanner, press and hold the [STAR] button for two seconds.
17
aAOFENO
www.baofengradio.us http://www.baofengradio.us www.foscam.us
Menu Definitions
Menu Item Shortcut Description
MDF-B 22 Memory Display Format - [B]
Availability: Global
Settings/Notes
CH [0] | NAME [1] | FREQ [2] Default: FREQ
CH: Displays the channel number.
NAME: Displays the channel name. Names must be entered using software. A channel
without an assigned name with have the channel number displayed.
FREQ: Displays programmed Frequency.
Menu Item Shortcut Description
BCL 23
Busy Channel Lock-Out: Disables the [PTT] button on a
channel that is already in use. The transceiver will sound a
beep tone and will not transmit if the [PTT] button is pressed
when a channel is already in use.
Availability: MR/Channel Mode (Read Only), VFO/Frequency Mode, Stored in Channel
Settings/Notes
OFF[0] | ON [1] Default: OFF
54

aAOFENE
www.baofengradio.us http://www.baofengradio.us www.foscam.us
Menu Definitions
Menu Item Shortcut Description
PTT-LT 20 PTT-Lagged Transmission (PTT-ID Delay in milliseconds):
Length of time after [PTT] is pressed until PTT-ID is transmitted
Availability: Global
Settings/Notes
(SSBFB290) 0-30 Default: 5
(>BFB291) 0-50 Default: 5
Note: Requires menu 19 to be enabled.
Menu Item Shortcut Description
MDF-A 21 Memory Display Format - [A]
Availability: Global
Settings/Notes
CH [0] | NAME [1] | FREQ [2] Default: NAME
CH: Displays the channel number.
NAME: Displays the channel name. Names must be entered using software. A channel
without an assigned name with have the channel number displayed.
FREQ: Displays programmed Frequency.
53
aAOFENO
www.baofengradio.us http://www.baofengradio.us www.foscam.us
Getting to Know the Radio
Menu and Function Buttons
The BE) button is used to access the menu and to confirm menu options.
The0:i:iilQ buttons are used to navigate through the menu items, as well as to
select channels, and to step up or down in frequency (depending on operating mode).
The ISUfl button is used to exit menus and cancel menu options.
Accessory Jack
The accessory jack on the Baofeng BF-F9V2+ is a Kenwood compatible two pin
design.
The Kenwood 2-pin connector has one 3.5mm TRS plug, and one 2.5mm TS plug,
with 12mm of space in between.
To attach accessories such as headsets, speaker, microphones, or USB PC cables, align
the connectors and push the plugs in fully. Ensure the radio is turned off before
attaching any accessories.
18

aAORENE
www.baofengradio.us http://www.baofengradio.us www.foscam.us
Basic Use
Power and Volume
Before the power is turned on, ensure that the battery and antenna are both attached,
as described in the Initial Setup section.
Turning the Unit On
To turn the unit on, rotate the volume/power knob clockwise until a "click" sound is
heard. If the radio powers on correctly, there should be an audible double beep, and
the display and backlight should turn on, looking something like picture below:
■EL
.*■*. : :." s
■...■W •...'
m■■■■«■■■
■■ ■■m
m*■■■■■■■
■» ■■■*
■■■■■■■■m
..flmmm*BMB"
Turning the Unit Off
Turn the volume/power knob counter-clock wise all the way until a "click"sound is
heard. The unit is now off.
Adjusting the Volume
To turn up the volume, turn the volume/power knob clock-wise.
To turn the volume down, turn the volume/power knob counter-clock-wise. Be careful
not to turn the knob too far, as you may accidentally turn the radio off.
A good way to adjust volume is by using the monitor function, enabled from the
[MONI] button below the [PTT] button, to more accurately and easily adjust the
volume by adjusting it to the un-squelched static sound.
aAOFENG
www.baofengradio.us http://www.baofengradio.us www.foscam.us
Menu Definitions
Menu Item
SC-REV
Shortcut Description
SCan-REVive/Resume Method: TO [0] | CO [1] | SE [2]
Default: TO
Availability: Global
Settings/Notes
TO: Time Operation - scanning will resume after a fixed time has passed.
CO: Carrier Operation - scanning will resume after the active signal disappears.
SE: Search Operation - scanning will not resume.
Menu Item
PTT-ID
Shortcut
19
Description
When to Send PTT-ID
Availability: MR/Channel Mode (Read Only), VFO/Frequency Mode, Stored in Channel
Settings/Notes
OFF [0] | BOT [1] | EOT [2] | BOTH [3] Default: OFF
OFF: No ID is sent.
BOT: The selected S-CODE is sent at the Beginning of Transmission.
EOT: The selected S-CODE is sent at the End of Transmission.
BOTH: The selected S-CODE is sent at the BOT and the EOT.
Note: Select S-CODE using menu 17.
Note: Recommended setting is OFF.
19 52

aAOFENG
www.baofengradio.us http://www.baofengradio.us www.foscam.us
Menu Definitions
Menu Item Shortcut Description
DTMFST 16 DTMF Side Tones: Determines when DTMF Side Tones can
be heard from the transceiver speaker.
Availability: Global
Settings/Notes
OFF [0] | DT-ST [1] | ANI-ST [2] | DT+ANI [3] Default: DT+ANI
OFF: No DTMF Side Tones are heard.
DT-ST: Side Tones are heard only from manually keyed DTMF codes.
ANI-ST: Side Tones are heard only from automatically keyed DTMF codes.
DT+ANI: All DTMF Side Tones are heard.
Note: Requires the transceiver to be in transmit mode.
Note: The mic can pick up the side tone and if the volume loud enough, it will overdrive
and/or distort the transmitted DTMF tones.
Note: (s: BFB231) [MENU]=A, [A] =C, [▼]=B, [EXIT]=D (+)
Note: (> BFB238) [MENU]=A, [A] =B, [T]=C, [EXIT]=D (+)
[MENU]=A, [A] =B, [T]=C, [EXIT]=0
(+) The Side Tone heard for 'D' is '0' (zero) but 'D' is sent over-the-air
Menu Item Shortcut Description
S-CODE 17
PTT-ID (Signal-CODE) Selection: Selects 1 of 15 signal codes.
The signal codes are programmed with software and are up
to 5 DTMF signals each.
Availability: MR/Channel Mode (Read Only), VFO/Frequency Mode, Separate VFO
A & B Settings, Stored in Channel
Settings/Notes
1 [0] | 2 [1] | 3 [2] | 4 [3] | 5 [4] | 6 [5] | 7 [6] | 8 [9] | 9 [8] | 10 [9] | 11 [10] | 12 [11] |
13 [12] | 14 [13] | 15 [14] Default: 1
Note: Menu 19 must be enabled for an S-CODE to be transmitted.
51
aAOFENO
www.baofengradio.us http://www.baofengradio.us www.foscam.us
Basic Use
Making a Call
Press and hold the [PTT] button on the left side of the radio body to transmit. Hold
the device's microphone approximately 3-5 cm from your mouth while transmitting.
When the PTT button is released, the device will go back to receive mode.
Channel Selection
There are two modes of operation on this radio: Frequency Mode (VFO) and
Channel/Memory Mode (MR). Both modes are detailed below.
Frequency Mode (VFO)
While in Frequency Mode (VFO), navigating up and down the frequency band is done
by using the [UP] and [DOWN] buttons. Each press of the button will increment or
decrement the frequency according to the frequency step that has been set on the
transceiver. Frequency step can be set in the menu. See the Menu Function & Description
chart or the Menu Definitions section for more details.
Frequencies can be input directly using the numeric keypad with kilohertz accuracy,
however, the radio will round up to the nearest frequency that corresponds to the
frequency step setting. For example, when a frequency is input with greater than 1kHz
resolution (such as 145.6875 as shown in the example below), always round your
input upwards.
For the following example, assume a 12.6 kHz frequency step.
Entering the frequency 145.6875 MHz on Display A
1. Use the [VF0/MR] button to switch to Frequency (VFO) mode.
2. Press [A/B] button until the black arrow appears next to the upper display (Display
A).
3. Enter [1] [4] [5] on the numeric keypad, it should look something like this:
20
Table of contents
Other Baofeng Portable Radio manuals

Baofeng
Baofeng UV-5G User manual

Baofeng
Baofeng BF-888S User manual

Baofeng
Baofeng BF-82 User manual

Baofeng
Baofeng BF-888S User manual

Baofeng
Baofeng UV-5R Series Operator's manual

Baofeng
Baofeng UV-5RIII User manual

Baofeng
Baofeng UV-82 User manual

Baofeng
Baofeng UV-3R User manual

Baofeng
Baofeng UV-5R Series User manual