barclaycard Smartpay Hub Specification sheet

1
Get started
with your
Smartpay Hub


Welcome to your
Smartpay Hub
We’re pleased to introduce Barclaycard Smartpay
Hub by Epos Now. With its award-winning
software for accepting payments, it’s here to help
you grow your business.
You’ll get dedicated support and training
in addition to 24/7 technical support. From
navigating the Epos Now software to getting
the apps set up, we’re here to ensure you’re
making the most of this valuable software.
This pack includes everything you need to
get going with your Smartpay Hub.
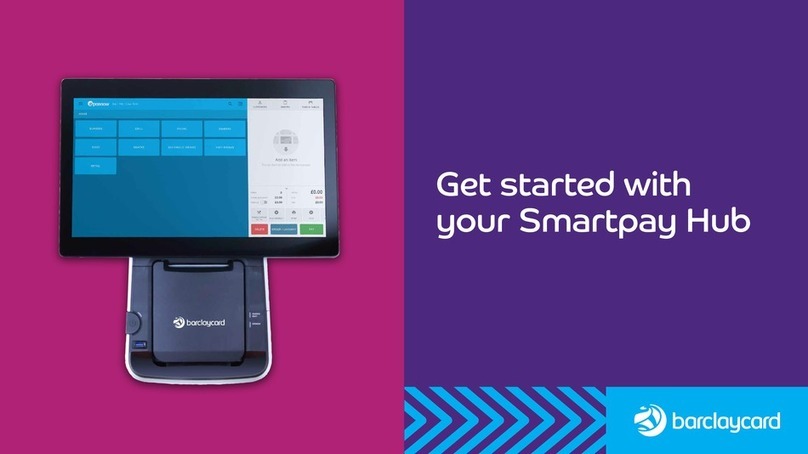
You’ll have a base unit that you can fix to your
counter and print receipts from. There’s also
a detachable tablet that you can take to
customers on your premises.
In order to get set up
quickly the first thing you’ll
need to do is to switch on
and follow the start-up guide
on the screen. Once you
have completed this we’ll be
in touch to help you to get
everything fully implemented.
Contents
Getting started 4
Smartpay Hub Card Reader 6
Base unit features 7
Receipt printer 9
Mobile mode 11
Desk mount 12
Smartpay Hub Accessories 13
Troubleshooting 14
Specifications 15

Getting started
Step 1
Connect the power supply
First of all, you’ll need to plug your base unit into
a power supply. You can use either of the power
sockets on the back. Just make sure you secure
things using the cable strain relief.
If you’ve got a USB barcode scanner and/or a cash
drawer, connect those too. There’s more about the
extras you can get on page 13.
Step 2
Get up and running
There isn’t a power switch, so your base unit should
turn on as soon as you plug it in.
Ethernet port Optional USB Optional Power
(For future barcode scanner cash drawer
development, not
currently used)
4

Step 3 Step 4
Grab the tablet Follow the startup guide
Attach to the cradle – this will charge your tablet You’re almost there. When you turn on the tablet for
while the base unit power’s on. Make sure it’s fully the first time, it’ll automatically load up the startup
charged before tapping the power button to switch guide. Follow that to finish setting things up.
it on.
5

Taking Payments
Barclaycard Smartpay Hub Card Reader
Take contactless, Chip & PIN and mobile payments
through the Smartpay Hub Card Reader.
The card reader works wirelessly using Bluetooth,
but also attaches to the back of the Smartpay
Hub tablet, so you can take payments around
your premises.
Once you’ve completed your startup guide we’ll
call you to get everything set up. This includes a
simple integration that connects your Smartpay
Hub Card Reader so you can start to take payments.
6

Your base unit at a glance
Let’s take a closer look at the front of the unit...
1) Tablet LED
Shows if the base unit’s on or off.
2) Tablet hinge
You can tilt the screen angle.
3) Receipt Printer Lid
The paper roll lives in here (there’s more on
page 10).
4) Base unit LEDs
Here’s what the different LED colours mean:
• Flashing white – the unit’s starting up
• Solid white – it’s ready to use
• Solid blue – printer paired and connected
• Quick flashing blue – Bluetooth is in
‘discoverable mode’ so it’s ready to pair
• Slow flashing blue – Bluetooth pairing is not
complete so the printer won’t work
1
3
4
2
7

And here’s the back of the unit...
5) Tablet lock
Keeps the tablet locked to the base unit.
6) Cable strain relief
Keeps the power and connector cables in place.
7) USB ports
You can use these ports to plug in barcode
scanners and other extra devices (you’ll find
them on page 13).
8) Ethernet port
We’re working on developing this –
so you can’t use it just yet.
9) Power jacks
You can plug the power supply into
either of these.
10) Cash drawer connector
For an optional RJ12 cash drawer
(more on page 13).
11) Fixing bracket
So you can secure the base unit to your
counter (see page 12 for more info).
5
6
7
8
10 11
9
8

Receipt printer
12) Pinhole reset button
You can use this to reboot the system
(there’s more about this on page 14).
13) Indicator LEDs
Show you what’s going on with the base unit
and any other devices that are plugged in.
14) Pairing button
Allows Bluetooth pairing between the base unit
and tablet.
15) Paper roll compartment
Holds 80mm paper roll for printing receipts.
16) Tear strip
Lets you tear paper rolls easily.
12
13
14
15
16
9

How to change the receipt paper roll
You can use 80mm thermal receipt printer paper
in the base unit. Here’s how to change it:
1) Lift the printer lid latch until it clicks and unlocks.
2) Open the printer lid and remove the old roll.
3) Insert a new roll. Make sure the free end of the roll
is towards the front of the compartment.
4) Check that an excess of the roll of paper is outside
of the base unit.
5) With an even pressure, firmly close the printer lid
until it clicks and locks shut.
To order your new till roll, head to the
Smartpay Hub section at pdqconsumables.com
or call us on 01698 843 866*
10

Take payments on the go
You can use your tablet to take the
till directly to customers in your
business premises.
To remove the tablet:
1) Unlock it from the cradle.
2) Slide it upwards. You can then use the hand strap
to carry it around.
To put the tablet back in the cradle:
1) Check that the pushpin connectors are at the
bottom of the tablet.
2) Slide the tablet wrap down into the cradle.
3) Keep it safe by using the lock on the back of
the cradle.
11

Mount it to your counter
You can securely fix your base unit to a Bottom of base-unit
countertop using the mounting bracket.
There are two ways you can do it. Back of base unit
You can mount using the adhesive pad:
1) Connect the power supply and any extra devices
to the base unit.
2) Remove the plastic tape on the bottom of the
adhesive pad.
3) Put the base unit where you’d like it to go,
then push down to secure it in place.
Or you can mount by screwing it into the counter:
1) Slide the mounting bracket off the base unit.
2) Affix the mounting bracket to your counter
through the screw holes.
3) Connect the power supply and any extra devices
to the base unit.
4) Align the lugs at the bottom of the base unit with
the mounting bracket.
5) Then slide the unit until it locks in place.
Cable strain relief
Slide mounting bracket
Front of base unit
12

Smartpay Hub accessories
Here are a few extra devices you can use alongside your Smartpay Hub.
Card reader stand
If you’d like your card reader to be fixed to a
countertop, you can purchase the optional stand.
This also charges your card reader.
Smartpay Hub Card Reader not included.
Cash drawer
The Smartpay Hub’s built to work seamlessly with
the Epos Now cash drawer. Simply plug it into the
base unit, and it’s ready. You can set it to automatically
trigger after a transaction, or open it from the
Smartpay Hub software.
USB barcode scanner
Connects to your base unit and allows you to quickly
sell barcoded items.
Order printer
Add an order printer to your bar, kitchen or warehouse
to have completed orders automatically print out when
they’re placed.
To order, just call us on 01698 843 866*
or visit the Smartpay Hub section at
pdqconsumables.com
13

Troubleshooting
Need to reset? Traffic-light LEDs
If the base unit ever stops responding, you can There are seven LEDs in the printer compartment.
safely reboot it. Here’s what all those coloured lights mean.
Just open the lid of the paper roll compartment
and press the pinhole reset switch. The white LED
should switch off and then flash to show the base
unit’s rebooting.
LED colour (top to bottom) State What it means
Green (overall status) On OK
Flash Tamper alert (with red LED)
Red (tamper indicator) Flash Tamper alert (with green LED)
Yellow (not assigned)
Yellow (PED status) On Connected
Off Disconnected
Flash Comms activity
Yellow (tablet comms) On Connected
Off Disconnected
Flash Comms activity
Yellow (scanner) On Connected
Off Disconnected
Flash Scan activity
Yellow (printer) On Connected
Off Disconnected
14

Specifications
Physical connections on the base unit
• RJ12 cash drawer connector (12V)
• 4 x standard USBs (500mA)
Receipt printing
• Fast, integrated 80mm thermal printer
Controls and status lights
• Reset button
• Bluetooth communications button
• Diagnostic LEDs
• Power/status LED
• Communications LED
Compliance
Communication
• Internal Bluetooth 4.0 module
Power and charging
• 12V 10A DC power jack input
Physical dimensions
• With tablet: H: 210mm – 280mm x W: 315mm x
D: 250mm
• Without tablet: H: 185mm – 240mm x W: 300mm x
D: 250mm
• Tablet: H: 180mm x W: 300mm x D: 40mm
Supported devices
The Smartpay hub supports connection to the
following extra devices:
• 12V RJ12 cash drawer
• USB barcode scanners
• Barclaycard card reader
15

16
Need any help or support?
Call the Barclaycard Smartpay Hub support team on
0330 100 3625*
Or visit us online at
barclaycard.co.uk/smartpayhubhelp
*Calls to 03 numbers use free plan minutes if available; otherwise they cost
the same as calls to 01/02 prex numbers. Please check with your service
provider. Calls may be monitored or recorded in order to maintain high
levels of security and quality of service.
Barclaycard is a trading name of Barclays Bank PLC and Barclaycard International
Payments Limited. Barclays Bank PLC is authorised by the Prudential Regulation
Authority and regulated by the Financial Conduct Authority and the Prudential
Regulation Authority (Financial Services Register number: 122702). Registered
in England No. 1026167. Registered Oce: 1 Churchill Place, London E14 5HP.
Barclaycard International Payments Limited, trading as Barclaycard, is regulated
by the Central Bank of Ireland. Registered Number: 316541. Registered Oce:
One Molesworth Street, Dublin 2, Ireland, D02 RF29. Directors: Paul Adams
(British), James Kelly, Mary Lambkin Coyle and Michael Reed (USA).
Calls may be recorded for security and other purposes.
Other manuals for Smartpay Hub
1
Table of contents
Other barclaycard Switch manuals