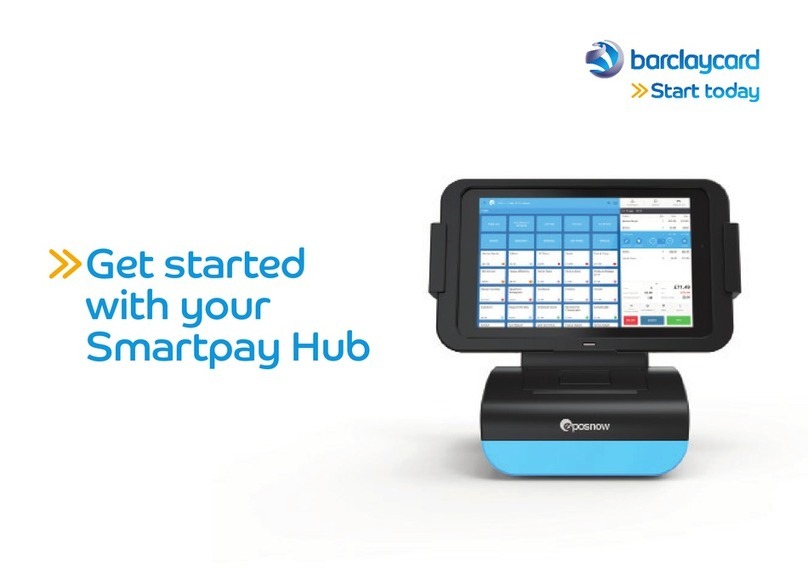
barclaycard Smartpay Hub Specification sheet

1
Get started with
your Smartpay Hub

2
Contents
3 What’s in the box
and getting started
4 Connecting to the internet
5 Setup Wizard
6 Setting up the printer
7 Connecting Bluetooth devices
8 Smartpay Hub features
9 Printer loading
10 Supported peripherals
11 Safety information
12 Technical information
Welcome to Smartpay Hub
With its award-winning software for accepting payments,
your Smartpay Hub is here to help you grow your business.
You’ll get dedicated support and training in addition to 24/7
technical support. From navigating the Epos Now software to
getting the apps set up, we’re here to ensure you’re making the
most of this valuable software.
This pack includes everything you need to get going with your
Smartpay Hub. It’s easy to get started – just follow this guide.
Once you’ve switched on your device, follow the steps on the
screen. When you’ve completed this, we’ll be in touch within 48
hours to get you started with training and on your way to trading.

Connecting to
the internet
Setup
Wizard
Setting up
the printer
What’s in the
box and getting
started
Connecting Smartpay Hub
features
Technical
to Bluetooth
Printer
loading information
Supported
peripherals
Safety
information
What’s in the box ? Getting started
The package contains*
1 x Smartpay Hub
1 x Power supply unit
1 x Dust cover
1xUser manual
1 x Ethernet cable
1 x Barclaycard card reader
*Contents may vary and may contain
additional antennas for Wi-Fi or
Bluetooth.
Connecting the power supply
1) The power supply is connected
via the power socket at the back
of the device – in the port cover.
3
Powering on the Smartpay Hub
2) To turn the Smartpay Hub on,
hit the ‘Power on’ button. The
light above it will turn blue. 3

Connecting to
the internet
Setup
Wizard
Setting up
the printer
What’s in the
box and getting
started
Connecting Smartpay Hub
features
Technical
to Bluetooth
Printer
loading information
Supported
peripherals
Safety
information
Connecting to the internet
1) You can either connect via
Ethernet (plug and play) or
via Wi-Fi. To connect via Wi-Fi,
swipe down from the top of the
screen. This will reveal a new
drop down screen. Swipe down
on this card to see more options
in a dropdown menu. Hit ‘Wi-Fi’.
2) You’ll then see a list of Wi-Fi
networks that are available to
join. Choose yours from the list.
3) When prompted, enter the
Wi-Fi network password,
then hit ‘Connect’.
4) Once you’ve connected to
Wi-Fi, navigate to the Epos
Now Till app on the screen
and continue as normal. If it
fails to connect, make sure
you’ve entered the password
correctly.
If you still have issues, navigate
to ‘Wi-Fi settings’ via the
Android settings icon on the
dropdown menu. If that still
doesn’t help, check your
network status.
4

Connecting to
the internet
Setup
Wizard
Setting up
the printer
What’s in the
box and getting
started
Connecting Smartpay Hub
features
Technical
to Bluetooth
Printer
loading information
Supported
peripherals
Safety
information
Setup wizard
1) When you open the app,
you’ll be presented with a
company setup wizard.
Firstly, choose your industry.
2) Once you’ve chosen your
industry, choose the best
match with your business.
This information will help us
set up the software to be
specific to you.
3) You’ll now be prompted to
create your Epos Now account.
Accurately fill in your details
to create your account. Your
merchant ID can be found in
your Barclaycard paperwork.
4) If you have an Epos Now
account already, please hit the
“Already have an Epos Now
account?” button and sign in.
5) Once you’ve created your
account, we’ll be in touch with
you within 48 hours to walk
you through the software,
and explain how to get the
most out of all features of
Smartpay Hub.
5

Connecting to
the internet
Setup
Wizard
Setting up
the printer
What’s in the
box and getting
started
Connecting Smartpay Hub
features
Technical
to Bluetooth
Printer
loading information
Supported
peripherals
Safety
information
Setting up the printer
1) Your printer is built-in. To set
this up, open the side menu
at ‘Till’ and go to ‘Settings’.
Then select the cog next to
‘App settings’.
2) A new page – ‘Settings’ – will
appear. Under ‘Receipt printer’,
choose ‘Set up printer’.
3) A pop-up will appear. In the
dropdown, select ‘T80 Built in’.
4) Your printer name should
appear. Choose that and
press ‘OK’.
You can test the printer on the
‘App settings’ page.
6

Connecting to
the internet
Setup
Wizard
Setting up
the printer
What’s in the
box and getting
started
Connecting Smartpay Hub
features
Technical
to Bluetooth
Printer
loading information
Supported
peripherals
Safety
information
Connecting to Bluetooth devices
1) Swipe down twice from the
top and then HOLD DOWN
the Bluetooth logo until the
Bluetooth page opens.
2) Select the ‘Pair new device’
option to find the device you
wish to pair with.
3) Select the relevant device
from the list to enter
pairing mode.
4) Ensure the Bluetooth pairing
code is the same on the
Bluetooth device and the
Smartpay Hub. Then select
‘Pair’ on both devices. (This
may appear as a tick icon on
the Bluetooth device.)
The integration of the
Barclaycard card reader
must be completed by Epos
Now over the phone during
your training. Specification
may vary and require a
separate Bluetooth USB
dongle, or additional
Bluetooth antenna.
7

Connecting to
the internet
Setup
Wizard
Setting up
the printer
What’s in the
box and getting
started
Connecting Smartpay Hub
features
Technical
to Bluetooth
Printer
loading information
Supported
peripherals
Safety
information
Smartpay Hub features
Front view
1) Power button
2) USB
3) Printer indicator
2
1 3
Printer alarm and indicator may
show/sound if:
• the printer is out of paper
• the printer paper is not
inserted correctly
• the printer is overheating / fault
with the printer
Please contact support if you
continue to have issues.
Front view
1) Audio Jack
2) 3x USB
3) LAN
4) 2x USB
5) COM
6) Power Input
7) Cashdrawer Port
8) HDMI Out
1 2 4 5 6 7
3
8
8

Connecting to
the internet
Setup
Wizard
Setting up
the printer
What’s in the
box and getting
started
Connecting Smartpay Hub
features
Technical
to Bluetooth
Printer
loading information
Supported
peripherals
Safety
information
Printer loading
1) Find the trigger – it’s under the
screen on the right-hand side
(as you’re facing the screen).
Pull the trigger from behind
(towards you) to open the
printer drawer.
2) Put the receipt paper in,
as shown above, then close
the printer drawer. Note – the
printer alarm won’t sound if
the paper’s put in the wrong
way around.
9

Connecting to
the internet
Setup
Wizard
Setting up
the printer
What’s in the
box and getting
started
Connecting Smartpay Hub
features
Technical
to Bluetooth
Printer
loading information
Supported
peripherals
Safety
information
Supported peripherals
Card reader stand
If you’d like your card reader
to be fixed to a counter top,
you can buy an optional stand.
USB barcode scanner
Connects to your Smartpay Hub
and makes selling barcoded
items simple.
Order printer
If you need completed orders
automatically printed when
they’re placed, add an order
printer to your bar, kitchen
or warehouse.
Cash drawer
The Smartpay Hub is built to
work seamlessly with the cash
drawer. Simply plug it in, and
it’s ready to work. You can set it
to automatically trigger after a
transaction, or open it from the
Smartpay Hub software.
To order, just call us
on 01698 843 866*
or visit the Smartpay
Hub section at
pdqconsumables.com
10

Connecting to
the internet
Setup
Wizard
Setting up
the printer
What’s in the
box and getting
started
Connecting
to Bluetooth
Safety information
General use
ALWAYS read the safety information and keep this guide
in a safe place. Heed all warnings, and follow these
instructions carefully before use.
DO NOT attempt to insert any sharp objects into the device,
or use them to operate it – they may scratch or damage
the product.
DO NOT place the device on an uneven surface.
ALWAYS consider the device placement and cables
connected to the device to ensure a safe working
environment.
DO NOT use harsh chemicals, cleaning solvents or
detergents to clean the product. Wipe with a dry, soft cloth
or tissue paper to clean. Disconnect the product from the
electrical outlet before cleaning.
DO NOT shove any foreign objects into the product or ports.
NEVER place any objects on top of the product, or on top of
the display, as this may damage the product.
DO NOT attempt to open the product casing.
This product does not contain any user serviceable parts.
Unauthorised handling of the device may damage it and will
void your warranty.
DO NOT expose the product to strong magnetic or
electrical fields.
NEVER use your product, and always disconnect your
product from the mains power supply, during an
electrical storm.
ALWAYS disconnect your product from mains power supply
if not being used for a significant period of time.
SAFE TEMPERATURE: This product should only be used in
environments with ambient temperatures between 0°C and
40°C. It is advised not to use the product in any extreme
cold or heat environment.
CAUTION: This product has some metal parts to
disperse heat.
ALWAYS keep the product away from heat sources such as
radiators, heaters and other appliances which produce heat.
DO NOT leave the product in high temperatures as
electronic devices and plastic parts may warp in heat.
INPUT RATING: Refer to the rating label on the product
and be sure that the power adapter complies with it. Only
use the power adapter that came with the product. Using
an unauthorised power supply will invalidate your warranty
and may damage the product beyond repair.
ALWAYS check the connections between any peripheral and
the product before powering on.
DO NOT insert anything into the product that may result in
short circuiting or damaging it.
ALWAYS handle the product with care to avoid damage.
CAUTION: This product should never be immersed in water,
used in a humid environment, and should be protected
against any water jets.
DO NOT expose the product to any chemical substances.
DO NOT use this product near medical devices.
CAUTION: Disconnect mains power in the event of any
abnormal smell or smoke emitting from the product.
NOTE: No one is entitled to modify or change the product in
any way, unless permitted by the company.
Smartpay Hub
features
Printer
loading
Supported
peripherals
Safety
information
Technical
information
Recycling
Always return your used electronic products, batteries,
and packaging materials to dedicated collection points.
This way, you help to prevent uncontrolled waste disposal
and promote the recycling of materials. All materials of the
device can be recovered as material and energy.
DO NOT throw the product in municipal waste. Check local
regulations for disposal of electronic products.
Disposal of Waste Electrical & Electronic Equipment (WEEE).
This symbol, on the product or on its packaging, indicates
that this product should not be treated as household
waste. Instead, it should be handed over to a suitable
collection point for the recycling of electrical and electronic
equipment. By ensuring this product is disposed of
correctly, you will help prevent potential negative
consequences for the environment and human health,
which could otherwise be caused by inappropriate waste
handling of this product. The recycling materials will help to
conserve natural resources. For more information about the
recycling of this product, please contact your local council
office, your household waste disposal service or where you
purchased the product.
Electrical Safety Information
Compliance is required with respect to the voltage,
frequency, and current requirements indicated on the
manufacturer’s label. Connection to a different power
source than those specified herein will likely result in
improper operation,damage to the equipment, or pose a
fire hazard if the limitations are not followed.
There are no operator serviceable parts inside this
equipment. There are hazardous voltages generated by this
equipment which constitute a safety hazard. Service should
be provided only by a qualified service technician.
Contact a qualified electrician or the manufacturer if there
are questions about the installation, prior to connecting the
equipment to mains power.
Emissions and Immunity Information
Notice to Users in the European Union: Use only the
provided power cords and interconnecting cabling provided
with the equipment. Substitution of provided cords and
cabling may compromise electrical safety or CE Mark
Certification for emissions or immunity as required by
the following standards: This Information Technology
Equipment (ITE) is required to have a CE Mark on the
Manufacturer’s label which means that the equipment has
been tested to the following Directives and Standards: This
equipment has been tested to the requirements for the CE
Mark as required by EMC Directive 2014/30/ EU as indicated
in European Standard EN 55032 Class A and the Low Voltage
Directive 2014/35/EU as in European Standard EN 60950-1.
Trademarks
Manufactured by Epos Now, 2 Whiting Road, Norwich
Business Park, Norwich, England, NR4 6DJ.
Epos Now, and the Epos Now logo are trademarks or
registered trademarks of Epos Now Limited.
11

Connecting to
the internet
Setup
Wizard
Setting up
the printer
What’s in the
box and getting
started
Connecting Smartpay Hub
features
Technical
to Bluetooth
Printer
loading information
Supported
peripherals
Safety
information
Technical information
System Processor
GPU
Memory
Storage
OS
Intel®Celeron 3865U Dual Core
Intel HD Graphics
2GB
64GB
Android 8.1
Display Display 15.6” diagonal, 10pt capacitive touch screen
Resolution 1920*1080
Viewing angle Horizontal: ±85° or 170° total | Vertical: ±85° or 170° total
Contrast ratio 800:1
Brightness Typ 300cd/m2
Network Wi-Fi
Ethernet
Bluetooth
802.11 a/c
100M/1000M
Bluetooth 4.2
Interface USB Host x 1 Front facing USB 3.0
USB Host x 5 Rear USB 2.0 x 5
LAN x 1 RJ45
Serial Port x 2 DB9
Audio Jack x 1 3.5mm
Cash drawer port x 1 RJ12
Power interface x 1 DC input
HDMI x 1 HDMI out
Other Antenna ports
Speakers
Power
Operating temperature
Antennas for Wi-Fi and Bluetooth
2 x 1W
24V / 2.5A
0°C - 40°C
12

Need any help or support?
Visit us online at barclaycard.co.uk/smartpayhubhelp
Or call the Barclaycard Smartpay Hub support team 0844 822 2011*
Available in large print, Braille and audio format by calling 0800 161 5350*
(Barclaycard Payment Solutions) / 1800 812700 (Barclaycard International Payments)
*Calls charges apply. 0844 calls will cost 7p per minute plus your phone company’s access charge (current at August 2018). Calls to 0800 numbers are free from UK landlines and personal mobiles, otherwise call charges may apply.
Calls to 0818 are charged at local call rates please check with your network provider charges may be higher from mobile network providers. Calls to 1800 numbers are free from ROI landlines and personal mobiles otherwise call charges
may apply. Calls may be monitored or recorded in order to maintain high levels of security and quality of service.
Barclaycard is a trading name of Barclays Bank PLC and Barclaycard International Payments Limited. Barclays Bank PLC is authorised by the Prudential Regulation Authority and regulated by the Financial Conduct Authority and the
Prudential Regulation Authority (Financial Services Register number: 122702). Registered in England No. 1026167. Registered Office: 1 Churchill Place, London E14 5HP. Barclaycard International Payments Limited, trading as Barclaycard,
is regulated by the Central Bank of Ireland. Registered Number: 316541. Registered Office: One Molesworth Street, Dublin 2, Ireland, D02 RF29. Directors: Paul Adams (British), James Kelly, Mary Lambkin Coyle and Peter Morris.
BCD114569 FCTB06 01/21
Other manuals for Smartpay Hub
1
Table of contents
Other barclaycard Switch manuals
Popular Switch manuals by other brands

Allen-Bradley
Allen-Bradley 440J-N Series installation instructions

TRENDnet
TRENDnet TEG-S40SX Specifications

Renkforce
Renkforce 1005584 operating instructions

Crestron
Crestron HD-RX-4K-510-C-E quick start

Grundfos
Grundfos PM Rain Installation and operating instructions

Xylem
Xylem McDonnell & Miller FS4-3T Series instruction manual