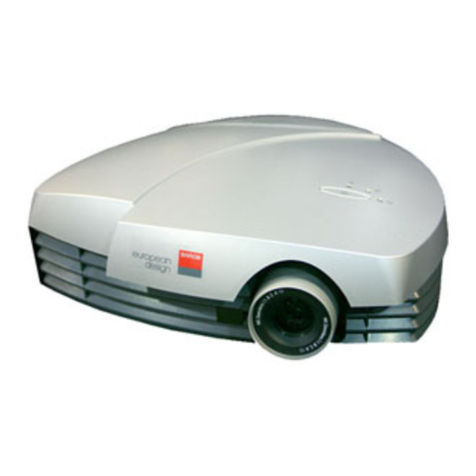
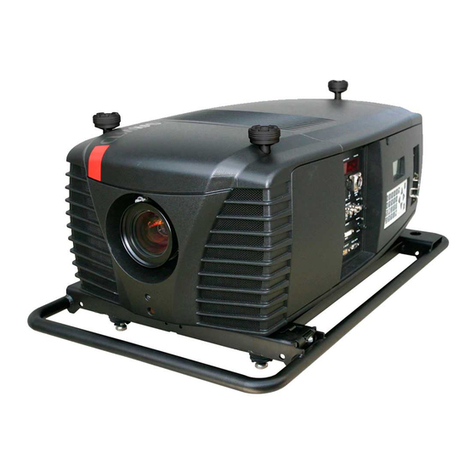
Barco RETRO GRAPHICS 2100 User manual

OWNER'S MANUAL
R9001150
GRAPHICS
2100

BARCO PROJECTION SYSTEMS
Date : 190898 Rev. : 02
OWNER'S MANUAL
R9001150
GRAPHICS
2100
Art. No. : R5975187

Due to constant research, the information in this manual is subject to change without notice.
Produced by BARCO N , August 1998.
All rights reserved.
Trademarks are the rights of their respective owners.
BARCO nv/Projection Systems
Noordlaan 5
B-8520 Kuurne
Belgium
Printed in Belgium
ederal communication commission ( CC statement)
This equipment has been tested and found to comply with the limits for a class B digital device, pursuant to Part 15 of the FCC Rules. These
limits are designed to provide reasonable protection against harmful interference when the equipment is operated in a commercial environment.
This equipment generates, uses, and can radiate radio frequency energy and, if not installed and used in accordance with the instruction
manual, may cause harmful interference to radio communications. Operation of this equipment in a residential area is likely to cause harmful
interference in which case the user will be required to correct the interference at his own expense.
Instructions to the user :
if this equipment does cause interference to radio or television reception, the user may try to correct the interference by one or more of the
following measures :
- Re-orientation of the receiving antenna for the radio or television.
- Relocate the equipment with respect to the receiver.
- Plug the equipment into a different outlet so that the equipment and receiver are on different branch circuits.
- Fasten cables connectors to the equipment by mounting screws.
Note :
The use of shielded cables is required to comply within the limits of Part15 of FCC rules and EN55022

Table of Contents
i-1
5975187 BARCOGRAPHICS 2100 190898
TABLE OF CONTENTS
i
TABLE OF CONTENTS .............................................................................................................................................................................. i-1
UNPACKING AND DIMENSIONS ............................................................................................................................................................... 1-1
Unpacking ...................................................................................................................................................................................... 1-1
Projector dimensions ..................................................................................................................................................................... 1-1
Battery installation in the RCU. ...................................................................................................................................................... 1-2
INSTALLATION GUIDELINES ................................................................................................................................................................... 2-1
Environment ................................................................................................................................................................................... 2-1
What about ambient light ? ............................................................................................................................................................ 2-1
Which screen type? ...................................................................................................................................................................... 2-1
What image size? How big should the image be? ...................................................................................................................... 2-1
Where to install the projector? ...................................................................................................................................................... 2-2
How to install a projection lens? ................................................................................................................................................... 2-3
INSTALLATION SET UP ........................................................................................................................................................................... 3-1
LOCATION AND FUCNTIONS OF CONTROL ........................................................................................................................................... 4-1
Front panel terminology ................................................................................................................................................................. 4-1
Control panel terminology ............................................................................................................................................................. 4-2
CONNECTIONS ........................................................................................................................................................................................ 5-1
Power (mains) cord connection ................................................................................................................................................... 5-1
Fuses ............................................................................................................................................................................................ 5-1
Switching on ................................................................................................................................................................................. 5-1
Lamp Lifetime ................................................................................................................................................................................ 5-2
Switching to stand-by. .................................................................................................................................................................. 5-2
Switching off ................................................................................................................................................................................. 5-2
Signal input connection to the projector. ...................................................................................................................................... 5-2
Connecting a ideo source to the BNC input ............................................................................................................................... 5-3
Connecting a ideo source to the Cinch input ............................................................................................................................. 5-3
Connecting a S- ideo source to the mini DIN input...................................................................................................................... 5-4
Connecting a RGB analog source to source 4 or 5 ..................................................................................................................... 5-4
Connecting a computer, e.g. IBM PC (or compatible), Apple Macintosh to the RS 232 input of the projector. .......................... 5-5
Set up of the baud rate for communication with a computer. .................................................................................................... 5-5
Connecting a RC DS 05 to the projector. .................................................................................................................................... 5-5
Connecting a S05 to the projector ............................................................................................................................................. 5-5
Connecting an IR Remote Receiver 800 to the projector. ............................................................................................................ 5-5
CONTROLLING ........................................................................................................................................................................................ 6-1
How to use the RCU? ................................................................................................................................................................... 6-1
Projector address ......................................................................................................................................................................... 6-1
How to display a projector address? ........................................................................................................................................... 6-2
How to program an address into the RCU? ................................................................................................................................. 6-2
Picture controls with direct access. ............................................................................................................................................ 6-2
Sound controls with direct access .............................................................................................................................................. 6-3
START UP OF THE ADJUSTMENT MODE ................................................................................................................................................ 7-1
Adjustment Mode .......................................................................................................................................................................... 7-1
RANDOM ACCESS ADJUSTMENT MODE ................................................................................................................................................ 8-1
Starting up the Random Access Adjustment Mode ..................................................................................................................... 8-1
File service .................................................................................................................................................................................... 8-2
Load file ......................................................................................................................................................................................... 8-2
Edit file ........................................................................................................................................................................................... 8-3
Rename file .................................................................................................................................................................................... 8-5
Copy file ........................................................................................................................................................................................ 8-5
Delete file(s) .................................................................................................................................................................................. 8-6
File Options .................................................................................................................................................................................... 8-6
Picture Tuning ................................................................................................................................................................................ 8-6
Sync slow/fast ............................................................................................................................................................................. 8-7
Still ideo ....................................................................................................................................................................................... 8-7
Color Balance ................................................................................................................................................................................ 8-7
Gamma .......................................................................................................................................................................................... 8-7
Audio Tuning ................................................................................................................................................................................. 8-8

olume, Balance, Bass and Treble .............................................................................................................................................. 8-8

Table of Contents
i-2 5975187 BARCOGRAPHICS 2100 190898
Mute ............................................................................................................................................................................................... 8-8
Lock ............................................................................................................................................................................................... 8-8
Fade ............................................................................................................................................................................................... 8-8
Geometry ....................................................................................................................................................................................... 8-9
Shift ............................................................................................................................................................................................... 8-9
Size ................................................................................................................................................................................................ 8-9
Side keystone .............................................................................................................................................................................. 8-10
Blanking ....................................................................................................................................................................................... 8-10
Options ........................................................................................................................................................................................ 8-11
INSTALLATION MODE ............................................................................................................................................................................. 9-1
Starting up the Installation Mode ................................................................................................................................................... 9-1
Configuration ................................................................................................................................................................................. 9-1
Internal Patterns ............................................................................................................................................................................ 9-1
SER ICE MODE ..................................................................................................................................................................................... 10-1
Starting up the Service Mode ..................................................................................................................................................... 10-1
Identification ................................................................................................................................................................................ 10-2
Change Password ...................................................................................................................................................................... 10-3
Change Language ....................................................................................................................................................................... 10-3
Change Projector Address ......................................................................................................................................................... 10-3
Change Baudrate PC ................................................................................................................................................................... 10-4
Reset Lamp Runtime ................................................................................................................................................................... 10-4
Lamp Run Time History ............................................................................................................................................................... 10-4
Dimming ....................................................................................................................................................................................... 10-5
Preset Input Balance ................................................................................................................................................................... 10-5
60 Hz Tracking ............................................................................................................................................................................ 10-5
I2C diagnosis. .............................................................................................................................................................................. 10-6
Appendix A : Standard Source Set Up Files ......................................................................................................................................... A-1
Appendix B : Lenses .............................................................................................................................................................................. B-1
Focusing the lens ......................................................................................................................................................................... B-1
Lens Cleaning Procedure ............................................................................................................................................................ B-1
Lenses ......................................................................................................................................................................................... B-2
Appendix C : Source numbers 90 - 99 .................................................................................................................................................. C-1

1-1
Unpacking & Dimensions
5975187 BARCOGRAPHICS 2100 200597
1
Pull
To open
12345
641.5
405 191.5
63
335
224
141
55
35 141.2
20
250
220
278 127
5
194.9
603
225 245 67.5
UNPACKING & DIMENSIONS
Unpacking
To open the banding, pull on the clip as shown in the first drawing.
Take the projector out of its shipping carton and place it on a table.
For transportation, the projector is mounted on a wooden board with 3 bolts (M5). Use a 8 mm wrench to remove these bolts.
When using the projector as a table mounted configuration, always mount the 3 plastic supporting feet by turning in into the provided holes
(see drawing on next page).
Save the original shipping carton and packing material, they will come in handy if you ever have to ship your projector. For maximum protection,
repack your projector as it was originally packed at the factory.
Contents of the shipped box :
- 1 remote control unit RCU + 9 battery
- 1 owners manual.
- 1 installation manual.
- 3 plastic supporting feet.
- 2 supporting feet extensions for 100% off-axis projection.
- 1 BARCOGRAPHICS 2100
- 1 power cable with outlet plug type CEE7.

1-2
Unpacking & Dimensions
5975187 BARCOGRAPHICS 2100 200597
310a.DRW
fig.1
fig.2
Battery installation in the RCU.
A battery is delivered inside the plastic bag with the power cord. Before using the RCU, install the battery.
Remove the battery cover on the backside of the remote control by pushing the indicated handle a little
to the bottom of the RCU. Lift up the top side of the cover at the same time (fig. 1).
Insert the new 9 battery in the lower compartment and connect the battery to the contact plate.
Insert the battery into the lower compartment and put the cover back.
Note : projector address has to be programmed on the RCU before using the RCU (see chapter
'Controlling')
Insert here the 'Insert card
RCU' which you can cut out
on the last page of this manual.
Contact
plate
Battery

Installation Guidelines
2-1
5975187 BARCOGRAPHICS 2100 200597
2INSTALLATION GUIDELINES
Installation gui elines
Careful consideration of things as image size, ambient light level,
projector placement and type of screen to use are critical to the
optimum use of the projection system.
Max. ambient temperature : 40 °C.
Min. ambient temperature : 0 °C.
The projector will not operate if ambient temperature falls outside this
range (0 °C - 40 °C).
* Environment
Do not install the projection system in a site near heat sources such
as radiators or air ducts, or in a place subject to direct sunlight,
excessive dust or humidity. Be aware that room heat rises to the
ceiling; check that temperature near the installation site.
* What about ambient light ?
The ambient light level of any room is made up of direct or indirect
sunlight and the light fixtures in the room. The amount of ambient light
will determine how bright the image will appear. So, avoid direct light
on the screen.
Windows that face the screen should be covered by opaque drapery
while the set is being viewed. It is desirable to install the projecting
system in a room whose walls and floor are of non-reflecting material.
The use of recessed ceiling lights and a method of dimming those
lights to an acceptable level is also important. Too much ambient light
results in a washing out of the projected image. That appears as
less contrast between the darkest and lightest parts of the image.
With bigger screens, the washing out becomes more important. As
a general rule, darken the room to the point where there is just
sufficient light to read or write comfortably. Spot lighting is desirable
for illuminating small areas so that interference with the screen is
minimal.
* Which screen type?
There are two major categories of screens used for projection
equipment. Those used for front projected images and those for rear
projection applications.
Screens are rated by how much light they reflect (or transmit in the
case of rear projection systems) given a determined amount of light
projected toward them. The GAIN of a screen is the term used. Front
and rear screens are both rated in terms of gain. The gain of screens
range from a white matte screen with a gain of 1 (x1) to a brushed
aluminized screen with a gain of 10 (x10) or more. The choice
between higher and lower gain screens is largely a matter of
personal preference and another consideration called the iewing
angle.
In considering the type of screen to choose, determine where the
viewers will be located and go for the highest gain screen possible.
A high gain screen will provide a brighter picture but reduce the
viewing angle.
For more information about screens, contact your local screen
supplier
* What image size? How big should the image be?
The BARCOGRAPHICS 2100 is designed for projecting an image size
from 1.00m (3.3ft) to 6.00m (20ft) with a aspect ratio of 4 to 3.
Screen width

Installation Guidelines
2-2 5975187 BARCOGRAPHICS 2100 200597
* Where to install the projector?
Definitions of the Abbreviation on drawings
B = Distance between ceiling and top of the screen or
between floor and bottom of the screen.
A = Correction value, distance between bottom side of
projector and middle of the lens. alue to be subtracted from
B to obtain the correct installation position. (A value is a
constant value for all screen widths and type of lenses, A =
200 mm or 7.874".)
CD = Total distance between projector and ceiling or projector
and floor.
SW = Screen width.
SH = Screen height (image height).
PD = Projector Distance, distance between screen and
projector.
Inputs and computer video format input compatibility :
IDEO and S- IDEO
RGB ANALOG with STANDARD SYNC (SYNC ON GREEN or
SEPARATE SYNC)
RGB ANALOG with TRI-LE EL SYNC (SYNC ON GREEN or
SEPARATE SYNC)
All computer sources with resolution up to 1280 x 1024.
Ceiling mounting of the BARCOGRA HICS 2100
(70% off-axis projection)
Table mounting of the BARCOGRA HICS 2100
(70% off-axis projection)
Screen
PD
B
Ceiling
Projector
CD
A
CD = B + (SW x 0.225) - A
SH Optical axis projection lens
SH
SW
SIDE VIEW
BACK VIEW
Screen
BOTTOMVIEW
SW
Ceiling
Screen
PD
B
Floor
Projector
CD
A
CD = B+ (SW x 0.225) - A
CD = height of table + supporting feet
SH Optical axis projection lens
SH
SW
SIDE VIEW
BACK VIEW
Screen
BOTTOMVIEW
SW
Floor

Installation Guidelines
2-3
5975187 BARCOGRAPHICS 2100 200597
To install the projector
100% off-axis, consult
a qualified service tech-
nician.
* How to install a projection lens?
The projector is supplied without any lens. The following lenses are
available as an option (order numbers are given in appendix B) :
SD(1.2:1) - ideo
SD(1.2:1)
SD(1.7:1)
SD(1.6-1.9:1)
SD(0.8:1)
How to install the lens?
Remove the foam rubber in the opening of the lens holder.
- Take the new lens out of its shipping carton and remove the lens
covers.
- Turn the lens into the lens holder by turning clockwise.
- Focus the lens (see appendix B, 'Focusing the lens') and secure
the correct position with the fastener ring by turning
this ring clockwise.
* How to install the projector?
Ceiling mount or table mount?
To install the BARCOGRAPHICS 2100, it is recommended using the
BARCO mounting kits which are specially designed for this function.
BARCO ceiling support CM50 for LCD projectors.
CM50 with pulley system, Order number : R9829610.
CM50 without pulley system, Order number : R9829611.
Note : The CM50 in combination with the adapter plate can
only be used for 70 % OFF AXIS projection.
Always use the BARCO ceiling support to attach your
BARCOGRAPHICS 2100 to the ceiling.
The installation instruction for this support is enclosed in the packet
of the set.
When using the adapter plate and the CM50 to mount the
BARCOGRAPHICS 2100 to the ceiling, only 70% off-axis projection
is possible.
BARCO projection table
BARCO's projection table provides adjustable height and offers a
stable surface for the projector
Order number R9827740.
Screen
PD
B
Floor
Projector
CD
A
CD = B - A
CD = height of table + supporting feet
SH
SH
SW
SIDE VIEW
BACK VIEW
Screen
BOTTOM VIEW
SW
Floor

Installation Set Up
3-1
5975187 BARCOGRAPHICS 2100 190898
3INSTALLATION SET UP
The projector can be installed to project images in four different
configurations : front/table, front/ceiling, rear/table and rear/ceiling.
To change the Configuration, enter the adjustment mode by pushing ADJUST or ENTER.
Highlight Installation by pushing the control disk up or down and press ENTER to select.
The installation menu will be displayed.
ENTER displays the Installation menu.
EXIT returns to operational mode.
Highlight Configuration by pushing the control disk up or down and press ENTER to
select. The configuration menu will be displayed.
ENTER displays the Configuration menu.
EXIT returns to the path selection menu.
ADJUST returns to operational mode.
The actual selected configuration will be highlighted.
Push the control disk up or down to select the corresponding configuration with
regard to the projector environment. Press ENTER to confirm your selection.
ENTER to confirm the selection.
EXIT returns to the installation menu.
ADJUST returns to operational mode.
Select with ê or é
then <ENTER>
<EXIT> to return.
Select with ê or é
then <ENTER>
<EXIT> to return.
Select with ê or é
then <ENTER>
<EXIT> to return.
CONFIGURATION
FRONT/TABLE
FRONT/CEILING
REAR/TABLE
REAR/CEILING
INSTALLATION
CONFIGURATION
OSD COLOR
INTERNAL ATTERNS
ADJUSTMENT MODE
Select a path from below :
RANDOM ACCESS
INSTALLATION
SERVICE
Source 01
5HDU7DEOH
5HDU&HLOLQJ
)URQW7DEOH
)URQW&HLOLQJ

Location and Function of Controls
4-1
5975187 BARCOGRAPHICS 2100 200597
4LOCATION AND FUNCTION OF CONTROLS
ower switch : '1' = on, '0' = off
ower input : switchable between 120 AC and 230
AC
IR receiver : receiver for control signals transmitted from
the RCU.
Diagnostics code : a) source number
b) error code : a two digit error code is displayed when
something goes wrong inside the projector.
Source 5 : RGB H/C V input : RGB analog input with
standard sync on 5 BNC connectors. The sync can be sync
on green, composite sync, separate sync (H & )
Source 4 : RGB H/C V input : RGB analog input with
standard sync on 5 BNC connectors. The sync can be sync
on green, composite sync or separate sync (H & )
Source 1 : Video input (composite video) on BNC connec-
tor. Allows a video tape recorder, video camera, color
receiver/monitor, etc. having a video line output to be
connected to the projector.
Source 2 : Video input on Cinch (RCA) connector. Allows
a video tape recorder, video camera, color receiver/moni-
tor, etc. having a video line output to be connected to the
projector.
Source 3 : S-Video on 4-pin mini-DIN connector. Separate
Y/C (luma-chroma) signal inputs for higher quality playback
1
2
3
4
5
of Super HS signals.
AUDIO IN : 3 audio inputs on 2 Cinch (RCA) connectors for
audio (L-R).
AUDIO OUT LED : when muted, led is out.
AUDIO OUT : 2 x Cinch (RCA) stereo audio output.
rojector mode indication : indicates the status of the
projector.
no light : power switch is not pressed.
red light : power switch is pressed, projector in stand
b y mode.
green light : projector in operational mode.
IR-Acknowledged : (green LED) IR signals are recog-
nized.
IR-Received : (red LED) IR signals are received but not
recognized.
RS232 IN : to allow communication with external computer,
e.g. IBM PC or compatible, Macintosh ...
RS232 OUT : used to connect to next projector, RS232IN
plug (communication link for PC or MAC to the next projec-
tor).
Communication port : allows communication with the
800 peripherals.
CTRL : remote input for wired remote control.
10
12
11
13
14
15
16
17
18
6
7
8
9
Front panel terminology
0I
SOURCE1SOURCE 4
SOURCE5
SOURCE 2
SOURCE 3
AUDIO OUT AUDIO IN C AUDIO IN B AUDIO IN A
VIDEO
VIDEO
S VIDEO
RGBH/CV
RGBH/CV
L - R L - R L - R L - R
IR
RR
GG
BB
H/C H/C
VV
RS 232 IN RS 232 OUT COMM PORT CTRL
hardwired
remote
Read instructions before
connecting peripherals
1215 16 17 18
SOURCE 1SOURCE 4
SOURCE 5
SOURCE 2
SOURCE 3
AUDIO OUT AUDIO IN C AUDIO IN B AUDIO IN A
VIDEO
VIDEO
S VIDEO
RGBH/CV
RGBH/CV
L - R L - R L - R L - R
IR
RR
GG
BB
H/C H/C
VV
356 7 8
912
1314
4
1011

Location and Function of Controls
4-2 5975187 BARCOGRAPHICS 2100 200597
Control Panel Terminology
a. Local keypad
Gaining access
The keypad is located behind a door, screened with
the name of the projector.
To open the door, push once on the indicated side
of the door and turn it to the right side of the
projector.
b. Remote control
This remote control includes a battery powered infrared (IR) trans-
mitter that allows the user to control the projector remotely.
This remote control is used for source selection, control,
adaptation and set up. It includes automatic storing of :
- picture controls (Brightness, Sharpness...)
- settings
Other functions of the remote control are :
- switching between standby and operational mode.
- switching to "pause" (blanked picture, full power for immediate
restarting)
- direct access to all connected sources.
- variable adjustment speed : when pushing continuously on the
arrow keys or the picture keys, the adjustment will be executed
in an accelerated fashion.
Remote Control (RCU)
Local keypad
COLOR
PHASE
SHARPN TINT BRIGHTN
STANDBY
ENTER
TEXT
EXIT
PAUSE
CONTRAST
-+
-+
-+
-+
-+
0
9
78
6
5
43
2
1
(17(5
3$86(
-+
3+$6(
)5((=
7(;7
(;,7
$'-
$''5
67%<
6+$531(66
7,17
&2/25
%5,*+71(66
&2175$67
087(
-+
%$/$1&(
-+
75(%/(
-+
92/80(
-+
%$66

Location and Function of Controls
4-3
5975187 BARCOGRAPHICS 2100 200597
Terminology
Back light key : when activated, all keys will light up and
are visible in the dark.
ADJ. : ADJUST key, to enter the adjustment mode or for
quick exit in the adjustment mode.
Address key (recessed key), to enter the address of the
projector (between 0 and 9). Press the recessed address
key with a pencil, followed by pressing one digit button
between 0 and 9.
STBY : stand by button - to start projection when
the power switch is switched on.
- to switch off the projector without switching off the
power switch.
AUSE : to stop projection for a short time, press 'PAUSE'.
The image disappears but full power is retained for imme-
diate restarting.
MUTE : to interrupt the sound reproduction.
Digit buttons : direct input selection.
Sound controls : use these buttons to obtain the desired
sound reproduction (see also 'Controlling').
icture controls : use these buttons to obtain the desired
picture analog level (see also 'Controlling').
HASE : used to remove instability of the image.
10
1
2
3
4
5
6
7
8
9
TEXT : when adjusting one of the image, e.g. controls
during a meeting, the displayed bar scale can be removed
by pressing 'TEXT' key first. To re-display the bar scale on
the screen, press 'TEXT' key again.
FREEZE : press to freeze the projected image.
ENTER : to start up the adjustment mode or to confirm an
adjustment or selection in the adjustment mode.
EXIT : to leave the adjustment mode or to scroll upwards
when in the adjustment mode.
Control disk (on RCU) or '+' and '-' keys (cursor keys):
to make menu selections when in the adjustment mode.
The control disk can move up, down, to the right or to the
left.
Comparision between control disk movement and the use
of the cursor keys on the local keypad :
RCU = local keypad
control disk up = '+' key up
control disk down = '-' key down
control disk to the right = '+' key right
control disk to the left = '-' key left
Use the '+' and '-' keys (cursor keys) : to increase or
decrease the analog level of the image controls when they
are first selected.
RC operating indication : lights up when a button on the
remote control is pressed. (This is a visual indicator to check
the operation of the remote control)
11
12
13
14
15
16

Connections
5-1
5975187 BARCOGRAPHICS 2100 190898
CONTRAST
COLOR
PHASE
SHARPN TINT BRIGHTN
STANDBY
ENTER
TEXT
EXIT
PAUSE
-+
-+
-+
-+
-+
0
9
78
6
5
4
3
21
(17(5
3$86(
-+
3+$ 6(
)5((=
7(;7
(;,7
$'-
$''5
67%<
6+$ 531(66
7,17
&2/ 25
%5,*+71(66
&2175$67
087(
-+
%$/$1&(
-+
75(%/(
-+
92/80(
-+
%$66
0I
SOURCE 1SOURCE 4SOURCE 5
SOURCE 2
SOURCE 3
AUDIO OUT AUDIO IN C AUDIO IN B AUDIO IN A
VIDEO
VIDEO
S VID EO
RGBH/CVRGBH/CV
L - R L - R L - R L - R
IR
RR
GG
BB
H/C H/C
VV
RS 232 IN RS 232 OUT COMM PORT CTRL
hardwired
remote
Read instructions before
connecting peripherals
5CONNECTIONS
Power (mains) cor connection
Use the delivered power cord to connect your projector to the wall
outlet. Plug the female power connector into the male connector at
the front of the projector.
The power voltage for the projector is indicated on the identification
plate on the rear of the projector.
The projector input voltage is internally switchable between 230 ac
and 120 ac. Consult a qualified service technician to adapt the input
voltage to the correct voltage on the wall outled.
This projector may be connected to an IT-power system.
Fuses
Warning
For continued protection against fire hazard :
- replace with the same type of fuse.
- refer replacement to qualified service personnel
Fuse type : T16 AH/250 Order no. : B370076
Switching on
Use the power switch to switch on.
When '0' is visible, the projector is switched off.
When '1' is visible, the projector is switched on.
When switching on with the power switch, the projector starts in the
stand by mode. The projector mode indication lamp is red.
To start image projection, press the 'Stand by' button on the local
keypad or on the remote control. The projector mode indication lamp
will be green.
Stand by button Projector mode indication lamp
SOURCE 1
SOURCE 4
SOURCE 5
SOURCE 2
SOURCE 3
AUDIO OUT AUDIO IN C AUDIO IN B AUDIO IN A
VIDEO
VIDEO
S VIDEO
RGBH/CVRGBH/CV
L - R L - R L - R L - R
IR
RR
GG
BB
H/C H/C
VV
0I
AUDIO OUT AUDIO IN C AUDIO IN B AUDIO IN A
L - R L - R L - R L - R

Connections
5-2 5975187 BARCOGRAPHICS 2100 190898
Lamp Lifetime
30 hours before end of lamp lifetime, the following message will scroll
over the screen for 1 minute. This message will be repeated every
30 minutes. Press EXIT to remove the message before the minute
is over.
When the end of lamp lifetime is reached, the following message,
with the exact run time is displayed on the screen.
Lamp run time is 1000 hours Operating the lamp longer than 1000
hours may damage the projector Please replace the lamp
When OK (ENTER) is pressed to go on, the warning will be repeated
every 30 minutes.
The total lifetime of the lamp for a safe operation is depending on the
type of lamp and on the operating mode. The different values are
shown in Table 1.
Do not use it longer. Always replace with a same type of lamp. Call
a BARCO authorized service technician for lamp replacement.
Warning : Using a lamp longer than Lamp Lifetime
is angerous, the lamp coul explo e.
Note: Switching the projector OFF an ON again,
a s 45 minutes to the lamp run time.
Switching to stan -by.
When the projector is running and you want to go to stand-by, press
the stand-by key.
Caution : Before powering down the projector, switch the projector
to stand-by and let the projector lamp cool down until the fans stop
blowing (or for at least 15 minutes).
Switching off
To switch off:
- Press first STANDBY key and let cool down until the fans
stop blowing ( or at least 15 minutes).
- Switch off the projector with the power switch.
Signal input connection to the projector.
The following sources can be connected to the projector :
- Composite ideo
- S- ideo
- RGBS or RGsB
- RGBH
- RGB3S or RG3sB
Note : When using a RC DS05 or S05, the input configuration of the
projector must be as follows :
ideo from RC DS05 or S05 è port 1
S- ideo from RC DS05 or S05 è port 3
RGB from RC DS05 è port 4
Remaining Lamp
run time : 2
hours
Source input Input type Digit button on Audio input
RCU (lock is off)
port 1 Comp. ideo 1 A
port 2 Comp. ideo 2 B
port 3 S- ideo 3 C
port 4 RGB (*) 4 B
port 5 RGB (*) 5 C
(*) RGB with separate sync (composite or hor. or vert. sync)
or with sync signals on green.
Table 1
Article
Numbre Dimming / Lamp
Drive Mode Lamp
Lifetime
R9829510 Dimming 1000
R9829600 Economic
Normal 3500
2000
R9829740 Dimming 4000

Connections
5-3
5975187 BARCOGRAPHICS 2100 190898
Connecting a Vi eo source to the BNC input
(port 1)
Composite video signals from a CR, OFF air signal decoder, etc. ...
1 x BNC 1.0 pp ± 3 dB
Connect the audio input signals to the AUDIO A input when the audio
lock is OFF (see also chapter "Controlling")
Video input selection :
Press digit button 1 on the RCU.
Connecting a Vi eo source to the Cinch (RCA)
input (port 2)
Coposite video signals from a CR, OFF air signal decoder, etc. ...
1 x Cinch (RCA) 1.0 pp ± 3 dB
Connect the audio input signals to the AUDIO B input when the audio
lock is OFF (see also chapter "Controlling")
Video input selection :
Press digit button 2 on the RCU.
SOURCE 1SOURCE 4
SOURCE 5
SOURCE 2
SOURCE 3
AUDIO OUT AUDIO IN C AUDIO IN B AUDIO IN A
VIDEO
VIDEO
S VIDEO
RGBH/CV
RGBH/CV
L - R L - R L - R L - R
IR
RR
GG
BB
H/C H/C
VV
TV tuner, e.g.
TVDM 40 stereo
VCR
Audio amplifier
TV tuner, e.g.
TVDM 40 stereo
VCR
Audio amplifier
SOURCE 1SOURCE 4
SOURCE 5
SOURCE 2
SOURCE 3
AUDIO OUT AUDIO IN C AUDIO IN B AUDIO IN A
VIDEO
VIDEO
S VIDEO
RGBH/CV
RGBH/CV
L - R L - R L - R L - R
IR
RR
GG
BB
H/C H/C
VV

Connections
5-4 5975187 BARCOGRAPHICS 2100 190898
Connecting a S-Vi eo source to the 4-mini DIN
input (port 3)
Separate Y-luma/C-chroma signals for higher quality playback of
Super HS signals..
1 x 4 pins plug
pin configuration :
1 ground luminance
2 ground chrominance
3 luminance 1.0 pp ± 3 dB
4 chrominance 282 m pp ± 3 dB
Connect the audio input signals to the AUDIO C input when the audio
lock is OFF (see also chapter "Controlling")
S-Video input selection :
Press digit button 3 on the RCU.
Connecting a RGB analog source to port 4 or 5
RGB analog input terminals with automatic sync detection. Sync can
be separate Horizontal and ertical sync (RGB-H ), Composite sync
(RGB-S), Sync signals on green(RGsB), Composite tri-level sync
(RGB-3S), Tri-level sync signals on green (RG3sB) or RGB with
composite video as sync signal.
Always use an interface when a computer and local monitor have
to be connected to the projector. Recommended interfaces to be
applied:
Universal analog interface.
Order number : R9826100.
RGB 120 MHz analog interface.
Order number : R9826570.
GA interface
Order number 120 : R9828079.
Order number 230 : R9828070
MAC interface
Order number 120 : R9828059
Order number 230 : R9828050
MAGIK interface
Order number 120 : R9828129
Order number 230 : R9828120
RGBS/RGsB analog : 5 x BNC
Red : 0.7 pp ± 3 dB
Blue : 0.7 pp ± 3 dB
Green : 0.7 pp ± 3 dB
1 pp ± 3 dB if sync on green
ert. sync : 1 pp to 4 pp ± 3 dB
Hor. sync / Composite sync : 1 pp to 4 pp ± 3 dB
All inputs are non-floating inputs.
All input signals are 75 ohm terminated.
Connect the possible audio input signals for input 4 to the AUDIO B
input when the audio lock is OFF and for source 5 to the AUDIO C input
when the audio lock is OFF (see also chapter "Controlling")
RGB input selection :
For source 4, press digit button 4 on the RCU.
For source 5, press digit button 5 on the RCU.
S-VHS VCR
Audio amplifier
SOURCE 1SOURCE 4
SOURCE 5
SOURCE 2
SOURCE 3
AUDIO OUT AUDIO IN C AUDIO IN B AUDIO IN A
VIDEO
VIDEO
S VIDEO
RGBH/CV
RGBH/CV
L - R L - R L - R L - R
IR
RR
GG
BB
H/C H/C
VV
SOURCE 1SOURCE 4
SOURCE 5
SOURCE 2
SOURCE 3
AUDIO OUT AUDIO IN C AUDIO IN B AUDIO IN A
VIDEO
VIDEO
S VIDEO
RGBH/CV
L - R L - R L - R L - R
IR
RR
GG
BB
H/C H/C
V
BARCO interface
To audio amplifier
RGBH/CV
V

Connections
5-5
5975187 BARCOGRAPHICS 2100 190898
Connecting a computer, e.g. IBM PC (or
compatible), Apple Macintosh to the RS 232 input
of the projector.
The projector has a RS232 port that allows it to communicate with a
computer.
Applications : remote control and data communications.
a) remote control :
- easy adjustment of projector via IBM PC (or compat-
ible) or MAC connection.
- allow storage of multiple projector configurations and
set ups.
- wide range of control possibilities.
- address range from 0 to 255.
b) data communications :
- sending data to the projector or copying the data from
the projector to a hard memory device.
Set up of the bau rate for communication with a
computer.
See 'Change Baudrate PC' in chapter 'Service mode'.
Connecting a RCVDS 05 to the projector.
- Up to 20 inputs with the RC DS 05 and 90 inputs when RC DS's
are linked via the expansion module.
- Serial communication with the projector.
- Remote control buttons on the RC DS to control the projector
(source selection and analog settings).
- The selected source number will be displayed on a 2 digit display
and the selected input module will be indicated with a LED on the
rear.
The following connections have to be made between the RC DS and
the projector :
ideo to port 1
S- ideo to port 3
RGB to port 4
For more information about the use of the RC DS 05, consult the
owner's manual, order number : R5975765.
Connecting a VS05 to the projector.
The S05 can switch up to 5 Composite ideo sources, 3 Super
ideo sources and 1 RGB analog or component video source to the
projector. In addition, the audio signal related to the source, can be
switched to an audio amplifier.
Order number : R9827890
For more information about the use of the S05, consult the S05
owner's manual, BARCO order number : R5975245.
Connecting an IR Remote Receiver 800 to the
projector.
This infrared receiver unit makes it possible to control the projector
from another room.
There is a communication line cable between the IR receiver and the
projector or the RC DS. The control information from the RCU can
now be sent to the IR Remote Receiver 800.
The IR Remote Receiver 800 displays the selected source on a 7-
segment display.
Order number : R9827515.
RS 232 IN RS 232 OUT COMM PORT CTRL
hardwired
remote
Read instructions before
co nnectin g periphe rals
RS232 connection
To next projector
RS232 IN
Screen
Communication cable
BARCODATA 2100
IR Remote Receiver 800
Projection room Control room

Controlling
6-1
5975187 BARCOGRAPHICS 2100 200597
6CONTROLLING
The projector can be controlled with
a. the RCU
b. the hardwired RCU (cable is not included)
c. the local keypad.
Controlling the projector with the RCU and the hardwired RCU is equal.
How to use the RCU?
a) Point the front of the RCU to the reflective screen surface.
b) RCU used in a hardwired configuration.
Plug one end of the remote cable in the connector on the bottom of
the RCU and the second side in the connector in the front panel of
the projector labelled 'CTRL'.
c) Point the front of the RCU directly at one of the IR sensors of the
projector.
When using the wireless remote control, make sure you are within
the effective operating distance (30m (100ft) in a straight line). The
remote control unit will not function properly if strong light strikes the
sensor window or if there are obstacles between the remote control
unit and the projector IR sensor.
Projector a ress
a. Software set up of the projector address.
See 'Change projector address' in chapter 'Service mode'.
Every projector requires an individual address between 0 and 255
which can be set in the Service mode. Only projectors with
addresses between 0 and 9 can be controlled with the RCU.
b. How to control the projector or projectors.
The projector's address may be set to any value between 0 and 255.
When the address is set, the projector can be controlled now :
- RCU for addresses between 0 and 9.
- Computer, e.g. IBM PC (or compatible), Apple MAC, etc. for
addresses between 0 and 255.
Note : A projector will respond to a RCU set to an address of '0'
regardless of what address is set in the projector itself.
c. Using the RCU.
Before using the RCU, it is necessary to enter the projector address
into the RCU (only when that address is between 1 and 9). The
projector with the corresponding address will listen to that specific
RCU.
When address 0, 'zero address' is programmed into the RCU, every
projector, without exception will listen to the commands given by this
RCU.
0
I
ADDR
ADJ EXIT
STBYMUTE TEXT
BRIGHTNESS
-+
-+
-+
-+
SHARPNESS
-+
TINT
COLOR
CONTRAST
)5(( =
10
9
78
65
43
21
(17(5
RCU
Front of projector
RCU
Rear of projector
Table
45° 45° 45° 45°
0I
SOURCE 1
SOURCE 4
SOURCE 5
SOURCE2
SOURCE3
AUDIOOUT A UDIOIN C AUDIOIN B AUDIO IN A
VIDEO
VIDEO
S VIDEO
RGBH/CV
RGBH/CV
L - R L - R L - R L - R
IR
RR
GG
BB
H/C H/C
VV
RS232IN RS232 OU T COMMPORT CTRL
hardwired
remote
Readinstructionsbef ore
connectingperipherals
ADDR
ADJ EXIT
STBY MUTE TEXT
BRIGHTNESS
-+
-+
-+
-+
SHARPNESS
-+
TINT
COLOR
CONTRAST
)5((=
109
78
65
43
21
(17(5
Ceiling
Screen
IR sensor
RCU
Other manuals for RETRO GRAPHICS 2100
1
Table of contents
Other Barco Projector manuals

Barco
Barco R9001890 User manual

Barco
Barco DP2K-E series User guide

Barco
Barco BarcoGraphics Maxwell/ 6300 User manual

Barco
Barco R9004460 User manual

Barco
Barco G60 Series User manual

Barco
Barco HDQ--2K40 User manual

Barco
Barco F90 - W13WUXGA User manual

Barco
Barco PGXG-61B User guide

Barco
Barco RLM-W14 User manual

Barco
Barco Evo22sxplus Manual

Barco
Barco BarcoReality 909 User manual

Barco
Barco SIM 7C R9011206 User manual

Barco
Barco R9001280 User manual

Barco
Barco PJWU-101B User guide

Barco
Barco OL-521 Manual

Barco
Barco PFWX-51B User guide

Barco
Barco HDX 4K User manual

Barco
Barco IRIS 800 User manual

Barco
Barco PFWX-51B User manual

Barco
Barco ULTRA REALITY 7000 User manual