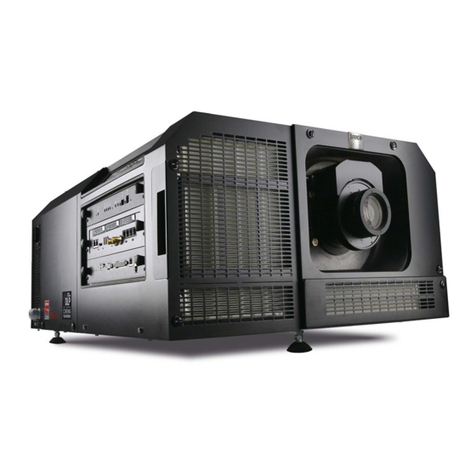
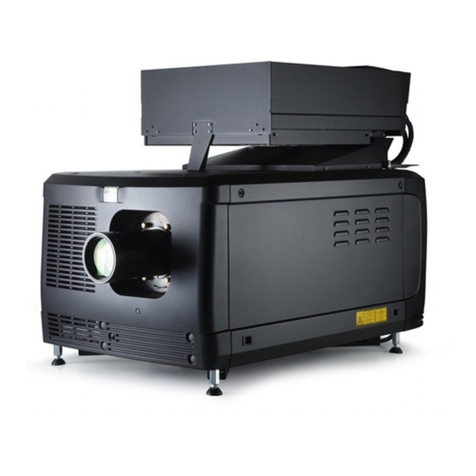
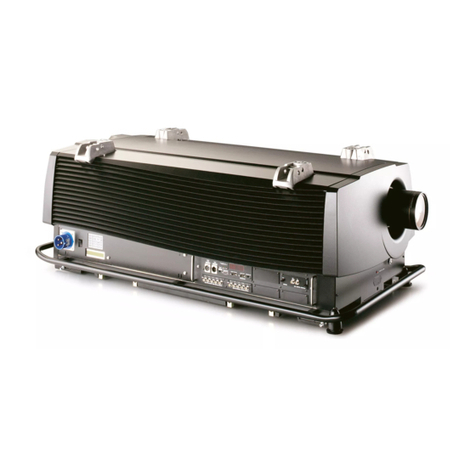
Barco SIM 7C R9011206 User manual

SIM 7C
Service manual
R9011206
R59770119/02
28/05/2008

Barco nv Simulation Products
Noordlaan 5, B-8520 Kuurne
Phone: +32 56.36.82.11
Fax: +32 56.36.84.86
E-mail: [email protected]
Visit us at the web: www.barco.com
Printed in Belgium

Changes
Barco provides this manual ’as is’ without warranty of any kind, either expressed or implied, including but not limited to the implied war-
ranties or merchantability and fitness for a particular purpose. Barco may make improvements and/or changes to the product(s) and/or the
program(s) described in this publication at any time without notice.
This publication could contain technical inaccuracies or typographical errors. Changes are periodically made to the information in this
publication; these changes are incorporated in new editions of this publication.
Copyright ©
All rights reserved. No part of this document may be copied, reproduced or translated. It shall not otherwise be recorded, transmitted or
stored in a retrieval system without the prior written consent of Barco.
Guarantee and Compensation
Barco provides a guarantee relating to perfect manufacturing as part of the legally stipulated terms of guarantee. On receipt, the purchaser
must immediately inspect all delivered goods for damage incurred during transport, as well as for material and manufacturing faults Barco
must be informed immediately in writing of any complaints.
The period of guarantee begins on the date of transfer of risks, in the case of special systems and software on the date of commissioning,
at latest 30 days after the transfer of risks. In the event of justified notice of complaint, Barco can repair the fault or provide a replacement
at its own discretion within an appropriate period. If this measure proves to be impossible or unsuccessful, the purchaser can demand a
reduction in the purchase price or cancellation of the contract. All other claims, in particular those relating to compensation for direct or
indirect damage, and also damage attributed to the operation of software as well as to other services provided by Barco, being a component
of the system or independent service, will be deemed invalid provided the damage is not proven to be attributed to the absence of properties
guaranteed in writing or due to the intent or gross negligence or part of Barco.
If the purchaser or a third party carries out modifications or repairs on goods delivered by Barco, or if the goods are handled incorrectly,
in particular if the systems are commissioned operated incorrectly or if, after the transfer of risks, the goods are subject to influences not
agreed upon in the contract, all guarantee claims of the purchaser will be rendered invalid. Not included in the guarantee coverage are
system failures which are attributed to programs or special electronic circuitry provided by the purchaser, e.g. interfaces. Normal wear as
well as normal maintenance are not subject to the guarantee provided by Barco either.
The environmental conditions as well as the servicing and maintenance regulations specified in the this manual must be complied with by
the customer.
Trademarks
Brand and product names mentioned in this manual may be trademarks, registered trademarks or copyrights of their respective holders.
All brand and product names mentioned in this manual serve as comments or examples and are not to be understood as advertising for
the products or their manufactures.
Federal Communications Commission (FCC Statement)
This equipment has been tested and found to comply with the limits for a class B digital device, pursuant to Part 15 of the FCC rules.
These limits are designed to provide reasonable protection against harmful interference when the equipment is operated in a residential
environment. This equipment generates, uses, and can radiate radio frequency energy and, if not installed and used in accordance with the
instruction manual, may cause harmful interference to radio communications. Operation of this equipment in a residential area is likely to
cause harmful interference in which case the user is encouraged to try to correct the interference by one or more of the following measures.
Introduction to the user :
If this equipment does cause interference to radio or television reception, the user may try to correct the interference by one or more of the
following measures :
• Re-orientation of the receiving antenna for the radio or television.
• Relocate the equipment with respect to the receiver.
• Plug the equipment into a different outlet so that the equipment and receiver are on different branch circuits.
• Fasten cables connectors to the equipment by mounting screws.
The use of shielded cables is required to comply within the limits of Part 15 of FCC rules and EN55022.


Table of contents
TABLE OF CONTENTS
1. Safety................................................................................................................. 3
1.1 Safety Instructions.................................................................................................................... 3
1.2 Extra safety instruction ............................................................................................................... 5
2. Spare parts .......................................................................................................... 7
2.1 Consumables ......................................................................................................................... 7
2.2 Lamps................................................................................................................................. 7
3. General information................................................................................................ 9
3.1 Servicing the SIM 7C................................................................................................................. 9
3.2 Conventions .......................................................................................................................... 9
3.3 General instructions .................................................................................................................. 9
3.3.1 Connector instructions ......................................................................................................... 9
3.3.2 Wires and cable ties ..........................................................................................................10
3.3.3 EMC shielding clamps........................................................................................................10
3.4 Tools ................................................................................................................................. 11
4. Covers...............................................................................................................13
4.1 Lens cover top .......................................................................................................................13
4.1.1 Removing the lens cover top .................................................................................................13
4.1.2 Installing the lens cover top. ..................................................................................................13
4.2 Lens cover bottom . . .................................................................................................................14
4.2.1 Removing the lens cover bottom............................................................................................. 14
4.2.2 Installing the lens cover bottom ..............................................................................................14
4.3 Top filter cover .......................................................................................................................15
4.3.1 Removing the top filter cover.................................................................................................15
4.3.2 Installing the top filter cover ..................................................................................................16
4.4 Side filter cover ......................................................................................................................17
4.4.1 Removing the side filter cover................................................................................................17
4.4.2 Installing the side filter cover .................................................................................................17
4.5 Lamp cover ..........................................................................................................................17
4.5.1 Removing the lamp cover ....................................................................................................17
4.5.2 Installing the lamp cover ......................................................................................................18
5. Projector software (firmware)...................................................................................21
5.1 Description of the software..........................................................................................................21
5.2 Projector software version...........................................................................................................21
5.3 Upgrading the projector software ................................................................................................... 22
6. Optical parts and servicing procedures.......................................................................25
6.1 Lamp.................................................................................................................................25
6.1.1 Description of the lamp .......................................................................................................25
6.1.2 Removing the lamp cover ....................................................................................................26
6.1.3 Removing the lamp door...................................................................................................... 26
6.1.4 Removing the lamp ...........................................................................................................27
6.1.5 Installing the lamp.............................................................................................................28
6.1.6 Installing the lamp door .......................................................................................................29
6.1.7 Reset the lamp runtime.......................................................................................................30
6.1.8 Installing the lamp cover ......................................................................................................31
7. Maintenance procedures.........................................................................................33
7.1 Maintenance: introduction. . .........................................................................................................33
7.2 Filter replacement ................................................................................................................... 33
7.2.1 Removing the side filter.......................................................................................................33
7.2.2 Mounting the side filter........................................................................................................35
7.2.3 Removing the top filter........................................................................................................36
7.2.4 Mounting the top filter.........................................................................................................37
7.3 Cleaning the projector lens..........................................................................................................37
7.4 Cleaning the optical path . . . ......................................................................................................... 37
Index......................................................................................................................39
R59770119 SIM 7C 28/05/2008 1
Table of contents
2R59770119 SIM 7C 28/05/2008

1. Safety
Safety Instructions
1. Before returning an instrument to the customer, always make a safety check of the entire instrument, including, but not limited
to, the following items:
a) Be sure that no built-in protective devices are defective and/or have been defeated during servicing. (1) Protective shields
are provided on this chassis to protect both the technician and the customer. Correctly replace all missing protective shields,
including any removed for servicing convenience. (2) When reinstalling the chassis and/or other assembly in the cabinet,
be sure to put back in place all protective devices, including, but not limited to, insulating materials, barriers, covers/shields,
and isolation resistor/capacitor networks. Do not operate this instrument or permit it to be operated without all protective
devices correctly installed and functioning. Servicers who defeat safety features or fail to perform safety checks may be
liable for any resulting damage.
b) Be sure that there are no cabinet openings through which an adult or child might be able to insert their fingers and contact a
hazardous voltage. Such openings include, but are not limited to, (1) excessively wide cabinet ventilation slots, and (2) an
improperly fitted and/or incorrectly secured cover panels.
c) Leakage Current Hot Check. With the instrument completely reassembled, plug the AC line cord directly into a 220 V AC
outlet (Do not use an isolation transformer during this test). Use a leakage current tester or a metering system that complies
with American National Standards Institute (ANSI) C101.0 Leakage Current for Appliances and Underwriters Laboratories
(UL) 1410, (50.7). With the instrument AC switch first in the on position and then in the off position, measure from a known
earth ground (metal waterpipe, conduit, etc.) to all exposed metal parts of the instrument (antennas, handle bracket, metal
cabinet, screwheads, metallic overlays, control shafts, etc.). especially any exposed metal parts that offer an electrical
return path to the chassis. Any current measured must not exceed 1.5 mA. Reverse the instrument power cord plug in the
outlet and repeat test. ANY MEASUREMENTS NOT WITHIN THE LIMITS SPECIFIED HEREIN INDICATE A POTENTIAL
SHOCK HAZARD THAT MUST BE ELIMINATED BEFORE RETURNING THE INSTRUMENT TO THE CUSTOMER OR
BEFORE CONNECTING ACCESSORIES.
Leakage Current Tester
Reading should
not be above
1.5 mA
Test all exposed metal surfaces
Earth
Ground
+-
Device Under Test
2-Wired cord
Also test with plug reversed
(Using AC Adapter plug as required)
AC Leakage Test
Image 1-1
AC Leakage Test
d) Ultraviolet Radiation exposure - Warning: This lamp can cause serious skin burn and eye inflammation from shortwave
ultraviolet radiation if not operated in enclosed fixtures. DO NOT operate this lamp in a fixture with a missing or broken lens
cover.
e) Ozone: Operating lamp generates ozone gas which is harmful to the respiratory system. Therefore the lamp should be
operated in adequately ventilated equipment.
2. Read and comply with all caution and safety-related notes on or inside the projector cabinet or on the projector chassis, or on
the picture tube.
3. Design Alteration Warning - Do not alter or add to the mechanical or electrical design of this apparatus. Design alterations and
additions, including, but not limited to, circuit modifications and the addition of items such as auxiliary audio and/or video output
connections, might alter the safety characteristics of this apparatus and create a hazard to the user. Any design alterations
or additions may void the manufacturer’s warranty and may make you, the servicer responsible for personal injury or property
damage resulting therefrom.
4. Lamp explosion Protection Warning – The lamp in this projector operates with a high internal pressure and there is a slight risk
that the lamp may explode, particularly if it is used beyond its rated life. Do not remove, install, or otherwise handle the lamp
in any manner without first putting on shatterproof goggles equipped with side shields. People not so equipped must be kept
safely away while lamps are handled. Keep the lamp away from your body. For continued explosion protection, replace the
lamp only with one of the same type number. Always replace the lamp before the rated life time.
4R59770119 SIM 7C 28/05/2008

1. Safety
5. Hot Chassis Warning - This projector chassis has two ground systems: the primary ground system is formed by the negative
voltage of the rectified mains (power) and is only used as a reference in primary circuits; the secondary ground system is
connected to earth ground via the earth conductor in the mains (power) lead. Separation between primary and secondary
circuits is performed by the safety isolation transformers. Components bridging this transformers are also safety components
and must never be defeated or altercated. All user-accessible conductive parts must be connected to earth ground, or are kept
at SELV (Safety Extra Low Voltage).
6. Observe original lead dress. Always inspect in all areas for pinched, out-of-face, or frayed wiring. Do not change spacing
between components, and between components and the printed-circuit board. Check AC power cord for damage. Take extra
care to assure correct lead dress in the following areas:
a) near sharp edges
b) near thermally hot parts - be sure that leads and components do not touch thermally hot parts
c) the AC supply
d) high voltage
7. Components, parts, and/or wiring that appear to have overheated or are otherwise damaged should be replaced with compo-
nents, parts, or wiring that meet original specifications. Additionally, determine the cause of overheating and/or damage and, if
necessary, take corrective action to remove any potential safety hazard.
8. PRODUCT SAFETY NOTICE - Many electrical and mechanical parts have special safety-related characteristics some of which
are often not evident from visual inspection, nor can the protection they give necessarily be obtained by replacing them with
components rated for higher voltage, wattage, etc. Use of a substitute replacement that does not have the same safety charac-
teristics as the recommended replacement part in BARCO service data parts list might create shock, fire, and/or other hazards.
Product Safety is under review continuously and new instructions are issued whenever appropriate. For the latest information,
always consult the appropriate current BARCO service literature.
9. Do not spray chemical on or near this instrument or any of its assemblies.
10. Electrostatically Sensitive (ES) Devices Some semiconductor (solid state) devices can be damaged easily by static electricity.
Such components commonly are called Electrostatically Sensitive (ES) Devices. Examples of typical ES devices are integrated
circuits and some field-effect transistors and semiconductor "chip" components. The following techniques should be used to
help reduce the incidence of component damage caused by static electricity:
a) Immediately before handling any semiconductor-equipped assembly, drain off any electrostatic charge on your body by
touching a known earth ground. Wear a commercially available high impedance discharging wrist strap device.
b) After removing an electrical assembly equipped with ES devices, place the assembly on a static dissipative surface such as
a 3M No 8210 table mat, to prevent electrostatic charge buildup or exposure of the assembly.
c) Do not use freon-propelled chemicals. These can generate electrical charges sufficient to damage ES devices.
d) Do not remove a replacement ES device from its protective package until immediately before you are ready to install it
(Most replacement ES devices are packaged with leads electrically shorted together by conductive foam, aluminium foil or
comparable conductive material).
e) Immediately before removing the protective material from the leads of a replacement ES device, touch the protective material
to the chassis or circuit assembly into which the device will be installed. CAUTION: Be sure no power is applied to the chassis
or circuit, and observe all other safety precautions.
f) Minimize bodily motions when handling unpacked replacement ES devices (Otherwise harmless motion such as the brush-
ing together of your clothes fabric or the lifting of your foot from a carpeted floor can generate static electricity sufficient to
damage an ES device).
1.2 Extra safety instruction
Dustfilters
For safety reasons, both dust filters must always be present and mounted in a correct way.
R59770119 SIM 7C 28/05/2008 5

1. Safety
6R59770119 SIM 7C 28/05/2008

2. Spare parts
8R59770119 SIM 7C 28/05/2008

3. General information
3. GENERAL INFORMATION
3.1 Servicing the SIM 7C
Important remark about servicing the SIM 7C
If a SIM 7C projector fails, it will not be repaired on site, but it will be replaced by a good projector.
This is why this service manual only contains procedures to replace lamps and dust filters.
How to take the projector out of the system is described in the System manual.
3.2 Conventions
Projector orientation
In this manual, references to location (left, right, front, rear, top, bottom) on the projector are made as shown in the following image.
top
right front leftrear
bottom
Image 3-1
Projector orientation convention
3.3 General instructions
Overview
• Connector instructions
• Wires and cable ties
• EMC shielding clamps
3.3.1 Connector instructions
CAUTION:Always respect the ES (electrostatic sensitivity) instructions.
Do not use any kind of tools when unplugging a connector.
CAUTION:Never pull the wires to unplug a connector. Always grip the connector and pull to unplug (after
unlocking if applicable).
Overview of the connectors
Several types of connectors are used in the projector (ordered by size):
R59770119 SIM 7C 28/05/2008 9

3. General information
• SH: smallest one, mainly used to connect signals
• PH: mainly used to connect low power
• VH: used to connect higher power
• ATX: biggest connector
• board to board connectors
•flex foil connectors
The number mentioned next to the connector type indicates the amount of wires on this connector.
Board to board connectors
It is important to disconnect and connect this type of connectors in a straight way.
When plugging in a board to board connector, make sure it is completely in!
3.3.2 Wires and cable ties
CAUTION:If wires are not properly fixed to each other, to the chassis and/or to other components in the same
way as it was done in production, damage can occur!
Wires
Due to the amount of cables, some of the procedures described below can become quite complicated. Make sure to take into
account the following directions:
• before removing a wire, carefully take notice of its position
• when guiding a wire through a slot of the chassis, makes sure the connector does not get stuck
• when reinstalling a wired component, make sure the wire is in its original position
Cable ties
Different types of cable ties are used in this projector. Some of them can be reused, others need to be cut and will have to be
replaced by new ones during service activities.
Image 3-2
Cable tie: single use
Image 3-3
Cable tie: reusable
Image 3-4
Cable tie mounting: reusable
Put the new cable ties in the same position as it has been done in production.
CAUTION:When cutting a cable tie, make sure not to damage the wires!
3.3.3 EMC shielding clamps
EMC shielding clamps
When replacing wires or components, always put back the EMC shielding clamps in their original position.
10 R59770119 SIM 7C 28/05/2008

3. General information
Image 3-5
EMC shielding clamp
Depending on the type of EMC shielding clamp, use a pair of cutting pliers and/or a slotted screwdriver to open the clamp.
3.4 Tools
Overview of the tools needed for servicing procedures
This is a list of all the tools that may be needed when servicing the projector in the field.
Description Mostly used for
Torx screwdriver T8 electronic parts
Torx screwdriver T10 electronic parts
Torx screwdriver T10 x 300 mechanical parts
Torx screwdriver T20 mechanical parts
Hex or Allen™ key set mechanical parts
open ended nut spanner 3/16” input connectors (DVI, VGA)
nut spanner 7 mm mechanical parts
cutting pliers (small) cable ties
cable ties fixing wires
slotted screwdriver 3 mm or 4 mm opening EMC shielding clamps
R59770119 SIM 7C 28/05/2008 11

3. General information
12 R59770119 SIM 7C 28/05/2008

4. Covers
4. COVERS
Overview
• Lens cover top
• Lens cover bottom
•Topfilter cover
•Sidefilter cover
• Lamp cover
4.1 Lens cover top
Overview
• Removing the lens cover top
• Installing the lens cover top
Description
The lens cover top is used to hide the top part of the lens holder. By removing this cover, the lens locking system can be reached.
4.1.1 Removing the lens cover top
Necessary tools
Torx screwdriver T10
How to remove the lens cover top?
1. Release the 6 fixing screws
Tip: The screws are no-loss screws and will not drop.
Image 4-1
Lens cover top: fixing screws on top of the projector
Image 4-2
Lens cover top: fixing screws on the front side of the projector
2. Remove the lens cover top
4.1.2 Installing the lens cover top
Necessary tools
Torx screwdriver T10
How to install the lens cover top?
1. Put the lens cover top in the right position
2. Fix the lens cover top by tightening the six fixing screws
R59770119 SIM 7C 28/05/2008 13

4. Covers
Image 4-3
Lens cover top: fixing screws on top of the projector
Image 4-4
Lens cover top: fixing screws on the front side of the projector
4.2 Lens cover bottom
Overview
• Removing the lens cover bottom
• Installing the lens cover bottom
Description
The lens cover bottom is used to hide the front lower part of the lens holder.
4.2.1 Removing the lens cover bottom
Necessary tools
Torx screwdriver T10
How to remove the lens cover bottom?
1. Release the 3 fixing screws
Tip: The screws are no-loss screws and will not drop.
Image 4-5
Lens cover bottom: fixing screws on the front side of the projector
2. Remove the lens cover bottom
4.2.2 Installing the lens cover bottom
Necessary tools
Torx screwdriver T10
14 R59770119 SIM 7C 28/05/2008

4. Covers
How to install the lens cover bottom?
1. Put the lens cover bottom in the right position
2. Fix the lens cover top by tightening the three fixing screws
Image 4-6
Lens cover bottom: fixing screws on the front side of the projector
4.3 Top filter cover
Overview
• Removing the top filter cover
• Installing the top filter cover
Description
The top filter cover is used to fix the top dust filter in its housing.
4.3.1 Removing the top filter cover
Necessary tools
Torx screwdriver T10
How to remove the top filter cover?
1. Release the 4 fixing screws
Tip: The screws are no-loss screws and will not drop.
Image 4-7
Top filter cover: fixing screws
2. Lift the top filter cover to remove it
R59770119 SIM 7C 28/05/2008 15

4. Covers
Image 4-8
Top filter cover: lift to remove
4.3.2 Installing the top filter cover
Necessary tools
Torx screwdriver T10
How to install the top filter cover?
1. Put the top filter cover in the right position
Image 4-9
Top filter cover: put it in the right position
2. Fix the top filter cover top by tightening the 4 fixing screws
Image 4-10
Top filter cover: fixing screws
16 R59770119 SIM 7C 28/05/2008
Table of contents
Other Barco Projector manuals

Barco
Barco OV-D2 User manual

Barco
Barco 90 00719 User manual

Barco
Barco R9840700 User manual

Barco
Barco LX-5 SERIES User manual

Barco
Barco XDX User manual

Barco
Barco BarcoReality 909 User manual

Barco
Barco GRAPHICS 9300 User manual

Barco
Barco Cine 8 User manual

Barco
Barco R9040014 User manual

Barco
Barco R9001190 User manual

Barco
Barco G50 User manual

Barco
Barco UDX 4K22 User manual

Barco
Barco G60 W Series User manual

Barco
Barco G60 Series User guide

Barco
Barco RLM-W12 User manual

Barco
Barco R9002411 User manual

Barco
Barco DP-3000 User manual

Barco
Barco DP2K-10S User manual

Barco
Barco iQ (PRO) G350 User manual

Barco
Barco RETRO GRAPHICS 2100 User manual