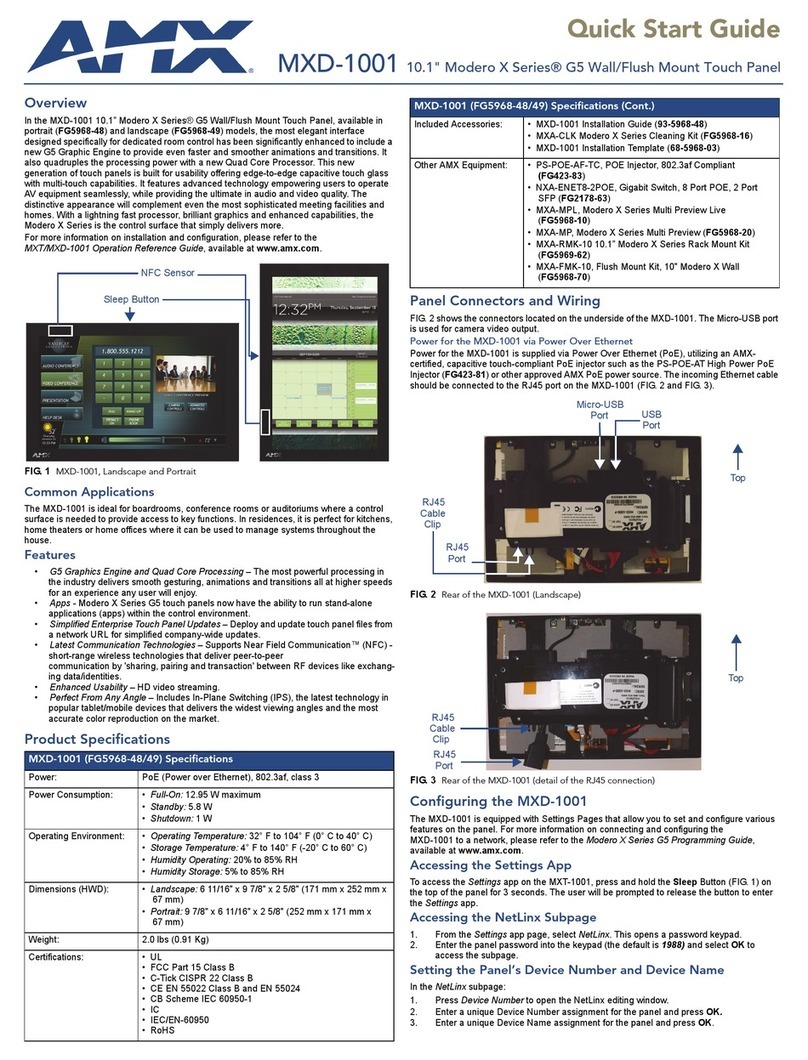
barfield 2312G-8 Operator's manual

2312G Turbine Temperature Indicating System Test Set
USER INSTRUCTION MANUAL
BARFIELD M/N 2312G Series
56-101-00550-D
November 7, 2014
_________________________________
BARFIELD, INC.
This Manual is applicable for the following Models and Parts Numbers:
Model Number Part Number
2312G-8 101-00550
2312G-15 101-00551
2312G-22 101-00552
2312G-16A 101-00554
2312G-25 101-00555
2312G-8 101-00557
(w/o case)
Corporate Headquarters
4101 Northwest 29thStreet
Miami, Florida 33142
www.barfieldinc.com
Email: gsesales@barfieldinc.com

2312G INSTRUCTION MANUAL
56-101-00550-D CONTACT
11/7/14 Page ii
CONTACT INFORMATION
Users are requested to notify the manufacturer of any discrepancy, omission, or error
found in this manual. Inquiries should include specific questions and reference the
publication title, number, chapter, page, figure, paragraph, and effective date.
Please send comments to:
TECHNICAL CUSTOMER SUPPORT - GSTE
BARFIELD, INC.
P.O. BOX 025367
MIAMI, FL 33102-5367
USA
Telephone (305) 894-5400
(800) 321-1039
Fax (305) 894-5401
Email: [email protected]

2312G INSTRUCTION MANUAL
56-101-00550-D ATT
11/7/14 Page iii
ATTENTION
Although every effort has been made to provide the end user of this equipment with the most
current and accurate information, it may be necessary to revise this manual in the future. Please
be sure to complete and return a Revision Request Form to Barfield revision services and visit
the company website, http://barfieldinc.com/, for publication updates.
Additionally, Barfield MUST have your name and address on file as a registered user of this
equipment to ensure validation of the warranty. Please complete the OWNER WARRANTY
REGISTRATION card promptly. This card ensures validation of the warranty.
Please send to:
Barfield, Inc.
P.O. Box 025367
Miami, FL 33102-5367
USA

2312G INSTRUCTION MANUAL
56-101-00550-D REV
11/7/14 Page iv
REVISION RECORD
REV. ECO # REV. DATE DESCRIPTION OF CHANGE
A N / A 08 / 08 / 01 Initial Release.
B 260-00729 08 / 20 / 08 Company logo and contact information were
updated. Manual was reformatted.
C 260-00995 02 / 07 / 14
The 45 VOLT battery (NEDA-213 CELL) used to power
the Insulation function is no longer in production by any
known source. The Voltage Converter P/N 137-08002
was designed to be used in conjunction with an Alkaline
9 volt battery to provide the required 45 volts. The
Converter coupled with the 9V battery are together
inserted in place of the obsolete 45V battery and the
Test Set specification are unchanged.
D 260-01058 11 / 07 / 14 Updated Barfield logo

2312G INSTRUCTION MANUAL
56-101-00550-D LOARF
11/7/14 Page v
LIST OF APPROVED REPAIR FACILITIES
The manufacturer of this equipment does not recommend the user to attempt any maintenance
or repair. In case of malfunction, contact the manufacturer, to obtain the list of approved repair
facilities worldwide, ensuring that this equipment will be serviced using proper procedures and
certified instruments. A Return Maintenance Authorization (RMA) number will be assigned
during this call, to keep track of the shipment and the service.
BARFIELD PRODUCT SUPPORT
DIVISION
Shipping Address:
Telephone (305) 894-5400
(800) 321-1039
Fax (305) 894-5401
Barfield, Inc.
4101 NW 29th Street
Miami, Florida 33142
USA
Mailing Address:
Barfield, Inc.
P.O. Box 025367
Miami, FL 33102-5367
USA

2312G INSTRUCTION MANUAL
56-101-00550-D Blank
11/7/14 Page vi
THIS PAGE INTENTIONALLY LEFT BLANK

2312G INSTRUCTION MANUAL
56-101-00550-D TOC
11/7/14 Page vii
TABLE OF CONTENTS
Contact Information
Attention Page
Revision Record Page
List of Approved Repair Facilities
Table of Contents
List of Figures and Tables
CHAPTER ............................................................................................PAGE
INTRODUCTION
1. PUBLICATION BREAKDOWN .....................................................................1
2. INFORMATION PROVIDED WITH THE UNIT.............................................1
3. RECERTIFICATION .....................................................................................3
1 PRODUCT DESCRIPTION
1. GENERAL DESCRIPTION............................................................................5
2. THEORY.......................................................................................................5
3. SWITCHING FUNCTIONS............................................................................5
2 PRODUCT SPECIFICATIONS
1. PHYSICAL DATA .........................................................................................9
2. SPECIFICATIONS.........................................................................................9
3 OPERATION
1. GENERAL OPERATING INSTRUCTIONS....................................................11
2. THERMOCOUPLE RESISTANCE TEST PROCEDURE...............................14
3. APPROXIMATE SYSTEM LEAD RESISTANCE TEST PROCEDURE ..........14
4. PRECISION SYSTEM LEAD RESISTANCE TEST PROCEDURE...............14
5. INSULATION TESTING PROCEDURE ........................................................15
6. INDICATOR TEST PROCEDURE ................................................................16
7. “POTENTIOMETRIC” INDICATOR TEST PROCEDURE..............................16
4 RECEIVING, SHIPPING, AND STORAGE
1. RECEIVING.................................................................................................20
2. SHIPPING ...................................................................................................20
3. STORAGE ...................................................................................................20

2312G INSTRUCTION MANUAL
56-101-00550-D LOFT
11/7/14 Page viii
LIST OF FIGURES AND TABLES
Page
Figure 1 IDENTIFICATION LABEL ...................................................................................................1
Figure 2 OWNER WARRANTY REGISTRATION CARD .................................................................2
Figure 3 LIMITED WARRANTY STATEMENT .................................................................................3
Figure 4 2312G PANEL LAYOUT ......................................................................................................7
Figure 5 BATTERY AND CONVERTER ..........................................................................................12
Table 1: Specifications Table.............................................................................................................9

2312G INSTRUCTION MANUAL
56-101-00550-D INTRO
11/7/14 Page 1 / 20
INTRODUCTION
1. PUBLICATION BREAKDOWN
This publication, concerning the 2312G TURBINE TEMPERATURE INDICATING SYSTEM
TEST SET, establishes its standards of operation and maintenance.
This publication has been developed to provide instructions for complete testing and
troubleshooting of the temperature-indicating system and thermocouples installed on a turbine
type engine. Instructions are also provided for testing system resistance and insulation.
This publication contains the description, identification data, and operating procedures for
the: 2312G-8, -15, -22, -16A, -25, and -8 (see paragraph 2.B. below) Turbine Temperature
Indicating System Test Set, P/N’s 101-00550, -00551, -00552, -00554, -00555 and -00557,
Figure 1 (hereafter referred to as the 2312G).
Models -U and -8A, P/N’s 101-00553 and 101-00556 respectively, are special modified units
for specific applications requested by a manufacturer for individual requirements and are not
discussed in this text. If information is required, contact the manufacturer.
2. INFORMATION PROVIDED WITH THE UNIT
Besides this User Instruction Manual, the unit is provided with the four items described
below.
A. The identification label, similar to Figure 1, is located on the back of the tensiometer and
provides the following information:
Manufacturers' Name
Designation of Equipment
Equipment Part Number.
Equipment Serial No.
National Stock Number (for models -8 and -22 only)
Figure 1 IDENTIFICATION LABEL
TURBINE TEMP INDICATOR SYSTEM TEST SET
2312G
101-00550

2312G INSTRUCTION MANUAL
56-101-00550-D INTRO
11/7/14 Page 2 / 20
B. The Owner's Warranty Registration card (Figure 2) is to be completed by the owner and
returned to Barfield, Inc. within ten (10) days of purchase to ensure automatic update of
printed matter and validation of warranty.
Figure 2 OWNER WARRANTY REGISTRATION CARD
C. The Limited One Year Warranty (Figure 3) lists the manufacturer's obligation to the
original purchaser.
D. The Certificate of Calibration: Each new unit and re-certified unit, is delivered with a
Certificate of Calibration that shows the date of the last calibration and when the next
calibration is due. It certifies the accuracy of the unit and lists the part number and serial
number to which it applies.
3. RECERTIFICATION
This equipment has a one-year recertification requirement. Qualified technicians in a shop
equipped with the necessary tooling and facilities must perform the maintenance required by
this unit.

2312G INSTRUCTION MANUAL
56-101-00550-D INTRO
11/7/14 Page 3 / 20
Figure 3 LIMITED WARRANTY STATEMENT

2312G INSTRUCTION MANUAL
56-101-00550-D Blank
11/7/14 Page 4 / 20
THIS PAGE INTENTIONALLY LEFT BLANK

2312G INSTRUCTION MANUAL
56-101-00550-D CH. 1
11/7/14 Page 5 / 20
CHAPTER 1: PRODUCT DESCRIPTION
1. GENERAL DESCRIPTION
A. The 2312G provides the means for quickly test, calibrate and troubleshoot a turbine
temperature indicating system installed on this type of engines. It has sufficient sensitivity
and accuracy to test thermocouple and system resistance, insulation, and indicator
calibration. It features portability, simplicity of operation, direct reading, and multifunction
versatility.
B. The 2312G is supplied with a vinyl carrying case with test cable compartment and a plug-in
test cable (except 2312G-8, P/N 101-00557).
2. THEORY
A. The low resistance ohmmeter circuits are the four-wire type. This circuit virtually eliminates
the effects of lead wire resistance so that direct readings as low as 0.02 ohm are easily
done.
B. A high resistance ohmmeter measures resistance leakage up to one (1) megaohm. The
45-volt power supply often reveals leakage that is not detected by conventional low voltage
ohmmeters, but is well within circuit insulation limitations.
C. A Wheatstone Bridge circuit provides an accurate direct reading of lead resistance. A self-
contained resistance standard is provided for calibration immediately before making lead
resistance measurement. This eliminates the need for measuring test lead resistance and
subtracting its value from subsequent measurements. A unique transistor switching circuit
protects the meter from overloads due to attempting measurements much lower or higher
than nominal.
D. For indicator calibration tests, an adjustable thermocouple simulator is provided with
simulated lead resistance. Ambient temperature correction is set by a panel adjustment and
direct comparison made between the 2312G and the indicator under test up to 1000C.
3. SWITCHING FUNCTIONS (Refer to Figure 4.)
A. The meter bezel knob (3) permits setting of the meter pointer as required.
B. The “CAL. ADJUST” control knob (4) permits exact adjustment to desired test points when
used in conjunction with the “TEST” pushbutton (6) or the “CAL” pushbutton (7).

2312G INSTRUCTION MANUAL
56-101-00550-D CH. 1
11/7/14 Page 6 / 20
C. The “FUNCTION” switch (5):
(1) In the “RX1” position, permits resistance measurement readings in direct values on the
panel meter (2) “RX1 / RX10” scale.
(2) In the “RX10” position, the reading on the “RX1 / RX10” scale must be multiplied by 10.
(3) In the “INS.” position, insulation resistance (2.5k to 1 megaohm) is displayed on panel
meter’s “INS.” scale.
(4) In the “LEAD” position, lead resistance value is displayed on the panel meter’s “LEAD
RES.” scale.
(5) In the “IND.” position, the 2312G is a millivolt source for simulating temperatures from -
20 to +1000C displayed on the panel meter’s C scale.
D. The BLACK “TEST” pushbutton activates applicable circuitry and permits meter readings of
the function selected.
E. The RED “CAL.” pushbutton is used with the “CAL. ADJUST” control knob and allows scale
adjustment.

2312G INSTRUCTION MANUAL
56-101-00550-D CH. 1
11/7/14 Page 7 / 20
Figure 4 2312G PANEL LAYOUT

2312G INSTRUCTION MANUAL
56-101-00550-D Blank
11/7/14 Page 8 / 20
THIS PAGE INTENTIONALLY LEFT BLANK

2312G INSTRUCTION MANUAL
56-101-00550-D CH. 2
11/7/14 Page 9 / 20
CHAPTER 2: PRODUCT SPECIFICATIONS
1. PHYSICAL DATA
A. Depth 11.4 CM (4.5 in)
B. Width
15.2 CM (6 in)
C. Height
20.3 CM (8 in)
D. Weight
1.7 Kg (3.75 lbs)
NOTE: All physical data specifications include carrying case.
2. SPECIFICATIONS
Specifications for all models of the 2312G are identical except for the “LEAD” function circuit.
The Lead measuring circuit and the simulating resistance in the indicator function are the
value of the system lead resistance applicable to the particular system.
FUNCTION POSITION RANGE
R X 1 .02 to 10
Ohms
R X 10 0.2 to 100
Ohms
INS 2.5k to 1
megaohm
LEAD
(2312G-8) 7.8 to 8.2
Ohms
(2312G-15) 14.5 to 15.5
Ohms
(2312G-22) 21.0 to 23.0
Ohms
(2312G-U) 0.55 to 0.75
Ohms
IFICATIONS

2312G INSTRUCTION MANUAL
56-101-00550-D Blank
11/7/14 Page 10 / 20
THIS PAGE INTENTIONALLY LEFT BLANK

2312G INSTRUCTION MANUAL
56-101-00550-D CH. 3
11/7/14 Page 11 / 20
CHAPTER 3: OPERATION
1. GENERAL OPERATING INSTRUCTIONS
Consult temperature indicator system and/or engine manufacturers’ instructions for procedures
and specifications. Read complete 2312G Operation procedures before attempting to use the
2312G.
A. Overload Protection Circuit:
Because of the meter protection circuit in the “LEAD” function, resistances much lower or
higher than nominal will disable the measurement circuit, and the meter pointer will start to
move quickly and then return to rest, at or near, bottom of scale. Measurement can be
resumed by releasing the ‘”TEST” pushbutton, waiting a couple of seconds for automatic
reset, then pressing the “TEST” pushbutton again. If the resistance is out of range, but
not sufficient to trip the protective circuit, the pointer will go to one of its stops, but the
current will not be sufficient to overload the meter.
B. Preparation For Use:
(1) Battery Installation/Replacement:
(a) Place the 2312G on a clean area. (A clean cloth or paper pad placed to the right
of the 2312G to receive the inverted panel is desirable.) Remove the four (4)
corner screws. Withdraw the panel and rest it to the right of its case.
(b) Insert the 1.5-volt, size D (NEDA 13A) battery by grasping the ends and pushing
straight down. Observe polarity. The RED terminal is positive (+).
(c) Insert the 45-volt No. 415 (NEDA 213) battery. Observe polarity. Align terminals
and swing into clips. Use pressure from the bottom until battery is seated in clips
and terminals.
NOTE
: To remove batteries, reverse steps (b) and (c) above.
(2) 45V Battery Installation/Replacement:
WARNING: THE 45VDC VOLTAGE CONVERTER, P/N 137-08002, IS DESIGNED
SPECIFICALLY FOR AND INTENDED FOR EXCLUSIVE USE WITH A BARFIELD 2312G
TEST SET (P/N 101-00550) TO SUPPLY THE 45 VOLTS NEEDED FOR THE INSULATION
MEASUREMENT CIRCUITRY USING AN ALKALINE 9 VOLT BATTERY FOR POWER. THE
137-08002 CONVERTER COUPLED WITH A 9 VOLT BATTERY DO NOT TOGETHER
CONSTITUTE A UNIVERSAL REPLACEMENT FOR A 45 VOLT NEDA-213 CELL.
(a) Remove the old 45V battery from the 2312G by placing the 2312G on a clean area. (A
clean cloth or paper pad placed next to the 2312G to receive the panel is desirable.)
Remove the four corner panel screws. Withdraw the panel assembly from the case.

2312G INSTRUCTION MANUAL
56-101-00550-D CH. 3
11/7/14 Page 12 / 20
(b) Disconnect the 45V battery leads from the 45V battery.
(c) Connect a new 9 Volt alkaline battery to the 9V Input terminals of the Voltage Converter
observing polarity.
WARNING: POWERING THE 137-08002 FROM ANY SOURCE OTHER THAN AN
ALKALINE 9 VOLT BATTERY MAY CAUSE DAMAGE TO THE CONVERTER.
NOTE: The converter output can be checked by connecting a DVM (set for 200 VDC) in parallel
with 30KΩof resistance (to the 45V Output terminals observing polarity. The output
voltage with a fresh battery should measure approximately 47 VDC.
(d) Connect the 45V battery leads to the 45V Output terminals of the Converter observing
polarity as depicted in Figure 1.
Figure 5 BATTERY AND CONVERTER
(e) Carefully install the coupled 9V battery and Converter pair into the 2312G 45V battery
clips and terminals.
(f) Re-install the 2312G panel assembly into the case and replace the 4 panel screws.
(3) Operation:
(a) To check the 2312G 45V Insulation battery once installed, set the 2312G FUNCTION
switch to INS position then depress and hold the CAL pushbutton while varying the CAL
ADJUST to set meter pointer over the Insulation 0 ohm mark.
NOTE: The 137-08002 converter is essentially asleep until either the 45V level is checked or an
Insulation measurement is performed and so does not drain the 9V battery.
(b) Perform Insulation testing with the 2312G in the normal fashion as detailed in the 2312G
Instruction Manual P/N 56-101-00550.
(4) Battery Check:
Perform the 2312G battery check before each test procedure that follows.
(a) To check the 45-volt battery used for insulation testing:
1) Rotate the “FUNCTION” selector switch to “INS” position.
This manual suits for next models
4
Table of contents
Popular Touch Panel manuals by other brands
RS Automation
RS Automation AnyTouch V8 Plus Series operating instructions

Onyx
Onyx 1531 owner's manual
Siemens
Siemens POL8T5.70/STD Mounting instruction

Extron electronics
Extron electronics TLP Pro 720M Setup guide

AMX
AMX Modero MXT-1901-PAN quick start guide

Crestron
Crestron Isys TPMC-4SM Operations & installation guide

Beckhoff
Beckhoff CP7709 Installation and operating instructions

Beckhoff
Beckhoff CP6700-0001-00 0 Series Installation and operating instructions

Avalue Technology
Avalue Technology SID-10W9 Quick reference guide

Boser
Boser BPF-3307 user manual

Advantech
Advantech PPC-L106T user manual

POSIFLEX
POSIFLEX TP-6000 SERIES user manual
