BARK BSW300A User manual
Model: BSW300A
For more information please visit
www.bark-solution.com
USER MANUAL
Please read this manual in its entire before using the Bark Collar
Barksolution to ensure safety & quality.

User Manual
Page 3
Bark Solution declares that BSW300A Model Anti-Bark Collar complies
with part 15 of the FCC rules
(1) This device may not cause harmful interference, and (2) this device
must accept any interference received, including interference that
may cause undesired operation.
Bark Solution is a trademark of Zimston Corp. – U.S.A
• Before using the collar, we strongly advise you to have your dog checked
by a vet to ensure he is fit to wear a collar.
• Regularly check your dog’s neck as repeated rubbing of the
contact points against the skin may cause irritation. If this happens, re-
move the collar until all signs of skin irritation have disappeared.
• Do not leave the collar on your dog for more than 8 hours a day.
The owner’s involvement during the first time use of the product is a key
factor to obtaining the best results.
Do not leave your dog unattended with the collar on until he is used to
wearing it and you are satisfied that it is working correctly. You should
ensure that the settings are adjusted correctly for your dog barking detec-
tion sensitivity, operating mode.
Closely watch your pet during the first days’ use.
Operate the device as per instructions.
As soon as your dog stops barking, congratulate him (but not excessively)
by stroking him, verbally flattering him, or giving him dry food so as to
encourage him to behave himself.
Remember that barking can indicate some behavioral problems. The bark
control collar will allow you to resolve problems caused by
excessive barking.
FCC
COMPLIANCE
ADVICE TO
FIRST TIME
USERS
TRADEMARK
WARNING
User Manual
Page 4
CONTROLLER
FEATURES
PACKAGE
CONTENTS
MAIN FEATURES
_100 levels of vibration.
_100 levels of static shock (optional).
_The levels can be altered by the use of up & down buttons.
_A tone button activates a tone on the receiver collar.
_The system can be used for 1 or 2 receivers.
POWER SAVING
_The Receiver will TURN OFF if unused for > 4 minutes.
_Any movement will activate the Receiver into STANDBY MODE.
_The Controller will go into STANDBY MODE if there is no
operation after 20 seconds and turn o after 2 minutes.
_1 x Remote
_1 x Receiver Collar (1 for 1)
_1 x Controller
_1 x Belt (1 for 1)
_1 x Test Bulb
INCREASE LEVEL
DECREASE LEVEL
SENSITIVITY

User Manual
Page 5
CONFIGURE
HOW TO USE
PACKAGE
CONTENTS
CHARGE THE CONTROLLER
Connect the charger connector to the charging jack. Then plug the charger
into a standard outlet, the red LED light inside the Transmitter will light
up. Charge the Controller for at least 6 hours before FIRST use. After it’s
fully charged, the red LED light will be turned o automatically.
CHARGE THE RECEIVING DEVICE
Once you plug the charger into a standard outlet the red LED light inside
the receiver device will light up.
Charge the receiver for at least 6 hours for the first charge. Once fully
charged, the red LED light will be turned o automatically.
LOW BATTERY INDICATOR:
the symbol will show up on the bottom right corner of the LCD screen.
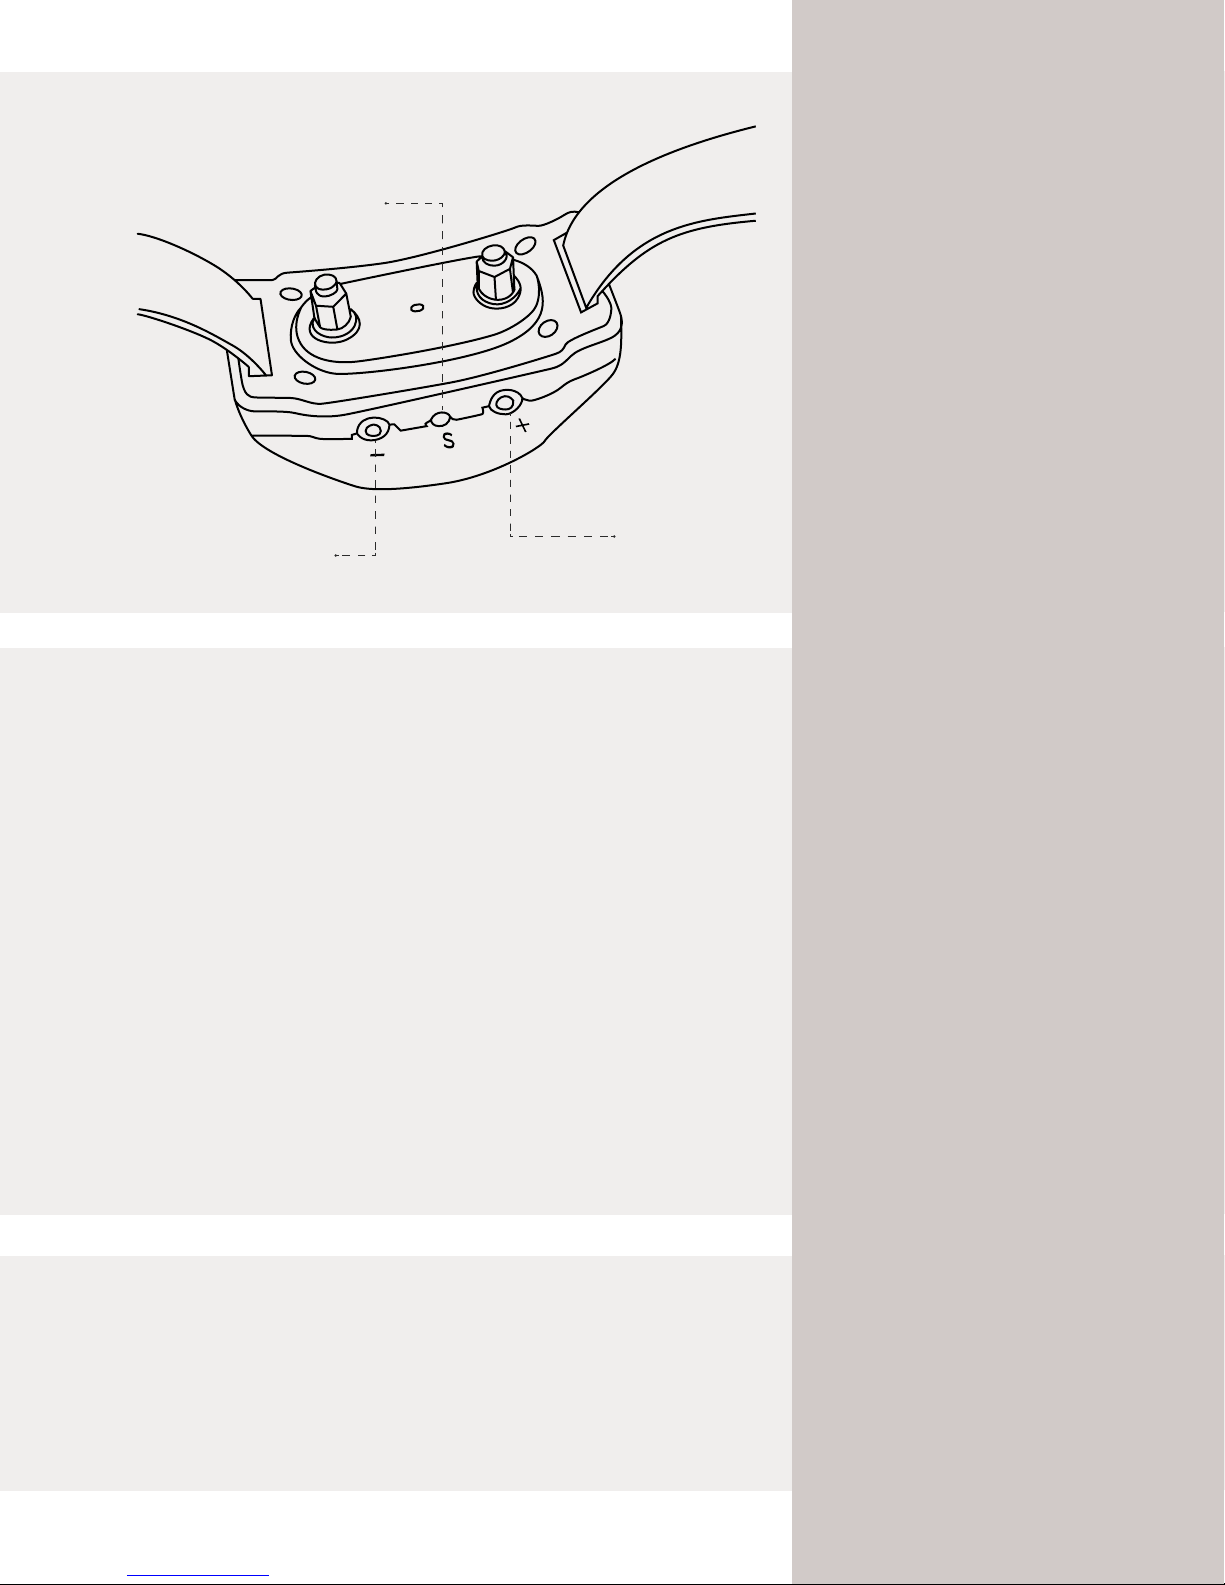
INSTALL THE RECEIVER’S CONTACT COLUMN
According to the size of the dog and dog hair length, choose the right size
column for your dog between the tall one and short one.
First, use the screw driver to press into the reset hole.
You will hear a beep.
Then Press the Y button in the Controller within 5 seconds. You will hear a
second “beep”, as a sign that it is paired successfully. If not, please try
again.
Press the up and down buttons to choose the intensity level.
Choose the between channels for 1 or 2 on right hand side to select your
connected receiver.
Note: If you fail to press the Y button after hearing the beep from
the receiver collar, you need to re-sync and restart by pressing the
Reset button of the receiver device.
Press the Y button; test bulb will flash. That means the shock
function works.

User Manual
Page 6
TESTS &
TROUBLE-
SHOOTING
NOTES
FOR USE
1) Take out the test bulb from the package and put it on the Receiver
device’s contact points.
2) Press Mode button of Remote transmitter, switch to Shock Mode,
confirm that LCD display is not 0 by pressing UP/DOWN button on
the right side to adjust.
Please make sure that the remote and the receiver collar have been
synced successfully.
Please make sure that the remote and the receiver collar have been
synced successfully.
TEST THE STATIC SHOCK FUNCTION
Press the Mode button switch to Shock mode
Press the Y button and the test bulb will flash; that means Shock
function works.
TEST THE VIBRATION FUNCTION
Press the Mode button switch to Vibration mode
Press the Y button, Receiver device will vibrate; that means Vibration
function works.
TEST THE BEEP FUNCTION
Press the Mode button switch to Beep mode.
Press the Y button, Receiver device will create a tone; that means beep
function works.
TEST THE LED LIGHT FUNCTION
Press the Mode button switch to Beep mode.
Press the Y button, Receiver device will flash, signifying that the LED
Light function works.
1. The lifetime of the device will vary according to how often you use the
product.
2. Valid distance of Controller means straight-line distance between the
Controller and the Receiver Collar without obstacles in between. If there
are interference signals or signal screening around, the actual remote Con-
troller distance may vary.
3. Only through training, can the pet understand the intention of its owner.
Good eect can only be achieved after a period of training.
4. Training sessions should be kept positive and short, about 10-15 minutes
long each time.
5. Presently, this product is the most eective and safest tool for training
pets. By following the correct operational instructions, you can eec-
tively train the pet and bring it no harm.

User Manual
Page 7
GUARANTEE
GUARANTEE
CONDITIONS
REGISTER
SPARE
PARTS
Bark Solution guarantees the product against production defects for 2
years of ownership (conditions apply).
All postage and packaging charges will be the purchaser’s sole responsibili-
ty. After the warranty period, a service or upgrade charge will apply relative
to replacement of the product, with new or refurbished items at Bark
Solution’s sole discretion.
Your product can be registered on our website at :-
www.bark-solution.com
You can purchase spare parts (straps, contract points, battery) from
your supplier at any time. You can also contact our customer service at
1. The guarantee will be valid only if the proof of the purchase
(invoice or sales receipt), without cancellation, is submitted to the
distributor or to Bark Solution.
The guarantee is limited to the original purchaser.
2. The warranty excludes:
• Changing the strap
• Direct or indirect transport risks incurred when sending the article
back to the distributor or Bark Solution
• Damage to the article caused by:
o Negligence or incorrect use (ex: bites, breakage, cracking)
o Use contrary to the instructions or not envisioned therein.
o Repairs performed by unauthorized persons
• Theft or Loss
3. No claim may be advanced against Bark Solution, particularly in
relation to incorrect use or breakdown.
4. Bark Solution reserves the right to modify the characteristics
of its products with a view to making technical improvements or to
comply with new regulations.
5. The information contained in this guide may be subject to amend-
ment without prior notice.
6. Photos and drawings are not contractual.
7. Warranty is void if product is resold.
Table of contents


