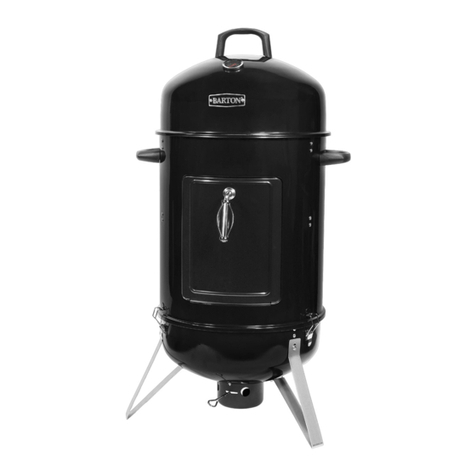
Barton 95546 Original instruction manual

CHARCOAL BBQ SMOKER 14”
SAVE THIS MANUAL: KEEP THIS MANUAL FOR SAFETY WARNINGS, PRECAUTIONS, ASSEMBLY,
OPERATING, INSPECTION, MAINTENANCE AND CLEANING PROCEDURES. WRITE THE PRODUCT’S
SERIAL NUMBER ON THE BACK OF THE MANUAL NEAR THE ASSEMBLY DIAGRAM (OR MONTH
AND YEAR OF PURCHASE IF PRODUCT HAS NO NUMBER)
OWNER’S MANUAL AND SAFETY INSTRUCTIONS
ITEM: 95546
FOR QUESTIONS PLEASE CALL OUR CUSTOMER SUPPORT: 909.628.0880 MON-FRI 9AM TO 3PM PST

1
SAFETY INFORMATION
GENERAL SAFETY WARNINGS
Read all safety warnings and instructions. Failure to follow the warnings and instructions may result
in electric shock, re and/or serious injury. Save all warnings and instructions for future reference.
• The device is intended to be used for grilling, smoking and baking food.
• The device can also be used as a re pit.
• The device is for personal domestic use only and is not suitable for commercial ap plications.
• Use the device only for the intended purpose and as described in the instructions. Any other use is
deemed to be improper.
• WARNING! This grill gets very hot and may not be moved during use.
• WARNING! Danger of carbon monoxide poisoning! Do not use indoors.
• WARNING! Do not use methylated spirit or petrol to light or relight! Only use re lighters in accordance with
EN 1860-3
• WARNING! Keep children and pets away!
• WARNING! Danger of injury and suffocation! Keep children and animals away from the device and packaging
material.
• The device will become very hot during use. Make sure that you do not come into contact with heated parts
while or after using the device. We recommend that you wear oven gloves when handling the device.
• DO NOT place any metal objects on or in the device. They may become very hot.
• ALWAYS allow the device to cool down sufciently before it is cleaned and I or stored away.
• DO NOT operate the device in the vicinity of combustible materials (e.g. tablecloths etc.).
• DO NOT use the device for heating.
• DO NOT cover the device during use in order to prevent it from catching re.
• DO NOT place any combustible materials, such as cardboard, plastic, paper or can dles, on or in the device.
• DO NOT place food that is still wrapped in cling lm or in plastic bags into or onto the device.
• In the event of a re:
- Hot fat/ oil may catch re if it is overheated. Do not extinguish burning fat/ oil with water, but smother the
ames with a re blanket or similar cloth or extinguish a fat re with a re extinguisher which is capable of
extinguishing res involving cooking fat!
- DO NOT use water to extinguish the re as the steam can pose an additional risk of scalding.
• ALWAYS set up the device with enough clearance on all sides and above and on a dry, even, stable and
heat-resistant surface.
• Protect the device from extreme temperature uctuations, persistent wet conditions and collisions.
• Only the accessory parts supplied by the manufacturer should be used. If accessory parts which are not
authorised by the manufacturer are used, all warranty and guarantee claims are void.
SAVE THESE WARNINGS.

PARTS INFORMATION
2

3
PARTS and ASSEMBLY
ASSEMBLY:
1. Take the device out of the packaging and remove any lms and stickers that may be present. Check the
device for any transport damage. If you nd any damage, do not operate the grill.
2. Set up all parts on a dry, at, solid surface.
3. Attach both lid handles (2) to the lid (3). Place two washers (B) and 1 lid handle
on the pre-punched holes. Push through two screw (A) from above and secure
each of them from below with 1 washer (B) and 1 wing nut (C). Proceed in exactly
the same way for the second lid handle.
4. Attach the holders (12) for the smoking rack (9) and the fat collecting tray (11)
in the upper drum (13). Place 1 holder on the inside in the pre-punched holes and
secure it with 2 screws (D) from the outside and 2 wing nuts (G) from the inside.
Proceed in exactly the same way for the remaining holders.

ASSEMBLY
4
5. Attach the handles (18) to the upper and lower drum (17). Place one handle on the
outside on the pre-punched holes and secure it 2 screws (F) from the outside and 2
washers (B) and two wing nuts (C) from the inside. Proceed in the same for the other
handles.
6. Secure the legs (16) to the re bowl (15). Place one leg on the outside on the pre-
punched holes and secure it with 2 screws (D) from the outside and 2 nuts (E) from
the inside, proceed in the same manner for the remaining legs.
7. Fix the two shield parts (6+21) to one another and to the grill tray. Place the right
and left shield into the grill tray. When you do this, make sure the hooks sit correctly
in the recesses. Fix the two shields to one another by pushing 3 screws (J) from
the outside through the pre-punched holed and securing them from the inside with 3
nuts (K).
8. Attach the securing hooks (5) to the shield with holders (4). Place one holder from
the outside of the pre-punched holes and secure it with 2 screws (H) from the outside
and two nuts (I) from the inside. Hook the securing hooks in to the holders. Bend
them apart slightly if necessary. Proceed to in the same manner for the other hooks.
NOTE: The securing hooks should be checked regularly to make sure they are
secure. Tighten the screws and nuts if loose.
PRE-OPERATION - BEFORE USE:
1. Clean the device and all accessories with a soft, damp cloth and a little mild detergent to remove any
possible production residues. Then dry the device and all accessories well.
2. Some smoke may be produced when the device is rst heated up. You should there fore allow the device
to glow for around 30 minutes WITHOUT any food to be grilled before you rst use it (see the “Before Initial
Use” and “Use” chapters) and then clean it again.
• WARNING! This grill gets very hot and may not be moved during use!
• WARNING! Danger of carbon monoxide poisoning! Do not use indoors!
• WARNING! Do not use methylated spirit or petrol to light or relight! Only use relighters in accordance with
EN 1860-3!
CAUTION: hot surfaces! The device will become very hot during use. Make sure that you do not come into
contact with heated parts while or after using the device. We recommend that you wear oven gloves when
handling the device.
• WARNING - Danger of re! Do not leave the device unattended while it is being used and make sure that
the items for grilling/smoking do not burn.
• CAUTION - Danger of burns! Do not place any metal objects on or in the device. They may become very
hot.

OPERATION
5
FIRE PIT USE:
1. Place the re bowl (15) on a at, solid and heat-resistant surface a sufcient distance away from ammable
or heat-sensitive objects. Make sure that all three legs (16) are tted securely and nobody can trip over the
re bowl.
2. Place rewood or similar items in the re bowl.
3. Light the rewood using standard lighters, paper or similar items. Do not reach into the naked ame!
GRILL USE:
1. Place the lower drum (17) on a at, solid and heat-resistant surface a
sufcient dis tance away from ammable or heat-sensitive objects. Make sure
that it is tted se curely and nobody can trip over it.
2. Place on the upper drum (13) and the grill tray (8) with the shield (6 + 21 ).
3. Place charcoal, briquettes or similar fuel into the grill tray. Do not use rewood!
4. Light the charcoal using standard lighters. Do not reach into the naked ame!
5. Slide the grill rack (7) using the handle (20) into the shield at the height you
want. Make sure that the grill rack is xed in the opening on the shield.
6. If necessary place on the lid (3) and x with securing hooks (5). If the grill
rack is on the bottom levels of the shield, the lid can additionally be placed on
top to retain the heat better. On the upper levels, the lid must be removed.
ONLY place the items for grilling once the fuel is covered by a later of ash.
7. Place the items for grilling onto the grill rack and cook them as you wish.
Once the items for grilling are fully grilled, take them off the grill rack.
SMOKER/OVEN USE:
1. Place the lower drum (17) on a at, solid, heat-resistant
surface a sufcient distance away from ammable or heat-
sensitive ob jects. Make sure that it is tted securely and nobody
can trip over it.
2. Place the re bowl (15) into the lower drum.
3. Place the charcoal rack (14) on the re bowl.
4. Place charcoal, briquettes or similar fuel onto the charcoal
rack. Caution! Do not use rewood!
5. Light the charcoal, briquettes or similar fuel using standard
lighters. Do not reach into the naked ame!
6. Place the fat collecting tray (11) into the upper drum (13) on
the lower hooks of the holders (12).
7. Place the rack (10) on the fat collecting tray. Baking
8. Place the upper drum on the lower drum. Make sure that they
t correctly.
9. Place the food that is to be baked (e.g. pizza) on the rack.
10. Place the lid (3) on the upper drum. The thermometer on the lid displays the tempera ture prevailing in the
device.
11. Once the food is fully baked, carefully remove it from the rack.
ONLY place on food once the charcoal, briquettes or similar fuel is covered l,ll with a layer of ash!
OPERATION and STORAGE
6
SMOKING:
7. Once the charcoal is glowing, scatter moist smoking chips or something similar over the charcoal.
8. Place the smoking rack (9) into the upper drum on the holders at the top. Make sure that the feet are placed
in the recesses which are provided for them.
9. Place the upper drum on the lower drum. Make sure that they t correctly.
10. Either place the items for smoking onto the rack or hang them on the hooks (19) and then hang them in
the smoking rack.
ONLY hang up the items for smoking once the fuel is covered by a later of ash.
11. Place the lid on the upper drum. The thermometer on the lid displays the temperature prevailing in the
device.
12. Once the items for smoking are fully smoked, carefully remove the hooks from the smoking rack.
AFTER USE:
1. After use, allow the charcoal, rewood or similar items to fully burn out or extinguish them with sand.
2. Allow the device and the fuel to cool down completely and then clean it thoroughly.
3. Dispose of the ash and any remaining fuel in an environmentally friendly manner.
CLEANING AND STORAGE:
CAUTION - Danger of burns! The housing, all accessories and the fuel may also still be hot after the re has
been extinguished. Wait until the device and the fuel have fully cooled down!
• Under no circumstances should you use any corrosive or abrasive cleaning agents, rough sponges or
knives to clean the device. These could damage the surfaces.
1. Remove the parts that have been used in the reverse order (see the “Use” chapter).
2. Clean all accessories with warm water and a little mild detergent. Over time, the effect of the heat may
cause discolouration to the re bowl (15). However, this does not restrict the performance of the device.
3. Dry all accessories thoroughly before everything is reassembled and stored away.
4. Store the device in a dry place that is protected from sunlight and is not accessible to children and
animals.
DISPOSAL:
Dispose of the packaging material and the article in an environmentally friendly manner and take
them to a recycling centre. Further information is available from

MAINTENANCE
THE MANUFACTURER AND/OR DISTRIBUTOR HAS PROVIDED THE PARTS LIST AND ASSEMBLY
DIAGRAM IN THIS MANUAL AS A REFERENCE TOOL ONLY. NEITHER THE MANUFACTURER OR
DISTRIBUTOR MAKES ANY REPRESENTATION OR WARRANTY OF ANY KIND TO THE BUYER THAT
HE OR SHE IS QUALIFIED TO MAKE ANY REPAIRS TO THE PRODUCT, OR THAT HE OR SHE IS
QUALIFIED TO REPLACE ANY PARTS OF THE PRODUCT. IN FACT, THE MANUFACTURER AND/OR
DISTRIBUTOR EXPRESSLY STATES THAT ALL REPAIRS AND PARTS REPLACEMENTS SHOULD BE
UNDERTAKEN BY CERTIFIED AND LICENSED TECHNICIANS, AND NOT BY THE BUYER. THE BUYER
ASSUMES ALL RISK AND LIABILITY ARISING OUT OF HIS OR HER REPAIRS TO THE ORIGINAL
PRODUCT OR REPLACEMENT PARTS THERETO, OR ARISING OUT OF HIS OR HER INSTALLATION
OF REPLACEMENT PARTS THERETO.
Record Product’s Serial Number Here:
Note: If product has no serial number, record month and year of purchase instead.
Note: Some parts are listed and shown for illustration purposes only and are not available individually
as replacement parts.
PLEASE READ THE FOLLOWING CAREFULLY
SAVE THESE INSTRUCTIONS
7
PRODUCT MADE IN CHINA
Table of contents
Other Barton Smoker manuals