BASSFACE SQ1.1 User manual


!Warning!
Bass Face products can produce sound pressure levels that can
permanently damage your hearing. Please exercise extreme caution
when setting volume levels. Also be mindful of other listeners, they might
not enjoy listening at the same levels as you. We will not be held in any
way responsible for injuries caused by the misuse of our products.
Please take care when attempting any alterations or installations with the Please take care when attempting any alterations or installations with the
electrical system of the car. ALWAYS disconnect the positive terminal at
the battery.
BassBass Face operates a policy of continuous improvement and reserves the right to update
and alter the content and design of both product and instructions as it sees fit. Although
the information contained in the instruction manuals is given in good faith based on
extensive testing and experience the final responsibility for the installation and operation
of your system must rest with the installer and the operator. If you are installing your
equipment yourself please be realistic about your abilities and seek professional advice
if you are unsure about any aspect of the task that you are undertaking.
IfIf you face a particular problem with your installation or product we will be happy to
answer your questions. Please email info@bassfaceaudio.co.uk - please note that our
response time is 2 to 3 days, and that we are closed over the weekend. For more urgent
help please contact your country distributor. In the UK this is Thompsons Ltd
(www.thompsonsltd.co.uk)
Please note that Bass Face is unable to process warranty support directly. For warranty
support you MUST contact your distributor.
Introduction:Introduction:
Firstly, thank you for your purchase. Every element of this product has been optimised to
give you the best possible performance for your money. We think that Bass Face
represents the highest quality to price ratio available on the market today.
Please take the time to read these instructions carefully. You will need to follow them to
have a successful install and get the most from the product.
DoDo remember that incorrect installation or abuse is NOT covered under warranty – it is
YOUR responsibility to make sure that your installation and partnered product is suitable
and compatible.

Firstly, thank you for your purchase. Every element of this product has been
optimised to give you the best possible performance for your money. We think that
Bass Face represents the highest quality to price ratio available on the market
today.
Please take the time to read these instructions carefully. You will need to follow
them to have a successful install and get the most from the product.
DoDo remember that incorrect installation or abuse is NOT covered under warranty
– it is YOUR responsibility to make sure that your installation and partnered
product is suitable and compatible.
The Bass Face SQ1.1 amplifier is a high power monoblock amplifier featuring a
pre amp with digital signal processing. This gives you concise and precise control
over every aspect of the signal on each of the 4 channels.
BeforeBefore you even get the amplifier out of the box (realistically, you will have done
this already and boy it looks sweet doesn’t it!) you will need to install a suitable
wiring kit in your vehicle. You need to use a minimum of 4AWG wiring for this
product, but we advise you use 0AWG where possible. If you are running one 10
or 12" woofer high quality 4AWG would suffice. If you are planning to run a more
demanding application such as a pair of 12" or 15" Woofers and run the amplifier
to maximum capacity, you will need to use 0AWG.
ToTo begin, disconnect the car battery, taking note of any required precautions
suggested by the vehicle manufacturer such as alarm or radio codes, or on board
computer or AGM battery requirements.
YouYou need to find a suitable point on the firewall (bulkhead) to run the power wire
through. If you have to drill a hole, you will need to fit a rubber grommet to ensure
the wire does not get damaged as a short will ruin the whole setup and can be very
dangerous. The positive wire needs to go to the + positive terminal on the battery.
A fuse of appropriate size to protect the cable (for a quality 4 AWG kit we suggest
100A for 0AWG we suggest 150A) needs to be fitted in line and no more than 18”
from the battery.
OnceOnce you have the cable in the car, run it back to the boot or to where you intend
to fit the amplifier. When you do this, be aware you will need to run the remote
cable and the RCA’s from the head-unit back to the amp too.
A common mistake is to forget that a car amplifier needs the remote 12V turn on
cable to see power for it to even work! If you only fit power and ground you’re going
to get…. Nothing!
IfIf the wires you are running have to run over or go alongside other looms of the
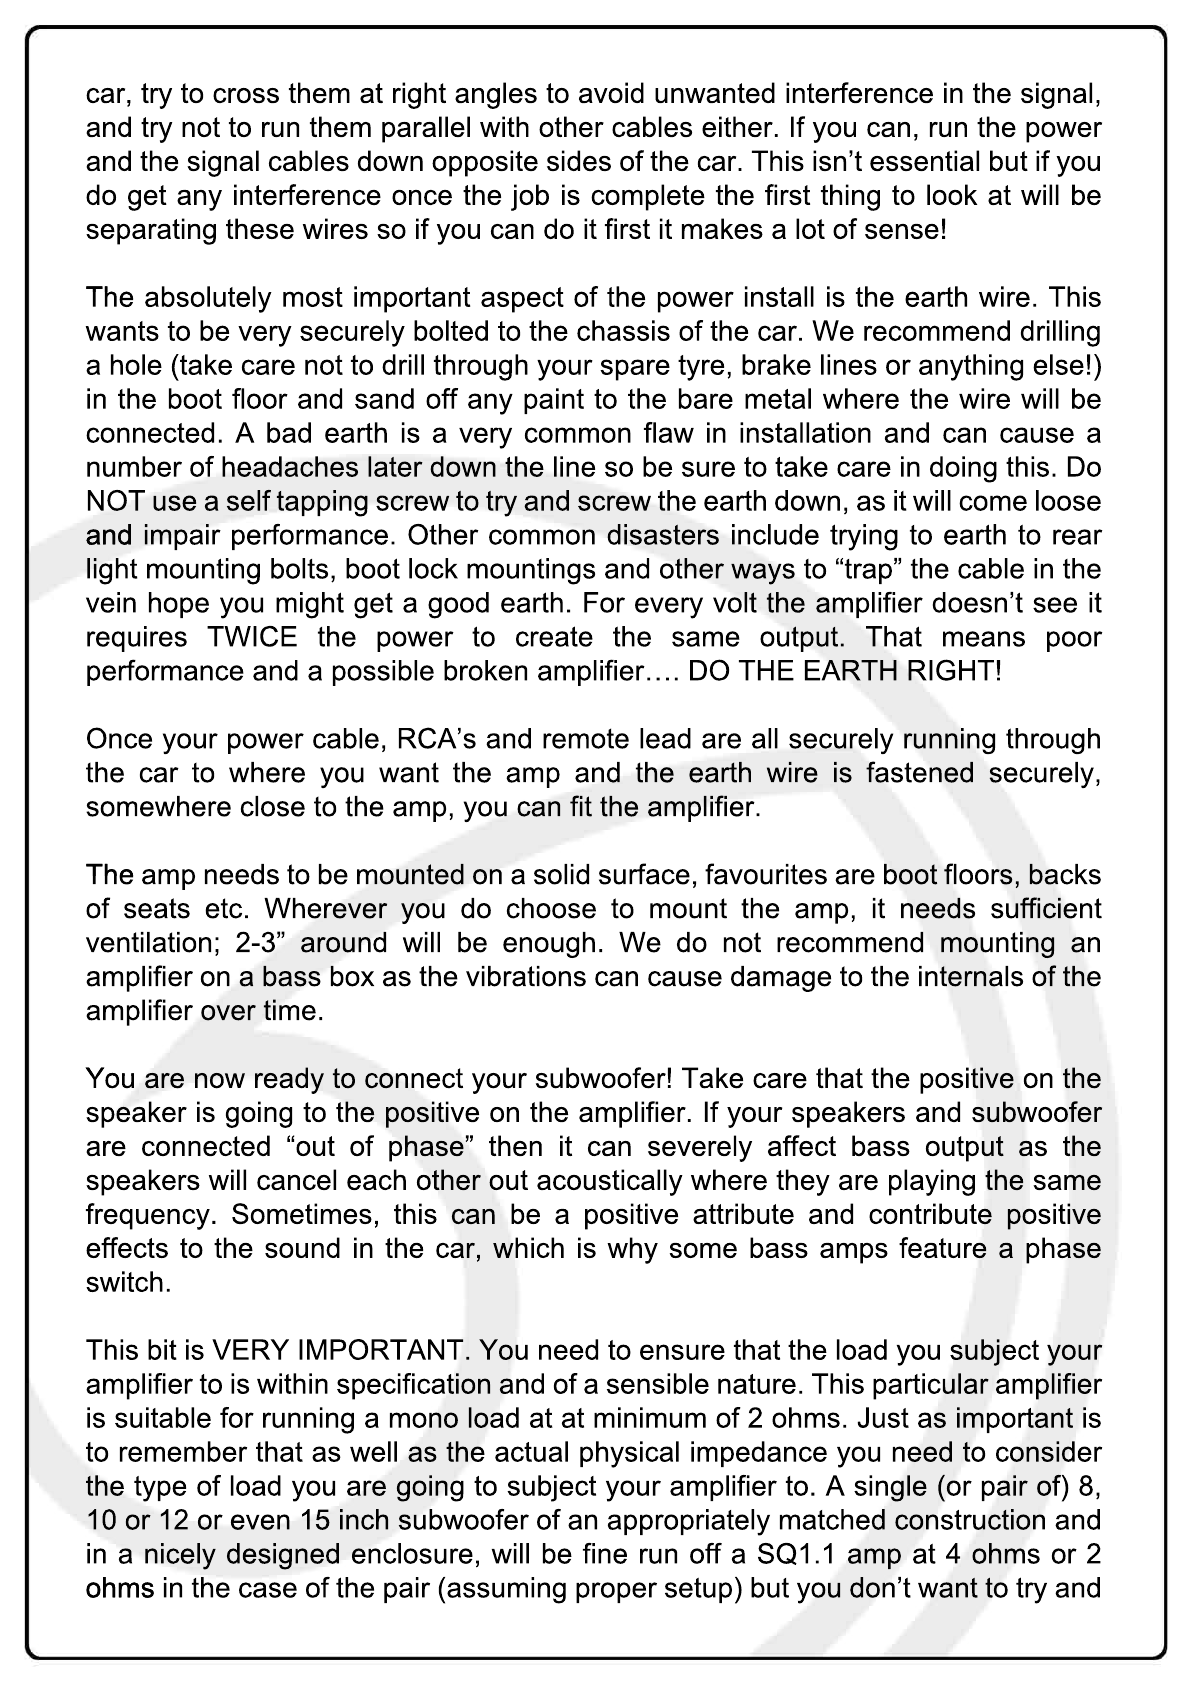
car, try to cross them at right angles to avoid unwanted interference in the signal,
and try not to run them parallel with other cables either. If you can, run the power
and the signal cables down opposite sides of the car. This isn’t essential but if you
do get any interference once the job is complete the first thing to look at will be
separating these wires so if you can do it first it makes a lot of sense!
TheThe absolutely most important aspect of the power install is the earth wire. This
wants to be very securely bolted to the chassis of the car. We recommend drilling
a hole (take care not to drill through your spare tyre, brake lines or anything else!)
in the boot floor and sand off any paint to the bare metal where the wire will be
connected. A bad earth is a very common flaw in installation and can cause a
number of headaches later down the line so be sure to take care in doing this. Do
NOT use a self tapping screw to try and screw the earth down, as it will come loose
andand impair performance. Other common disasters include trying to earth to rear
light mounting bolts, boot lock mountings and other ways to “trap” the cable in the
vein hope you might get a good earth. For every volt the amplifier doesn’t see it
requires TWICE the power to create the same output. That means poor
performance and a possible broken amplifier…. DO THE EARTH RIGHT!
Once your power cable, RCA’s and remote lead are all securely running through
the car to where you want the amp and the earth wire is fastened securely,
somewhere close to the amp, you can fit the amplifier.
TheThe amp needs to be mounted on a solid surface, favourites are boot floors, backs
of seats etc. Wherever you do choose to mount the amp, it needs sufficient
ventilation; 2-3” around will be enough. We do not recommend mounting an
amplifier on a bass box as the vibrations can cause damage to the internals of the
amplifier over time.
YouYou are now ready to connect your subwoofer! Take care that the positive on the
speaker is going to the positive on the amplifier. If your speakers and subwoofer
are connected “out of phase” then it can severely affect bass output as the
speakers will cancel each other out acoustically where they are playing the same
frequency. Sometimes, this can be a positive attribute and contribute positive
effects to the sound in the car, which is why some bass amps feature a phase
switch.
ThisThis bit is VERY IMPORTANT. You need to ensure that the load you subject your
amplifier to is within specification and of a sensible nature. This particular amplifier
is suitable for running a mono load at at minimum of 2 ohms. Just as important is
to remember that as well as the actual physical impedance you need to consider
the type of load you are going to subject your amplifier to. A single (or pair of) 8,
10 or 12 or even 15 inch subwoofer of an appropriately matched construction and
in a nicely designed enclosure, will be fine run off a SQ1.1 amp at 4 ohms or 2
ohmsohms in the case of the pair (assuming proper setup) but you don’t want to try and

run eight massive aluminium coned dual voice coil monster woofers off it, even
though on paper you might well have a 2Ohm load. You have to use a bit of
common sense. This is a SQ amplifier, and, although endowed with a vast amount
of power, it does have limitations.
Time to lay on some power. Connect the earth first. Then 12V power, then remote.
Then connect in the RCA cables and you are done!
NowNow you have physically installed your amplifier and connected the speakers, you
are ready for the fun bit! Please refer to the instructional videos on the Bass Face
website and YouTube for quick start and advanced set up guides. You will need to
connect the amplifier to either a PC with the DSP software, or the optional
controller to set the controls on the amplifier.
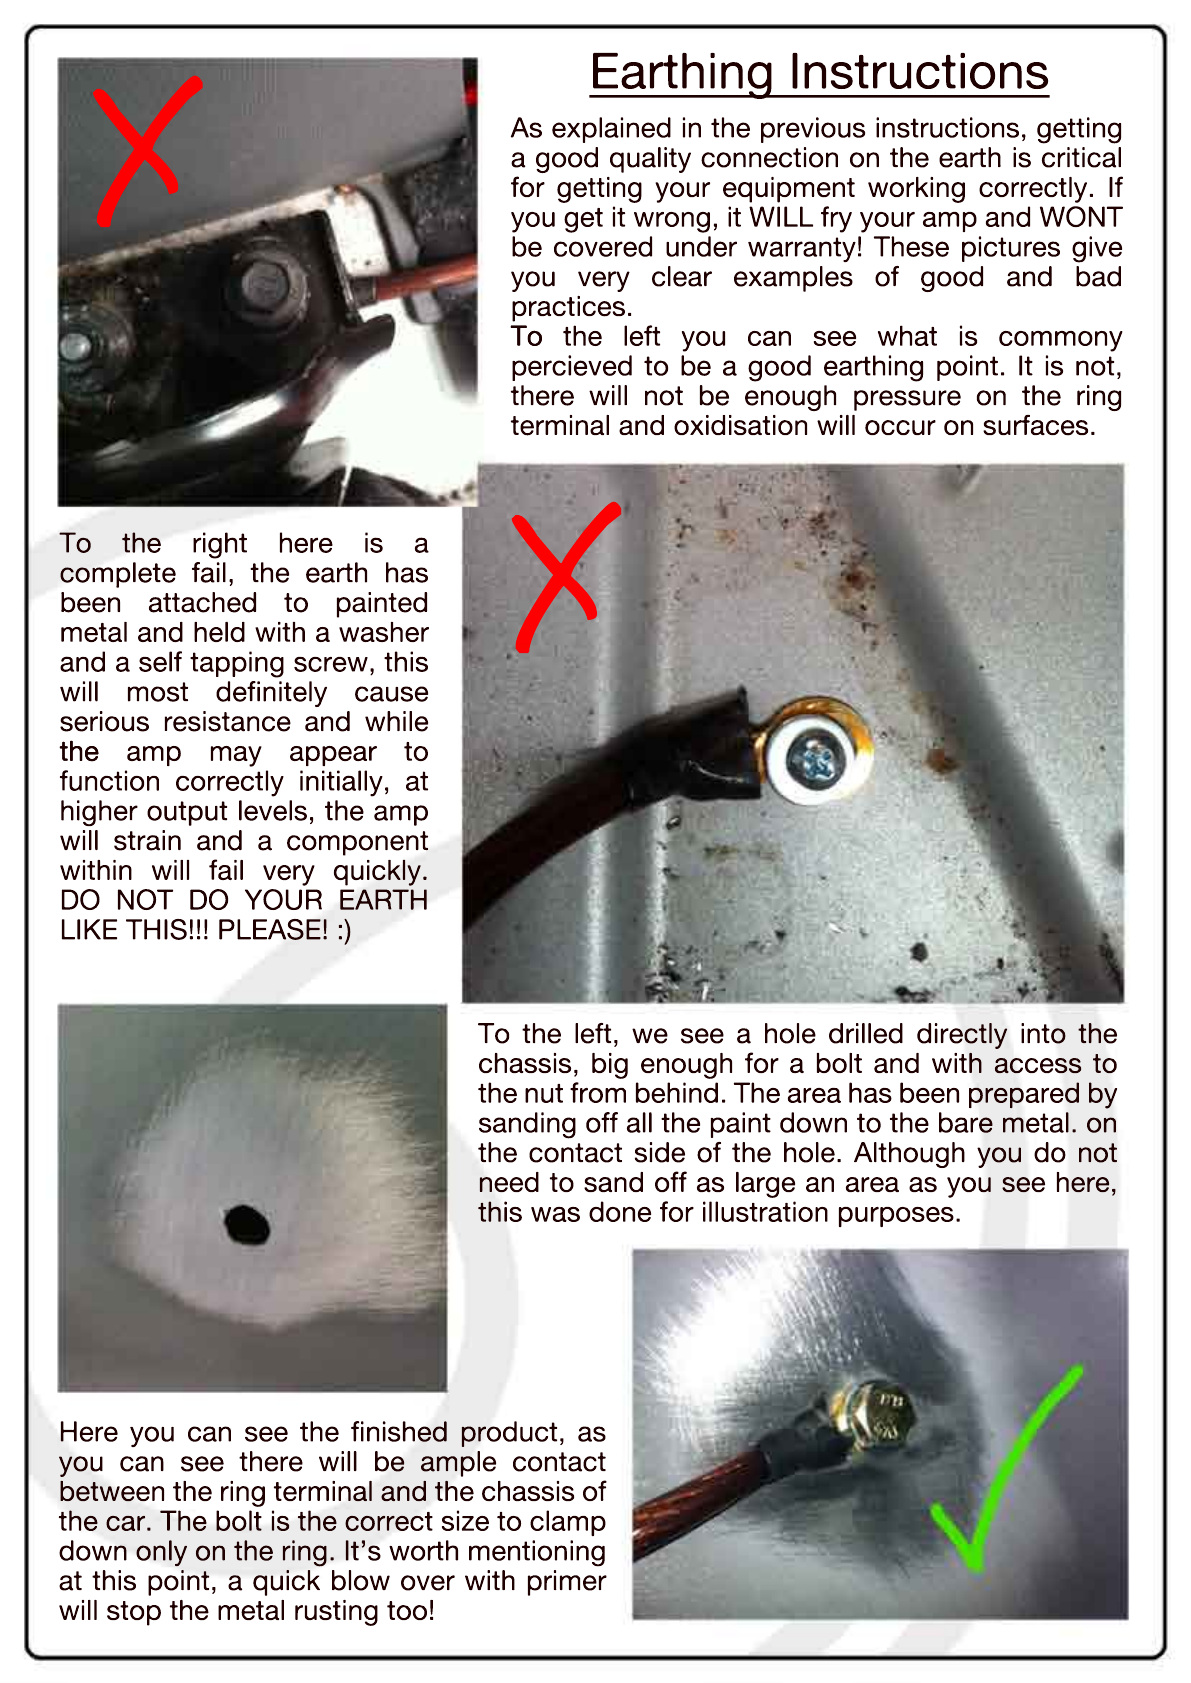
To the right here is a
complete fail, the earth has
been attached to painted
metal and held with a washer
and a self tapping screw, this
will most definitely cause
serious resistance and while
thethe amp may appear to
function correctly initially, at
higher output levels, the amp
will strain and a component
within will fail very quickly.
DO NOT DO YOUR EARTH
LIKE THIS!!! PLEASE! :)
To the left, we see a hole drilled directly into the
chassis, big enough for a bolt and with access to
the nut from behind. The area has been prepared by
sanding off all the paint down to the bare metal. on
the contact side of the hole. Although you do not
need to sand off as large an area as you see here,
this was done for illustration purposes.
Here you can see the finished product, as
you can see there will be ample contact
between the ring terminal and the chassis of
the car. The bolt is the correct size to clamp
down only on the ring. It’s worth mentioning
at this point, a quick blow over with primer
will stop the metal rusting too!
As explained in the previous instructions, getting
a good quality connection on the earth is critical
for getting your equipment working correctly. If
you get it wrong, it WILL fry your amp and WONT
be covered under warranty! These pictures give
you very clear examples of good and bad
practices.
ToTo the left you can see what is commony
percieved to be a good earthing point. It is not,
there will not be enough pressure on the ring
terminal and oxidisation will occur on surfaces.
X
X
Other BASSFACE Amplifier manuals

BASSFACE
BASSFACE DB2.1 User manual

BASSFACE
BASSFACE DB1.2 User manual

BASSFACE
BASSFACE DB2.2 User manual

BASSFACE
BASSFACE SQ 4.1 User manual

BASSFACE
BASSFACE DB4.5 User manual

BASSFACE
BASSFACE DB1.2 User manual

BASSFACE
BASSFACE BlackDB1.1 User manual

BASSFACE
BASSFACE DB4.1 User manual

BASSFACE
BASSFACE Team 5000/X1DFR User manual

BASSFACE
BASSFACE SUPPORT CREW POWER10.1A User manual


