BATSI MIE210MLP User manual

MIE210MLP
MINIMUM LEVEL PRODUCT
USER MANUAL
MANUAL DE USO

FUNCIONAMIENTO DEL MÓDULO MIE 210MLP
El modulo MIE 210MLP se utiliza para detectar cuando se ha llegado al nivel mínimo de producto
en un depósito. El equipo cuenta con la posibilidad de:
INTRODUCCIÓN
Este manual de instrucciones ha sido redactado por el fabricante del equipo y forma parte exclu-
siva del producto. Las operaciones contenidas se dirigen a personal formado y habilitado ade-
cuadamente. Se recomienda su lectura y conservación para futuras consultas.
CONDICIONES DE UTILIZACIÓN
BATSI® recomienda que la instalación de todos los dispositivos, equipos y materiales que cons-
tituyen el conjunto, debe efectuarse en el cumplimiento de las Directivas Europeas 2006/42/CE
(Directiva máquinas), 2014/30/UE y sucesivas modificaciones (equipos eléctricos a baja tensión).
Para los países que no forman parte de la Unión Europea, además de las normas nacionales
vigentes y para un nivel de seguridad suficiente, se recomienda también respetar las prescripcio-
nes contenidas en las mencionadas directivas.
ELIMINACIÓN DEL PRODUCTO
De conformidad con la directiva 2012/19/UE de la UE sobre residuos de aparatos eléctricos y
electrónicos (RAEE), este producto electrónico no puede desecharse con el resto de residuos
no clasificados. Deshágase de este equipo devolviéndolo a un punto de recogida local para su
reciclaje.
ALARMA NIVEL MINIMO
El equipo emitirá una señal acústica cuando el sensor detecte que se ha llegado al nivel mínimo
de carga previamente establecido.
Para que la alarma deje de sonar, bastará con pulsar el botón en cualqueira de los casos.
Para volver a activar la alarma, el sensor deberá volver a detectar producto.
1
Controlar dos niveles mínimos de dos depósitos diferentes.
Controlar solamente un nivel mínimo
Controlar dos niveles diferentes de un mismo depósito (mitad y mínimo, por ejemplo)
Mientras el nivel de producto sea correcto
en la pantalla aparecerá “OK” en el nivel en
cuestión.
Cuando se detecte nivel mínimo aparecerá por
pantalla “MINIM” y sonará un aviso acústico.
El aviso acústico es diferente para cada nivel.

2
MODIFICAR TIPO DE SENSOR
El equipo hace uso de uno o dos sensores para poder controlar el nivel mínimo (Level 1 selector
“CAR” y Level 2 selector “RPM”). Ese sensor puede ser de tipo NPN o PNP.
Para sensor tipo PNP Para sensor tipo NPN
Poner el jumper “CAR” y/o “RPM” en posición PPoner el jumper “CAR” y/o “RPM” en posición N
CONFIGURACIÓN NIVELES A CONTROLAR
Con el MIE210MLP se pueden controlar dos niveles diferentes (Level 1 y Level 2). Estos niveles
se pueden controlar por separado o de forma simultánea. Para escoger qué modalidad se prefie-
re se deben seguir unos pasos:
1 - Desconectar el equipo de la alimentación.
2 - Mantener pulsado el botón
3 - Volver a alimentar el equipo sin soltar el botón.
4 - Escoger la opción deseada mediante el botón.
Pulsación corta Pulsación corta
5 - Desconectar el equipo y volver a alimentar sin pulsar el botón.

3
CABLEADO
A continuación se muestra como debe conectarse el equipo con los sensoros. Los sensores deben
colocarse en el sitio donde se quiera controlar el nivel de producto.
El equipo cuenta con dos cableados, uno para alimentación y otro para conectar al sensor:
ATENCIÓN!
Tener en cuenta si los sensores són PNP o NPN

4
MIE210MLP MODULE OPERATION
The MIE210MLP module is capable to detect the exact moment when the minimum product
level has been reached in a tank. The equipment has the possibility of:
INTRODUCTION
This instruction manual has been written by the controller manufacturer and is an exclusive part
of the product. The operations contained are addressed to properly trained and qualified per-
sonnel. It is recommended to be read and stored for future reference.
TERMS OF USE
BATSI® recommends the installation of all devices, equipment and materials, complying with
European Directives 2006/42 / EC (Machinery Directive), 2014/30 / EU and subsequent modifica-
tions (low voltage electrical equipment). Non-EU countries, in addition to existing national stan-
dards and for a sufficient level of safety, it is also recommended to comply with the indications
contained in the above Directives.
PRODUCT DISPOSAL
In accordance with the EU Directive 2012/19 / EU on Waste Electrical and Electronic Equipment
(WEEE), this electronic product can not be disposed of with other unclassified waste. Dispose of
this equipment by returning it to a local collection point for recycling.
Detect two different levels of the same tank (for example middle and minimum).
Detect two different minimum levels of a different tanks.
Detect only one minimum level.
As long the product level is correct, “OK” will
be shown for every correct level.
When the minimum level has been detected,
“MINIM” will be shown and an acoustic warning
will be emitted. The acoustic warning is diffe-
rent for every level.
MINIMUM LEVEL ALARM
The MIE210MLP will emit an acoustic signal when one of the sensors detect a minimum level.
In order to stop the acoustic alarm, you just need to push the button in any case. To re-
activate the alarm, the sensor just have to detect product again.

5
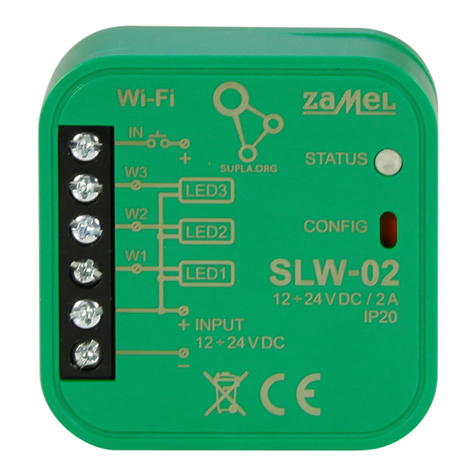
MODIFY SENSOR TYPE
The equipment needs one or two sensors in order to control the minimum level (selector “CAR”
for Level 1 and selector “RPM” for Level 2). Those sensors could be NPN or PNP type.
For PNP type sensor For NPN type sensor
Put the “CAR” and/or “RPM“ jumper to the P position Put the “CAR” and/or “RPM” jumper to the N position
SETTING LEVELS TO CONTROL
The MIE210MLP is capable to monitor two different levels (Level 1 and Level 2). Those both
levels can be monitored separetly or simultaneously. To choose the configuration wanted, just
follow the steps below:
1 - Disconnect the controller from the power supply.
2 - Hold the button pressed
3 - Connect the controller to power supply while the button is pressed.
4 - Choose the desired option using the button.
Short pulsation Short pulsation
5 - Disconnect the controller from the power supply and reconnect again without pressing
the button.

6
WIRING
Then it will show how the equipment should be connected to the sensor. The sensor should be
positioned wherever you want to count the actions by ensuring a correct assembly. The contro-
ller has two wiring, one for power supply and another to connect to the sensor:
WARNING!
Take into account whether the sensors are PNP or NPN.

7
Table of contents
Languages:
Popular Controllers manuals by other brands
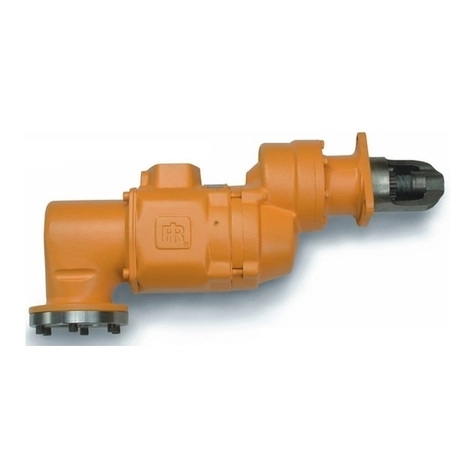
Ingersoll-Rand
Ingersoll-Rand ST700 Series Installation and maintenance information
Thermon
Thermon Genesis HMI quick start guide
Danfoss
Danfoss 140F1139 Installation and user guide
Hunter
Hunter Hydrawise Pro-HC Connecting
OMC
OMC W150 Installation and maintenance instruction
LED World
LED World HUEDA Installation sheet
3Ware
3Ware 8006-2LP - Escalade RAID Controller manual
Omron
Omron CS1D-CPU S Series Replacement guide

Olympia
Olympia Smart Plug operating manual

Sony
Sony ZRD-C12A operating instructions

Nexx Garage
Nexx Garage NXG-100 installation guide
Pentair Pool Products
Pentair Pool Products MiniMax NT 6800 installation instructions

