manuals.online logo
Brands
  1. Home
  2. •
  3. Brands
  4. •
  5. Baumatic
  6. •
  7. Dishwasher
  8. •
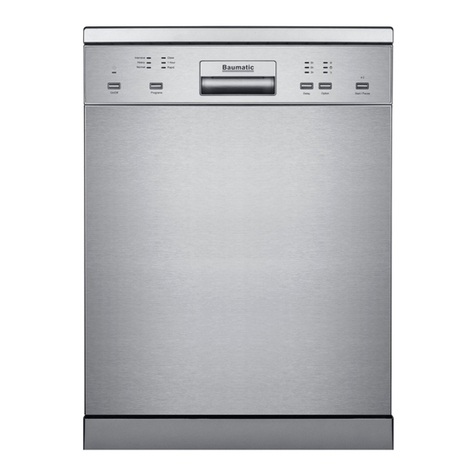
  9. Baumatic BDW70W User manual

Baumatic BDW70W User manual

This manual suits for next models

1

Other Baumatic Dishwasher manuals

Baumatic BDWI640 User manual

Baumatic

Baumatic BDWI640 User manual

Baumatic BDW47 User manual

Baumatic

Baumatic BDW47 User manual

Baumatic BDF465-SL/W User manual

Baumatic

Baumatic BDF465-SL/W User manual

Baumatic BDW9 Operating instructions

Baumatic

Baumatic BDW9 Operating instructions

Baumatic BFD64SS User manual

Baumatic

Baumatic BFD64SS User manual

Baumatic BDWF65W 60cm User manual

Baumatic

Baumatic BDWF65W 60cm User manual

Baumatic BDW13 User manual

Baumatic

Baumatic BDW13 User manual

Baumatic BDW01 User manual

Baumatic

Baumatic BDW01 User manual

Baumatic BDW66S User manual

Baumatic

Baumatic BDW66S User manual

Baumatic BDW2SS User manual

Baumatic

Baumatic BDW2SS User manual

Baumatic BDWS45SS User manual

Baumatic

Baumatic BDWS45SS User manual

Baumatic BDF665W User manual

Baumatic

Baumatic BDF665W User manual

Baumatic BDW17 User manual

Baumatic

Baumatic BDW17 User manual

Baumatic BDWS59SS User manual

Baumatic

Baumatic BDWS59SS User manual

Baumatic BBM14S User manual

Baumatic

Baumatic BBM14S User manual

Baumatic BFD61SS User manual

Baumatic

Baumatic BFD61SS User manual

Baumatic BDW45.1 User manual

Baumatic

Baumatic BDW45.1 User manual

Baumatic BDW5 Operating instructions

Baumatic

Baumatic BDW5 Operating instructions

Baumatic BFD64SS User manual

Baumatic

Baumatic BFD64SS User manual

Baumatic BDFF 612 User manual

Baumatic

Baumatic BDFF 612 User manual

Baumatic BFD62W User manual

Baumatic

Baumatic BFD62W User manual

Baumatic BDW1W/SS User manual

Baumatic

Baumatic BDW1W/SS User manual

Baumatic BDW10 Operating instructions

Baumatic

Baumatic BDW10 Operating instructions

Baumatic BDIF 612 User manual

Baumatic

Baumatic BDIF 612 User manual

Popular Dishwasher manuals by other brands

Samsung DW-FN320T user manual

Samsung

Samsung DW-FN320T user manual

LG LDS 5811WW Service manual

LG

LG LDS 5811WW Service manual

Elba EDW-B1462D owner's manual

Elba

Elba EDW-B1462D owner's manual

VESTEL NOVUS Series Service manual

VESTEL

VESTEL NOVUS Series Service manual

Bosch SMS4EMW00E Instructions for use

Bosch

Bosch SMS4EMW00E Instructions for use

Global-Tek GT-CR 2 manual

Global-Tek

Global-Tek GT-CR 2 manual

Smeg Dishwasher 85028 Instructions for installation and use

Smeg

Smeg Dishwasher 85028 Instructions for installation and use

LG LD-4080W Service manual

LG

LG LD-4080W Service manual

Bauknecht GCF 625 operating instructions

Bauknecht

Bauknecht GCF 625 operating instructions

Sharp QW-HX13F47EI-EU user manual

Sharp

Sharp QW-HX13F47EI-EU user manual

Asko D5536XLFI operating instructions

Asko

Asko D5536XLFI operating instructions

Modena WP 7134 WVM User manual book

Modena

Modena WP 7134 WVM User manual book

Beko DFN39340X instruction manual

Beko

Beko DFN39340X instruction manual

AEG FAVORIT 65050 VI1P user manual

AEG

AEG FAVORIT 65050 VI1P user manual

Siemens SN23HI37VE user manual

Siemens

Siemens SN23HI37VE user manual

Maytag MDB4651AWB - Tall Tub Dishwasher User instructions

Maytag

Maytag MDB4651AWB - Tall Tub Dishwasher User instructions

Hotpoint Ariston LL 42 Instruction book

Hotpoint Ariston

Hotpoint Ariston LL 42 Instruction book

Siemens SN45ZW56CS user manual

Siemens

Siemens SN45ZW56CS user manual

manuals.online logo
manuals.online logoBrands
  • About & Mission
  • Contact us
  • Privacy Policy
  • Terms and Conditions

Copyright 2025 Manuals.Online. All Rights Reserved.

1
BDW70W/S 60 cm
electronic dishwasher
BDW70S/W
14 place settings
Alt function
Dear Customer,
Congratulations on purchasing your new product from Think Appliances.
To register your parts and labour warranty (some conditions apply please refer to your
warranty card for more details) please contact out Customer Care team on:
1800 444 357
Our Customer Care centre is there to ensure you get the most out of your appliance. For
example, should you want to learn more about recommended cooking temperatures, the
various cooking functions available, how to set and program your LED clock, and importantly
taking care of your appliance when cleaning, please call us because we are here to help you.
It is important that you read through the following use and care manual thoroughly to
familiarize yourself with the installation and operation requirements of your appliance to
ensure optimum performance.
We also carry a complete range of spare parts for all Think products. For all your spare parts
enquiries please contact our team at Pronto Parts on:
1300 306 973
Again, thank you for choosing an appliance brought to you by Think Appliances and we look
forward to being of service to you.
Kind regards
Management
Think Appliances
Witheachwashcycle.
Compartment
For programmes with pre-wash only.
(Follow the user instructions!)
Electric indicator on control panel (if provided).
Check the rinse aid level
Load the baskets
Select a programme
Running the dishwasher
Switch off the appliance
Turn off the water tap,
unload the baskets
Fill the detergent dispenser
Warning: wait a few minutes (about 15 minutes) before unloading the dishwasher to avoid handling
the dishes and utensils while they are still hot and more susceptible to break.
They will alsodry better.Unload the appliance, startingfrom the lower basket.
Changing the programme
Add forgotten dishes in the
dishwasher.
Scrape off any large amount of leftover food. Soften remnants of burnt foodin pans,
then load the baskets. Refer to the dishwasher loading instructions.
When the working cycle has finished, the buzzer of the
dishwasher will sound 8 times, then stop.
Turn off the appliance using the On/Off Button.
If the appliance is switched
off during a wash cycle.
Open the door carefully.
Hotsteammay escape
when thedoorisopened!
If the appliance is switched off during a wash cycle, when switched
on again, please re-select the washing cycle and operate the dishwasher
according to the original Power-on state ).
Switch on the appliance
For detailed operating method read the corresponding content on the instruction manual.
Close the door, turn on the water tap. The machine will start working
after about 10 seconds.
Press the Programme Button, the selected programme indicator lights up.
( See the section entitled Operating instruction )“”
Open the door, press the On/Off button to switch on the appliance.
1. Arunning cycle can only be modified if it has been running for a short time. Otherwise the detergent
may have already been released and the water already drained. If this is the case, the detergent
dispenser must be refilled.
2. Open the door
, press the program button for more than 3 seconds, the machine will be in
standby state, then you can change the program to the desired cycle setting.
1.Open the door a little to stop the washing.
2.After the spray arms stop working, you can open the door
completely.
3.Add forgotten dishes.
4.Close the door, the dishwasher will run after 10 seconds.
To review the section on troubleshooting Tips
will help you to solve some common problems
by yourself .
Dear Customer,
Please carefully readthismanualbefore usingthe
dishwasher,it will help you to use and maintainthe
dishwasher properly.
Pass it on toany subsequent owner of the appliance.
Thismanualcontains sections on safety instr uctions,
Operating Instructions, InstallationInstructions and
Troubleshooting Tips, etc.
The manufacturer, following a policy of constant
development andupdating of the product, may
make modifications without giving prior notice.
Keep it as a referral later on.
If you can not solvethe problems by yourself ,
please ask for the help of professional technicians.
This appliance isintended tobe used in households
andsimilar applications suchas:
-staff kitchen areas in shops, offices and other
working environments;
-farm houses;
-by clients inhotels,motels and other residential
type environments;
-bed and breakfast type environments.
Dishwasher Features.................................... ...2
AttentionbeforeorafterloadingtheDishwasher
Baskets..........................................................6
Filtering System.............................................10
Caring forthe Dishwasher..................... .........11.
A Fill the RinseAid Dispenser............. .. ..3、..... ...
B Functionof Detergent .........................4、........
..............7
The Method Loading Normal Dishware
Wash CycleTable...........................................8
Turning on theAppliance................................8
Change the Programme.............. ................9....
At theEnd of the Wash Cycle...........................9
PositioningtheAppliance................... ..........12..
Water Connection.................................. .......13.
AboutPower Connection........................ .......12.
Startof dishwasher................................ ......14..
Before calling for service........................... .....15.
Errorcodes.................................... ..............16.
Technical information.............................. .....17..
Control Panel...................................................2
This appliance must be grounded. In the event of a
malfunction or breakdown, grounding will reduce
the risk of anelectric shock by providing a path of
least resistance of electric current. This appliance
is equipped with a cord having an equipment-
grounding conductor and a grounding plug.
The plug must be plugged into an appropriate outlet
that is installed and grounded in accordance with
all local codes and ordinances.
Keep children away from detergent and rinse aid, keep
child away from the open door of the dishwasher,
there could still be some detergent left inside.
ren
Donotabuse,siton,orstandonthedoorordish
rack of the dishwasher.
Do not touch the heating element during or
immediately after use.
(This instruction is only applicable to machines
with a visual heating element.)
Do not wash plastic items unless they are marked
dishwasher safe or the equivalent. For plastic items
not so marked, check the manufacturer's
recommendations.
Use only detergent and rinse additives
designed for an automatic dishwasher.
Never use soap, laundry detergent, or hand
washing detergent in your dishwasher. Keep
these products out of the reach of children.
During installation, the power supply must not
be excessively or dangerously bent or flattened.
Do not tamper with controls.
Do not place any heavy objects the
door when it is open. The appliance could tip
forward.
on or stand on
When loading items to be washed:
1) Locate sharp items so that they are not likely
to damage the door seal;
2 Warning: Knives and other utensils with
sharp points must be loadedinthe basket
with their points down orplaced in a
horizontal position.
)
When using your dishwasher, youshould
prevent plastic items from coming into contact
with the heating element.(This instruction is only
applicable to machines with a visual heating
element.)
Ifthesupplycord is damaged, itmustbereplaced
bythemanufactureroritsserviceagentora
similarly qualified person in order to avoid a
hazard.
Please dispose of packing materials properly.
Use the dishwasher only for its intended function.
Remove the door to the washing compartment when
removing an old dishwasher from service or discarding it.
Dishwasher detergents are strongly alkaline, they
can be extremely dangerous if swallowed.Avoid
contact with skin and eyes and keep children away
from the dishwasher when the door is open.
Check that the detergent comparment isempty
after completion of the wash cycle.
The applianceis to be connected to the water
mains using new hose sets and that old hose-sets
should not be reused.
The maximum number of place settings to be
washed is 14.
The maximum permissible inlet water pressure is
1Mpa.
The minimum permissible inlet water pressure is
0.04Mpa.
Children should be supervised to ensure that they do
not play with the appliance.
This appliance is not intended for use by persons
(including children with reduced physical, sensory or
mental capabilities, or lack of experience and
knowledge ,unless they have been given supervision
or instruction concerning use of the appliance by a
person responsible for their safety.
)
When using your dishwasher, follow the precautions listed below:
The door should not be left open,
since this could increase the risk of tripping.
Improper connection of the equipment-grounding
conductor can result in the risk of an electric shock.
Check with a qualified electrician or service
representative if you are in doubt whether the
appliance is properly grounded. Do not modify the
plug provided with the appliance; If it does not fit
the outlet. Have a proper outlet installed by a
qualified electrician.
Do not operate your dishwasher unless all
enclosure panels are properly in place. Open
the door very carefully if the dishwasher is
operating, there is a risk of water squirting out.
beforeusing it for the firsttime.
To getthe best performance from yourdishwasher, read all operating instructions
10 11
Back View
1
2
3
4
5
6
7
89
Front view
Lower basket
Dispenser
Cupshelf
Spray arms
Filter assembly
Inletpipeconnector
Drain pipe
Upperbasket
Cutlery rack
Top spray arm
1
Inner pipe
5
6
7
8
9
11
10
3
24
On/Off Button: To turn on/off the power supply.
Display screen: to show the reminding time
and the state(running state, delay time etc )
Program indicators:
RinseAid indicator:
Indicates whenthe dispenser needsto be refilled.
Delaytime ,Remain time ,orerror codes indicator:
Programstep indicators:
Delay Button : To Press the button to delay. Program Button : To Press the button to select
appropriate Program.
Alt function indicator:
Alt Button: Dual zone wash function, press the
button to select either upper basket or lower basket
loaded, and the response indicator .
Pre-washindicator:
Main-washindicator:
Rinseindicator:
Drying indicator:
Program end indicator:
* See the "Starting a
wash program" section
for more information.
Before using your dishwasher for the first time:
A. Filltherinse aiddispenser
B. Fill in detergent
Therinse aid isreleased duringthe finalrinseto preventwater from forming dropletson your dishes, which can
leave spots and streaks. It also improvesdryingby allowing water to rolloff thedishes. Yourdishwasheris
designed to use liquidrinse aids.The rinseaid dispenseris located insidethe door nextto the detergent dispenser.
Tofill the dispenser, open thecapand pour the rinse aidinto the dispenser until the levelindicator turns completely
black.Thevolume ofthe rinseaidcontaineris about 110ml.
RinseAid Dispenser
Function of RinseAid
Rinse aid is automaticallyadded during the last rinse,ensuring thorough rinsing, and spot and streak free drying.
Attention!
Onlyuse branded rinse aid for dishwasher. Never fill the rinseaiddispenserwith any othersubstances
(e.g. Dishwasher cleaning agent,liquid detergent). This would damage the appliance.
As the rinse aid diminishes, the size ofthe black dot
on the rinse aid level indicator changes, as illustrated below.
Full
3/4full
1/2full
1/4full-Shouldrefilltoeliminatespotting
Empty
If there is no rinse-aid warning light in the control panel, you can judge the amount of rinse-aid by the color of the
optical level
indicator "C" located next to the cap. When the rinse-aid container is full, thewhole indicator will be dark.As the
rinse-aid
diminishes, the size of the dark dot decreases.You should never let the rinse aid get below 1/ 4 full.
When to Refill the RinseAid Dispenser
RINSEAID DISPENSER
To open the dispenser, turn the cap to the "open" (left) arrow and lift it out.
Pour the rinse aid into the dispenser, being careful not to overfill.
Replace the cap by inserting it alignedwith "open" arrow and turning it tothe closed (right) arrow.
Be careful not to overfillthe dispenser,because this could cause over sudsing. Wipe away anyspills
witha damp cloth. Don'tforget toreplace thecap beforeyou close dishwasher door.
Attention!
Clean up any rinse aid split during filling with an absorbent cloth toavoid excess foaming
during the nextwash.
1
2
3
Adjusting RinseAid Dispenser
The rinse aid dispenser has six or four settings.Always start with the dispenser
set on "4". If spots and poor drying are a problem,increase the amount of rinse
aiddispensed by removing thedispenserlidandrotatingthedialto"5".Ifthe
dishes still are not drying properly or are show spots, adjust the dial to the next
higher lever until your dishes are spot-free. The recommended setting is "4".
(Factory value is "4".)
Increase the dose if there are drops of wateror limespots on the dishes after washing.
Reduce it if there are sticky whitish stains on your dishes or a bluish film on glassware or
knifeblades.
during thenextwash.
Don't forget to replacethe cap before you close dishwasher door.
Clean upany rinse aid spilled while duringfilling with an absorbent cloth to avoid excessive foaming
Detergents with its chemical ingredients are necessary to remove dirt, crush dirt and transport it out of the dishwasher.
Most of the commercial quality detergents are suitable forthis purpose.
Detergents
There are 3 sorts of detergents
1.With phosphate and withchlorine
2.With phosphate and without chlorine
3.Withoutphosphate and without chlorine
Based on their chemicalcomposition,detergentscan be split in two basic types:
Theuseof normal washing programs in combination with concentrated detergents
reducespollutionand is goodforyour dishes; these wash programs are specificallymatched
to the dirt-dissolving properties of theenzymes of theconcentrated detergent. For this reason
normal washprogramsinwhich concentrated detergents are used can achieve the same
results that can otherwise only be achieved using intensive programs.
“”
“”
“”
Detergent tablets of differentbrands dissolve at different speeds. For this reason some
detergent tablets cannotdissolve anddevelop their full cleaning power during short
programs. Therefore please use long programs when using detergent tablets, to
ensurethe completeremovalof detergentresiduals.
The dispensermust be refilled before thestart of each wash cycle followingthe instructions
provided in the wash cycle table .Your dishwasheruses less detergent andrinse aid than
Conventional dishwasher. Generally,only one tablespoon of detergent is needed for
a normal wash load.More heavily soileditems need more detergent.Alwaysaddthe
detergent just before starting thedishwasher, otherwise it could get damp and will not
dissolve properly.
Concentrated Detergent
DetergentTablets
DetergentDispenser
conventional, alkaline detergents with caustic components
low alkalineconcentrated detergents with natural enzymes
Normally new pulveriseddetergent is without phosphate.Thus the water softener function of
phosphate is not given. In this case we recommend tofill salt in the salt container even when
the hardness of water isonly6 dH. Ifdetergents without phosphate are used in the case ofhardwater
often white spots appearondishes and glasses. In this case please add more detergent to reach
better results. Detergents without chlorine doonlybleacha little. Strong and coloured spots will not
be removedcompletely.Inthis caseplease choose aprogramwitha higher temperature.
°
Amount ofDetergenttoUse
ProperUseofDetergent
Use only detergent specifically made for the usein dishwashers. Keep your detergent fresh and dry.
Don't put powdered detergent into the dispenser until you're ready to wash dishes.
Dishwasher detergent is corrosive! Take care to keepitout of reach of children.
Always add the detergentjustbefore starting eachwash cycle.
Only use branded detergent aid for dishwasher.
If thelid is closed: press release button. The lid will spring open.
Fill the detergentdispenser with detergent.
Themarkingindicatesthedosinglevels ,as
illustratedontheright:
The place of main wash cycle detergent placed.
The place of pre-wash cycle detergent placed.
Please observe the manufacturersdosing andstorage
Recommendations as stated on the detergent packaging.
Close the lidandpress until itlocks inplace.
Ifthedishesare heavily soiled, placean additional
detergent dose in the pre-wash detergent chamber. This detergent will take effect during the pre-wash phase.
A
B
Fill in Detergent
You find information about the amount of detergent for the single programme on the last page.
Pleaseaware, that according to the level soiling andthe specific hardness of water differences are possible.
Please observe the manufacturer's recommendations on the detergent packaging.