Bavono PTM-937WDR User manual

BAVONO PTM-937WDR
Outdoor 37X Zoom Wide Dynamic Range PTZ Dome Camera
I. Performance Instruction
Chapter One — Product Overview
II. Feature Functions Instruction
I. Wiring of Dome System
Chapter Two — Wiring and Setup of Dome System
Basic system connection
In the drawing, JMP-120R is
the impedance matching
selection of control signal and
noise restrain of RS-485, when
there is long distance
transmission or noise-control,
it can short jumper
User Manual
Address of Dome device is from 0 - 255.The number (address) of dome device in the control system is setup by
the hardware (8-digit on and o switch) of dome device.
Integrate multi-protocol and auto protocol dierentiation. Note: The dome device only auto dierentiate
controller of the rst communication.
Pan 360 degree continuous rotation.
Tilt 90 degree action plus 2 degree angle adjustment. Plus the 2 degree adjustment, the view angle can be 90 or
92 degree.
Pan manual operation speed can be 0.1 to 300 degree per second
Tilt manual operation speed can be 0.1 to 120 degree per second
128 preshot positions (A xed position that aimed by the dome camera, which can be set and revised by user
arbitrarily)
The maximum running speed when preshot is being called can reach 400 degree per second with accuracy of
±0.1 degree.
Compatible with many kinds of Module Camera
Power supply : AC 24V 1A (indoor type), AC 24V 2A (outdoor type)
Easy installation interface.
Pass environmental protection grade IP66 (outdoor type)
Adopts long distance RS-485 transmission mode
Transmission speed, i.e, Baud rate is selectable (Set by the fth and sixth bit of the on and o switch of the dome
device, baud rate 2400bps - 19200bps)
1.
2.
3.
4.
5.
6.
7.
8.
9.
10.
11.
12.
13.
14.
Multi-language operation menu and function display.
Camera name and operation position and angle display (The name of the camera can be edited and the
coordinate angle of the dome device can be displayed on the screen)
Operation crosshair function (Enable this option, the target can be captured more eectively with crosshair on
the screen)
Three PTZ tours operation with 2 minutes record of each tour (Can real-time monitor and record the action of
manual operation)
Six group of programmable vector scans (including scan speed, dwell time, preshot and interruption between
tours)
Auto ip function with 10 degree move up
Eight sectors of programmable sectional mask (Can mask part of the sectors of camera , which diers depending
on dierent types of camera)
Eight sectors of programmable sectional display (Can display the name and nature of concrete position
shooting by the camera, which diers depending on dierent types of camera)
Auto enter function running after self-test of the dome device and auto enter function running when there is no
transmission (Dwell time can be set form 1 to 999 seconds)
Frozen video picture function (freez picture function)
Operation return function (after executing operation return, the dome device will return to the previous
operation)
Intelligent manual scan function (execute this function in manual pan operation, you can adjust the manual pan
operation)
Intelligent power o real time memory (If power was cut o when a certain function is in operation, the dome
device can resume working at where the power is cut o )
High ecient 3-dimension scan
Camera zoom in speed limit function. ( When it was zooming in, the speed of the dome device will auto slow
down )
1.
2.
3.
4.
5.
6.
7.
8.
9.
10.
11.
12.
13.
14.
15.
1.
Multi-dome device connection
When connecting many dome
devices together, the user can
embed multi-device system with
auxiliaries such as arrester
device, video matrix , DVR and
alarm box for system integration.
AV24V: Power supply of dome
device, which will convert 110V /
60Hz or 220V/50Hz input to AC
24V output and supply to the
dome device.
2.
Attention: No operation when
the dome device is power on!
II. Setting of Dome Device Communication
Before installation and use, the setting of communication protocol and transmission speed (baud rate ) should comply with
the control system
Wiring (Please do not turn the power on)
1.
Setting dome device address. (Turn the power o when setting, and restart the device after revision)3.
4.
5.
6.
2.
Install camera. (Please refer to camera installation for details)
Attention: 1. Do not connect the camera and dome device with FFC in a wrong way.
2. The installation holes of dierent camera dier.
Connect the power of dome device
At this moment, the self-test (rotation) of dome device and self-test ( there will be image on the monitor) of camera can be seen.
Attention: When the dome device is self-testing, it is normal when sound is issued caused by the block of dome device after 2 - 5
seconds of vertical movement, which is the orientation of the dome itself.
Controller setting
Set the protocol, baud rate and address of the keyboard controller identical with those of dome device. (Please refer to keyboard
controller instruction manual).
Attention: If the setting of protocol of dome device is auto detection, the protocol of keyboard controller can be set arbitrarily,
But its baud rate should be set identical with that of the dome device.
7. Start testing.
When all the above are ready, the testing to dome device can be started.
( Please refer to the next section for demonstration of menu operation and control of dome device.)
The gure shows: Address of the dome device: No.1
(Please refer to detailed parameter in next chapter)
This dip switch located on PCB in the dome device
8. Complete the test (Summary)
1) If the performance of item 7 is normal, it indicates the system is basically normal, Please do not change the wiring
and various setting to avoid fault and unnecessary damage and loss.
2) If the performance of item 7 is abnormal, or only one item works normally, please check the wiring ( item 1 and 4 ) and
setting (item 2 ,3 and 6 ) carefully.
Chapter Three — English Operation Menu of Dome Device
I. Main menu
1.
2.
3.
Press 95+SHOT on the keyboard to enter the Main menu of dome
device
Select options joy stick only between up and down, the arrow
points to the current selected option, Press OPEN or left right of
joystick to command entering the submenu ofthat option or
change the value or setting of that option.
Press CLOSE to exit menu or return to upper stage menu
• RS-485 Bus: It is for the control signal (RS-485 signal ) output of controller, connecting to the communication
input terminals of control cable of each dome device.
• Video: It is for image signal output of dome device, (Can directly output to video equipment such as monitor
or video matrix. Take care of the match up of impedance)
Setting protocol and baud rate (Turn the power o when setting,
and restart the device after revision).
2. Sector Setup
Sector setup Press OPEN or joystick left or right to enter
3. Control Options
Control options Press OPEN or joystick left or right to enter
4. Diagnostic Options
Diagnostic options Press OPEN or joystick left or right to enter
Joystick left or right when programming to select preshot and press OPEN
to conrm.
Joystick left or right to select (0 - 9 or A - Z). Press OPEN to conrm selection.
Press CLOSE to exit or return to upper stage menu when programming is
done
< Setup pan start point. Press OPEN or joystick left or right to enter Capture
the start point and press CLOSE to exit and return to upper stage menu.
< Edit the name of preshot. Press OPEN or joystick left or right enter
< Joystick left or right when programming to select preshot and press
OPEN to conrm
< Name display On / O joystick left or right select IRIS CLOSE to Exit
⑤Name
⑥Name Display
Joystick left or right to select (0 - 9 or A - Z). Press OPEN to conrm
selection, Press CLOSE to exit or return to upper stage menu when
programming is done.
1). Number ( 1 - 9 ) Number selection joystick left or right to select
2). Name editing Press OPEN or joystick left or right to entere
3). Pan Start pos
< Setup pan end point, Press OPEN or joystick left or right to enter. Capture the
end point and press CLOSE to exit and return to upper stage menu.
4). Pan End pos
< Setup tilt start point, Press OPEN or joystick left or right to enter, Capture the
start point and press CLOSE to exit return to upper stage menu.
5). Tilt Start pos
< Setup tile end point. Press OPEN or joystick left or right to enter. Capture the
end point and press CLOSE to exit and return to upper menu.
6). Tilt End pos
< Sector name display ON/OFF joystick left or right to select
< Coordinates display ON/OFF joystick left or right to select
< Crosshairs ON/OFF joystick left or right to select
< Start-up screen message display ON/OFF Joystick left or right to select
< Pan/Tilt setup of dome device Press OPEN or joystick left or right to enter
7). Name display ON/OFF
8). Coordinates ON/OFF
9). Crosshairs ON/OFF
10). Start-UP scr messsage ON/OFF
1). Set pan and Tilt
2). Set Default Function
3). Delay
4). Operation ON/OFF
<Set default function Press OPEN or joystick or right to enter
< Default function ON/OFF joystick left or right to select IRIS CLOSE Exit Speed Limit ON/OFF
< Operation speed limit ON/OFF joystick left or right to select Auto Flip ON/OFF
< Auto ip ON/OFF joystick left or right to select Auto Focus PTZ/OFF/Z
< Auto focus options joystick left or right to select Auto AE PTZ/OFF/Z
< Auto AE option joystick left or right to select Vector scan AF ON/OFF
< Vector scan auto focus control joystick left or right to select IRIS CLOSE to Exit
< Time delay setting (second) Press OPEN or joystick left or right to enter
< Joystick left or right when programming to select preshot and press OPEN to
conrm
①Pan Reverse ON/OFF < Pan Reverse ON/OFF joystick left or right to select
② Tilt Reverse ON/OFF < Tilt Reverse ON/OFF joystick left or right to select
③ +2 Tilt Limit ON/OFF <+2 Tilt Limit ON/OFF joystick left or right to select
④Find Home on STA ON/OFF < Find Home on start ON/OFF joystick left or right to select
IRIS CLOSE to Exit
① Default Function P/V/T
②Number 1
< Select default function (Preshot /Tour /PTZ) Press OPEN or joystick left or right to enter
< Function number selection Press OPEN or joystick left or right to enter
< Joystick left or right when programming to select preshot and press OPEN to
conrm
<
Joystick left or right to select (0 - 9),Press OPEN to conrm selection.
Press CLOSE to exit or return to upper stage menu when programming is done
Joystick left or right to select (0 - 9). Press OPEN to conrm selection.
Press CLOSE to exit or return to upper stage menu when programming is done
1). Clear Memory
< Clear data in the memory
Press OPEN or joystick left or right to enter
< Reminder:are you sure to do this
Press OPEN to conrm
Press CLOSE to exit and return to upper stage menu
2). Restore Def Setting
3) Color system PAL/NTSC
4). Scan & Camera Reset (Null)
5). Dome Information
< PAL/NTSC switch joystick left or right to select
< Restart dome camera. Press OPEN or joystick left or right to enter
< Restore default setting
Press OPEN or joystick left or right to enter
< Reminder: are you sure to do this
Press OPEN to conrm
Press CLOSE to exit and return to upper stage menu
Dome information, Press OPEN or joystick left or right to enter
Type of camera
Control protocol
Baud rate
Dome number
Press CLOSE to exit and return to upper stage menu
IRIS CLOSE to Exit
<
<
<
<
<
<
5. Camera Options
WDR/BLC Setting
1. Press [EXIT]
2.
Use [up] or [down] button to select the [EXIT] then use [left] or [right] button to select a
mode
• RET: Return to the previous.
• TOP: Return to the CAMERA SETTING menu screen.
• END: Exit the setup menu.
Note: The setup menu will be disappear after save the current setting value.
The MENU screen appears on the monitor.
Check the current settings on the menu.
• You can use the camera identication (CAMERA ID) to assign a number to the camera.
• You can set the exposure options using the EXPOSURE menu.
• UseWDR/BLC option to set the options
for BLC or WDR camera.
Select [EXPOSURE] option on the [CAMERA SETTING] menu.
Press [EXIT] button and the EXPOSURE menu appears.
• You can set the brightness level. (0-100)
1. Select [BRIGHTNESS] option.
2. Use [left] or [right] button to set the bright level.
• AGC (Automatic Gain Control) setting
• If pictures are not clear due to darkness, use for increase the sensitivity of picture.
If the images are too dark, change the maximum [AGC] value to make the images lighter.
1. Select [WDR/BLC] option.
2. Use [left] or [right] button to select a mode then press [EXIT].
1. Select [CAMERA ID] option on the [CAMERA SETTING] menu.
2. Use [left] or [right] to select a CAMERA ID (OFF, 1-255).
• WDR: Set the WDR limit. - WDR LIMIT: LOW ←→ MIDDLE ←→ HIGH
• BLC: Set the BLC limit. - BLC LIMIT: LOW ←→ MIDDLE ←→ HIGH
• HSBLC: Use for adjusting brightness the specic area of picture.
- AREA SETTING: Use [left] or [right] button to select a area then use [up]or [down]
button to select a ON or OFF. Press [EXIT] to exit the Area setting menu.
- GRAY SCALE: Use [left] or [right] button to select a gray scale.
(GRAY ←→ D.GRAY ←→ BLACK).
- USER SCALE: Use [left] or [right] button to select a bright level.(5 level)
1. Select [AGC] option.
2. Use [left] or [right] button to select a mode.
(OFF ←→ LOW ←→ MIDDLE ←→ HIGH)
1. Use [up] or [down] button to select [SENS-UP] option.
2. Use [left] or [right] button to select a [AUTO].To setting the [AUTO] funtion, select the
[AUTO] on the [SHUTTER].
3. Press and use [left] or [right] button to set the SENS-UP limit (x2~x128).
Note: If you set to one of the SHUTTER options except AUTO on the
[SHUTTER] menu, the [SENS-UP] setting is not available and [---] mark is displayed.
• ATW (Auto-Tracing White Balance): The color temperature
range for the proper white balance is approximately 1700 - 11000K. Proper white
balance may not be obtained under the following conditions:
• You can select one of three modes for white balance adjustment.
1. Select [WHITE BAL] option.
2. Use [left] or [right] button to select one of three modes for white balance then press
[EXIT].
1) The color temperature is out of the 1700 - 11000K range.
2) When the scene contains mostly high color temperature objects, such as a blue
sky or sunset.
3) When the scene is dim.
• AWC → PUSH: If you select the AWC → PUSH mode, you will be able to set up
the White Balance automatically using [EXIT] button.
• MANUAL: You can set the white balance options manually.
- COLOR TEMP: Use [left] or [right] button to select a funtion.
(INDOOR: 3200, OUTDOOR: 5100)
- RED: Obtains the optimum amount of red gain.
- BLUE: Obtains the optimum amount of blue gain.It is a function of a color camera to delete
the lter with the IR Cut function in an illumination below the standard value so that it has
a better sensitivity.
II.Tree Menu List
1. All sub-menus can be seen clearly in this tree list.
1)Language Options
< Language options joystick left or right to select
< Display options
< Preshot setup options
< Preshot number selection Press OPEN or joy stick left or right enter
< The default number after entering is 001, (hundred bit / ten bit / single bit),
joy stick left or right to select preshot position and press OPEN to conrm ,
and joy stick left or right again to select numbers(0 - 9), Press OPEN to conrm
the selection.
①Preshot (Preset position) Setup
< Select preshot and press CLOSE to conrm the programming when done
and auto exit and return to the upper stage menu.
②Set Preshot
< The action of the dome device can be seen and return to
corresponding preshot point.
③Call Preshot
< Press OPEN or joystick left or right to enter
< Reminder: Are you sure to delete preshot?
④Delete Preshot
Press OPEN to conrm
Press CLOSE to exit and return to upper stage menu
IRIS CLOSE to Exit
IRIS CLOSE to Exit
01
02
03
04
05
06
07
08
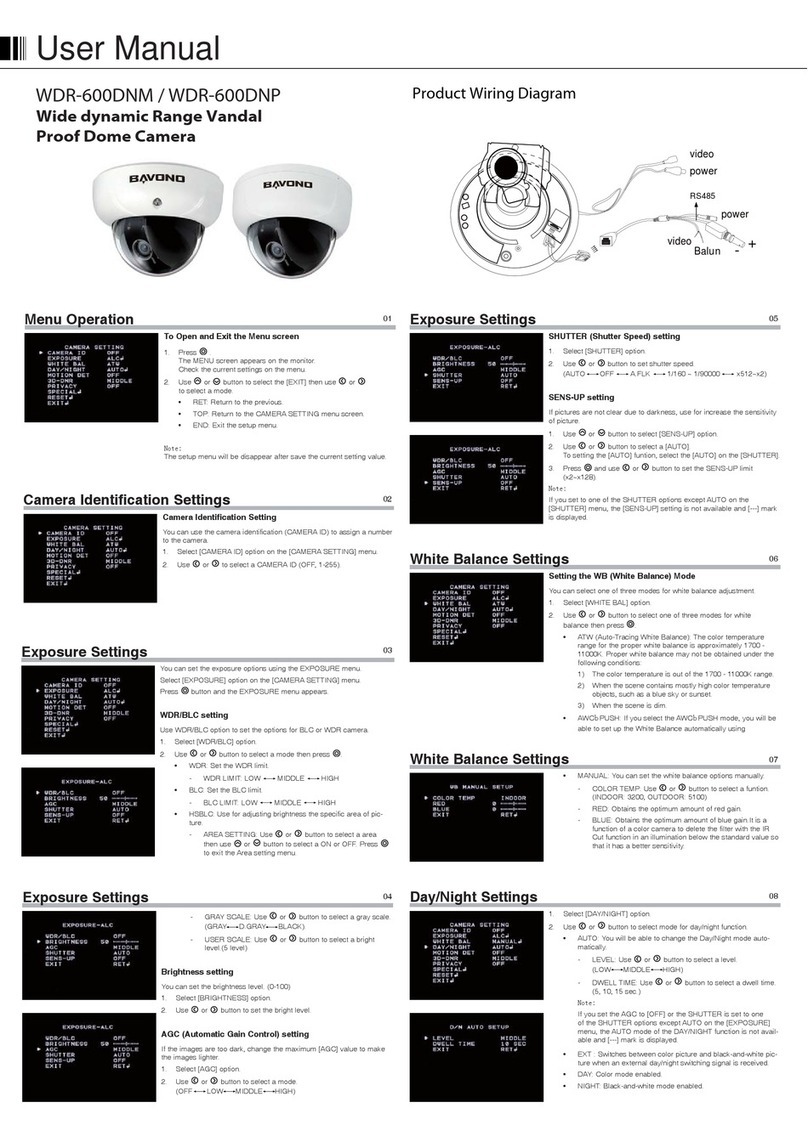
To Open and Exit the Menu screen
Camera Identication Setting
Exposure Setting
Brightness setting
SENS-UP setting
Setting the WB (White Balance) Mode
White Balance Setting

Chapter Four
—
Short-cut Operations and
Specification of Dome Device
Specification
Chapter Five
— Troubleshooting of Dome Device
Short-cut operation table
51+Preset
52+Preset
53+Preset
51+SHOT
52+SHOT
55+Preset
55+SHOT
57+SHOT
58+Preset
58+SHOT
59+Preset
59+SHOT
61+SHOT
62+SHOT
80+SHOT
81+SHOT
82+SHOT
83+SHOT
84+SHOT
85+SHOT
86+SHOT
87+SHOT
88+SHOT
89+SHOT/89+Preset
95+SHOT
91+SHOT
92/93/94+SHOT
Run cruise track
Setup start position for line scan
Setup end position for line scan
Setup speed for line scan
Run line scan
BLC off
BLC on
Call camera menu
Digital zoom off
Digital zoom on
Manual focus
Auto focus
Auto white balance
Manual white balance
Run PTZ Tour 1
Run PTZ Tour 2
Run PTZ Tour 3
Start Vector Scan 1
Start Vector Scan 2
Start Vector Scan 3
Start Vector Scan 4
Start Vector Scan 5
Start Vector Scan 6
Toggles between freeze and unfreeze video
Setup the Menus and Camera
Invokes the Flashback Function
Reserve
System Preset Short – cut Operation Table
Preset point of the position: 1-50, 64-77, 102-165 (totally 128)
Scanning System
Image Sensor
Effective Picture Elements
Horizontal Resolution
Minimum illumination (approx.)
Synchronizing System
Electronic Anti-shake
Video Output Level
Video S/N Ratio
Electrical Shutter
3D-DNR
AGC
WDR
Sens-Up
White Balance
Day / Night
Optical Zoom
Motion Detection
Privacy Masking
OSD Language
Preset Positions
Communication
Protection Levels
Lens
Power Requirement
Power Consumption
Operating Temperature
Storage Temperature
Humidity
PAL
1/4" EX-View HAD CCD
795(H)× 596(V)
540 TV lines
0.003 Lux (Color) / 0.0001 Lux (B/W)
Internel / Line Lock LL
Electronic Anti-shake EIS
1.0 V (p-p) / 75 ohms, composite
More than 52dB ( AGC Off )
1/50 - 1/100,000 sec
Low / Middle / High / Off
Low / Middle / High / Off
On / Off
On / Off
ATW / Manual / Push
Color / B/W / Ext / Auto
On / Off (37 X Zoom)
On / Off (4 Zones)
On / Off (8 Zones)
English / Chinese
128 Preset
RS-485
IP 66
Auto Iris Lens (3.3mm - 76mm)
AC 24V
3.6W
–10℃ - +50℃
–20℃ - +60℃
0% - 80%
Model PTM-937WDR
Preset point of the position: 1-50, 64-77, 102-165 (totally 128)
Troubleshooting Table
Preset point of the position: 1-50, 64-77, 102-165 (totally 128)
Problem Description
After power on,no motion and no
image
After power on, the dome device
totate normally, but no character
nor image display
After self-test of the dome device,
menu cannot be displayed
Distorted character or image
After power on, no self-test and
motor locked
Cannot stop pan rotation (rotate
and stop alternatively)
After normal working, it will totate
one circle when being controlled
Vertical range is not within90±2
degree with large deviation
Self-test is normal, but cannot
control
Insensitive control of dome
device
Call out function fails
Auto action of dome device
periodically
One dome working well while
the other does not under
identical operaion
Wrong operation
Restart the dome device
95+SHOT
Change OSD board
Wrong setting
Add driver
Check the circuit
Replace slip ring
Restart the dome device
Called this setting
Something wrong with the setting or wiring
Power cable is connected improperly.
Power cable is connected improperly
Fault of power PCB of dome device
Fault of main control board
Character monitor switch is off
Fault of OSD control board
System wrong function
Improper connection between camera and dome
device
Interfered by exterior electronic signal (noise) or the
camera is directed to the monitor screen
The system setting is start self-test after receiving
command and you can see the video on the screen
OSD board is not properly connected with main
control board or the photoelectric switch is broken
Pan interrupter is not in due position
The system is checking the data again
Improper connection of control cable
Overload or too long distance transmission
Improper contact of control cable
Slip ring is demage
System failure caused by noise interference
NO transmission auto “call back” function is set to
the dome device
Something wrong with the setting or wiring
Fault occurs when the dome device is in tilt movement,
It may be caused by obstacle of camera of other
object,which lead to early tilt movement
Switch on the character monitor according to the menu instruction
Grounding the dome device or shut off the surrounding big
electronic devices (electric,HF,signal generating equipment,
or rotate the camera)
Connect the controller and set correct transmission protocol
and baud rate as well as dome device address
Fix OSD board again, if the problem still exits, then replace the
OSD board
Adjust the pan interupter
It is normal event
Check and adjust the mechanical installation
Set the protocol, baud rate and address of dome device
Check the circuit
Replace a FFC cable or a camera
Check if the power cable is connected to power of AC24V
Change the power PCB
Change slip ring
Change main control board
Please follow the above
basic system wiring strictly
Shielded cable should be
adopted for video cable
There is character display in
normal circumstance
Pan interrupter should be at
2/3 of the central slot within
photoelectric switch
If this happens frequently,
please adjust the pan
interrupter or check if the
connection is too tight
Mostly happen in the
connection
About 45 second after the
dome device is power on.
After self-test, the menu can
only be displayed when
there is image display of the
dome device
Possible Reason Troubleshooting RemarksS.N.
1
2
3
4
5
6
7
8
9
10
11
12
13
1. Select [3D-DNR] option.
2. Use [left] or [right] button to select a option.
(OFF ←→ LOW ←→ MIDDLE ←→ HIGH)
Note: If you set the AGC to [OFF] on the [EXPOSURE] menu, the [3D-DNR]
function is not available and [---] mark is displayed.
• This function is aiming at the protection of personal privacy, selecting a screen
part black not to be displayed in the screen. This function permits the control of
the strength level in 8 levels. You may setup the size and location of the area.
1. Select [PRIVACY] option.
2. Use [left] or [right] button to select a [ON] and press [EXIT]. The PRIVACY SETUP
menu appears.
3. Use [left] or [right] button to select a mask (AREA1 - AREA8) on the
[MASK NUMBER].
4. Use [left] or [right] button to set up the ON or OFF on the DISPLAY option.
5. Use [left] or [right] button to set up the GRAY, WHITE or BLACK on the COLOR option.
6. Use [up] or [down]select an option then use [left] or [right] button to adjust the option.
• HEIGHT: Enlarge or decrease the vertical size of the mask.
• WIDTH: Enlarge or decrease the horizontal size of the mask.
• MOVE X: Moves horizontal position of the mask.
• MOVE Y: Moves vertical position of the mask.
• This menu lets you adjust and set up D-ZOOM, D-EFFECT, SHARPNESS, COLOR,
SYNC, USER TITLE, LANGUAGE function by yourself in the SPECIAL menu.
1. Select [SPECIAL] option.
2. Press [EXIT] button and the SPECIAL menu appears. Setting the D-ZOOM (Digital
Zoom ) level You can select the digital zoom level.
1. Select [D-ZOOM] option on the [SPECIAL] menu.
2. Use [left] or [right] button to select a [ON] then press [EXIT] the DIGITAL ZOOM
menu appears.
3. Use [up]or [down] to select a option then use [left] or [right] button to select a
level.
• Setting the D-ZOOM oe, you can select listed DIGITAL ZOOM eect
• Setting the D-EFFECT (Digital eect) you can select the digital eect.
1. Select [D-EFFECT] option on the [SPECIAL] menu
2. Use [left] or [right] button to select a digital eect.
• V-FLIP: Flip the picture vertically.
• MIRROR: Turn on the mirror eect.
• ROTATE: Rotate the picture. (180°)
• OFF: Turn o the digital eect.
• INT: Selects for using the internal synchronization.
• LL (Line Lock): Selects for the operation of multi cameras ,because it
synchronizes the camera phase by using the external signal (AC Signal).
A little phase deviation for some sets may be aligned.
• Setting the SYNC (Synchronization), you can select internal sync (INT) m ode or
line-lock (LINE) mode. The SYNC function is available only with AC power source.
1. Select [SYNC] option on the [SPECIAL] menu.
2. Use [left] or [right] button to select [INT] or [LL] (Line Lock).
1. Select [USER TITLE] option on the [SPECIAL] screen.
2. Use [left] or [right] button to select a [ON] then press [EXIT] .The USER TITLE
menu appears.
3. Use [up] or [down] , [left] or [right] button to select a character or number.
• Setting the USER TITLE, you can use the camera identication to assign a
number and character to the camera (0 - 9, A-Z, a-z).
• The USER TITLE is displayed on the upper left of the screen.
To disappear the user title, select [OFF].
- CLR: If you enter the wrong code, select CLR then press [EXIT].
- POS: Use [up] or [down] , [left] or [right] button to move position of USER TITLE
on the screen.
- END: Conrm your selection.
- A(Blank): Inserts a space at the cursor position.
- ← / → : Moves cursor to left or right.
1. Select [LANGUAGE] option on the [SPECIAL] screen.
2. Press [left] or [right] button to select a language.
• Setting the Language, you can Select a language for the Setup menu and on-screen display.
• CAMERA REBOOT: To reboot the camera system.
• FACTORY RESET: To reset the camera setting to factory setting, select
[FACTORY RESET] option.
1. Select [RESET] option.
2. Press [EXIT] button and the RESET menu appears.
3. Use [up] or [down] to select option.
6. Function Programming
Special function programming. Press OPEN or joystick left or right to enter
1. PTZ Tour (Pattern) Pan/Tilt/Zoom tour programming Press OPEN or joystick left or right to enter
2. Program Vector Scan
< Program vector scan. Press OPEN or joystick left or right to enter
3. Program Alarms
①Number (1 - 3)
②Name
③Program a Tour
④Run a Tour
⑤Delete a Tour
⑥Name Display ON/OFF: PTZ tour name display ON/OFF ,joystick left or right to select IRIS CLOSE to Exit
< PTZ tour number joystick left or right to select
< Edit PTZ name Press OPEN or joystick left or right to enter
< Joystick left or right when programming to select preshot and press OPEN to conrm
< Enter PTZ tour programming. Press OPEN or joy stick left to enter
< Press OPEN to conrm and start programming
< Press CLOSE to exit the programming and return to upper stage menu
< Delete PTZ tour. Press OPEN or joystick left or right to enter
< Reminder : are you sure to do this. Press OPEN to conrm.
< Joystick arbitrarily to move the cursor, and stop the cursor at place of programming,
Press OPEN to enter the selection.
< Delete vector scan press OPEN or joy stick left or right to enter
< Reminder :are you sure to do this.
< Run Pan /Tilt / Zoom tour (pattern). Press OPEN or joystick left or right to enter
< Run vector scan, Press OPEN or joy stick left or right to enter
· Joystick left or right to select (0 - 9 or A - Z),Press OPEN to conrm selection, Press CLOSE to
exit or return to upper stage menu when programming is done.
· Press CLOSE to exit and return to upper stage menu.
① Number (1 - 6) < Vector scan number joystick left or right to select
②Program a Vector scan
③Run a Vector Scan
④Delete a Vector Scan
· Function name : Press OPEN continuously to slect P: Preshot,T: self:study (pattenr or PTZ tour),V: vector scan
· Function number: Joystick left or right to select (0~9), Press OPEN to conrm selection.
· Press CLOSE to exit or return to upper stage menu when programming is doen, stage menu
· Velocity selection : Press OPEN continuously to select
· Velocity selection: Joy stick left or right when programming to select preshot and press OPEN to conrm,
· Joy stick left or right to select (0 - 9) , Press OPEN to conrm selection. Press CLOSE to exit or return to upper stage menu
when programming is done.
Press OPEN to conrm
Press CLOSE to exit and return to upper stage
IRIS CLOSE to Exit
< Program alarms, Press OPEN or joy stick left or right to enter < This function is not available at the moment
• HEIGHT: Enlarge or decrease the vertical size of the mask.
• WIDTH: Enlarge or decrease the horizontal size of the mask.
• MOVE X: Moves horizontal position of the mask.
• MOVE Y: Moves vertical position of the mask.
6. Use [SENSITIVITY] option to obtain the optimum detection level. If pictures are
not clear due to bightness, use for reduce the noise of picture.
The motion detection detects the moving objects in the scene by monitoring changes
in brightness level. You can select the level of sensitivity for motion detection to 4
zone.
1. Select [MOTION DET] option.
2. Use [left] or [right] button to select a [ON] and press [EXIT] . The MOTION
DETECTION menu appears.
3. Use [left] or [right] button to select a zone number (AREA1~AREA4) on the
[ZONE NUMBER].
4. Use [left] or [right] button to set up the ON or OFF on the ZONE STATE.
5. Use [up] or [down] to select an option then use [left] or [right] button to adjust
the option.
• If you set the AGC to [OFF] or the SHUTTER is set to one of the SHUTTER options
except AUTO on the [EXPOSURE] menu, the AUTO mode of the DAY/NIGHT function
is not available and [---] mark is displayed.
• EXT : Switches between color picture and black-and-white picture ,when an external
day/night switching signal is received.
• DAY: Color mode enabled.
• NIGHT: Black-and-white mode enabled.
Note:
1. Select [DAY/NIGHT] option.
2. Use [left] or [right] button to select mode for day/night function.
• AUTO: You will be able to change the Day/Night mode automatically.
- LEVEL: Use [left] or [right] button to select a level. (LOW ←→ MIDDLE ←→ HIGH)
- DWELL TIME: Use or button to select a dwell time. (5, 10, 15 sec.)
09
10
11
12
13
14
15
16
17
18
19
20
21
Day/Night Setting
Motion Detection Setting
3D-DNR Setting
Privacy Setting
Special Menu Settings
D-ZOOM
D-EFFECT
• Setting the SHARPNESS eect, you can select the SHARPNESS eect.
1. Select [SHARPNESS] option on the [SPECIAL] menu.
2. Use [left] or [right] button to change a adjust the option.
SHARPNESS
• Setting the COLOR eect, you can select the color eect.
• ON: Color screen
• OFF: B/W (Black and White) screen
1. Select [COLOR] option on the [SPECIAL] menu.
2. Use [left] or [right] button to change a color eect.
COLOR
SYNC
USER TITLE
Language
Reset Settings
Table of contents
Other Bavono Security Camera manuals
