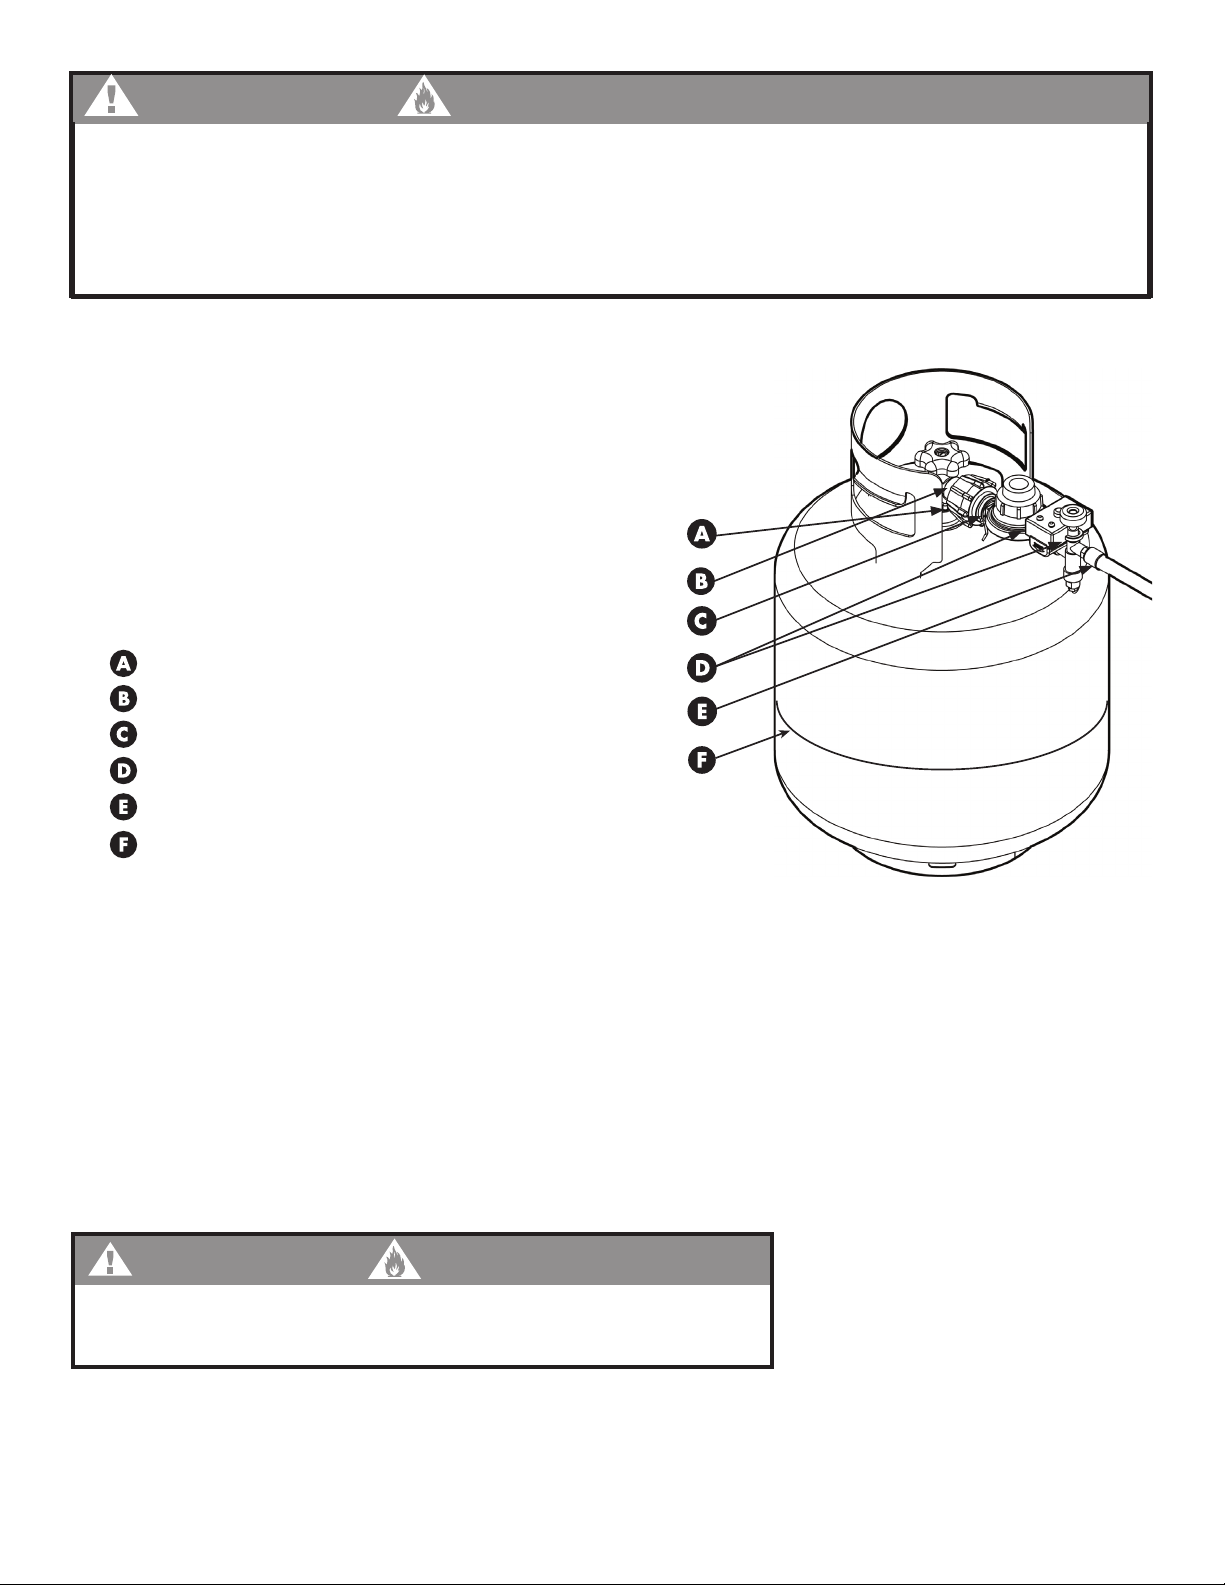
19
Model #
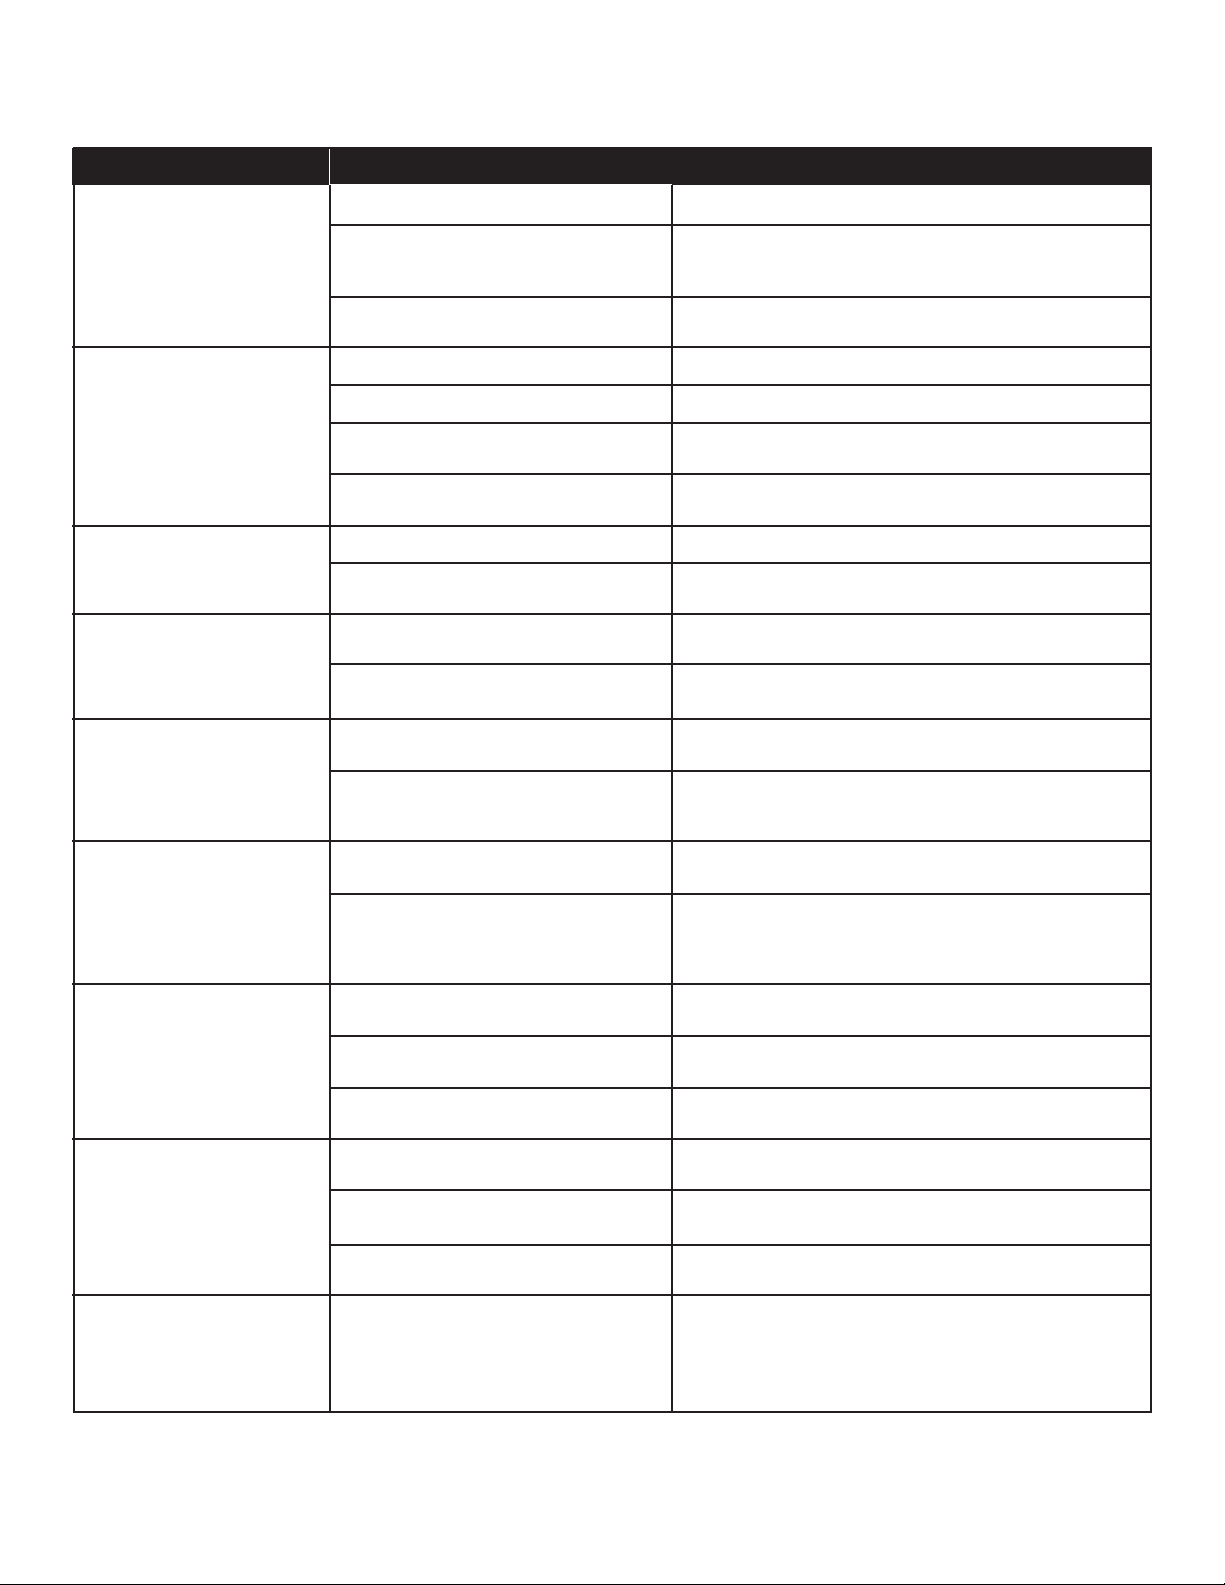
Burner will not light
Yellow, sooty irregular
flame
Cooker lights, but
flame is very small
Flame dramatically
reduces, and LP
cylinder has frost on it.
Hissing or gurgling
sounds coming from
appliance
Flame has gone out
Timer will not work
Burner is clean, but
still will not light
TROUBLE-SHOOTING
Symptom Cause Possible Solution
Obstruction in the burner
Obstruction in the burner
Batteries are dead
Did not press Power or Start button
Faulty Timer
Poor oxygen/gas mixture
Obstruction in the burner
LP tank has low fuel
LP tank has low fuel
LP tank has low fuel
Too windy
Moisture in the burner
Gas Flow Limiting Device has
activated
Extended cooking on HIGH; the liquid
propane is freezing inside the tank.
Damaged or leaking hose and
regulator assembly
Poor oxygen/gas mixture
Not enough gas flow from tank
LP tank has low fuel
Part of appliance is damaged
LP tank has low fuel
Damaged hose & regulator assembly
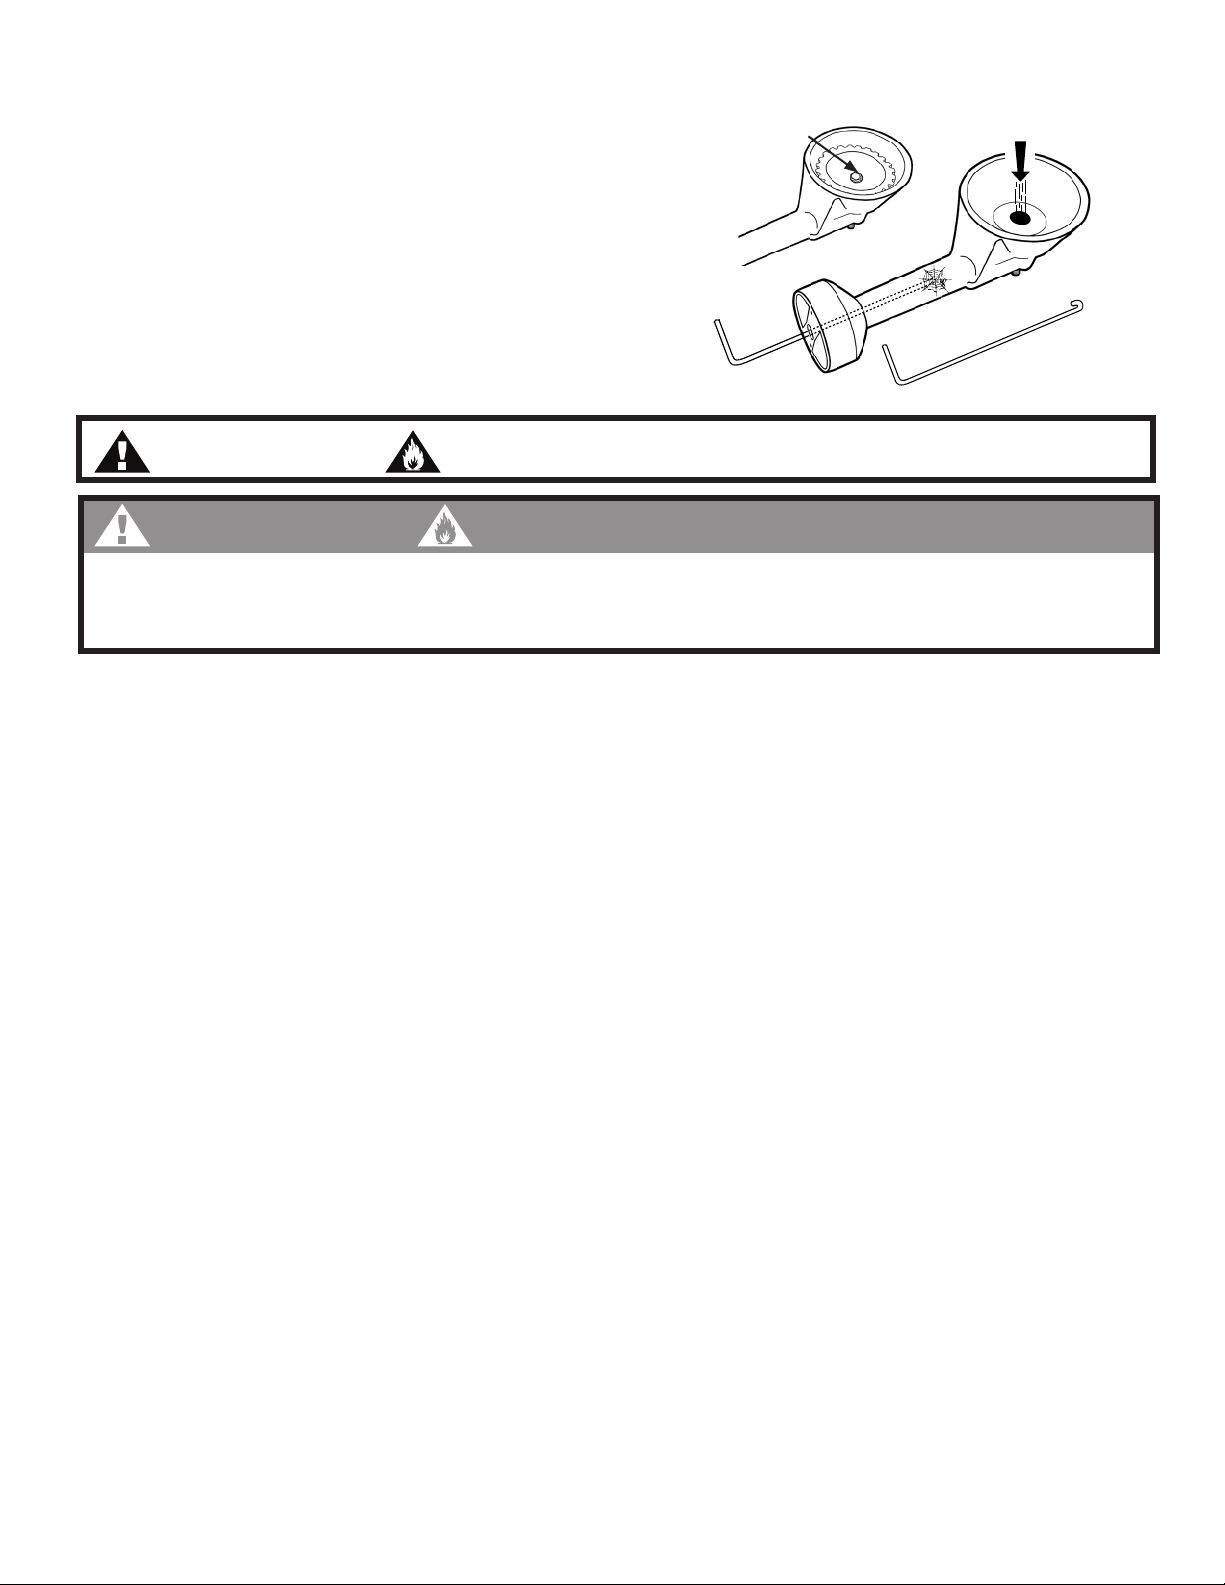
Disconnect hose and regulator. Inspect and clean burner.
Flush burner if necessary.
Disconnect hose and regulator. Inspect and clean burner.
Flush burner if necessary.
Adjust air shutter to obtain optimum blue flame.
Disconnect hose and regulator. Inspect and clean burner.
Flush burner if necessary.
Use a tank fill gauge to always know gas level.
If gas is too low to operate, refill or exchange tank.
Use a tank fill gauge to always know gas level.
If gas is too low to operate, refill or exchange tank.
Use a tank fill gauge to always know gas level.
If gas is too low to operate, refill or exchange tank.
Check wind direction and wait for wind to die
down, or set cooker away from windy areas.
Turn unit OFF and wait for it to cool down. Inspect burner
and pour water out.
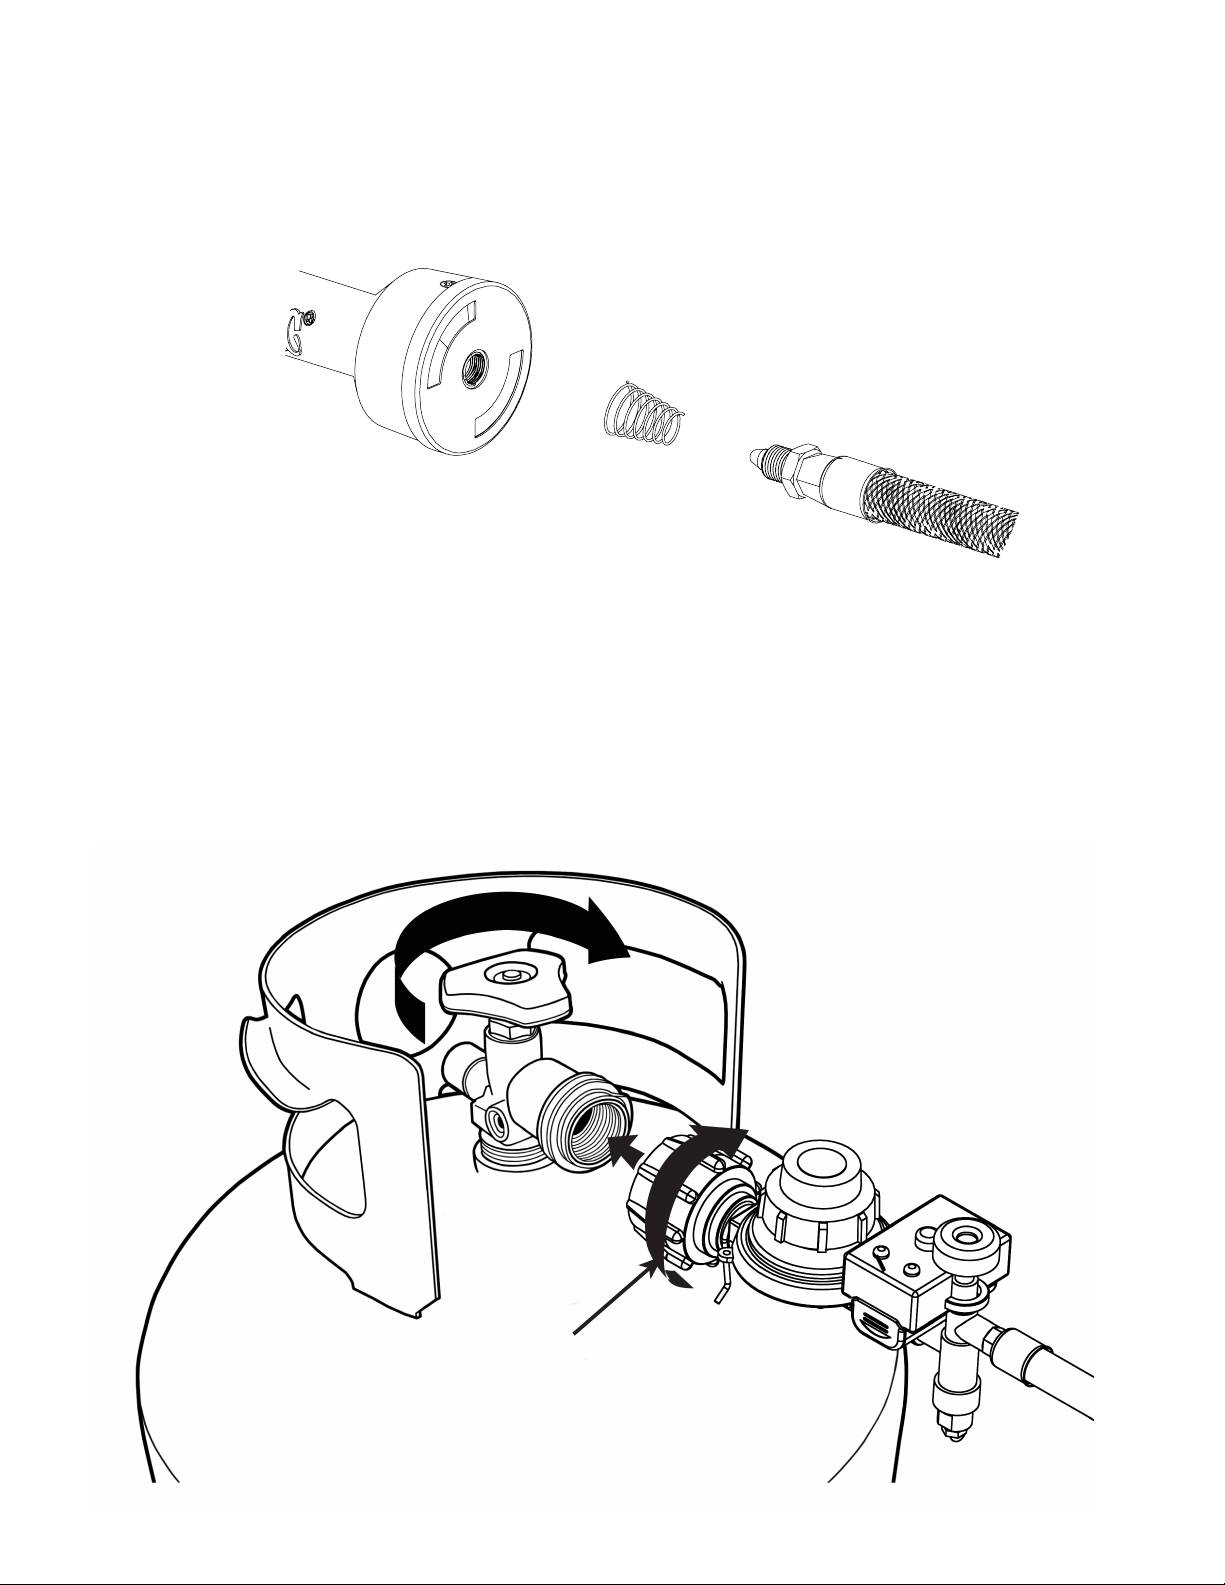
Turn LP cylinder valve and HVR brass valve OFF.
Wait 30 seconds and repeat steps for lighting.
Turn unit OFF, and stop cooking until frost melts and tank
is no longer cold to the touch. If you return to cooking with
the same LP tank, operate on MEDIUM to MEDIUM-HIGH.
Turn unit OFF and wait for it to cool down. Perform
Gas Leak Test to confirm gas leak. Contact Barbour
International, Inc. to replace damaged hose and regulator
assembly, Model# M5HPR-TMR.
Turn air shutter to almost closed position, then try to re-light.
Open LP cylinder valve all the way.
Use a tank fill gauge to always know gas level.
If gas is too low to operate, refill or exchange tank.
Inspect LP tank, burner, and HVR assembly for
damage. Contact Barbour International, Inc. to replace
damaged parts.
Use a tank fill gauge to always know gas level.
If gas is too low to operate, refill or exchange tank.
Contact Barbour International, Inc. to replace
damaged hose and regulator assembly.
Contact Barbour International, Inc. customer service at
1-800-864-6194, or visit www.thebayou.com.
Replace Batteries - See page 11
Follow Timer instructions - See page 12
Contact Barbour International, Inc. to replace hose
and regulator assembly, Model# M5HPR-TMR.
Timer stopped before
time was up Batteries are dead Replace Batteries - See page 11
REV. 08/2017