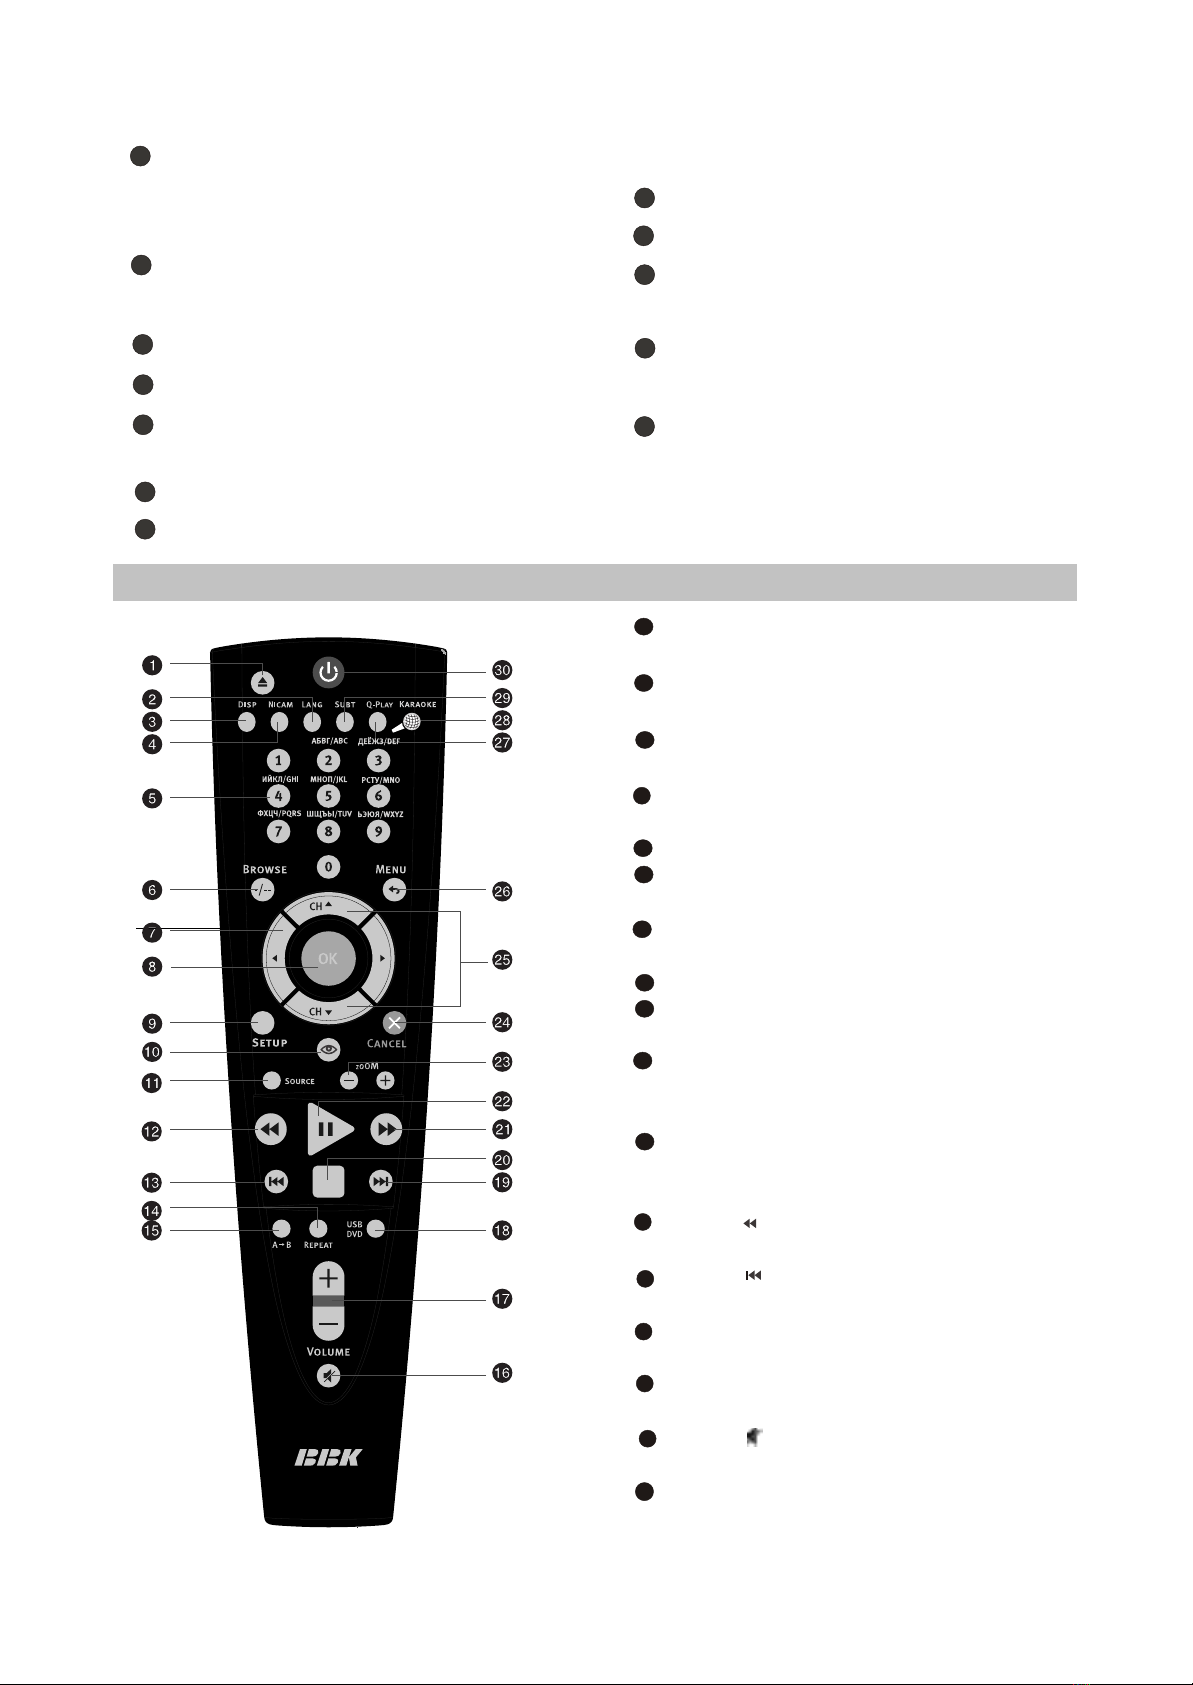
USB/DVD button
Press to select USB/DVD mode.
Button
Press to skip forward.
Button
Press to stop the playback.
Button
Press to forward scanning.
Button
Press to playback/pause.
ZOOM+/-button
Press to zoom in/out.
CANCEL button
Press to go one level back/cancel current
operation.
CH button
Press to switch between channels /to
choose menu item.
MENU / button
DVD disk menu/PBC function/Press to
return to the previous channel.
Q-PLAY button
Press to turn the Q-PLAY mode on.
KARAOKE button
Press to change the subtitles language.
SUBT button
Press to change the subtitles language.
Button
Press to switch on the device/into standby
mode.
18
21
20
22
23
25
24
19
27
26
28
30
29
SELECT RETURN SETUP
ENTER
(1 )Switching interfaces
2.1.4 CONNECTION AND STARTING
5
7
8
6
3
4
SCART socket
Meant for external audio video signal
source connection. There is no need to
use additional audiocord.
Y Cb(Pb) Cr(Pr)
PC AUDIO IN
Meant for PC stereo audio output
connection.
COAXIAL OUT
Meant for multi-channel sound playback.
AUDIO VIDEO IN
Used for external signal source connection.
12 V socket
Meant for adapter connection.
2.1.5
This LCD TV can store up to 100 channels
and enables to scan channels thought automatic,
manual and fine tuning scanning mode. Built-in
TV tuner supports stereo audio playback in
NICAM system.
(1) Adjusted channels selection
#Press +CH-buttons on the left panel or CH
buttons on the remote control each time, when
you want to change a channel.
#Use numeric buttons to enter the number of the
channel.
#Press button to return to the previous
channel.
(2) Default picture settings
selection
#You may select one of the default picture
settings:
USER, STANDARD, DYNAMIC and SOFT.
#You may adjust necessary parameters in the
device menu.
#Turn to Picture item on this page for details.
TV MODE
2
1RF input
Meant for antenna connection.
VGA port
Meant for PC connection.
(3) Default sound settings
selection
#You may select one of the default sound
settings:
USER, MUSIC, FILM and NEWS.
#You may adjust necessary parameters in the
device menu.
#Turn to page.13 for details.
- 7 -
For LD1506X andLD1906X
For LD2006X