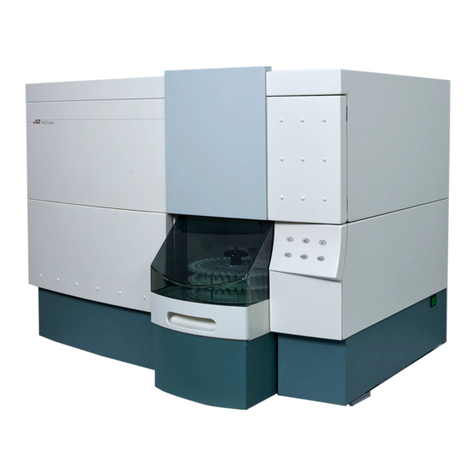
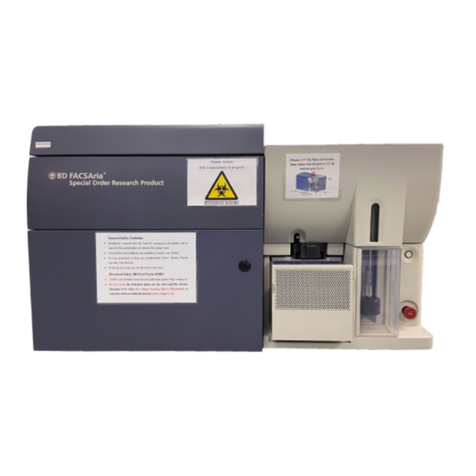
BD FACSAria User manual

BD FACSAria Quick Guide
Before Turning On The Instrument
1. Open the sheath tank and check the Sheath level, fill the tank with 1X Sheath Fluid
using the Leinco 10X Preservative Free Clear Sort Sheath Fluid, DO NOT USE THE
LEINCO 10X CLEAR FLOW SHEATH FLUID.
2. Disconnect the pressure line from the ethanol tank and connect it to the top of the
sheath tank. Disconnect the sheath line from the short yellow line with in-line filter
on the ethanol tank. Connect the sheath line to the short blue line with in-line filter
on the top of the sheath tank.
3. Disconnect the waste tank and empty the tank in the sink. Reconnect the waste line
and waste level probe into the fluidics cart.
4. Turn the instrument on by pressing the large green button. Do not turn off/on any
of the laser main button/dials.
Starting up
1. Open DIVA and log in with your own user name and password. Watch the bottom
right of the cytometer window for ‘Instrument connected’ status at the bottom of
the Cytometer window. If the computer cannot connect to the cytometer, do a hard
reboot of both the instrument and computer making sure that the computer is
turned on first. Once the instrument has connected, select ‘Use CST Settings’ from
the CST mismatch window.
Note: Selecting ‘Use CST Settings’ will revert pressure value to that of the
selected configuration. Go to Cytometer > View Configurations to change.
2. Perform the Fluidic Startup under the ‘Cytometer’ menu as prescribed by the
software.
3. After the Fluidic Startup has been performed make sure to check that the voltage is
off and open the sort chamber and wipe everything (walls, waste trough, charge
plates) with kimwipes to decrease chance of arcing errors.
4. Put the desired nozzle tip in place. Place the nozzle tip in position with the o-ring
facing up, close the locking lever to hold it in place. Choose the correct configuration
in Cytometer>Configurations if necessary. Choose the correct sort setup in FACSDiva
software (sort => sort setup => 70/100 micron) according to the selected nozzle tip
from the sort menu if not done automatically.
5. Turn the stream on by clicking on the stream button (red X) at the top of the Break
off Window, the stream button should show as a green checkmark once the stream
is turned on.
6. Make sure stream is straight in the Break Off window. Adjust the position of the
waste stream to the centre of the waste aspirator by rotating the sort block (use hex
tool to release the adjustment screw on left and right of the sort chamber). If time
allows, wait 30 minutes for the stream to completely stabilize.
7. Close sorting chamber door and make sure screw is tight.

8. Close the hood and ensure it snaps into place. This will allow the laser interlock to
disengage and allow laser light to pass through the flow cell.
Setting up the break off point
1. . Make sure that the stream appears in the Break off Window.
a. No stream, dripping or spraying: remove nozzle tip. Sonicate the nozzle,
wipe out the flow cell and sort chamber.
b. Unsteady stream: shut off the stream, turn it on again. If problem persist,
remove the nozzle tip, sonicate, and put it back on again.
c. Stream obscured by grey area: sheath fluid in front of droplet camera. Turn
off the stream, remove the nozzle tip and the key, dry everything out, and
clean the chamber with kimwipe.1
2. Monitor the droplet formation
3. The leftmost figure above shows fast converging droplets wherein the satellites
attach to the top of their droplet. Fast converging droplets are required to use the
70um tip and are preferred for the 100um tip. Slow converging droplets, shown in
the rightmost figure, are never preferred but can be used for the 100um tip. If you
observe slow converging droplets while using the 70um, remove and sonicate the tip
as slow converging droplets can never be used with the 70um tip.
Drop 1
Gap
Satellite
droplets
70um tip
85/100/135um tip
Gap (wide band): distance between the
unbroken stream and the first unattached
droplet
Drop1 (thin band): position of the first
unattached droplet
70/85um tip: satellites attach to the droplet
on top, the gap is located at between the
above satellite droplet and the following
droplet.
85/100/130um tip: Satellites attach the
droplet below, gap is located just on top of the
last attach droplet and its following satellite
droplet

4. If possible, the prearranged DIVA settings for Amplitude, Frequency, Drop 1 and Gap
should be used with Sweet Spot Monitoring to guarantee a stable stream.
5. An ideal stream will:
a. Be vertical and symmetrical with no slant or severe skew on droplets.
b. Have fewer than 6 satellite droplets.
c. Display fast-converging droplets on the 70um or 100um tip.
d. Stabilize with Sweet Spot on. Note that Amplitude and Frequency are locked
when Sweet Spot is on.
6. If the prearranged settings do not yield an ideal stream, begin with adjusting
Frequency. Frequency should be ~85-96kHz for the 70um and ~35-48kHz for the
100um. Use the highest value in that range that yields good droplet formation with a
low Amplitude value.
7. Adjust Amplitude (usually between 10-50) so there are at least 1-2 drops above and
below the break off point. Sweet Spot Monitoring tends to increase amplitude over
time, so starting with a lower value is best.
8. Set the gap target which yields the most distinct and cleanest side streams. Typically,
this is set to ~6. You can test different gap settings by adjusting amplitude.
9. Set the Drop 1 target based on the actual value displayed to the right. This serves as
a target for the Sweet Spot Monitoring, but also tracks drift over the course of the
experiment. If Drop 1 drifts +/- 10 from the original value, redo drop delay.
10. Activate Sweet Spot Monitoring. This will track drift in the Gap and Drop 1
measurements and automatically adjust Amplitude to compensate and return the
stream to your target values. It will also pause sorting if there is significant deviation
from the target Gap and Drop 1 until it is able to return the stream to normal. This
will not pause acquisition, so it’s best to stop acquisition manually in the event of
major stream instability.
Optimizing the sort stream
1. Get the brightest/sharpest image of the waste and side streams by adjusting the
silver screw next to the sorting chamber.
2. In a test sort, set the two inner side streams a deflection of ~40 and the outer
streams to ~70. Then select the 2nd drop value in the stream window. Adjust 2nd
drop so there is the least amount of fanning and the streams are distinct and clean.
3. Bring all side streams except the inner left back to zero, as you will need this for
drop delay.
Drop Delay
1. Open the Drop Delay experiment.

2. Retrieve the DDCP-70-2 beads and mix well. Dilute 1 drop in about 1mL of DI
H2O. To run Auto Delay the beads must acquire at 1,000-3,000 events/sec for
the 70um and 600-1,500 events/sec for the 100um so further dilution may be
needed.
3. In the browser window, open the Sort Layout (should sort ‘Not P1’to the inner
left). Load and acquire the DDCP beads.
4. Turn on the Plate Voltage, Test Sort and the Optical Filter icon (which allows you
to look at the beads in the waste and side stream).
5. At this time, a tight and bright spot should be in the right square (0%/100%).
6. Change the inner left deflection value so that the Test Sort side stream is centred
in the left window of the Optical Filter. You will have to turn the Optical Filter
On/Off to adjust the position, as they aren’t beads in the side stream during Test
Sort.
7. Click on Sort (cancel the opening of the drawer) and select the Sort Precision:
Initial. You should now see beads in the left Optical Filter window.
8. Click Auto Delay: This process uses an algorithm to determine the best Drop
Delay setting. It may take a few minutes as the software must run through a
range of possible values. Once completed it will display a histogram of these
values and automatically select the Drop Delay setting best suited for your
stream.
9. Turn off the Optical Filter, the Plate Voltage, and unload the DDCP beads.
Sort
1. To set deflection values for the side streams, turn on Plate Voltage and Test Sort.
2. Using either the built-in software (Aria Fusion) or the paper guide (AriaII and
AriaIIIu), set the side stream deflections according to your collection vessels.
3. Alternatively, you can load empty collection tubes and open the Waste Drawer.
Then adjust deflection until the side streams are going into the collection tubes.
During Sorting
1. During a sort:
a. In the sort window, Precision should be set to Ultimate.
b. Maximum threshold rate is 20,000 evt/s for the 70um and 15,000 evt/s
for the 100um. Higher threshold rates will cause lower efficiency
(efficiency = [sorted events]/[aborted events + sorted events]) and vice
versa.
2. In 3-way or 4-way sorts, separate the most common and rarest populations by
placing rare populations on the periphery and common population in the center.
This will prevent cross contamination.
3. Clogs: During a full clog, the stream will become so unstable Sweet Spot turns
off, the Waste Drawer will close over the collection tubes, and the stream itself
will turn off. Partial clogs might not trigger a stop and could lead to the waste
stream flowing into a collection tube. In this event hit the Emergency Stop (big
red button) to stop the stream. After a clog you will have to clean the sort
chamber, remove the nozzle, and sonicate it.
4. If the software freezes, first minimize and maximize the DIVA software window,
if this doesn’t work push the Emergency Stop button.
Sort in plates
1. Place the ACDU adapter under the sort chamber.
2. Select a custom device with the correct number of wells from the bottom of the
Device dropdown menu in the upper left corner of the Sort Layout.
3. Align the far-left stream so it will fall vertically as much as possible. (Usually ~18)
4. Calibrate>Custom Device. This will default to the custom device selected in the
Sort Layout.
5. Go to Home. Align stream so it falls in the middle of A1 using the arrows and
squirt button in the middle of the Home device screen. Set Home.
6. Go to Farthest. Align stream so it falls in the middle of H12 using the arrows and
squirt button in the middle of the Home device screen. Set Farthest.
7. Apply>Close
8. It is usually useful to do a test sort to make sure the sort arm is well calibrated:
sort 100 beads or unstained cells in each corner of the plate or randomly assign
wells to be sorted all over the plate to test accuracy.
Cleaning and Shut Down (NEVER USE CONTRAD)
1. After the experiment, run bleach 10% for 5 minutes at flow rate of 11.
2. If you are the last user of the day, you must shutdown the instrument.
3. Select Fluidics Shutdown in the Instrument menu: as indicated, take out the
nozzle tip (there are no closed loop flow nozzles, ignore this step). Disconnect
the tubes from the Sheath tank and plug them on the EtOH tank and put a tube
of 1.5% Citronox in the sample loader. Follow the software instructions.
4. After the shutdown is complete, turn off the software and turn off the
instrument.
Other manuals for FACSAria
2
Table of contents
Other BD Measuring Instrument manuals

BD
BD PhoenixSpec User manual

BD
BD FACSymphony A1 Flow User manual

BD
BD FACSCanto II User manual

BD
BD FACSAria User manual

BD
BD ALARIS 8015 Installation and operating instructions

BD
BD FACSymphony A3 User manual

BD
BD LSRFortessa User manual

BD
BD LSRII User manual

BD
BD FACSCalibur User manual

BD
BD FACSCanto II User manual