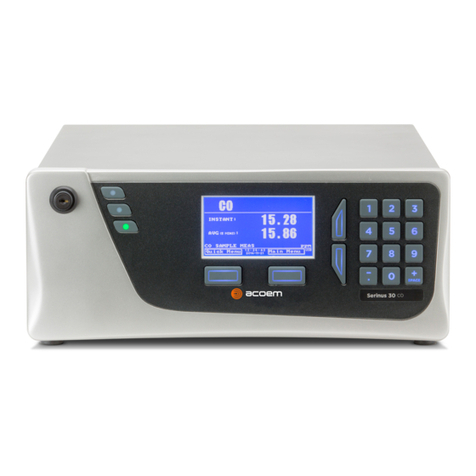
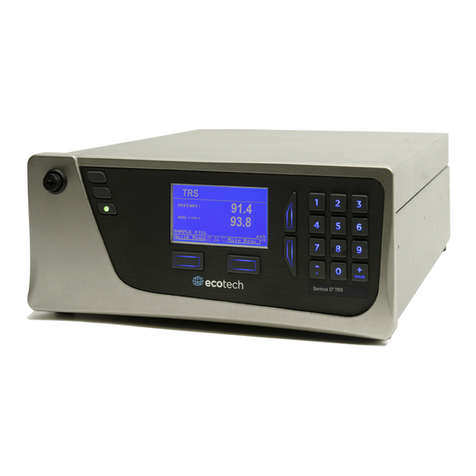
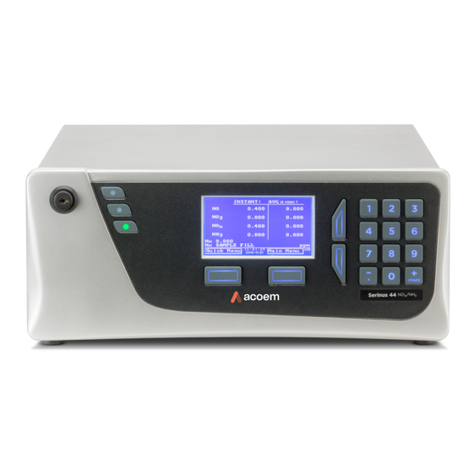
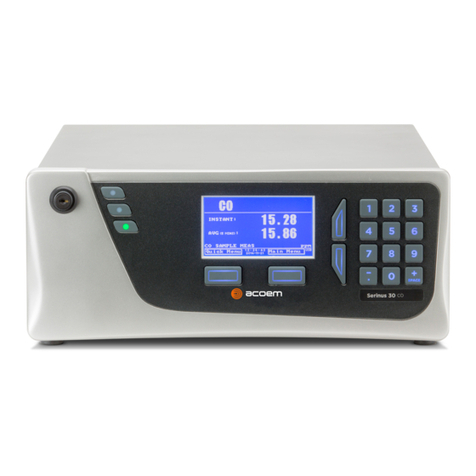
Ecotech Acoem Serinus 10 User manual

Serinus® 10
Ozone Analyser
User Manual
Version: 3.2
ACOEM Ecotech
1492 Ferntree Gully Road Knoxfield VIC 3180
Manual subject to change without notice. Images used are for illustrative purposes only. Ecotech & Serinus are trademarks or registered trademarks
of Ecotech Pty Ltd in the United States and/or other countries. © 2021 Ecotech Pty Ltd. All Rights Reserved.

Serinus® 10 User Manual 3.2
Page 2
This page is intentionally blank

Introduction
Page 3
Table of Contents
Manufacturer’s Statement ....................................................................................................................................12
Safety Information.................................................................................................................................................13
Warranty................................................................................................................................................................15
Service and Repairs................................................................................................................................................16
Product Compliance and Approvals.......................................................................................................................17
Manual Revision History........................................................................................................................................18
1. Introduction........................................................................................................................... 21
1.1 Description................................................................................................................................................21
1.2 Specifications ............................................................................................................................................21
1.2.1 Measurement ............................................................................................................................21
1.2.2 Precision/Accuracy ....................................................................................................................21
1.2.3 Calibration .................................................................................................................................21
1.2.4 Power ......................................................................................................................................22
1.2.5 Operating Conditions.................................................................................................................22
1.2.6 Communications........................................................................................................................22
1.2.7 Physical Dimensions...................................................................................................................23
1.2.8 Certifications..............................................................................................................................23
1.3 Nomenclature ...........................................................................................................................................24
1.4 Background/Theory...................................................................................................................................25
1.4.1 Measurement Theory ................................................................................................................25
1.4.2 Kalman Filter Theory..................................................................................................................25
1.5 Instrument Description .............................................................................................................................26
1.5.1 Calibration Valve Manifold ........................................................................................................26
1.5.2 Sample Filter Holder ..................................................................................................................27
1.5.3 Ozone Scrubber .........................................................................................................................27
1.5.4 Optical Bench.............................................................................................................................28
1.5.5 Main Controller PCA ..................................................................................................................30
1.5.6 Pneumatic Tubing......................................................................................................................30
1.5.7 Rear Panel..................................................................................................................................30
1.5.8 Communications........................................................................................................................32
2. Installation/Decommission.................................................................................................... 35
2.1 Initial Check...............................................................................................................................................35
2.2 Installation Notes ......................................................................................................................................38
2.3 Instrument Set-Up.....................................................................................................................................39
2.3.1 Power connections ....................................................................................................................39
2.3.2 Pneumatic Connections.............................................................................................................40
2.3.3 Communications Connections ...................................................................................................43
2.3.4 Instrument Set-Up .....................................................................................................................43
2.4 U.S. EPA Equivalent Set-Up .......................................................................................................................44
2.5 EN Type Approval Set-Up ..........................................................................................................................45
2.6 Transporting/Storage ................................................................................................................................45
3. Operation............................................................................................................................... 49
3.1 Warm-Up...................................................................................................................................................49
3.2 Measurement............................................................................................................................................49

Serinus® 10 User Manual 3.2
Page 4
3.3 General Operation Information................................................................................................................ 50
3.3.1 Keypad & Display....................................................................................................................... 50
3.3.2 Home Screen............................................................................................................................. 52
3.4 Menus & Screens...................................................................................................................................... 54
3.4.1 Quick Menu............................................................................................................................... 55
3.4.2 Main Menu................................................................................................................................ 56
3.4.3 Analyser State Menu................................................................................................................. 57
3.4.4 Status Menu.............................................................................................................................. 58
3.4.5 Temperature Menu................................................................................................................... 59
3.4.6 Pressure & Flow Menu.............................................................................................................. 60
3.4.7 Voltage Menu............................................................................................................................ 61
3.4.8 General Settings Menu.............................................................................................................. 62
3.4.9 Measurement Settings Menu.................................................................................................... 63
3.4.10 Calibration Menu ...................................................................................................................... 64
3.4.11 Pressure Calibration Menu........................................................................................................ 66
3.4.12 Ozone Calibration Menu (Option)............................................................................................. 67
3.4.13 Flow Calibration Menu (Option)................................................................................................ 68
3.4.14 Service Menu............................................................................................................................. 69
3.4.15 Diagnostics Menu...................................................................................................................... 70
3.4.16 Digital Pots Menu...................................................................................................................... 70
3.4.17 Internal Pump Menu (Option)................................................................................................... 72
3.4.18 Valve Menu ............................................................................................................................... 73
3.4.19 Tests Menu................................................................................................................................ 74
3.4.20 Digital Input Test Menu............................................................................................................. 75
3.4.21 Digital Output Test Menu.......................................................................................................... 75
3.4.22 Calculation Factors Menu.......................................................................................................... 76
3.4.23 Communications Menu............................................................................................................. 77
3.4.24 Data Logging Menu ................................................................................................................... 78
3.4.25 Serial Communication Menu..................................................................................................... 78
3.4.26 Analog Input Menu ................................................................................................................... 79
3.4.27 Analog Output Menu................................................................................................................. 80
3.4.28 Digital Input Menu .................................................................................................................... 82
3.4.29 Digital Output Menu ................................................................................................................. 83
3.4.30 Network Menu (Option)............................................................................................................ 84
3.4.31 Bluetooth Menu........................................................................................................................ 85
3.4.32 Trend Display Menu .................................................................................................................. 86
3.4.33 Chart ...................................................................................................................................... 87
3.4.34 Advanced Menu ........................................................................................................................ 89
3.4.35 Hardware Menu ........................................................................................................................ 90
3.4.36 Parameter Display Menu........................................................................................................... 91
4. Communications.................................................................................................................... 93
4.1 RS232 Communication.............................................................................................................................. 93
4.2 USB Communication................................................................................................................................. 94
4.3 TCP/IP Network Communication (Optional)............................................................................................. 95
4.3.1 Reading Network Port Setup..................................................................................................... 96
4.3.2 Setting Network Port Setup ...................................................................................................... 96
4.3.3 Port Forwarding on Remote Modem/Router Setup.................................................................. 97
4.3.4 Airodis Setup to Communicate with Serinus............................................................................. 98
4.4 Analog and Digital Communication .......................................................................................................... 99
4.4.1 Analog Outputs ......................................................................................................................... 99
4.4.2 Analog Inputs .......................................................................................................................... 100

Introduction
Page 5
4.4.3 Digital Status Inputs.................................................................................................................100
4.4.4 Digital Status Outputs..............................................................................................................100
4.5 Logging Data............................................................................................................................................101
4.5.1 Configure Instrument Internal Logging....................................................................................101
4.6 Using Airodis Software to Download Data ..............................................................................................102
4.6.1 Connecting the Instrument to PC ............................................................................................102
4.6.2 Installing Airodis ......................................................................................................................105
4.6.3 Configuring Airodis ..................................................................................................................105
4.7 Serinus Remote App/Bluetooth ..............................................................................................................110
4.7.1 Installation...............................................................................................................................111
4.7.2 Connecting to the Instrument .................................................................................................111
4.7.3 Instrument Control ..................................................................................................................112
4.7.4 Real-Time Plot..........................................................................................................................114
4.7.5 Download.................................................................................................................................115
4.7.6 Get Parameters........................................................................................................................115
4.7.7 Preferences..............................................................................................................................116
5. Calibration ........................................................................................................................... 119
5.1 Overview .................................................................................................................................................119
5.2 Using Transfer Standards - Overview ......................................................................................................120
5.2.1 Principle...................................................................................................................................121
5.2.2 Set-Up ....................................................................................................................................122
5.3 Pressure Calibration ................................................................................................................................123
5.3.1 Full Pressure Calibration (Two Point Calibration) ....................................................................123
5.3.2 Pressure Calibration (Ambient Only) .......................................................................................125
5.3.3 Pressure Calibration (Internal Pump Option Only) ..................................................................126
5.4 Zero Calibration.......................................................................................................................................127
5.4.1 Calibration Port........................................................................................................................128
5.4.2 Sample Port .............................................................................................................................128
5.4.3 IZS (Option)..............................................................................................................................129
5.5 Span Calibration ......................................................................................................................................130
5.5.1 Calibration Port........................................................................................................................130
5.5.2 Sample Port .............................................................................................................................130
5.6 Precision Check .......................................................................................................................................131
5.6.1 Zero Precision Check................................................................................................................131
5.6.2 Span Precision Check ...............................................................................................................132
5.7 Multipoint Precision Check .....................................................................................................................133
5.8 Flow Calibration (Internal Pump Option Only) ........................................................................................134
5.9 High Pressure Zero Valve (Option) ..........................................................................................................135
5.9.1 Single Pressurised Calibration (Option) ...................................................................................136
6. Service ................................................................................................................................. 139
6.1 Additional Safety Requirements for Service Personnel...........................................................................139
6.2 Maintenance Tools..................................................................................................................................139
6.3 Maintenance Schedule............................................................................................................................140
6.4 Maintenance Procedures ........................................................................................................................142
6.4.1 Particulate Filter Replacement ................................................................................................142
6.4.2 Clean Chassis Fan Filter............................................................................................................144
6.4.3 Leak Check ...............................................................................................................................145
6.4.4 Ozone Scrubber Check.............................................................................................................150

Serinus® 10 User Manual 3.2
Page 6
6.4.5 Clean Pneumatics.................................................................................................................... 152
6.4.6 Clean Optical Cell .................................................................................................................... 152
6.4.7 UV Lamp Check ....................................................................................................................... 156
6.4.8 Orifice/Sintered Filter Replacement ....................................................................................... 157
6.4.9 Pressure Sensor Check ............................................................................................................ 159
6.5 Bootloader.............................................................................................................................................. 160
6.5.1 Display Help Screen................................................................................................................. 161
6.5.2 Communications Port Test...................................................................................................... 161
6.5.3 Updating Firmware ................................................................................................................. 161
6.5.4 Erase All Settings..................................................................................................................... 161
6.5.5 Start Analyser.......................................................................................................................... 161
7. Troubleshooting................................................................................................................... 163
7.1 Flow Fault ............................................................................................................................................... 166
7.2 Noisy/Unstable Readings........................................................................................................................ 167
7.3 Lamp Temperature Failure ..................................................................................................................... 168
7.4 USB Memory Stick Failure....................................................................................................................... 169
7.5 Ecotech Service Support Files ................................................................................................................. 170
8. Optional Extras.....................................................................................................................173
8.1 Dual Sample Filter (PN: E020100)........................................................................................................... 173
8.2 Network Port (PN: E020101)................................................................................................................... 173
8.2.1 Hardware Setup ...................................................................................................................... 174
8.3 Rack Mount Kit (PN: E020116)................................................................................................................ 174
8.4 Internal Pump (PN: E020105) ................................................................................................................. 178
8.4.1 Hardware Setup ...................................................................................................................... 178
8.4.2 Internal Pump Additional Components................................................................................... 178
8.4.3 Internal Pump Removed Components .................................................................................... 179
8.4.4 Pressure Calibration Internal Pump Option ............................................................................ 179
8.4.5 Flow Calibration ...................................................................................................................... 179
8.4.6 Internal Pump Leak Check....................................................................................................... 179
8.4.7 Pump Control .......................................................................................................................... 179
8.5 High Pressurised Zero Valve (PN: E020109)............................................................................................ 180
8.6 Internal Zero & Span (IZS) (PN: E020130) ............................................................................................... 180
8.6.1 Hardware Setup ...................................................................................................................... 180
8.6.2 IZS Additional Components..................................................................................................... 180
8.6.3 IZS Removed Components ...................................................................................................... 181
8.6.4 Serinus 10 Schematic with IZS Option..................................................................................... 182
8.6.5 Ozone Generator Characterisation ......................................................................................... 182
9. Parts List and Schematics..................................................................................................... 183
9.1 Serinus Accessories Kit............................................................................................................................ 183
9.2 Maintenance Kit...................................................................................................................................... 183
9.3 Consumables .......................................................................................................................................... 184
9.4 Instrument Parts List............................................................................................................................... 185
9.5 Plumbing Schematic –(PN: D020004) .................................................................................................... 188
9.6 Plumbing Schematic –(PN: D020050) .................................................................................................... 189
9.7 Plumbing Schematic –(PN: D020051) .................................................................................................... 190
9.8 Block Wiring Schematic –(PN: D020101) ............................................................................................... 191

Introduction
Page 7
9.9 Block Wiring Schematic –(PN: D020121)................................................................................................192
9.10 Optical Bench/Photometer Assembly –(PN: H013100)..........................................................................193
9.11 Calibration Manifold Assembly –(PN: H010013-02)...............................................................................194
9.12 Valve Assembly –(PN: H010042) ............................................................................................................195
9.13 Charcoal Scrubber Assembly –(PN: H010038)........................................................................................196
9.14 Calibration Manifold Assembly (IZS) –(PN: H010056) ............................................................................197
9.15 Sample Filter Holder Assembly –(PN: H010160) ....................................................................................198
9.16 Ozone Generator Assembly –(PN: H013150) .........................................................................................199
List of Figures
Figure 1 –Major Components of Serinus 10............................................................................... 26
Figure 2 –Calibration Valve Manifold......................................................................................... 26
Figure 3 –Sample Filter Holder................................................................................................... 27
Figure 4 –Ozone Scrubber.......................................................................................................... 27
Figure 5 –Optical Bench Major Parts.......................................................................................... 28
Figure 6 –Orifice and Sintered Filter .......................................................................................... 28
Figure 7 –Lamp Driver PCA Type Jumper Setting (REV D).......................................................... 29
Figure 8 –Ecotech Tubing ........................................................................................................... 30
Figure 9 –Rear Panel................................................................................................................... 30
Figure 10 –Power ON/OFF Switch.............................................................................................. 31
Figure 11 –Communication Connections ................................................................................... 32
Figure 12 –Items Received ......................................................................................................... 36
Figure 13 –Opening the Instrument –1..................................................................................... 37
Figure 14 –Opening the Instrument –2..................................................................................... 37
Figure 15 –Opening the Instrument –3..................................................................................... 37
Figure 16 –Opening the Instrument –4..................................................................................... 38
Figure 17 –Instrument Rear Panel.............................................................................................. 39
Figure 18 –Connect Power Cord................................................................................................. 40
Figure 19 –Turn ON Power Switch ............................................................................................. 40
Figure 20 –Dust Plugs................................................................................................................. 41
Figure 21 –Remove Nut.............................................................................................................. 41
Figure 22 –Insert Tube ............................................................................................................... 41
Figure 23 –Tighten Nut............................................................................................................... 42
Figure 24 –Installation of USB Memory Stick............................................................................. 43
Figure 25 –Switching the Battery ON/OFF ................................................................................. 43
Figure 26 –Dust Plugs................................................................................................................. 46
Figure 27 –Packing Instruction................................................................................................... 47
Figure 28 –Front Panel ............................................................................................................... 50
Figure 29 –Home Screen ............................................................................................................ 52
Figure 30 –Quick Menu Screen .................................................................................................. 55
Figure 31 –Main Menu screen ................................................................................................... 56
Figure 32 –Analyser State Menu Screen .................................................................................... 57

Serinus® 10 User Manual 3.2
Page 8
Figure 33 –Status Menu Screen.................................................................................................. 58
Figure 34 –Temperature Menu Screen.......................................................................................59
Figure 35 –Pressure & Flow Menu Screen..................................................................................60
Figure 36 –Voltage Menu Screen ...............................................................................................61
Figure 37 –General Settings Menu Screen................................................................................. 62
Figure 38 –Measurement Settings Menu Screen.......................................................................63
Figure 39 –Calibration Menu Screen .......................................................................................... 64
Figure 40 –Pressure Calibration Menu Screen ...........................................................................66
Figure 41 –Ozone Calibration Menu Screen...............................................................................67
Figure 42 –Flow Calibration Menu Screen..................................................................................68
Figure 43 –Service Menu Screen ................................................................................................69
Figure 44 –Diagnostics Menu Screen .........................................................................................70
Figure 45 –Digital Pots Menu .....................................................................................................70
Figure 46 –Internal Pump Menu Screen..................................................................................... 72
Figure 47 –Valve Menu Screen................................................................................................... 73
Figure 48 –Tests Menu Screen ...................................................................................................74
Figure 49 –Digital Input Test Menu Screen ................................................................................75
Figure 50 –Digital Output Test Menu Screen ............................................................................. 75
Figure 51 –Calculation Factors Menu Screen .............................................................................76
Figure 52 –Communications Menu Screen.................................................................................77
Figure 53 –Data Logging Menu Screen....................................................................................... 78
Figure 54 –Serial Communication Menu Screen ........................................................................78
Figure 55 –Analog Input Menu Screen.......................................................................................79
Figure 56 –Analog Output Menu Screen.................................................................................... 80
Figure 57 –Digital Input Menu Screen........................................................................................82
Figure 58 –Digital Output Menu Screen.....................................................................................83
Figure 59 –Network Menu Screen..............................................................................................84
Figure 60 –Bluetooth Menu Screen............................................................................................85
Figure 61 –Trend Display Menu Screen...................................................................................... 86
Figure 62 –Chart Screen .............................................................................................................87
Figure 63 –Advanced Menu.........................................................................................................89
Figure 64 –Hardware Menu Screen............................................................................................90
Figure 65 –Parameter Display Menu Screen .............................................................................. 91
Figure 66 –Communication Ports...............................................................................................93
Figure 67 –Multidrop RS232 Cable Example ..............................................................................94
Figure 68 –Example of Typical Network Setups .........................................................................95
Figure 69 –Example of Network Menu Setup.............................................................................97
Figure 70 –Port Forwarding Example .........................................................................................97
Figure 71 –LAN Network Set-Up (Airodis) ..................................................................................98
Figure 72 –WAN Network Set-Up (Airodis) ................................................................................98
Figure 73 –25 Pin Rear Panel PCA (Default Jumpers Highlighted) ...........................................100
Figure 74 –Analog & Digital I/O Individual Pin Descriptions ....................................................101
Figure 75 –Installing Driver Software (Device Manager).......................................................... 102
Figure 76 –Update Driver Popup..............................................................................................103

Introduction
Page 9
Figure 77 –Update Driver Popup (Directory Location)............................................................. 103
Figure 78 –Installing Driver Confirmation Prompt................................................................... 104
Figure 79 –Successful Driver Installation ................................................................................. 104
Figure 80 –Airodis Workspace Manager .................................................................................. 105
Figure 81 –Adding a New Station............................................................................................. 106
Figure 82 –New Station Connection......................................................................................... 106
Figure 83 –Station Configuration (Channel List) ...................................................................... 107
Figure 84 –Error Status Notification......................................................................................... 107
Figure 85 –Downloading Data.................................................................................................. 108
Figure 86 –Download Data Status............................................................................................ 108
Figure 87 –Data Visibility.......................................................................................................... 109
Figure 88 –Exporting Data........................................................................................................ 109
Figure 89 –Data Download Complete ...................................................................................... 110
Figure 90 –Downloading the App from Google Play Store ...................................................... 111
Figure 91 –Bluetooth Pairing Request...................................................................................... 111
Figure 92 –Showing or Hiding the NumPad ............................................................................. 112
Figure 93 –Switching Instruments............................................................................................ 113
Figure 94 –Real-Time Plot ........................................................................................................ 114
Figure 95 –Plot of Downloaded Data ....................................................................................... 115
Figure 96 –Directory Settings................................................................................................... 116
Figure 97 –Logs Format............................................................................................................ 116
Figure 98 –Colour Theme Settings ........................................................................................... 117
Figure 99 –Example of a Calibration System............................................................................ 119
Figure 100 –Ozone Transfer Standard Hierarchy..................................................................... 121
Figure 101 –Typical uses of Transfer Standards to Calibrate Instruments. ............................. 122
Figure 102 –Full Pressure Calibration Set-up (Vacuum)........................................................... 124
Figure 103 –Full Pressure Calibration Set-up (Ambient).......................................................... 124
Figure 104 –Ambient Pressure Calibration Set-up................................................................... 125
Figure 105 –Pressure Calibration (Internal Pump Option Only) Set-up................................... 126
Figure 106 –Pump Bypass Flow................................................................................................ 127
Figure 107 –Zero Calibration Set-up - 1 ................................................................................... 128
Figure 108 –Zero Calibration Set-up - 2 ................................................................................... 129
Figure 109 –Excel Graph of Multipoint Calibration.................................................................. 134
Figure 110 –Single High Pressure Calibration Option .............................................................. 136
Figure 111 –Minifit Extraction Tool –(PN: T030001)............................................................... 139
Figure 112 –Orifice Removal Tool –(PN: H010046)................................................................. 140
Figure 113 –Leak Test Jig –(PN: H050069) .............................................................................. 140
Figure 114 –Air Monitoring Test Equipment Kit (AMTEK) –Customisable.............................. 140
Figure 115 –Remove Kynar Nut................................................................................................ 142
Figure 116 –Remove Retaining Ring......................................................................................... 142
Figure 117 –Remove Filter Sealing Cap.................................................................................... 143
Figure 118 –Particulate Filter................................................................................................... 143
Figure 119 –Avoid to Touch Particulate Filter Paper ............................................................... 144
Figure 120 –Kynar Elbow Barb Fitting Direction ...................................................................... 144

Serinus® 10 User Manual 3.2
Page 10
Figure 121 –Remove Filter Casing and Filter............................................................................145
Figure 122 –Leak Test Jig on Exhaust Port................................................................................145
Figure 123 –Connect Vacuum Source....................................................................................... 146
Figure 124 –Kynar Blocker Nut.................................................................................................146
Figure 125 –Pressure Gauge on Leak Test Jig...........................................................................147
Figure 126 –Pump Bypass Flow ................................................................................................148
Figure 127 –Barometer to Sample Port....................................................................................149
Figure 128 –Barometer to Calibration Port..............................................................................150
Figure 129 –Connect Span Source............................................................................................151
Figure 130 –Ozone Scrubber ....................................................................................................151
Figure 131 –Remove the Kynar Nut..........................................................................................152
Figure 132 –Loosening Tube Collet from Detector End ...........................................................153
Figure 133 –Removing Two Screws..........................................................................................153
Figure 134 –Removing Detector Block from Optical Cell .........................................................154
Figure 135 –Remove Retaining Screw ...................................................................................... 154
Figure 136 –Removing Measurement Cell (Glass).................................................................... 155
Figure 137 –Location of UV Lamp Securing Grub Screw ..........................................................156
Figure 138 –Remove Screw ......................................................................................................157
Figure 139 –Remove Lamp Block..............................................................................................157
Figure 140 –Remove Lamp Mounting Block.............................................................................158
Figure 141 –Remove Kynar Elbow Fitting.................................................................................158
Figure 142 –Remove Orifice and Sintered Filter.......................................................................159
Figure 143 –Test Point Location ............................................................................................... 160
Figure 144 –Flow Fault Diagnostic Procedure..........................................................................166
Figure 145 –Noisy Zero or Unstable Span Diagnostic Procedure............................................. 167
Figure 146 –Lamp Temperature Failure Diagnostic Procedure................................................168
Figure 147 –USB Memory Stick Failure ....................................................................................169
Figure 148 –USB Memory Stick File Structure.......................................................................... 171
Figure 149 –Dual Filter Option Installed...................................................................................173
Figure 150 –Separate Rack Slides.............................................................................................174
Figure 151 –Assemble Inner Slide on Chassis...........................................................................175
Figure 152 –Rack Mount Ears Fitted to Instrument .................................................................175
Figure 153 –Attach Rack Mount Adaptors to Outer Slides ...................................................... 176
Figure 154 –Test Fit Rack Slide Assembly into Rack .................................................................176
Figure 155 –Attach Slides to Front of Rack............................................................................... 177
Figure 156 –Slide Clips..............................................................................................................177
Figure 157 –IZS Additional Components ..................................................................................181
Figure 158 –IZS Schematic........................................................................................................182
List of Tables
Table 1 –Internationally Recognised Symbols............................................................................ 13
Table 2 –Manual Revision History ..............................................................................................18
Table 3 –List of Items Received................................................................................................... 35

Introduction
Page 11
Table 4 –Measurements: Background and Sample Cycles......................................................... 49
Table 5 –Front Panel Buttons Function...................................................................................... 50
Table 6 –Digital Output States ................................................................................................... 83
Table 7 –Chart Navigation Buttons ............................................................................................ 88
Table 8 –New Station Setup..................................................................................................... 106
Table 9 –Maintenance Schedule .............................................................................................. 141
Table 10 –Troubleshooting List ................................................................................................ 163
Table 11 –Included Parts (Rack Mount Kit).............................................................................. 174
Table 12 –Internal Pump Components .................................................................................... 178
Table 13 –Internal Pump Removed Components .................................................................... 179
Table 14 –IZS Components....................................................................................................... 180
Table 15 –IZS Removed Components....................................................................................... 181
Table 16 –Serinus Accessories Kit H010136............................................................................. 183
Table 17 –Serinus 10 Maintenance Kit - E020201.................................................................... 183
Table 18 –Serinus 10 Consumables.......................................................................................... 184
Table 19 –Spare Parts List (Main Components) ....................................................................... 185
Table 20 –Spare Parts List (Cables) .......................................................................................... 185
Table 21 –Spare Parts List (O-rings) ......................................................................................... 186
Table 22 –Spare Parts List (Fittings) ......................................................................................... 186
Table 23 –Spare Parts List (Miscellaneous).............................................................................. 186
Table 24 –Spare Parts List (Shipping) ....................................................................................... 187
Table 25 –Advanced Protocol Parameter List.......................................................................... 201
Table 26 –Bayern-Hessen Data ................................................................................................ 215
Table 27 –Block Check Operation ............................................................................................ 216
Table 28 –Status Bit Map ......................................................................................................... 217
Table 29 –Failure Bit Map (Positive Logic) ............................................................................... 218
Table 30 –Modbus Error Codes................................................................................................ 221
List of Appendices
Appendix A. Advanced Protocol Parameter List ......................................................................... 201
Appendix B. EC9800 Protocol ..................................................................................................... 213
B.1 Command Format ......................................................................................................................................213
B.2 Commands .................................................................................................................................................213
Appendix C. Bayern-Hessen Protocol ......................................................................................... 215
C.1 Command Format ......................................................................................................................................215
C.2 Commands .................................................................................................................................................216
Appendix D. ModBus Protocol .................................................................................................... 219
D.1 Command Format ......................................................................................................................................219
D.2 Commands .................................................................................................................................................220
Appendix E. Beer-Lambert Law................................................................................................... 223

Serinus® 10 User Manual 3.2
Page 12
Manufacturer’s Statement
Thank you for selecting the Ecotech Serinus® 10 Ozone Analyser.
The Serinus series is the next generation of Ecotech designed and manufactured gas analysers. The
Serinus® 10 will perform Ozone measurements over a range of 0 - 20 ppm with a lower detectable limit
of 0.5 ppb.
This User Manual provides a complete product description including operating instructions, calibration
and maintenance requirements for the Serinus® 10 Ozone Analyser. This manual is valid for the most
recent version of the Serinus® 10 which includes the new Auto ranging Power Supply, Main Controller
PCA and Rear Panel PCA.
Reference should also be made to the relevant local standards which should be used in conjunction
with this manual. Some of these standards are listed in this manual.
If, after reading this manual you have any questions or you are still unsure or unclear on any part of
the Serinus® 10, please do not hesitate to contact Ecotech or your local Ecotech distributor.
Please help the environment and recycle the pages of this manual when
you have finished using it.
Notice
The information contained in this manual is subject to change without notice. Ecotech reserves the
right to make changes to equipment construction, design, specifications and/or procedures without
notification.
Copyright © 2021. All rights reserved. Reproduction of this manual, in any form, is prohibited without
the written consent of Ecotech Pty Ltd.

Introduction
Page 13
Safety Information
Read all the safety information in this section prior to using the equipment. To reduce the risk of
personal injury caused by potential hazards, follow all safety notices and warnings in this
documentation.
The following internationally recognised symbols are used on Ecotech equipment:
Table 1 –Internationally Recognised Symbols
Protective conductor terminal
IEC 60417-5019
Alternating current
IEC 60417-5032
Caution, hot surface
IEC 60417-5041
Caution, risk of danger to user and/or equipment
Refer to any accompanying documents
ISO 7000-0434
Caution, risk of electric shock
ISO 3864-5036
These symbols will also be found throughout this manual to indicate relevant safety messages.
Note: Notes are used throughout this manual to indicate additional information regarding a
particular part or process.
If the equipment is used for purposes not specified by Ecotech, the protection provided by this
equipment may be impaired.

Serinus® 10 User Manual 3.2
Page 14
Important Safety Messages
Disconnect Power Prior to Service
Hazardous voltages exist within the instrument. Do not remove or modify any of the
internal components or electrical connections whilst the mains power is ON.
Always unplug the equipment prior to removing or replacing any components.
Replacing Parts
Replacement of any part should only be carried out by qualified personnel, using only
parts specified by Ecotech, as these parts meet stringent Ecotech quality.
Mains Supply Cord
Do not replace the detachable mains supply cord with an inadequately rated cord. Any
mains supply cord that is used with the instrument must comply with the safety
requirements (250 V/10 A minimum requirement). A mains power cord with a protective
earth conductor must be used.
Ensure that the mains supply cord is maintained in a safe working condition.
Do Not Expose Equipment to Flammable Gases
This equipment is not intended for use in explosive environments, or conditions where
flammable gases are present. The user should not expose the equipment to these
conditions. Do not introduce any flammable gases into the instrument, otherwise serious
accidents such as explosion or fire may result.
Electromagnetic Compliance
The instrument lid should be closed when in normal operation, to comply with EMC
regulations.
Means of Lifting/Carrying Instrument
This instrument is a heavy and bulky object. Two persons should lift/carry the object,
otherwise use proper lifting equipment. Proper lifting techniques should be used when
moving the instrument.
Internal Components
Do not insert a rod or finger into the cooling fans, otherwise injury may result.
Do not energise the instrument until all conductive cleaning liquids, used on internal
components, are dried up.

Introduction
Page 15
Warranty
This product has been manufactured in an ISO 9001 facility with care and attention to quality.
The product is subject to a 24-month warranty on parts and labour from date of shipment. The
warranty period commences when the product is shipped from the factory. Lamps, filters and other
consumable items are not covered by this warranty.
Each instrument is subjected to a vigorous testing procedure prior to despatch and will be
accompanied with a parameter list and a multipoint precision check thereby enabling the instrument
to be installed and ready for use without any further testing.

Serinus® 10 User Manual 3.2
Page 16
Service and Repairs
Our qualified and experienced technicians are available to provide fast and friendly service between
the hours of 8:30 am –5:00 pm AEST Monday to Friday. Please contact either your local distributor or
Ecotech regarding any questions you have about your instrument.
Service Guidelines
This manual is designed to provide the necessary information for the setup, operation, testing,
maintenance and troubleshooting of your instrument.
Should you still require support after consulting the documentation, we encourage you to contact your
local distributor for support.
To contact Ecotech directly, please e-mail our Technical Support Services group at
Please dial 1300 364 946 if calling from within Australia
Please dial +61 3 9730 7800 if calling from outside of Australia
Please contact Ecotech and obtain a Return Material Authorisation (RMA) number before sending any
equipment back to the factory. This allows us to track and schedule service work and to expedite
customer service. Please include this RMA number when you return equipment, preferably both inside
and outside the shipping packaging. This will ensure you receive prompt service.
When shipping instrumentation, please also include the following information:
Name and phone number
Company name
Shipping address
Quantity of items being returned
Model number/s or a description of each item
Serial number/s of each item (if applicable)
A description of the problem and any fault-finding completed
Original sales order or invoice number related to the equipment
Shipping Address:
Attention Service Department
Ecotech Pty Ltd
1492 Ferntree Gully Road,
Knoxfield, VIC Australia 3180.

Introduction
Page 17
Product Compliance and Approvals
The Serinus® 10 Ozone Analyser, as manufactured by Ecotech Pty Ltd, complies with the essential
requirements of the directives listed below (including CE compliance). The respective standards have
been applied:
Low Voltage Directive (LVD) Directive 2014/35/EU
EN 61010-1:2010
Safety requirements for electrical equipment, for
measurement, control and laboratory use –General
requirements
Electromagnetic Compatibility (EMC) Directive 2014/30/EU
EN 61326-1:2013
Electrical equipment for measurement, control and
laboratory use –EMC requirements –General requirements
Radio Equipment Directive (RED) 2014/53/EU
EN 300 328 V2.1.1
Wideband transmission systems –Data transmission
equipment operating in the 2.4 GHz ISM band and using wide
band modulation techniques
Regulatory Compliance Mark (RCM) - Australia
AS/NZS 4268:2017
Radio equipment and systems –Short range devices –Limits
and methods of measurement
ARPANSA
Radiation Protection Standard
Maximum Exposure Levels to Radiofrequency Fields –3 kHz -
300 GHz –Radiation Protection Series Publicaiton No. 3: 2002
This analyser is also certified to a number of measurement standards –refer to Section 1.2.8.

Serinus® 10 User Manual 3.2
Page 18
Manual Revision History
Manual PN: M010026
Current revision: 3.2
Date released: 18 February 2021
Description: User Manual for the Serinus® 10 Ozone Analyser
This manual is the full user manual for the Serinus® 10 Ozone Analyser. This manual contains all
relevant information on theory, specifications, installation, operation, maintenance and calibration.
Any information that cannot be found within this manual can be obtained by contacting Ecotech.
This manual uses cross reference links extensively throughout this manual. The hot keys below will
greatly reduce the amount of time scrolling between references:
You can access the links by pressing the following:
CTRL + LEFT MOUSE CLICK: Move to the link location
You can switch between links by pressing the following:
ALT + LEFT ARROW KEY: Returns you to previous Link
ALT + RIGHT ARROW KEY: Swaps back
Table 2 –Manual Revision History
Edition
Date
Summary
1.0
September 2008
Initial Release
1.1
December 2008
Menu updates and general corrections
1.2
March 2009
New maintenance procedures
Updated analyser setup
Small corrections
New menu items added
1.3
November 2009
Serinus downloader added
Internal pump option added
USB - Advanced Parameters updated
Minor corrections
1.4
September 2010
CE conformity added
Parts list updated
Pressurised zero valve added
Updates to rack mount option
Updates to Serinus downloader
Update to 25 pin I/O
Update to network communications

Introduction
Page 19
Edition
Date
Summary
2.0
July 2012
New chassis
Update menu system
Add Bluetooth menu
Serinus Remote Android App
Rack mount procedure update
Analog output calibration
2.1
March 2013
Formatting updates
2.2
November 2013
Formatting updates
2.3
April 2014
IZS Option Added,
Auto-Ranging Power Supply Added
Main Controller and Rear Panel PCAs changed.
3.1
June 2018
Safety Information updated
Product Compliance & Approvals updated
3.2
February 2021
Manual update to firmware 4.0.7 Rev. Q board.
A number of changes to descriptions, procedures and menu
items.
Standardization of naming convection applied.

Serinus® 10 User Manual 3.2
Page 20
This page is intentionally blank.
Table of contents
Other Ecotech Measuring Instrument manuals

Ecotech
Ecotech Serinus 44 User manual

Ecotech
Ecotech Serinus 51 User manual

Ecotech
Ecotech Acoem Serinus 30 User manual

Ecotech
Ecotech Serinus 40 User manual

Ecotech
Ecotech HiVol 3000 User manual

Ecotech
Ecotech A Series User manual

Ecotech
Ecotech Serinus 57 User manual

Ecotech
Ecotech Serinus 30 User manual
Popular Measuring Instrument manuals by other brands

Extech Instruments
Extech Instruments RPM40 user guide

IKA
IKA HELISTAND manual

Agilent Technologies
Agilent Technologies B1500A Training manual

Hydac
Hydac FMM Operating and maintenance instructions

ThermoFisher Scientific
ThermoFisher Scientific Orion Lab Star EC112 Operation manual

Hydreka
Hydreka 801 Operation manual