Laser Safety
The use of controls, adjustments, or the performance of procedures other than
those specied herein may result in hazardous radiation exposure.
Do Not stare into the laser beams.
Do Not disassemble the instrument or attempt
to perform any internal servicing. Repair and
servicing of this laser are to be performed only
by a Futtura authorized service centre.
This laser complies with all applicable portions
of title 21 of the Code of Federal Regulations se by the Department of Health,
Education, and Welfare, The Food and Drug Administration, the Centre for
Devices, and the Bureau of Radiological Health.
Warranty
LT-850 . 3
The Futtura LT-850 Laser is warranted to the original purchaser to be
free from defects in workmanship and material. Futtura will repair or
replace any defective part which may malfunction under normal and
proper use within a period of TWO YEARS from the date of purchase
without charge of parts and labor, once delivered and shipped prepaid
to Futtura together with proof of date and place of purchase. This
warranty is not subject to misuse, abuse, assignment, or transfer. The
exclusive remedy under any and all warrants and guarantees, ex-
pressed or implied, is limited to repair and/or replacement as provided
herein, and Futtura shall not be liable for damages from loss or delay
of equipment uses, consequential, or incidental damage.
Laser Safety
The use of controls, adjustments, or the performance of procedures other than
those specied herein may result in hazardous radiation exposure.
Do Not stare into the laser beams.
Do Not disassemble the instrument or attempt
to perform any internal servicing. Repair and
servicing of this laser are to be performed only
by a Futtura authorized service centre.
This laser complies with all applicable portions
of title 21 of the Code of Federal Regulations se by the Department of Health,
Education, and Welfare, The Food and Drug Administration, the Centre for
Devices, and the Bureau of Radiological Health.
Warranty
LT-850 . 3
The Futtura LT-850 Laser is warranted to the original purchaser to be
free from defects in workmanship and material. Futtura will repair or
replace any defective part which may malfunction under normal and
proper use within a period of Two Years from the date of purchase
without charge of parts and labor, once delivered and shipped prepaid
to Futtura together with proof of date and place of purchase. This
warranty is not subject to misuse, abuse, assignment, or transfer. The
exclusive remedy under any and all warrants and guarantees, ex-
pressed or implied, is limited to repair and/or replacement as provided
herein, and Futtura shall not be liable for damages from loss or delay
of equipment uses, consequential, or incidental damage.
14 . LT-850
Calibration LT-850
Your LT-850 Self-Leveling Grade Laser is a sealed unit and is
calibrated to precise accuracies at the factory. However, if a cali-
bration error is present, we recommend you have your unit
calibrated at a certied Futtura Service Center.
Field calibration is possible if great care taken in following these
instructions.
Upright Position Calibration – X and Y axis
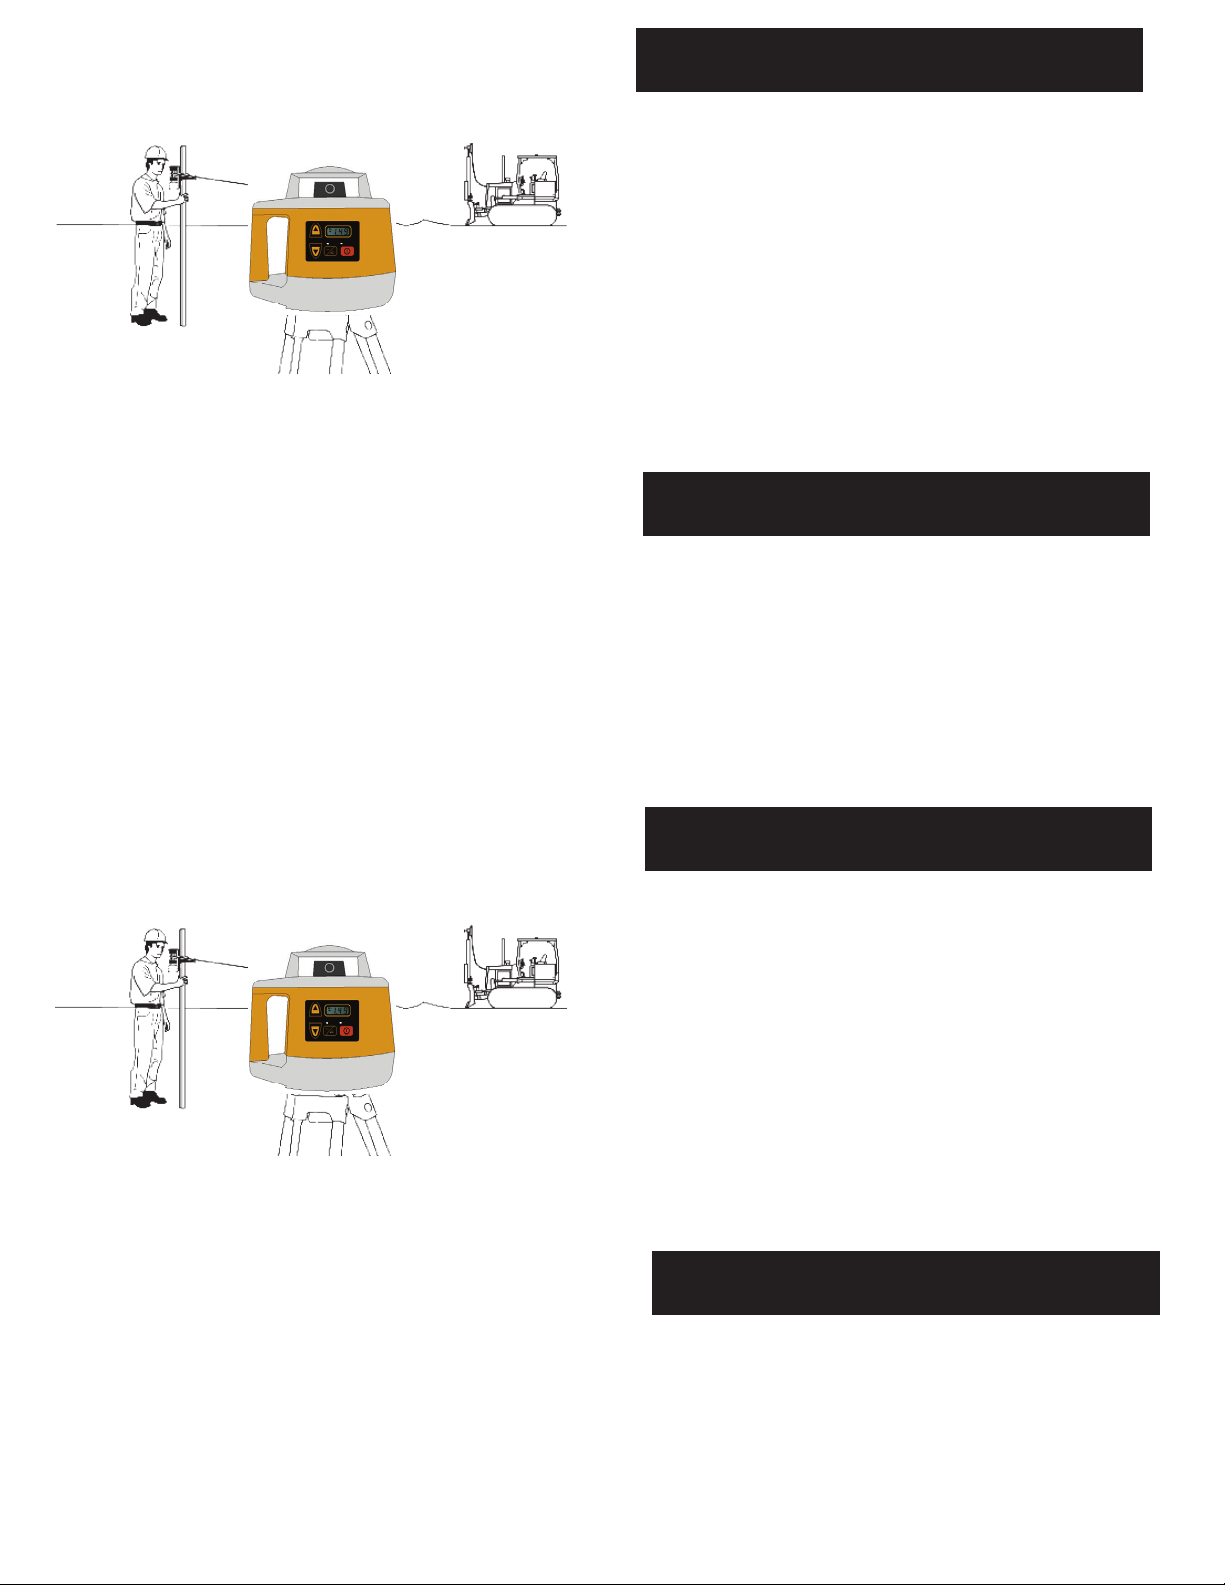
1) To Calibrate the X axis, mount the laser on a tripod or a level,
sturdy surface and place approximately 100 feet (30m) away from
a wall. Face the X axis of the unit to the wall.
2) Establish the new calibration point (C), following the instruction
in Calibration Test.
3) Turn the unit off, then turn the unit back on holding the Mode
Button.
4) The display will now read Co.1 or Co.2 and the laser beam
will turn on and the unit will rotate. Press the mode button until
the display reads Co.1. Now the display will alternate between
Co.1 and a calibration value, which can be a positive or negative
number.
5) Move the detector to the new calibration point (C). With the
Plus and Minus Buttons, increase or decrease the calibration
value until the laser beam moves to the new calibration point.
6) Press the mode button until the display shows Co.2. Repeat 4
and 5 for the Y axis.
7) Pressing the Power button once will store the new calibration
values and then put the unit into the Flat Mode.
8) Follow the Calibration Test instructions to verify the unit is now
calibrated.
14 . LT-850
Calibration LT-850
Your LT-850 Self-Leveling Grade Laser is a sealed unit and is
calibrated to precise accuracies at the factory. However, if a cali-
bration error is present, we recommend you have your unit
calibrated at a certied Futtura Service Center.
Field calibration is possible if great care taken in following these
instructions.
Upright Position Calibration – X and Y axis
1) To Calibrate the X axis, mount the laser on a tripod or a level,
sturdy surface and place approximately 100 feet (30m) away from
a wall. Face the X axis of the unit to the wall.
2) Establish the new calibration point (C), following the instruction
in Calibration Test.
3) Turn the unit off, then turn the unit back on holding the Mode
Button.
4) The display will now read Co.1 or Co.2 and the laser beam will
turn on and the unit will rotate. Press the mode button until the
display reads Co.1. Now the display will alternate between Co.1
and a calibration value, which can be a positive or negative num-
ber. When the laser has leveled itself, it will read Lo.1
5) Move the detector to the new calibration point (C). With the
Plus and Minus Buttons, increase or decrease the calibration
value until the laser beam moves to the new calibration point.
6) Press the mode button until the display shows Co.2. Wait for it
to level and read Lo.2, then repeat 4 and 5 for the Y axis.
7) Pressing the Power button once will store the new calibration
values and then put the unit into the Flat Mode.
8) Follow the Calibration Test instructions to verify the unit is now
calibrated.