6assembly instructions
vertica
8558 home theater
Fine tuning your new BDI Vertica Home Theater Furniture
These steps are to be followed after you have unpacked and completed the simple assembly instructions for your
Vertica AV cabinet. Due to jostling in freight or perhaps an uneven oor, the door on your Vertica cabinet may
not appear to be in perfect alignment. Making a few minor adjustments can rectify this situation. Be aware that
depending on your situation, patience and a bit of trial and error are required.
STEP 1 - Level your Vertica unit
Levelers are integrated into each leg assembly and are accessed at the bottom of each cabinet leg using Leveler
Wrench (B2). If your oor is uneven, you may extend one or more levelers to attain a level, stable cabinet
placement. Turning the leveler clockwise will extend the leveler; turning it counter-clockwise will retract it.
Optional Flat Panel TV Mount
This BDI cabinet is compatible with BDI’s Arena Flat-Panel TV
Mount #9972 (sold separately), with the following features:
•accommodates most TVs up to 70", 175 lbs
•swivel allows rotating for optimal viewing
•allows adjustable TV mounting height
•accepts and routes cables to and from the TV
For more information, visit www.bdiusa.com
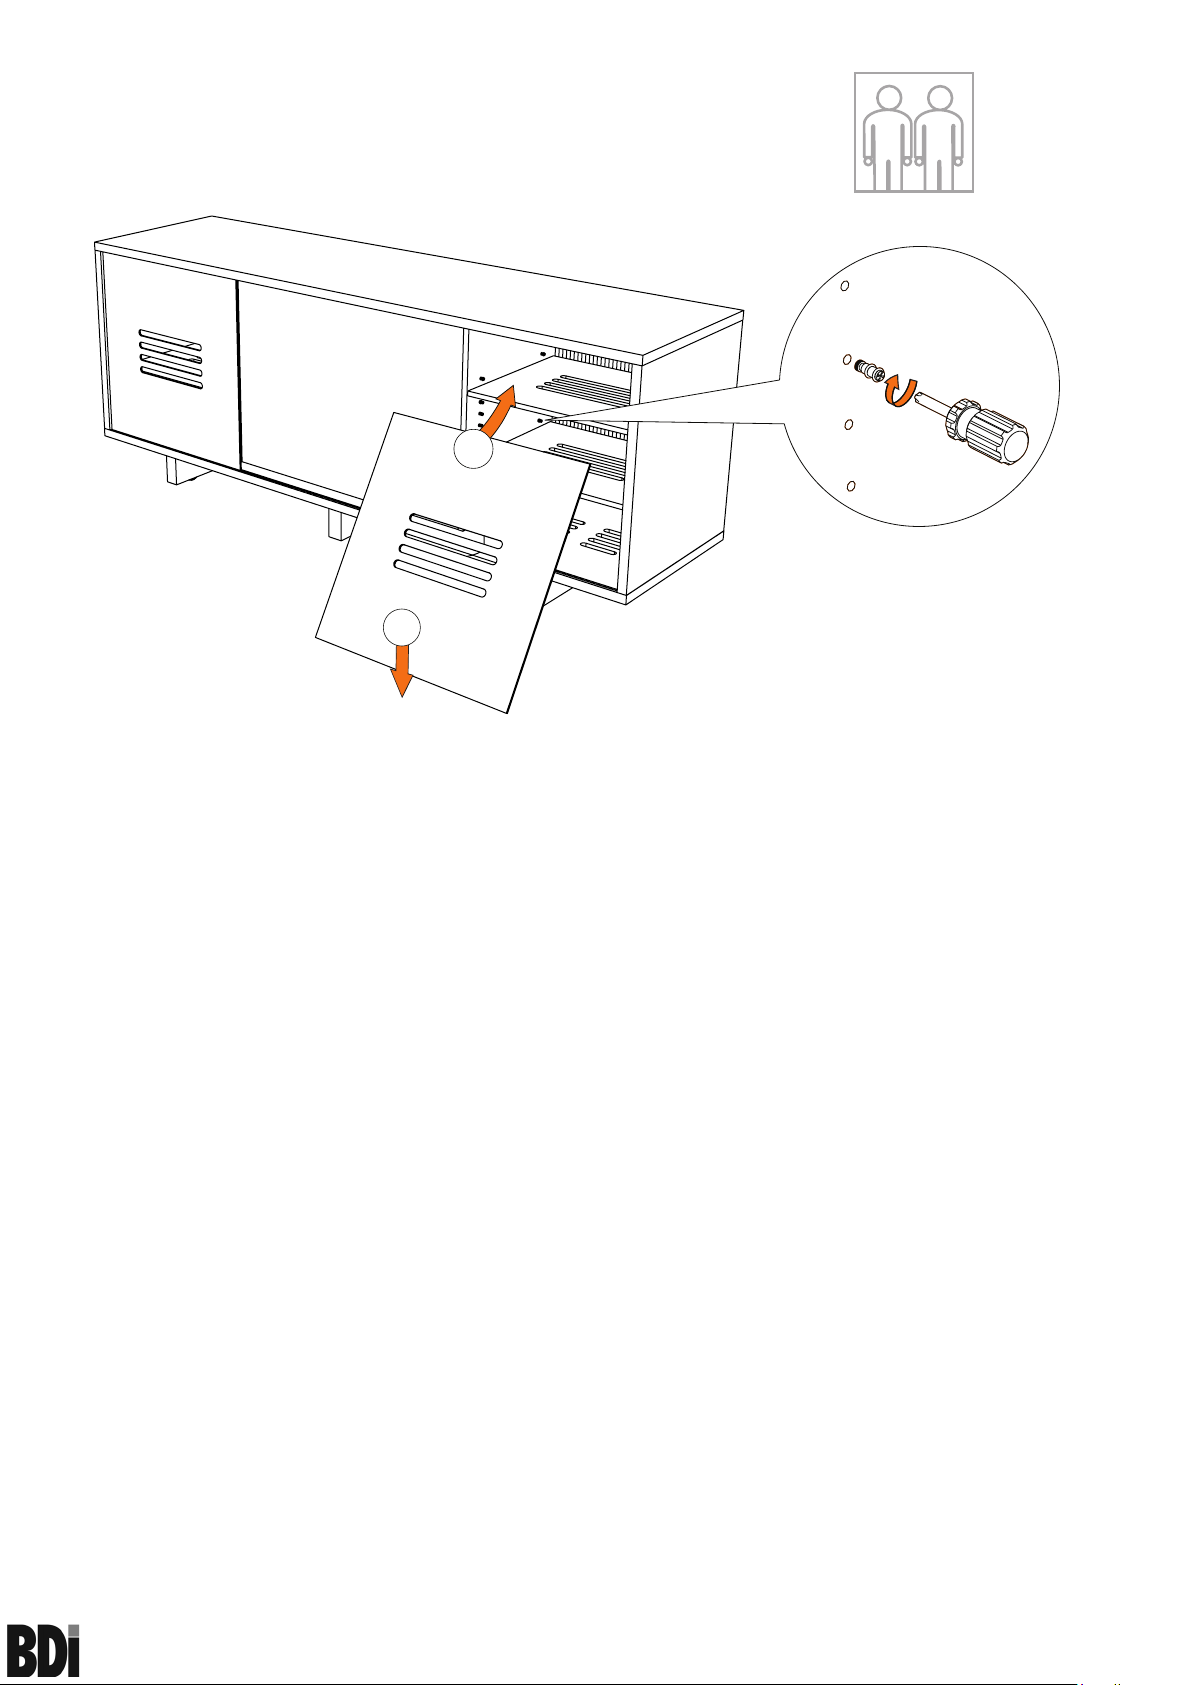
Step 8b
Drawer Removal: Depress Orange Release Lever on both mechanisms
simultaneously, then carefully lift drawer up and away from cabinet.
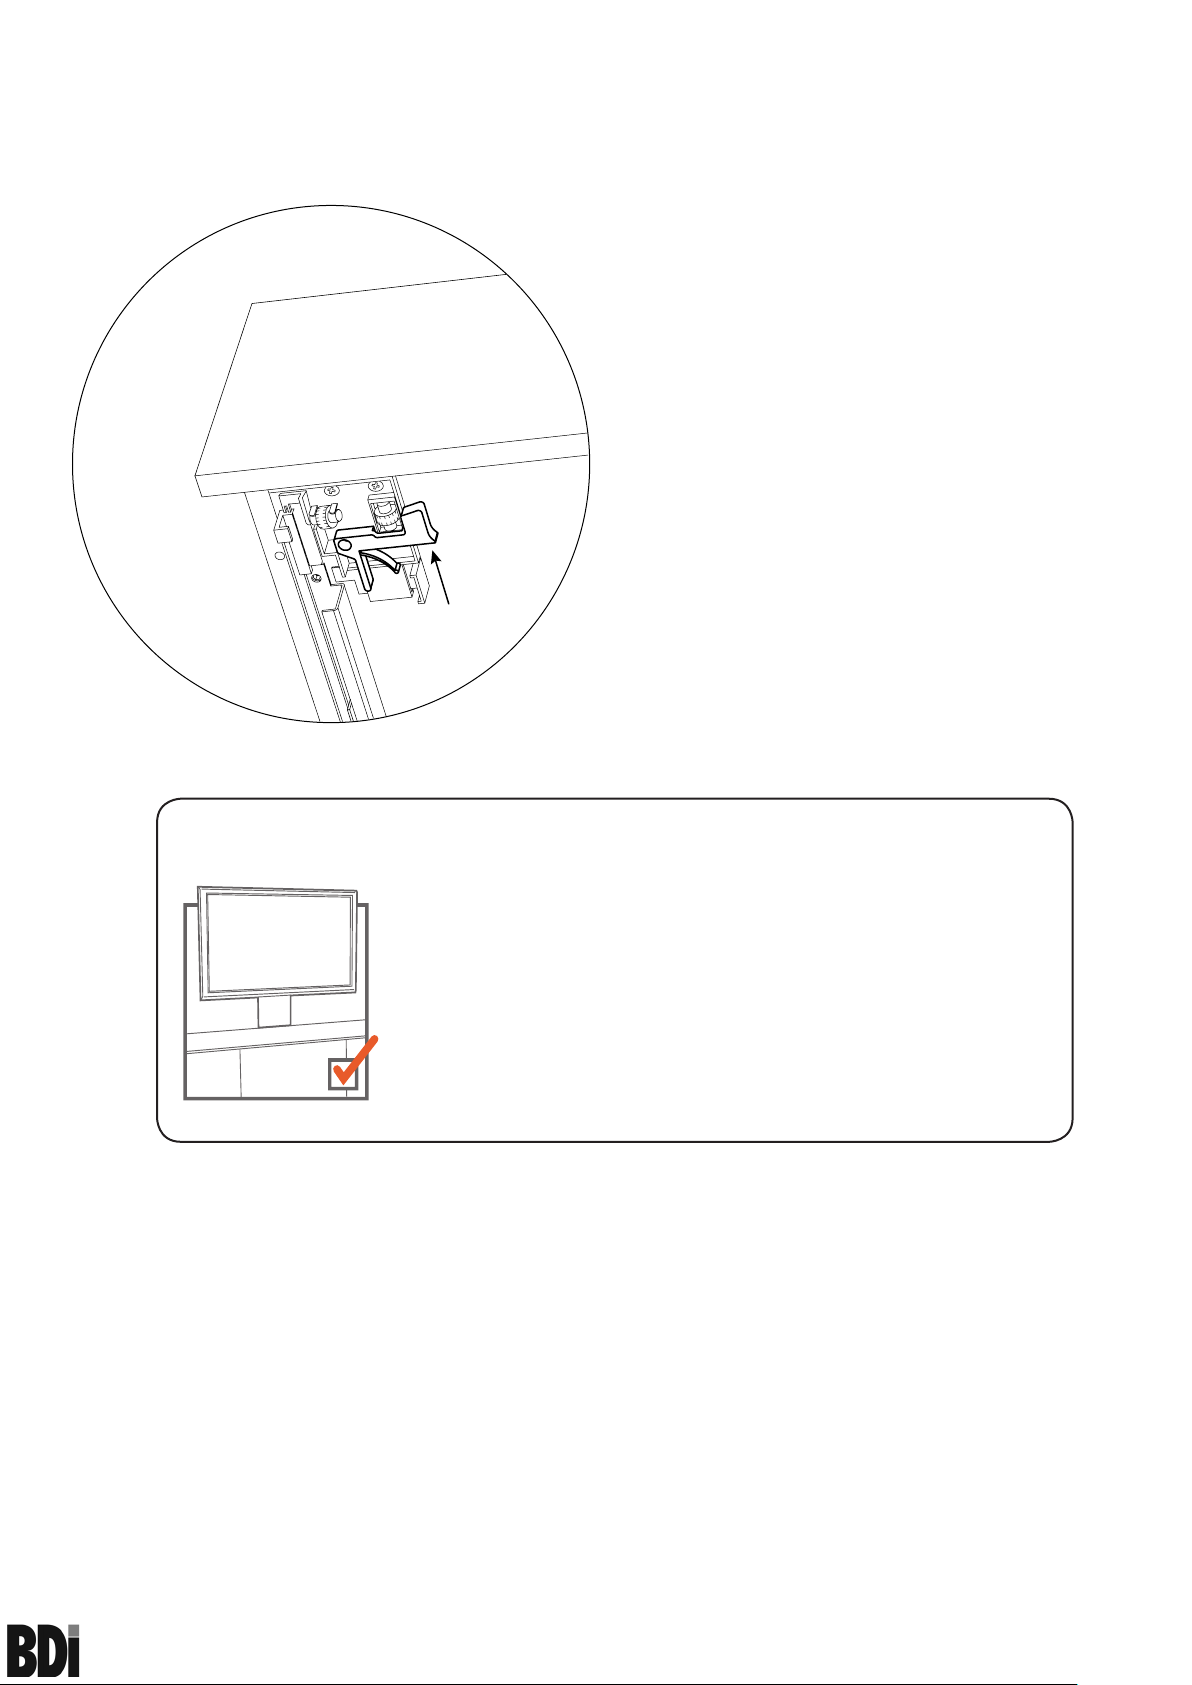
Front-to-Back Adjustment: Turn Black Wheel on one
or both mechanisms, as necessary, to adjust drawer
position in or out.