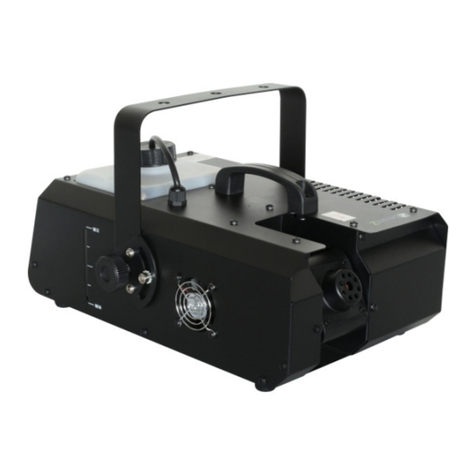
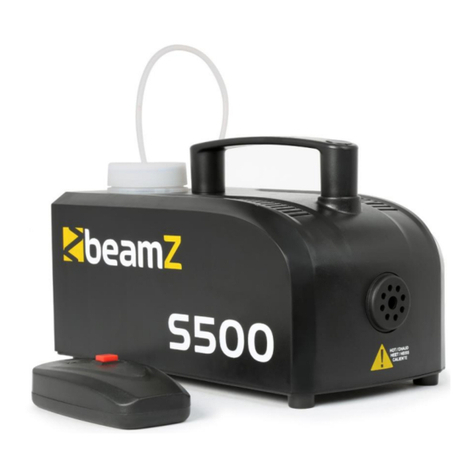
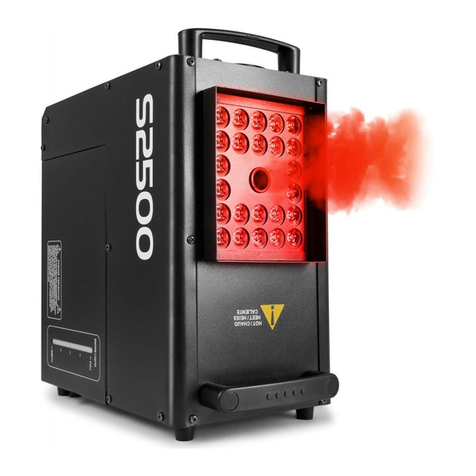
Beamz 160.487 User manual

Ref. Nr. 160.487
S900
INSTRUCTION MANUAL
GEBRUIKSAANWIJZING
BEDIENUNGSANLEITUNG
MANUEL D'INSTRUCTIONS
INSTRUKCJA OBSŁUGI
V1.5

- 2 -
ENGLISH
Warning:
- The smokemachine must be placed at least 100 cm away from inflammable materials such as curtains,
books, etc. Make sure that the housing cannot be touched by accident.
- For indoor use only.
- During installation, nobody should stand beneath the mounting area.
- Prior to the first use, have the unit checked by a qualified person.
- The unit contains voltage carrying parts. DO NOT open the smokemachine.
- Never plug or unplug the unit with wet hands.
- If the plug and/or mains lead are damaged, they need to be repaired by a qualified technician.
- If the unit is damaged to an extent that you can see internal parts, do not plug the unit into a mains
outlet. It needs to be repaired by a qualified technician.
- Only connect this unit to an earthed mains outlet of 230Vac/50Hz .
- Always unplug the unit during a thunderstorm or when it is not in use.
- If the unit has not been used for a longer period of time, condensation can occur inside the housing.
Please let the unit reach room temperature prior to use.
- When you unplug the unit from the mains always pull the plug, never the lead.
- In order to prevent dropping of the unit, a safety fastening needs to be installed. This can be a solid
chain, a steel cable, etc. which has to be fastened separately from the mounting bracket.
- The supplied bracket is the main fixing and must be used to solidly mount the light effect.
- In order to avoid accidents in public premises, the local legal requirements and safety
regulations/warnings must be fulfilled.
- Keep out of the reach of children.
Safety
Plug the smoke machine only in an earthed mains outlet or extension cord! ATTENTION: the powercord can
only be replaced by an original replacement, supplied by Tronios.
Be careful when filling the fluid tank. First of all, unplug the mains lead! Then unscrew the cap on the tank and
fill it by means of a funnel.
Only use the original Beamz smoke fluid which is environmental friendly and, if used correctly, leaves no
residues.
Do not obstruct the openings on top of the case to guarantee a good ventilation. The heating element of the
smoke machine generates heat which needs to be removed. Don’t put any objects on the smoke machine.
Installation and Use
Unpack the fog machine. Fill the fluid tank by means of a funnel. Plug the unit into a mains outlet. Thus the
heating element is automatically switched on. Depending on the room temperature, it takes about 5 minutes
until the working temperature is reached. Then the thermostat is clicking and the LED on the manual control
lights up.
Push the switch once and the smoke machine will produce a nice thick fog. Once the smoke machine has
reached its working temperature (the LED is lit) the smoke machine can produce continuously fog during about
1 minute.
After this period of time, the fog generator is cooled so much down that the thermostat switches off. Wait a few
minutes until the working temperature is reached again. It is recommended to produce smoke with small pauses
in between so that the temperature is maintained and the thermostat doesn’t switch off.
Location
Select a location where it is easy to fill the tank. It is also possible to hang the unit by means of the supplied
holder and fixing screws.
Switching the unit off
Switch the unit off by unplugging it from the mains. Otherwise the 900W heating element will draw unnecessarily
current.

- 3 -
Maintenance
Refilling the fluid reservoir should be done carefully. Remove the plug from the mains first! Then unscrew the
cap of the reservoir and fill it by means of a suitable funnel. Use only the original Beamz smoke liquid. This fluid
is environmentally friendly, biodegradable and leaves no residue when used correctly. Make sure the smoke
liquid to become contaminated, close the cap of the liquid smoke can and after filling tank right.
After 40 hours, the smoke machine must be cleaned to avoid deposits in the machine, pump and heater.
Clean procedure
Run clean procedure in a well-ventilated area
•Remove smoke liquid from the tank, add cleaning solution to tank
•Switch smoke machine and wait until it is warm up
•Press the button to switch the liquid pumped through the machine
•Perform the above operation until the tank is empty
•Fill the tank with liquid smoke
Specifications
Power supply: .................................................220-240VAC/50Hz
Heating element:...........................................................900 watts
Heat up time: ............................................................. 3.5minutes
Smoke production:............................................ca. 125m³/minute
Tank capacity:.................................................................2,5 liters
Dims:.............................................................345 x 205 x 190mm
Weight.................................................................................4.2 kg
Accessories
Smoke fluid, high quality fluid on water basis, specially designed for Beamz smoke machines. Guarantees a
trouble-free use.
5 liter packaging, ref. no. 160.583
1 liter packaging, ref. no. 160.644
Flavor, adds a pleasant fragrance to the air. One bottle is sufficient for 5 liter smoke fluid.
coconut 160.650 tropical 160.653
mint 160.651 strawberry 160.654
vanilla 160.652
Electric products must not be put into household waste. Please bring them to a recycling centre. Ask
your local authorities or your dealer about the way to proceed.
Do not attempt to make any repairs yourself. This would invalid your warranty.Do not make any changes to the unit. This would also
invalid your warranty.The warranty is not applicable in case of accidents or damages caused by inappropriate use or disrespect of the
warnings contained in this manual.Tronios BV cannot be held responsible for personal injuries caused by a disrespect of the safety
recommendations and warnings. This is also applicable to all damages in whatever form.

- 4 -
NEDERLANDS
Waarschuwing:
- Plaats de rookmachine op minimaal 100 cm van brandbaar materiaal zoals gordijnen, boeken enz. Zorg
er voor dat het apparaat dusdanig bevestigd wordt dat de behuizing niet per ongeluk aangeraakt kan
worden.
- Alleen voor gebruik binnenshuis.
- Tijdens de montage mag zich niemand onder de montageplaats bevinden.
- Voordat het apparaat in werking wordt gesteld altijd eerst een deskundige raadplegen.
- In het apparaat bevinden zich onder spanning staande onderdelen; open daarom NOOIT dit toestel.
- Voordat het apparaat gerepareerd of onderhouden wordt dient deze eerst losgekoppeld te worden van
het net.
- Verwijder of plaats een stekker nooit met natte handen uit en in het stopcontact.
- Indien zowel stekker en/of netsnoer als snoeringang-in-het apparaat beschadigd zijn dient dit door een
vakman hersteld te worden.
- Indien het apparaat dermate beschadigd is dat inwendige (onder)delen zichtbaar zijn mag de stekker
NOOIT in het stopcontact worden geplaatst én het apparaat NOOIT worden ingeschakeld . Neem in dit
geval contact op met uw leverancier.
- Sluit het apparaat alléén aan op een 230Vac/50Hz geaard stopcontact , verbonden met een 10-16A
meterkastgroep.
- Bij onweer altijd de stekker uit het stopcontact halen , zo ook wanneer het apparaat een poos niet
gebruikt wordt.
- Bij hergebruik kan condensatiewater gevormd worden; laat het apparaat eerst op kamertemperatuur
komen.
- Bij het verwijderen van de stekker uit het stopcontact nooit aan het netsnoer trekken.
- Om te voorkomen dat het apparaat naar beneden valt (bij ophanging), dient een veiligheidsophanging
te worden aangebracht. Te denken valt aan een deugdelijke ketting, staalkabel o.i.d., dat onafhankelijk
van de beugel moet worden bevestigd.
- De bijgeleverde beugel dient als hoofdophanging en moét worden gebruikt om het apparaat deugdelijk
op te hangen.
- Om ongevallen in bedrijven te voorkomen moét rekening worden gehouden met de daarvoor geldende
richtlijnen en moeten de veiligheidsaanwijzingen/waarschuwingen worden gevolgd.
- Het apparaat buiten bereik van kinderen houden
Veiligheid
Sluit de rookmachine altijd aan op een wandcontactdoos of verlengkabel voorzien van randaarde! LET OP: het
netsnoer mag uitsluitend vervangen worden door een door Tronios geleverd type
Het bijvullen van het vloeistofreservoir dient voorzichtig te geschieden. Neem eerst de netstekker uit het
stopcontact! Draai daarna de dop van het reservoir en vul bij met behulp van een passende trechter.Gebruik
uitsluitend de originele Beamz rookvloeistof. Deze rookvloeistof is milieuvriendelijk, tevens biologisch
afbreekbaar en laat, bij juist gebruik, geen residu achter. De openingen aan de bovenzijde van de kast
moeten vrij blijven voor een goede ventilatie. Het verwarmingselement van de rookgenerator ontwikkelt warmte
welke afgevoerd moet worden. Plaats geen voorwerpen op de rookmachine.
Installatie en gebruik
Haal de rookmachine uit de verpakking. Vul het rookvloeistofreservoir bij met behulp van een trechter. Steek
daarna pas de stekker weer in het stopcontact. Het verwarmingselement wordt hierdoor nu automatisch
ingeschakeld. Het voorverwarmen duurt ca. 5 minuten, afhankelijk van de omgevingstemperatuur. Is de juiste
temperatuur van de rookgenerator bereikt, dan klikt de thermostaat en gaat de signaallamp op de
handbediening aan. Druk nu kort op de schakelknop en de rookmachine produceert een mooie dichte rook. Is
de rookgenerator op temperatuur (lamp brandt!) dan kan de rookmachine ongeveer 1 minuut onafgebroken
achtereen rook produceren.
Na deze periode is de rookgenerator zodanig afgekoeld dat de thermostaat uitschakelt. Het
verwarmingselement heeft daarna een paar minuten nodig om de rookgenerator weer op temperatuur te
brengen. Laat u de rookmachine met korte tussenpozen rook maken, dan blijft de temperatuur op peil en zal de
thermostaat niet uitschakelen.
Opstelling
Plaats de rookmachine op een gemakkelijk bereikbare plaats in verband met het bijvullen. Het is ook mogelijk
de machine op te hangen d.m.v. de meegeleverde beugel met stelschroeven.

- 5 -
Uitschakelen
Schakel de rookmachine altijd uit door de stekker uit het stopcontact te halen. Het 900watt verwarmingselement
blijft anders onnodig stroom verbruiken.
Onderhoud
Het bijvullen van het vloeistofreservoir dient voorzichtig te geschieden. Neem eerst de netstekker uit het
stopcontact! Draai daarna de dop van het reservoir en vul bij met behulp van een passende trechter. Gebruik
uitsluitend de originele Beamz rookvloeistof. Deze rookvloeistof is milieuvriendelijk, tevens biologisch
afbreekbaar en laat bij juist gebruik geen residu achter. Zorg ervoor dat de rookvloeistof niet verontreinigd raakt,
sluit de dop van de rookvloeistof kan en tank gelijk na het vullen.
Na 40 uur gebruik, moet de rookmachine gereinigd worden om aanslag in de machine, pomp en
verwarmingselement te voorkomen.
Reinigsprocedure
Onderstaande uitvoeren in een goed geventileerde ruimte
•verwijder rookvloeistof uit de tank en vul daarna de tank met het reinigingsmiddel.
•schakel rookmachine in en wacht totdat deze opgewarmd is
•druk op de schakelknop zodat de vloeistof door de machine gepompt wordt
•voer bovenstaande handeling uit totdat tank leeg is
•vul de tank met rookvloeistof
Technische gegevens
Aansluitspanning: ...........................................220-240VAC/50Hz
Verwarmingselement:.....................................................900 watt
Opwarmtijd:...................................................................5-minuten
Aaneengesloten gebruik:............................... 1 minuut maximaal
Rookopbrengst: ................................................ca. 125m³/minuut
Tankinhoud:......................................................................2,5 liter
Afmetingen:.......................................................320x205x155mm
Gewicht:..............................................................................4.2 kg
Toebehoren
Rookvloeistof, hoge kwaliteit op waterbasis, speciaal voor de Beamz rookmachine. Garandeert een goede
werking.
5 liter verpakking, bestelnummer 160.583
1 liter verpakking, bestelnummer 160.644
Parfum, verhoogt de sfeer door aan de rook een aangenaam luchtje toe te voegen. Een flesje is voldoende voor
ca. 5 liter rookvloeistof.
coco 160.650 tropico 160.653 vanille 160.652
mint 160.651 aardbei 160.654
Afgedankte artikelen !!
Raadpleeg eventueel www.nvmp.nl en/of www.vrom.nl v.w.b. het afdanken van elektronische apparaten in het kader
van de WEEE-regeling. Vele artikelen kunnen worden gerecycled, gooi ze daarom niet bij het huisvuil maar lever ze in
bij een gemeentelijk depot of uw dealer. Lever ook afgedankte batterijen in bij uw gemeentelijk depot of bij de dealer, zie
www.stibat.nl .
Voer zelf geen reparaties uit aan het apparaat; in élk geval vervalt de totale garantie. Ook mag het apparaat niet eigenmachtig worden
gemodificeerd , ook in dit geval vervalt de totale garantie. Ook vervalt de garantie bij ongevallen en beschadigingen in élke vorm t.g.v.
onoordeelkundig gebruik en het niet in achtnemen van de waarschuwingen in het algemeen en gestelde in deze gebruiksaanwijzing.
Tevens aanvaardt Tronios BV geen enkele aansprakelijkheid in geval van persoonlijke ongelukken als gevolg van het niet naleven van
veiligheidsinstructies en waarschuwingen .Dit geldt ook voor gevolgschade in wélke vorm dan ook.
This manual suits for next models
1
Table of contents
Languages:
Other Beamz Fog Machine manuals

Beamz
Beamz SNOW 500 User manual

Beamz
Beamz S700-LS User manual

Beamz
Beamz S500 User manual

Beamz
Beamz S1500LED User manual

Beamz
Beamz S2000DMX LED 24 x 3W User manual

Beamz
Beamz ICE 1800 User manual

Beamz
Beamz 160.434 User manual

Beamz
Beamz F1600 User manual

Beamz
Beamz Rage 1000LED User manual

Beamz
Beamz HZ3000 User manual

Beamz
Beamz S3500 User manual

Beamz
Beamz S900 User manual

Beamz
Beamz S700-LED User manual

Beamz
Beamz S700-JB User manual

Beamz
Beamz Rage 600 User manual

Beamz
Beamz S1800 User manual

Beamz
Beamz S2000 DMX User manual

Beamz
Beamz S2500 User manual

Beamz
Beamz LF Series User manual

Beamz
Beamz DMX 160.446 User manual