Beast Road bar User manual
V2021.01
Page 1
INSTRUCTION MANUAL
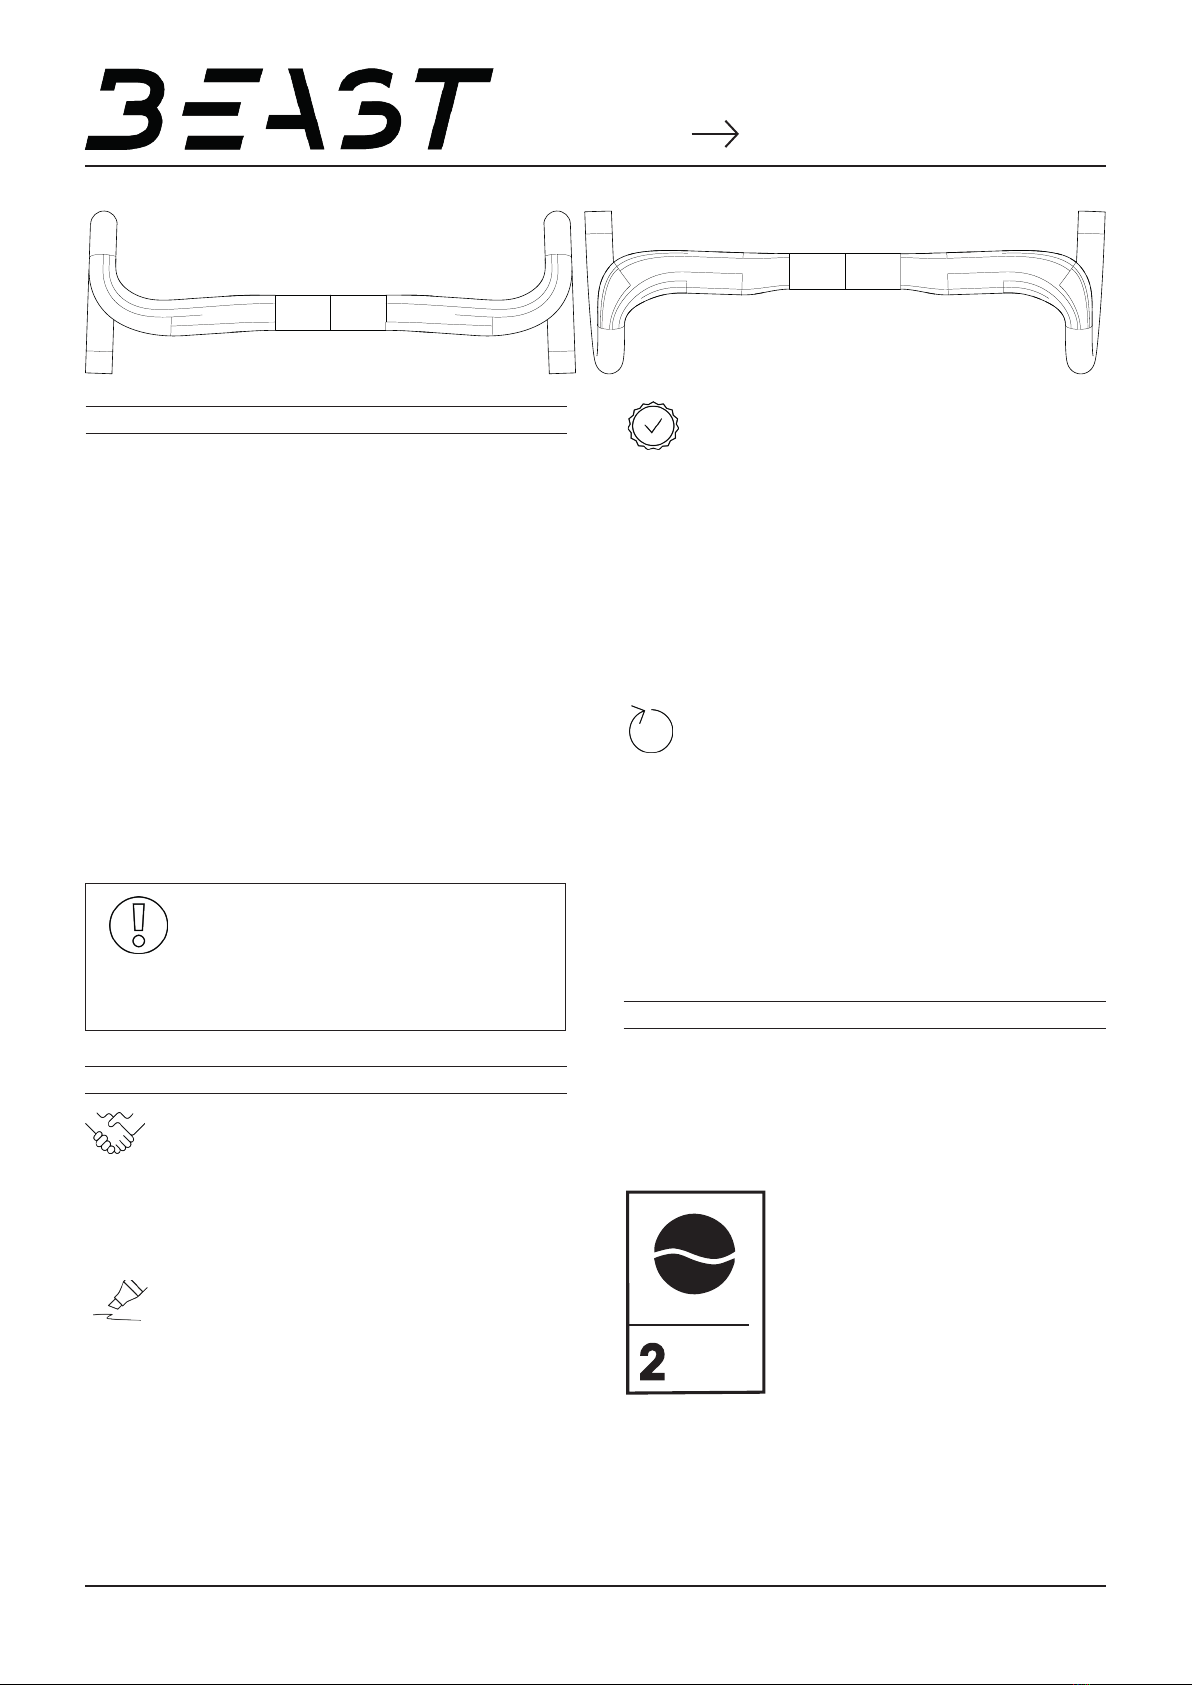
ROAD BAR | ULTRA BAR
INTRODUCTION
Welcome to the Beast family! Thank you for putting your trust in our
components. You have chosen one of the sturdiest, lightest, best
quality products. Genuine craftsmanship - developed, designed and
manufactured in Germany.
Your safety is very important to us, so please read this manual
carefully before you install your new Beast Components product or
ride it for the first time. Third party users must also be informed
about the following provisions. Therefore, please keep these
instructions in a safe place for later usage.
These operating instructions are intended for the user of our
Road Bar and Ultra Bar and include information on the installation,
maintenance and care. For your own safty please follow all
instructions.
Your Beast Components-Team
Release your Beast and share experiences with our community!
#beastcomponents #releaseyourbeast #beabeast
WARRANTY & SERVICE
OUR PROMISE
We manufacture the highest quality products for your bike and also
want to ensure the best possible service and support. Therefore we
offer the original owner of Beast Components products a 5-year
warranty and a lifetime crash replacement program for our entire
product range.
PRODUCT REGISTRATION
To get the manufacturer‘s warranty and to participate in the crash
replacement program, you must register your components with
us. Send us an email with a copy of the invoice and the following
Name, First Name
Address
Phone number
5 YEARS MANUFACTURER WARRANTY
We vouch for the quality of our products „Made in Germany“. This
is why we warrant our carbon products to be free from defects in
material or workmanship for 5 years from the original purchase date
(product registration required).
Modified, misplaced, misused, improperly installed or obviously
abused Beast Components products are not covered by this
warranty.
Based on this warranty, the company Black East GmbH is not liable
for compensation, especially not for indirect damage caused by
accidents, collateral damage and consequential damage.
LIFELONG CRASH REPLACEMENT
We offer the original owners of Beast Components products a
lifetime crash replacement program that covers all damages
(optical damages are excluded) outside of the warranty, whether
self-inflicted or third-party caused (product registration required).
In this case we guarantee you a one-time discount of 50% on
our recommended retail price if you decide to buy any new Beast
Components product in the same product category.
Please note that VAT, packaging, shipping and installation costs and
any import duties are not covered.
INTENDED OF USE
The intended use of Beast Components products is divided into six
categories, from riding on paved roads to downhill and freeride use.
Details can be found in the enclosed classification or at www.beast-
components.de/en/service. Beast Components products may only
be used within or below the intended category. Otherwise the user
takes full responsibility.
ROAD BAR & ULTRA BAR
Includes category 1, as well as rides on paths
that are paved by sand, gravel or similar
materials (e.g. forest road, field path). Roots,
thresholds, stones and drops may not be
present, or only to a limited extent, on paved
hiking trails.
The wheels are in constant contact with the
ground. May briefly lose contact with the
ground due to minor unevenness such as
roots.
ATTENTION:
Incorrect handling, installation, maintenance or servicing
can lead to accidents causing severe injuries or death!
LIGHT GRAVEL
READ MANUAL
BEFORE USAGE!
V2021.01
Page 2
GENERAL INFORMATION
Damage can lead to failure of the component and thus to serious
injury or even death. Externally damaged or defective components
must not be used under any circumstances and must be replaced
immediately. If you are unsure, contact us or a dealer.
WEIGHT LIMIT
Both the Road Bar and the Ultra Bar are not subject to any weight
restriction.
SHORTENING CARBON HANDLEBARS
The Road Bar and Ultra Bar must not be shortened or torqued. Doing
so could weaken the component structure, which will affect your
safety and void your warranty.
APPEARANCE
Our components are 100% handmade. Thereby it can come to
different appearances. It makes each component unique and has no
influence on the safety. By direct incidence of light you get a great
view of the individual fibers with partly shimmering shades.
INSTALLATION
INSTALLATION COMPATIBILITY
You can use your Road Bar or Ultra Bar with all conventional stems.
Before mounting, please ensure the compatibility of handlebar
clamping and stem clamping. The diameter of the clamping area of
the stem should be 31.8mm (±0.15mm).
Make sure that the handlebar clamp of the stem as well as the brake
and gearshift armatures have no sharp edges. We recommend not
to use them. If you still intend to do so, please remove burrs from all
sharp edges in the clamping area of the handlebars carefully with a
file and abrasive and round them off. Please note that this measure
may void the manufacturer‘s warranty. Contact the manufacturer if
necessary.
INSTALLATION ON THE STEM
• The handlebars may only be mounted with grease-free screws.
• Use the supplied assembly paste for mounting the stem to
reduce the necessary tightening torque, thus relieving the
material. To do this, apply the assembly paste to the clamping
areas.
• Position the handlebar in the center and tighten the stem bolts
gradually and not immediately to the maximum torque. Please
follow the mounting instructions of the stem manufacturer and
the maximum tightening torque of 5Nm.
INSTALLATION OF BRAKE AND SHIFT LEVERS
• Use the supplied assembly paste for mounting the stem to
reduce the necessary tightening torque, thus relieving the
material. To do this, apply the assembly paste to the clamping
areas.
• Position the brake lever at the desired location and tighten the
brake levers only until they can no longer be twisted. Make sure
not to exceed the maximum tightening torque of 4Nm when
tightening the screws.
• The mounting of clip on bars is only permitted on the Ultra
Bar within the clamping range of 100mm. Clip on bars should
be mounted as close as possible to the stem. The maximum
tightening torque must be observed.
MAINTENANCE AND CARE
Always inspect your Beast Components product for integrity before
riding. Damage can lead to component failure, resulting in serious
injury or even death. Defective components should not be driven
on under any circumstances and should be replaced immediately. If
you are unsure, contact us or a specialist dealer.
The following issues should always be considered:
• After every crash and impact, the carbon handlebar must
be checked for cracks, nicks and dents. To do this, all of the
fittings must be unscrewed. Even if no obvious defects such as
cracks, deformation or the like are visible, we can not guarantee
safe operation. Please consult a specialist dealer or contact us.
In case of doubt, the handlebar should be replaced.
• Check regularly whether the screws are tightened securely.
However, be sure to observe the maximum tightening torque
(see section „Installation“).
• Inspect the handlebar for signs of material fatigue and
stresses, such as cracks and dents.
• Clean your handlebar only with water or, if necessary, with a
commercial detergent.
Proper maintenance and care ensure a long service life and reliable
function.
DISPOSAL AND ENVIRONMENTAL PROTECTION
The statutory regulations shall apply. Whenever possible, avoid
creating waste.
Waste, especially carbon, lubricants, cleaners and any other fluids
must be disposed in an environmentally compatible manner.
CONTACT
Black East GmbH
Beast Components
Hermann-Mende-Str. 5-7
01099 Dresden, Germany
+49 351 501 937 00
www.beast-components.de
ATTENTION:
COMPONENT INSTALLATION ON CARBON
HANDLEBARS
Some new components on the market are unfavorable to
carbon handlebars due to their disadvantageous clamping
design. This is exacerbated by the fact that the maximum
Nm values specified by the component manufacturers
generally refer to aluminum handlebars. We therefore ask
you to read the following section with special attention!
INSTRUCTION MANUAL
ROAD BAR | ULTRA BAR
This manual suits for next models
1
Other Beast Bicycle Accessories manuals


