Beco HCA63640B User manual

www.beko.com
Hood
User manual
HCA63640B
01M-8809853200-4119-10
EN

Comples wth the WEEE Drectve.
Ths product was manufactured usng the latest technology n envronmentally frendly condtons.
Please read this user manual first!
Dear Customer,
Thank you for preferring a Beko product. We hope that you get the best results from
your product which has been manufactured with high quality and state-of-the-art
technology. Therefore, please read this entire user manual and all other accompanying
documents carefully before using the product and keep it as a reference for future use.
If you handover the product to someone else, give the user manual as well. Follow all
warnings and information in the user manual.
Remember that this user manual is also applicable for several other models. Differences
between models will be identified in the manual.
Explanation of symbols
Throughout this user manual the following symbols are used:
C
Important information or useful hints
about usage.
A
Warning for hazardous situations
with regard to life and property.
B
Warning for electric shock.
Does not contan PCB.

Hood / User Manual 3 / EN
CONTENTS
ENGLISH 04-17

Hood / User Manual
4 / EN
1 Important nstructons for safety and
envronment
This section contains safety in-
structions that will help protect
from risk of personal injury or prop-
erty damage. All warranties will be-
come void if you do not follow these
instructions.
1.1 General safety
•Always have the installation and
repairing procedures carried out
by the Authorised Service Agent.
Manufacturer shall not be held
responsible for damages arising
from procedures carried out by
unauthorised persons.
•This appliance is not intended for
use by persons (including chil-
dren) with reduced physical, sen-
sory or mental capabilities, or lack
of experience and knowledge.
Children should be supervised to
ensure that they do not play with
the appliance.
1.1.1 Electrcal safety
•Disconnect the product from the
mains during installation, main-
tenance, cleaning and repairing
procedures.
•If the power cable is damaged, it
must be replaced by the manufac-
turer, after sales service or a sim-
ilarly qualified person (preferably
an electrician) or someone desig-
nated by the importer in order to
avoid possible risks.
•Operating voltage is 220 to 240
volts.
•If the appliance has a failure, it
should not be operated unless
it is repaired by the Authorised
Service Agent. There is the risk of
electric shock!
•Do not route power cable close to
hobs. Otherwise power cable may
cause fire since it melts down eas-
ily.
•Never plug the hood before instal-
lation is completed.
•In order to obtain the best perfor-
mance, external conductor must
not be longer than 4 m. It must not
contain more than 2 perpendicu-
lar (90°) angles and its diameter
must be min. ø120 mm.
•Disconnect the appliance before
any intervention to the internal
parts of the appliance.

5 / EN
Hood / User Manual
1 Important nstructons for safety and
envronment
1.1.2 Product safety
•You can use a pipe with a diameter
of 120 mm or 150 mm on the flue
connection of the hood.
•Do not make connections to the
flues connected with stoves, ex-
haust shafts or flues with rising
flames. Observe the rules set by
authorities on the discharge of
exhaust air.
•The height between the lower
surface of the hood and upper
surface of the stove/oven should
not be less than 65 cm.
•Do not operate the hood without
aluminum filters and do not remove
the filters while it is operated.
•Never touch the hood's lamp after
they operated for a long time. Hot
lamps may burn your hand.
•Avoid big flames beneath the
product. Otherwise, particles on
oil filter may ignite and lead to a
fire.
•Turn on the hobs after placing
pans or pots on it. Otherwise, ris-
ing temperature may deform cer-
tain parts of your product.
•Turn off the hobs before taking
away pans or pots.
•Avoid inflammable materials
under the hood.
•Oil may ignite while frying foods.
Therefore, be careful about cloths
and curtains.
•Never leave the cooker unat-
tended when frying foods; other-
wise boiled oil may cause fire.
•There is the risk of fire if your
hood is not cleaned in the speci-
fied periods.
•Be extremely careful and wear
gloves when cleaning the hood.
•We advise you to operate the
appliance a few minutes before
starting to cook in order to in-
crease the suction power. Thus,
you shall have a continuous and
stable suction power when the
vapors arises.
•Operate your hood for 15 minutes
more after the end of cooking or
frying in order to remove smell
cooking vapour in the kitchen.
•When the hood is in use, espe-
cially together with gas cookers,
make sure that environment is
ventilated with clean air.
•Pay attention not to connect
the appliance to the flues used
by non-electrical devices. (E.g.:
Heater flue).

Hood / User Manual
6 / EN
1 Important nstructons for safety and
envronment
•When a non-electrical device is
concurrently used in the same
room together with the hood, the
negative pressure in the room
must be maximum 0.4 mbar in
order to prevent hood from suck-
ing other device's exhaust into the
room.
1.1.3 Chldren's safety
•Packaging materials are danger-
ous to children. Keep packaging
materials in a safe place out of
reach of children.
•Electrical appliances are danger-
ous to children. Keep children
away from the product. Do not
allow children play with the appli-
ance.
1.2 Intended use
•This appliance is intended for do-
mestic use. It is not suitable for
commercial use and it must not be
used out of its intended use.
•The manufacturer shall not be lia-
ble for any damage caused by im-
proper use or handling.
•The period required for the availa-
bility of spare parts for the correct
operation of the appliance is 10
years.
1.3 Complance wth WEEE
regulaton and dsposal of the
waste product
This product does not contain harmful
and forbidden materials described in the
"Directive on the Restriction of the Use
of Certain Hazardous Substances in
Waste Electrical and Electronic
Equipment" (WEEE) issued by the T.R. Ministry of
Environment and Urbanization.
Complies with the WEEE Directive.
This product has been manufactured with high
quality parts and materials which can be reused
and are suitable for recycling. Therefore, do not
dispose the product with normal domestic waste
at the end of its service life. Take it to a collection
point for the recycling of electrical and electronic
equipment. Please consult your local authorities
to learn the nearest collection point. Help protect
the environment and natural resources by recy-
cling used products.
1.4 Package nformaton
Ni-MH
The product package is made of recycla-
ble material as per the National
Legislation. Do not dispose of the pack-
age waste together with the household
waste or other waste and deliver them to the
package collection points indicated by the local
authority.

7 / EN
Hood / User Manual
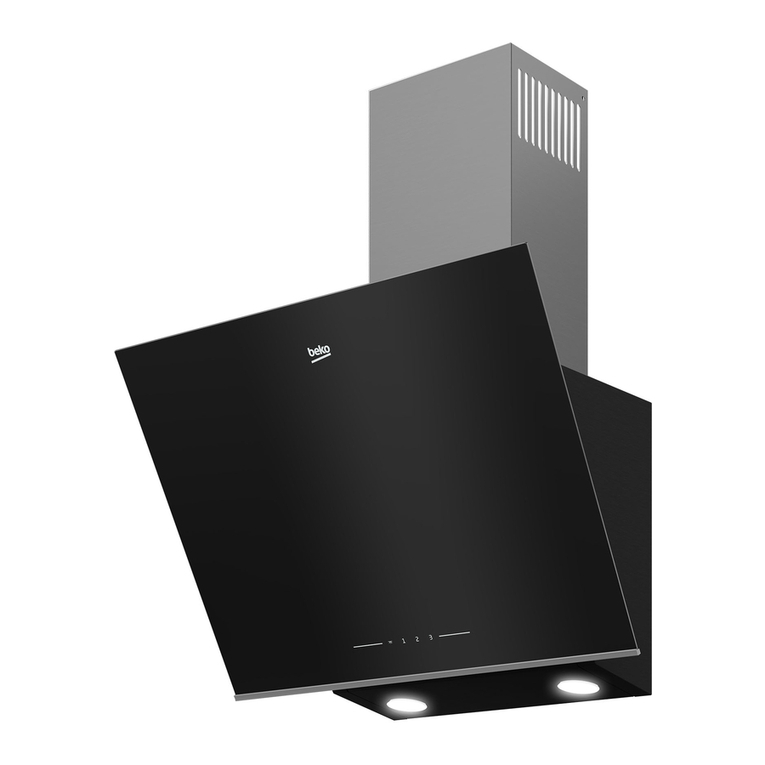
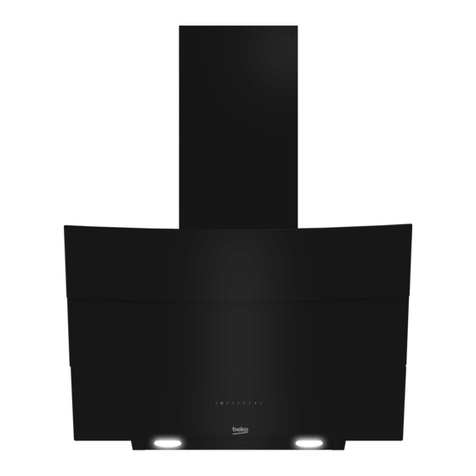
1. Internal flue
2. External flue
3. Glass cover
4. Control panel
5. Illumnaton
Values stated on the product labels or in the documentation accompanying it are obtained in laboratory
conditions in accordance with relevant standards. These values may vary depending on operational and
environmental conditions of the product.
2Techncal specfıcatons of your applance
(Figure 1)
1
2
3
4
5
HCA63640B
Wdth 596 mm
Depth 410 mm
Heght 750 mm/1080 mm
Supply
voltage 220 - 240 V~ 50 Hz
Control Wth 3 levels
Lamp
power 2 x 3 W
Ar outlet
ppe 120 / 150 mm
Motor
power 210 W
Total
power 216 W
Colour Black

Hood / User Manual
8 / EN
Please consult the nearest Authorised Service
Agent for the installation of your hood.
*Preparation of location and electrical installation
for the product is under customer’s responsibility.
A
Caution!
Remove the protective film (if any)
on the hood and flue surface after
the installation.
53 0
04 0
02
211
164
42
08
57:n M0 0801:xa
053
596
410
93 4
(Figure 2a)
3Installng your applance
(Figure 2b)
Distance between lower surface of the hood
and upper surface of the hob should be at least
65 cm.
Have a qualified electrician make the electrical
connection.
Install your appliance so that you can reach the
power connection (plug, outlet) easily after in-
stallation.
Dimensions are given in mm.

9 / EN
Hood / User Manual
3Installng your applance
3.1 Installaton accessores
1 x flue connection plate
1 x Ø120/150 mm plastic
flue adapter
Information required for the preparation of the in-
stallation place for your hood is given below.
3.2 Installng the hood onto
the wall
To install the hood onto the wall, loosen the
screws of hanger plates on the motor housing and
pull the plates upwards. Then, tighten the screws
of the hanger plates. (Figure 3a).
(Figure 3a)
Hanger plate
(Figure 3b)
External flue connection plate
If you will use Ø 120 mm flue pipe, install Ø 120
mm flue adapter onto it.

Hood / User Manual
10 / EN
3.2.1 Borng the hanger holes
Affix the installation template onto the installa-
tion place of the hood. Drill the points market with
(X,Y) (Figure 4) using a Ø 8 mm bit and points
market with (Z) (Figure 4) using a Ø 6 mm bit.
Z
Y
X
COOKING ZONE
Bottom surface of the appliance
3Installng your applance
Y
Y
Z
X
Z
X
8
8
8
8 mm plastic
wall plug
6 mm plastic
wall plug
(Figure 4)

11 / EN
Hood / User Manual
3.2.2 Hammerng the wall plugs
Hammer Ø 8 mm wall plugs (X,Y) into the holes
drilled for hanger screws. Hammer 2 x Ø 6 mm
wall plugs (Z) into the holes drilled with a Ø 6
mm bit for the external flue connection plate.
(Figure 5)
3.2.3 Installng the hanger
screws
Install 4.9x50 hanger screws into the Ø 8 mm wall
plugs (Y) you have hammered into the wall. There
must be a gap of 5 mm between the screw head
and the wall. (Figure 5)
Connect the internal flue connection plate to the
8 mm wall plugs (Z) on the wall using Ø 3.9x22
screws. (Figure 5)
Y
Y
Z
X
Z
X
(Figure 5)
4.9x50 Cross-
head screw
3.9 x 22 Cross-head
screw
3.2.4 Hangng the hood onto the
wall
•Hang the hood onto the screws you have in-
stalled into the Y holes.
•Open the side suction window of the hood by
pulling it towards yourself. Install the 4.9x50
screws through the X holes located inside in
order to secure the appliance.
3Installng your applance

Hood / User Manual
12 / EN
3.3 Installng the hood flue
Disconnect the product from mains supply before
starting flue installation. Fit the sheet metal flue
parts around the body.
Screw the external flue to the external flue con-
nection plates located on the motor housing.
(Figure 3b / 6)
Extend and screw the internal flue from its outer
edges onto the flue connection plate which was
secured to the wall (Figure 7).
3Installng your applance
(Figure 6)
(Figure 7)

13 / EN
Hood / User Manual
3.4.1 Usng wth flue connecton
•The vapour is removed via flue pipe which is se-
cured to the connection head on the hood.
•Diameter of the flue pipe should be equal to the
diameter of connection ring. To allow the air be
removed easily out of the room in horizontal
arrangements, the pipe should be slightly tilted
upwards (approximately 10°).
3.4.2 Usng wthout flue
connecton
•Air is filtered by the carbon filter and returned to
the room. Carbon filter is used when there is no
flue in the house.
•ıf the hood will be used without flue connection
remove the diverters inside the flue adapter.
•Remove the aluminum filter. To install the car-
bon filter, center the carbon filter on the plastic
part on both sides of the fan body, and secure it
on the tabs. Secure the filter by turning the tabs
to right or left.
•Install the aluminum filter.
3.5 Flue connecton:
Place adapter supplied together with the hood
into the ventilation hole located on the top sec-
tion of the hood. Procure a pipe with a diameter of
120/150 mm. Connect one end of the pipe to the
adapter and the other end to the flue.
Make sure that these two connections are secure
enough
so that they will not dislocate when the hood
is operated in max. speed. Check that the flaps
inside flue are functional when tightened with
the clamp. Fit the flue connection pipe onto the
adapter. If you fit the flue connection pipe inside
the adapter, air suction will not occur since the
flaps that prevent air backflow will remain closed.
It is not advisable to make connections to the
flues connected with stoves or exhaust shafts. Do
not make connections to such flues.
3Installng your applance
(Figure 7)
Pipe connection must be as short as possible and
have minimum number of elbows.
A: Flue outlet pipe
B: Flaps that prevent backflow
C: Plastic flue
3.5.1 Backflow prevention system (N-RV)
When the hood is operated, flaps are closed in or-
der to prevent possible odours and dust from en-
tering into the ambient from outside.
Correct Not correct

Hood / User Manual
14 / EN
(A): 1st level key
(B): 2nd level key
(C): 3rd level key
(D): Light On / Off key
4.1 Dgtal electronc control
wth 3 levels
(A) You can start your hood at speed level 1 by
pressing this key.
When you press this key again to switch off the
appliance, speed level indication on the display
disappears.
(B) key: You can start your hood at speed level 2
by pressing this key.
When you press this key again to switch off the
appliance, speed level indication on the display
disappears.
(C) key:You can start your hood at speed level 3 by
pressing this key.
When you press this key again to switch off the
appliance, speed level indication on the display
disappears.
(D) key: Light On/Off Key: You can illuminate the
cooking area by pressing this key.
Auto-stop in 15 min.:
This appliance is equipped with an Auto-Stop
function which allows the appliance to ventilate
the room for an additional period of time in order
to remove the unpleasant odour and vapour in the
room after the cooking is over. Appliance stops au-
tomatically after a certain period of time.
To enable the Auto-stop function, press any of the
speed level keys (A, B, C) on the control for longer
than 2 seconds. A timer with 15 minutes will be
activated.
If you press the same speed level key while the
Auto-stop function is enabled, function will be
disabled and the appliance will stop.
If you select a different speed level this function
will be disabled.
If you want your appliance to stop automatically,
you must enable the Auto-stop function again.
Periodical cleaning of metal filters:
Filters must be cleaned at about every 60 hours of
operation or 4 weeks depending on the frequency
of usage.
(Figure 8)
4Operatng your applance
A B C D

15 / EN
Hood / User Manual
4Operatng your applance
4.2 Energy effcent usage:
•When operating the hood, adjust the speed
level according to the odour and vapour inten-
sity in order to prevent unnecessary power con-
sumption.
•Use low speeds in normal conditions (1-2), and
high speed (3) when smell and vapors are inten-
sified.
•Lights on the hood are intended for illuminating
the cooking zone.
Using them to illuminate the ambient/kitchen will
result with unnecessary power consumption and
inadequate illumination.
4.3 Operatng the hood:
•Hood is equipped with a motor having various
speed settings.
•For a better performance, we advise you to
use low speeds in normal conditions, and high
speeds when smell and vapors are intensified.
•You can start the hood by pressing the desired
speed level key (A,B,C).
•You can illuminate the cooking area by pressing
the light key. (D)

Hood / User Manual
16 / EN
Prior to cleaning and maintenance, unplug the ap-
pliance or turn the main switch off or loosen the
fuse that supplies the hood.
5.1 Alumnum flter
This filter captures oil particles in the air. You are
recommended to clean your filter every month
under normal usage conditions. First remove the
aluminum filters for this process. Wash the filters
with liquid detergent and rinse them with water
and install them back after they get dry. Aluminum
filters may get discolored as they are washed; this
is normal and you don't need to change your filter.
5.1.1 Removng the alumnum
flters
1. Push the alumnum flter lock forward.
2. Then, slghtly lower t and pull forward.
Otherwse, you may bend the flter. (Fgure 9)
After the alumnum flter s washed and dred,
renstall the flter to ts slot by applyng above
steps n reverse order.
Carbon filter (Using without flue)
This filter removes the cooking odours. If it is not
possible to use a flue, it purifies the air which is
circulated inside the kitchen. Carbon filter of your
appliance will get clogged in time depending on
the frequency of use, style of cooking and regular
cleaning of the aluminum filters.
A
Caution!
Carbon filter should never be
washed.
You may obtain carbon filters from Beko
Authorised Service Agents.
5.2.1 Replacng the carbon flter
•Remove the aluminum filters. (Figure 9)
•To remove carbon filter, turn the tabs counter-
clockwise and release the filter. (Figure 10
•Install the new carbon filter.
•Install the aluminum filters.
(Figure 10)
Anti-odor filters contain charcoal (active carbon).
They must be changed with periods of approxi-
mately 3 months.
Regardless of using a carbon filter or not, alumi-
num filters must always be installed.
Do not operate your appliance without the alu-
minum filter in place. Using with carbon filter will
decrease suction performance of the appliance.
C
You can also wash aluminum filters
in dishwasher.
5Cleanng and mantenance
(Figure 9)

17 / EN
Hood / User Manual
5Cleanng and mantenance
5.3 Cleanng
Particularly do not neglect to clean your hood im-
mediately after you have made frying.
Use a soft cloth soaked with liquid detergent to
clean the outer surface of your hood.
Never use abrasive or scratching materials for
cleaning.
You may use the cleaning agents commercially
available for persistent grease etc. by following
the warnings on the product. In order not the
scratch the brushed steel body, wipe in the same
direction with the bush trace.
Do not use cleaning agents containing hydro-
chloric acid, bleach or abrasive powders in order
to maintain the surface quality of your product.
Use a cloth dampened in soapy water or special
stainless steel cleaning spray for stainless steel
steel surfaces. Remove the protective foil on the
appliance.
A
Caution!
You may cause a fire if you do not
follow the instructions on the clean-
ing and replacement of the filters of
your hood.
If you need to transport the appliance:
•Keep the original packaging of the appliance.
Transport the appliance with its original pack-
age, and follow the transport markings on the
original package.
If you do not have the original package:
•Do not place any objects on the hood.
•Protect the outer surface from impacts.
•Pack the appliance so that it would not be dam-
aged during transport.
5.4 Replacng the lamps
Disconnect the hood from the mains supply.
This appliance is equipped with 3 W lamps.
To replace the lamps, press the lamp downwards
from the rear section of the lamp holder to re-
lease the lamp. Then turn it counterclockwise by
1/4 tour and remove it.
Perform the above steps in reverse order to fit the
new lamps.
C
You may procure lamps from
Authorised Service Agents.

www.beko.com
Table of contents
Other Beco Ventilation Hood manuals
Popular Ventilation Hood manuals by other brands
Zigmund & Shtain
Zigmund & Shtain K 011.5 B instruction manual

Zanussi
Zanussi ZHC 605 Installation, use and maintenance handbook

Blaupunkt
Blaupunkt 5DL69654 instruction manual
Pyramis
Pyramis Agilo 90 Instruction on mounting and use
Zanussi
Zanussi ZHC960 operating instructions

Monsher
Monsher ROUEN 60 Noir user manual


