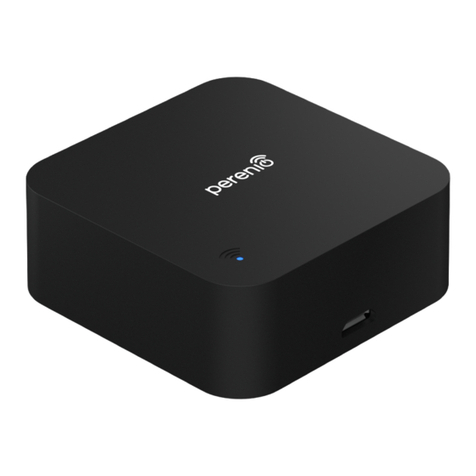
BECSY UC200 User manual

Universal Remote Control
User Manual
UC200/UC500

1. Product Composition and Name of Each Part for UC200/UC500-----1~2
2. Terminologies---------------------------------------------------------------3
3. Getting Started with Multi Remote-------------------------------4~5
4. Setting Mode------------------------------------------------------------6~7
5. Adding Database Devices----------------------------------------------8~10
6. Adding and Using OTT/Bluetooth Devices--------------------------11~19
7. Deleting Devices-----------------------------------------------------------20
8. Deleting Devices(Bluetooth)------------------------------------------21~23
9. Keys Adding---------------------------------------------------------------24
10. Deleting Keys--------------------------------------------------------------25
11. IR Learning------------------------------------------------------------26~28
12. Copying Keys-------------------------------------------------------- 29~30
13. Devices Moving-----------------------------------------------------------31
14. Changing Devices Names--------------------------------------------32~33
15. Move Key-------------------------------------------------------------34~35
16. Renaming Keys------------------------------------------------------------36
17. Preference-------------------------------------------------------------37~38
18. Setup Mode---------------------------------------------------------------38
19. Troubleshooting------------------------------------------------------39~41
20. Specifications--------------------------------------------------------------42
21. Warranty-------------------------------------------------------------------43
▪Product Safety Guidelines--------------------------------------------------44
▪Battery Safety Guidelines---------------------------------------------------45
ᆞContents

1
1. Product Composition and Name of Each Part for <UC200>
D
C
A
G
E F
M
O
N
Power ON/OFF
EXIT
LCD Screen
Volume UP/DOWN
H
I
J
Navigator
K
Selection
Menu
Home/Guide
Mute
G
H
I
J
K
Display home
Channel UP/DOWN
A
B
C
D
E
F
I
K
B
H
F
L
J
H
I
J
Information
L
J
K
USB Type-C Connector
USB C Cable
N
O
IR Transceiver
M

2
O
E
G
I
J
L
Power ON
Power OFF
LCD Screen
Return to previous
page
Go to next page
Display home
position
Settings
Volume UP/DOWN
H
Channel UP/DOWN
I
Mute
J
Navigator
K
Selection
L
Multi-media Control
M
Optional Function
N
IR Transceiver
USB Type-C
Connector
USB C Cable
A B
C
D
F
H
K
M
N
E
G
I
J
L
P Q
A
B
C
D
E
F
G
H
I
J
K
L
M
N
O
P
Q
1. Product Composition and Name of Each Part for <UC500>

3
▣Devices
Marked the products (TV, Audio, AC, etc.) to be registered
on the multi-remote controller (UC200/UC500) as devices.
Devices
INPUTTV INPUT
TIMER SOUND
CC RATIO
SIMPLINK +
Keys or Buttons
▣Keys/Buttons
Keys created in registered home appliances/devices
(volume, channel, and other function keys)
2. Terminologies

▪UC200 REMOTE POWER OFF
+ If you press and hold ON and the home screen button
at the same time for 3 seconds, the power of the remote
control unit is turned off.
4
3. Getting Started with Multi Remote
▪Screen Configuration and Device Selection
Title
Page
Device &
Button List
LCD Screen Touch
* You can select a device by touching the screen, and press
to move to the home screen.
▪UC200 REMOTE POWER ON
Press power button for second minutes.
(device goes into power saving mode if no action is made)
▪UC500 REMOTE POWER ON
Press power button for second minutes.
(device goes into power saving mode if no action is made)
<3 seconds >
▪UC500 REMOTE POWER OFF
+ If you press and hold ON and the home screen button
at the same time for 3 seconds, the power of the remote
control unit is turned off.
<3 seconds >

5
Or
You can change the page by scrolling left and right on the screen
or by pressing the previous/next page key on the UC500 product.
▪Moving Device
You can quickly move registered devices by scrolling the screen
up and down. (It will be moved to devices except Bluetooth
devices.)
▪Page Change
<UC500 Key >
3. Getting Started with Multi Remote

6
▪Run setting mode
< UC500 Home Screen Key 3 seconds >
Or
< UC200 Home Screen Key 3 seconds >
Press UC200 Home Screen Key or UC500 Setting
Key for 3 seconds for setting mode
4. Setting Mode
▪BECSY multi remote control consists of two modes, Basic Setup
and Expert Setup, and the basic setting of the remote control is
set to Basic Setup mode.
< Basic Setup Mode Screen >
Basic Setting
Setup Devices
Setup Keys
Preference
System
Update App and etc
Expert Setup
< Expert Setup Mode Screen >

▪Click the “Setup Mode” icon on the Basic Setup mode
screen to activate Expert Mode.
7
4. Setting Mode
※ Returning from expert mode to basic mode can be
set in the Preferences item in Setup.
1. Basic Setup Mode (Basic Setting)
Basic Setup allows users to easily set up and use the remote control;
a setting mode in which the basic menu is composed of icon buttons.
2. Expert Setup Mode
Expert Setup allows detailed settings for the remote control;
S/W update, user data backup and restore functions.
Expert Mode
ON
Setup Mode
< Expert Setup Mode Basic Setup Mode Setting >
▪Press and hold the UC500 setting key or the
home screen key of UC200 for 3 seconds, and move to setup
mode by pressing and then change to OFF in Preference Setup
Mode.
< Basic Setup Mode Expert Setup Mode Setting >

8
5. Adding Database Devices
▪BECSY multi remote controller has a built-in database, so you
can easily add various devices.
2) Select Add Device.
3) Select the type of device you want to
add. (Swipe the screen left and right or
using the previous/next page buttons.
More devices can be searched.)
1) Press and hold the UC500 setting key or the home
screen key of UC200 for 3 seconds, then the screen goes to basic
setup mode.

9
4) Select the manufacturer of your device.
(※ You can change the page by scrolling left/right or using the
previous/next page key to view more search by device and
manufacturer.)
5) Select an IR Codeset suitable for the
device. and press ON/OFF, Volume,
Channel keys, etc. to check if the device
operates normally.
Scroll left and right to find the
appropriate Codeset and press
key to confirm.
[TV]: Brand
Test any key to control the
selected device. If the device
is successfullyoperated.
Press SEL button tofinish.
To change the codeset,
press Prev/Next button
Codeset (1/28)
5. Adding Database Devices

(※ You can change capital and small letters by scrolling up/down the
screen, and the keyboard layout of letters by scrolling/right.
After setting the name, press the key to save.)
10
6) Set the device name.
7) When the device addition is complete,
the added devices appear in the order
they were created on the main screen.
5. Adding Database Devices

11
6. Adding and Using OTT/Bluetooth Devices OTT/Bluetooth
▪After selecting OTT, you can add and use a device.
After registering the template class as a basic, go through
the pairing process on the home screen to use it.
※ For Roku devices, we do not go through the pairing process.
3) Select OTT 4) Select device type.
1) Press and hold the UC500 setting key or the home
screen key of UC200 for 3 seconds, then the screen goes to basic
setup mode.
2) Select Add Device.

12
There is no paired
key. Would you like
to pair with
bluetooth host?
Bluetooth
OK Cancel
5) Enter the device name.
After completion, press the
key to confirm.
6) Go to the home screen
and check the added
devices.
※ How to pair Chromecast class
(Other Bluetooth class pairing methods are similar.)
7) Select Chromecast class
device from home screen.
8) Select OK on the pairing
screen
6. Adding and Using OTT/Bluetooth Devices OTT/Bluetooth

13
Try to pair remote
from chromecast_1
[timeout=178]
BT State
11) Select “Remote Controls & Accessories” on the Chromecast
settings screen.
9) Make sure that the pairing screen
appears as shown.
The waiting time for pairing is 3 minutes
and 30 seconds, and the pairing must be
completed within the timeout period
10) When the progress pairing screen appears, proceed with pairing in
Chromecast as well.
6. Adding and Using OTT/Bluetooth Devices OTT/Bluetooth

14
12) Select “pair a remote control or
accessory”.
13) When the UC500 device screen is displayed, selecting the device
automatically initiates pairing proceed. (Searching may take more
than 30 seconds depending on the situation.)
If the device is not searched, proceed from step 7 again.
6. Adding and Using OTT/Bluetooth Devices OTT/Bluetooth

15
14) When pairing is completed, the “UC500” device is registered to
Chromecast.
15) The pairing progress window appears on the LCD screen of
UC500 for a while, and the device selection screen appears.
(You can check the operation by pressing the key on the
Chromecast device.)
6. Adding and Using OTT/Bluetooth Devices OTT/Bluetooth

16
▣Main UI screen / Media UI screen of Chromecast device
(Switching the screen using left/right scroll or previous/next keys)
▣Mouse movement by dragging the LCD screen.
The wheel button in the center is controlled by the UP/DOWN
keys.
▪This is an example of how to use the Chromecast device.
You can use basic mode/mouse mode/keyboard mode.
6. Adding and Using OTT/Bluetooth Devices OTT/Bluetooth

17
▣Left/Right Mouse Click: Use the left/right arrow keys.
(When tapping the LCD screen, only the lower right area is the
right button.)
▣To move the keyboard screen, use the left/right scroll or previous
/next keys.
(Ctrl and Alt keys are used by pressing the following keys while
Ctrl keys are pressed.)
Ex) In case of using Ctrl + C : While “Ctrl” key is pressed Click “C”
6. Adding and Using OTT/Bluetooth Devices OTT/Bluetooth

18
▣For uppercase and lowercase letters in English,
scroll up/down the LCD screen
▣If the title is displayed in red, it is not connected to the device.
Please wait until the connection is complete.
< Upper case > < Low case >
conversion
6. Adding and Using OTT/Bluetooth Devices OTT/Bluetooth
This manual suits for next models
1
Table of contents
Popular Remote Control manuals by other brands
RTI
RTI RP-6 Operations & installation guide
Boston Scientific
Boston Scientific Vercise DBS 4 Handbook
Superrollo
Superrollo GW70 Translation of the Original Operating and Assembly Manual
Sony
Sony RM-V40 operating instructions
Flexball
Flexball 4500 WRC Operator's manual
Control All Wireless
Control All Wireless 4DP0L0EFA installation instructions
