Vimar CALL-WAY User manual

Viale Vicenza, 14
36063 Marostica VI - Italy
www.vimar.com
49401856A0 02 2311
03890
CALL-WAY
Vivavoce per chiamata Telesoccorso.
Dispositivo di telesoccorso adatto alla chiamata via rete cellulare di numeri predefiniti. La chiamata vivavoce viene avviata premendo il pulsante
“ALARM” a bordo o tramite il pulsante dell’accessorio bracciale/pendaglio in dotazione oppure tramite un altro dispositivo collegato all’interfaccia
art. 03895. Il dispositivo consente anche la ricezione di chiamate esterne con risposta automatica.
CONTENUTO DELLA CONFEZIONE
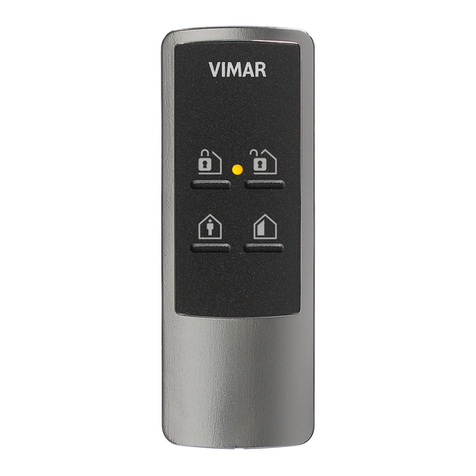
Bracciale/pendaglio (già associato)
art. 03893
Unità Vivavoce Staffa per installazione a parete
Alimentatore
(DC 9V 1A SPS)
ALIMENTAZIONE
Il vivavoce per chiamata telesoccorso è provvisto di un alimentatore da 9 V e di una batteria tampone ricaricabile (la durata massima della batteria
è di 36 ore) che interviene in caso di mancanza dell’alimentazione di rete. Al momento dell’installazione è necessario abilitare la batteria di backup
agendo sull’apposito interruttore posto sul retro del dispositivo.
N.B. Se il dispositivo non è alimentato da rete non è possibile eseguire le operazioni di programmazione SMS e ricevere le chiamate in ingresso.
INSTALLAZIONE
Inserimento della SIM card
• Prima di inserire la SIM nel dispositivo disabilitare l’eventuale codice PIN. Per effettuare questa operazione inserire la SIM nello smartphone e
seguire le indicazioni relative alla disabilitazione del PIN.
• La sede per l’inserimento della SIM è posta sul retro del dispositivo.
• Inserire delicatamente la SIM nella sua sede.
• Eventuali messaggi SMS salvati sulla SIM saranno cancellati all’avvio del dispositivo.
N.B.
- Sono supportate esclusivamente SIM nel formato nano.
- Non utilizzare adattatori per inserire la SIM nella sua sede.
Installazione a parete
1. Rompere le due prefratture presenti sulla staffa di montaggio a parete.
2. Utilizzare i due fori come dima assicurandosi che il simbolo del triangolo presente sulle staffe sia rivolto verso l’alto.
3. Forare con un trapano e fissare la staffa alla parete con le viti.
4. Connettere l’alimentatore al jack DC dell’Unità Vivavoce e posizionare correttamente il cavo.
ON
ON
5. Fissare l’Unità Vivavoce sulla staffa di montaggio. Assicurarsi che il segno impresso sul dispositivo sul sia allineato con il quello posto supe-
riormente sulla staffa.

Viale Vicenza, 14
36063 Marostica VI - Italy
www.vimar.com
49401856A0 02 2311
03890
CALL-WAY
6. Ruotare l’Unità Vivavoce in senso orario fino alla posizione di chiusura.
Aperto Chiuso
Installazione da tavolo
1. Pulire il retro dell’Unità Vivavoce con un detergente sgrassante. Connettere l’alimentatore al jack DC dell’Unità Vivavoce e posizionare corret-
tamente il cavo a destra o a sinistra.
2. Rimuovere la pellicola protettiva dalla pastiglia antiscivolo e fissarla sul retro dell’Unità Vivavoce.
3. Posizionare il dispositivo nel punto desiderato.
PRIMA PROGRAMMAZIONE
Il dispositivo si programma con l’invio di specifici comandi SMS verso il numero della SIM presente all’interno del dispositivo. A fronte di ogni
comando SMS inviato, il dispositivo risponde con un SMS contenente il nome del comando inviato seguito da <OK>.
Se non si riceve nessun messaggio o se si riceve il messaggio ERROR seguito dal nome del comando, l’invio/ricezione/esecuzione non è andata
a buon fine.
La dicitura PROG non è modificabile. Il codice d’accesso utilizzato negli esempi (1111) corrisponde alle ultime 4 cifre dell’IMEI riportato nell’eti-
chetta di tracciabilità posta sul retro del dispositivo.
1. Impostare l’APN APN:PROG,1111,<Parametro1>,<Parametro2>,<Parametro3>
Parametro 1: inserire l’APN dell’operatore telefonico
Parametro 2: inserire l’utente (facoltativo, lasciare vuoto se non presente)
Parametro 3: inserire la password (facoltativo, lasciare vuoto se non presente)
Esempio: APN:PROG,1111,ibox.tim.it,,
N.B. I campi utente e password, anche se vuoti, vanno sempre separati dalla virgola.
Principali APN testati
TIM ibox.tim.it
Vodafone web.omnitel.it
Wind3 internet.it
Iliad iliad
2. Programmare i numeri da chiamare RPT:PROG,1111,<Parametro1>,<Parametro2>,
<Parametro3>,<Parametro4>,<Parametro5>,<Parametro6>
Parametro 1: campo per la programmazione del numero
Parametro 2: numero di telefono
Parametro 3: gruppo di appartenenza del numero
Parametro 4: inserire sempre 0
Parametro 5: inserire sempre 0
Parametro 6: inserire sempre 4
Esempio: RPT:PROG,1111,1,0039378552428,1,0,0,4
ATTENZIONE: La SIM da utilizzare deve essere sia voce (SMS) che dati.

Viale Vicenza, 14
36063 Marostica VI - Italy
www.vimar.com
49401856A0 02 2311
03890
CALL-WAY
N.B. E’ possibile specificare il prefisso nazionale, e.g. +39 o 0039 ecc.
I punti 1 e 2 vanno obbligatoriamente effettuati mentre i successivi 3, 4, 5, 6, 7 e 8 sono facoltativi.
3. Programmare la modalità di risposta del dispositivo ANSIN:PROG,1111,<Parametro1>,<Parametro2>
Parametro 1:
- inserire 0 per non ricevere chiamate in ingresso;
- inserire 1 per ricevere chiamate in ingresso (il dispositivo suonerà; per rispondere premere il tasto ALARM o quello sul pendaglio/bracciale
se associato);
- inserire 2 per rispondere in automatico senza premere nessun pulsante.
Parametro 2: inserire sempre 0
Esempio: ANSIN:PROG,1111,1,0
4. Programmazione dei numeri preferiti (il dispositivo risponde in automatico alle chiamate in ingresso da parte dei numeri preferiti) CALID:PR
OG,1111,<Parametro1>,<Parametro2>
Parametro 1: campo di programmazione per il numero preferito (disponibili le opzioni 1 e 2)
Parametro 2: inserire il numero di telefono da programmare come preferito
Esempio: CALID:PROG,1111,1,378552428
5. Programmazione del codice di accesso ACCES:PROG,<Parametro1>,<Parametro2>,<Parametro3>
Parametro 1: inserire il codice di accesso attuale
Parametro 2: inserire 1
Parametro 3: inserire il nuovo codice di accesso
Il codice d’accesso utilizzato negli esempi (1111) corrisponde alle ultime 4 cifre dell’IMEI riportato nell’etichetta di tracciabilità posta sul retro
del dispositivo.
Esempio: ACCES:PROG,1111,1,1234
ATTENZIONE: Annota sempre il codice di accesso impostato. In caso di smarrimento rivolgersi al servizio di assistenza tecnica Vimar. Si
raccomanda di modificare il codice di accesso di default.
6. Regolazione dei volumi SPKVL:PROG,<Parametro1>,<Parametro2>,<Parametro3>
Parametro 1: inserire 1
Parametro 2: inserire un valore compreso tra 1 (minimo volume dell’altoparlante) e 5 (massimo volume dell’altoparlante)
Parametro 3: inserire un valore compreso tra 1 (minimo volume del microfono) e 5 (massimo volume del microfono)
Si consiglia di mantenere il valore di default a 2 per entrambi i parametri
Esempio: SPKVL:PROG,1111,1,2,2
7. Ripristino alle condizioni di fabbrica FTSET:PROG,1111
Il comando permette di ripristinare il dispositivo allo stato originale e di cancellare tutti i numeri memorizzati. In alternativa tenere premuto il
tasto ALARM per almeno 30 secondi.
8. Verificare la ricezione del dispositivo CSQ:PROG,1111
Il comando permette di verificare la qualità di ricezione del dispositivo (si veda la tabella seguente).
CSQ Significato ricezione
≤ -110 Nessun segnale
da -95 a -109 Scarsa
da -94 a -85 OK
da -84 a -75 Buona
da -74 a -53 Ottima
SUPERVISIONE DEL DISPOSITIVO
Per ricevere gli SMS relativi allo stato del dispositivo e degli accessori collegati (mancanza alimentazione di rete, ripristino alimentazione di rete,
livello batteria, ecc.) è necessario procedere alla programmazione di uno o più numeri.

Viale Vicenza, 14
36063 Marostica VI - Italy
www.vimar.com
49401856A0 02 2311
03890
CALL-WAY
RAEE - Informazione agli utilizzatori
Il simbolo del cassonetto barrato riportato sull’apparecchiatura o sulla sua confezione indica che il prodotto alla fine della propria vita utile deve essere raccolto separatamente dagli altri rifiuti.
L’utente dovrà, pertanto, conferire l’apparecchiatura giunta a fine vita agli idonei centri comunali di raccolta differenziata dei rifiuti elettrotecnici ed elettronici. In alternativa alla gestione autonoma,
è possibile consegnare gratuitamente l’apparecchiatura che si desidera smaltire al distributore, al momento dell’acquisto di una nuova apparecchiatura di tipo equivalente. Presso i distributori di
prodotti elettronici con superficie di vendita di almeno 400 m2è inoltre possibile consegnare gratuitamente, senza obbligo di acquisto, i prodotti elettronici da smaltire con dimensioni inferiori a
25 cm. L’adeguata raccolta differenziata per l’avvio successivo dell’apparecchiatura dismessa al riciclaggio, al trattamento e allo smaltimento ambientalmente compatibile contribuisce ad evitare
possibili effetti negativi sull’ambiente e sulla salute e favorisce il reimpiego e/o riciclo dei materiali di cui è composta l’apparecchiatura.
Programmare i numeri per la supervisione RPT:PROG,1111,<Parametro1>,<Parametro2>,<Parametro3>,<Parametro4>,<Parametro5>,
<Parametro6>
Parametro 1: campo per la programmazione del numero
Parametro 2: numero di telefono
Parametro 3: gruppo di appartenenza del numero
Parametro 4: inserire 31
Parametro 5: inserire 0
Parametro 6: inserire 1
Esempio: RPT:PROG,1111,1,0039378552428,1,31,0,1
Per tutti i dettagli circa la programmazione approfondita del dispositivo consulta il manuale scaricabile dal sito www.vimar.com.
ARRUOLAMENTO ALTRI ACCESSORI
L’Unità Vivavoce può arruolare fino a 10 dispositivi radiofrequenza (bracciale/pendaglio art. 03893 e interfaccia Telesoccorso art. 03895) da
utilizzare per attivare le segnalazioni di emergenza.
N.B. Il bracciale/pendaglio presente nella confezione è già associato all’Unità Vivavoce.
Modalità di arruolamento
Premere per 8 secondi il tasto “ALARM” dell’Unità Vivavoce; al termine degli 8 secondi il dispositivo emetterà un “bip”.
Dopo il bip rilasciare il tasto; si accede così alla modalità di arruolamento.
Arruolamento dei dispositivi e test
1. Premere il pulsante sul dispositivo radiofrequenza (per i dettagli si veda il relativo foglio istruzioni).
2. L’Unità Vivavoce emetterà 2 bip quando riceve il segnale dal dispositivo per indicare che ha lo ha arruolato.
3. Ripetere i punti 1. e 2. per arruolare tutti i dispositivi.
Per verificare la corretta ricezione in tutti i punti di interesse assicurarsi di sentire il suono di conferma dal Vivavoce quando viene premuto il
del pulsante bracciale/pendaglio.
Al termine premere una volta il tasto ALARM dell’Unità Vivavoce per uscire dalla modalità di arruolamento; il dispositivo emetterà 2 bip.
Rimozione dei dispositivi
Entrare nella modalità di arruolamento e premere velocemente per due volte il tasto ALARM; l’Unità Vivavoce emetterà due bip per indicare che
TUTTI I dispositivi sono stati eliminati e poi uscirà automaticamentdalla modalità di arruolamento.
CARATTERISTICHE TECNICHE.
• Range di frequenza: 868.3 MHz
• Potenza RF trasmessa: < 25 mW (14dBm)
• Bande di trasmissione:
- B1 (2100 MHz)
- B3 (1800 MHz)
- B5 (850 MHz)
- B8 (900 MHz)
• Batteria ricaricabile Ni-Mh 6 V 850 mAh (non sostituibile)
• Autonomia: 72 ore
CONFORMITÀ NORMATIVA.
Direttiva RED. Direttiva RoHS. Norme EN 301 489-3, EN 301 489-52, EN 301 908-1, EN 300 220-3-2, EN 50130-4, EN 55032, EN 55035, EN
IEC 61000-3-2, EN 61000-3-3, EN 62368-1, EN 50385, EN 62479, EN IEC 63000.
Vimar SpA dichiara che l’apparecchiatura radio è conforme alla direttiva 2014/53/UE. Il testo completo della dichiarazione di conformità UE è
disponibile nella scheda di prodotto al seguente indirizzo Internet: www.vimar.com.
Regolamento REACh (UE) n. 1907/2006 – art.33. Il prodotto potrebbe contenere tracce di piombo.
Viale Vicenza, 14
36063 Marostica VI - Italy
www.vimar.com
49401856A0 02 2311
VISTA FRONTALE
LED Rosso LED Verde
Speaker
Microfono
Tasto ALARM
Jack DC
Interruttore
batteria
Jack per Micro USB
(non utilizzato)
Sede per SIM Card
VISTA POSTERIORE
Azione Funzione
Tasto ALARM
Premere 1 volta Per effettuare una chiamata di emergenza/attivare l’allarme
Per rispondere ad una chiamata
Tenere premuto per 5 secondi Per annullare l’allarme
Per terminare la chiamata
LED Verde
Acceso Alimentazione presente
Lampeggia 1 volta ogni 5 secondi Mancanza di alimentazione di rete
LED Rosso
Lampeggia 1 volta ogni 2 secondi Batteria scarica
Lampeggia 1 volta ogni 5 secondi Errore comunicazione GSM
ATTENZIONE!
In caso di sostituzione, smaltire le batterie negli appositi cassonetti per la raccolta differenziata.

Viale Vicenza, 14
36063 Marostica VI - Italy
www.vimar.com
49401856A0 02 2311
03890
CALL-WAY
Hands-free unit for remote assistance calls.
Remote assistance device for calling recorded numbers by mobile phone. The hands-free call is sent by pressing the “ALARM” push button on
board or using the push button on the bracelet/pendant accessory supplied, or another device connected to the interface art. 03895. The device
can also receive incoming calls with automatic answering.
PACKAGE CONTENTS
Bracelet/pendant (already associated)
art. 03893
Hands-free unit A Wall Mounting Bracket
Power supply unit
(DC 9V 1A SPS adaptor)
POWER SUPPLY
The hands-free unit for remote assistance calls is equipped with a 9 V power supply unit and a rechargeable buffer battery (the battery lasts
maximum 36 hours) that cuts in if there is no mains power. During installation, the backup battery must be enabled at the specific switch on the
back of the device.
N.B. If the device is not mains powered, text message programming operations cannot be performed, nor can incoming calls be received.
INSTALLATION
Inserting the SIM card
• Before inserting the SIM card in the device, disable any PIN code.
• The SIM slot is on the rear of the device.
• Insert the SIM delicately into the slot.
• Any text messages stored on the SIM will be deleted when the device is started up.
N.B.
- Use only nano SIM cards.
- Do not use adaptors to insert the SIM in the slot.
Wall Mounting
1. Break through the 2 knockouts on the Wall Mounting Bracket.
2. Use the 2 holes as a template to mark the hole positions, making sure that the triangle symbol on the bracket points straight up.
3. Drill 2 holes and screw the bracket onto the wall.
4. Connect a DC 9V 1A SPS power adapter to DC jack of art. 03980 and position the cable correctly.
ON
ON
5. Fit art. 03980 onto the mounting bracket. Make sure the impressed mark on VCP-WIFI is aligned with the upper mark on the bracket.

Viale Vicenza, 14
36063 Marostica VI - Italy
www.vimar.com
49401856A0 02 2311
03890
CALL-WAY
6. Rotate art. 03980 clockwise to the lock position.
Open position Lock position
Table Mounting
1. Clean the back of art. 03890 with degreaser. Connect a DC 9 V 1A SPS power adapter to DC jack and position the cable correctly to the right
or left.
2. Remove the protective cover from the non-slip pad and apply to the back of art. 03890
3. Place art. 03890 in the desired location.
FIRST PROGRAMMING
The device is programmed by sending specific SMS commands to the number of the SIM in the device. When each SMS command is sent, the
device answers with a text message containing the name of the command sent followed by <OK>.
If no message is received or an ERROR message is received, followed by the command name, the sending/receipt/execution was not successful.
The word PROG is non-editable. The access code used in the examples (1111) corresponds to the last 4 digits of the IMEI number found of the
tracking label on the back of the device.
1. Set the APN APN:PROG,1111,<Parameter1>,<Parameter2>,<Parameter3>
Parameter 1: enter the APN of the telephone operator
Parameter 2: enter the user (optional, leave empty if not present)
Parameter 3: enter the password (optional, leave empty if not present)
Example: APN:PROG,1111,ibox.tim.it,,
N.B. The user and password fields, even when empty, must always be separated by a comma.
Main APN tested
TIM ibox.tim.it
Vodafone web.omnitel.it
Wind3 internet.it
Iliad iliad
2. Programme the numbers to call RPT:PROG,1111,<Parameter1>,<Parameter2>,
<Parameter3>,<Parameter4>,<Parameter5>,<Parameter6>
Parameter 1: field for programming the number
Parameter 2: phone number
Parameter 3: group the number belongs to
Parameter 4: always enter 0
Parameter 5: always enter 0
Parameter 6: always enter 4
Example: RPT:PROG,1111,1,0039378552428,1,0,0,4
CAUTION: The SIM to use must be for both voice (text messages) and data.

Viale Vicenza, 14
36063 Marostica VI - Italy
www.vimar.com
49401856A0 02 2311
03890
CALL-WAY
N.B. It is possible to specify the country prefix, e.g. +39 or 0039 etc.
Points 1 and 2 must be done while 3, 4, 5, 6 and 7 are optional.
3. Programme the device answer mode ANSIN:PROG,1111,<Parameter1>,<Parameter2>
Parameter 1:
- enter 0 to not receive incoming calls;
- enter 1 to receive incoming calls (the device will ring; to answer, press the ALARM button or the one of the pendant/bracelet if associated);
- enter 2 to answer automatically without pressing any push button.
Parameter 2: always enter 0
Example: ANSIN:PROG,1111,1,0
4.Programming favourite numbers (the device answers incoming calls from favourite numbers automatically)
CALID:PROG,1111,<Parameter1>,<Parameter2>
Parameter 1: programming field for the favourite number (options 1 and 2 available)
Parameter 2: enter the phone number to programme as favourite
Example: CALID:PROG,1111,1,378552428
5. Programming the access code ACCES:PROG, <Parameter1>,<Parameter2>,<Parameter3>
Parameter 1: enter the current access code
Parameter 2: enter 1
Parameter 3: enter the new access code
The access code used in the examples (1111) corresponds to the last 4 digits of the IMEI number found of the tracking label on the back of
the device.
Example: ACCES:PROG,1111,1,1234
CAUTION: Always note down the access code. If you lose it, contact the Vimar technical assistance service. It is recommended to change
the default access code.
6. Volume adjustment SPKVL:PROG,<Parameter1>,<Parameter2>,<Parameter3>
Parameter 1: enter 1
Parameter 2: enter a value between 1 (minimum speaker volume) and 5 (maximum speaker volume)
Parameter 3: enter a value between 1 (minimum microphone volume) and 5 (maximum microphone volume)
We recommend you keep the default value of 2 for both parameters
Example: SPKVL:PROG,1111,1,2,2
7. Factory setting reset FTSET:PROG,1111
This control allows you to reset the device to its original settings and to delete all the numbers stored. Alternatively keep the ALARM button
pressed for at least 30 seconds.
8. Check device reception CSQ:PROG,1111
This control allows you to check the quality of the device reception (see the following table).
CSQ Corresponding reception
≤ -110 No signal
from -95 to -109 Poor
from -94 to -85 OK
from -84 to -75 Good
from -74 to -53 Excellent
DEVICE SUPERVISION
To receive text messages on the status of the device and the connected accessories (no mains power, mains power restored, battery level, etc.)
one ore more numbers must be programmed.

Viale Vicenza, 14
36063 Marostica VI - Italy
www.vimar.com
49401856A0 02 2311
03890
CALL-WAY
Programme the numbers for supervision RPT:PROG,1111,<Parameter1>,<Parameter2>,<Parameter3>,<Parameter4>,<Parameter5>,
<Parameter6>
Parameter 1: field for programming the number
Parameter 2: phone number
Parameter 3: group the number belongs to
Parameter 4: enter 31
Parameter 5: enter 0
Parameter 6: enter 1
Example: RPT:PROG,1111,1,0039378552428,1,31,0,1
For details on full programming of the device, consult the manual that can be downloaded from the website www.vimar.com.
ENROLLING OTHER ACCESSORIES
Local RF Device Management art. 03980 can learn up to 10 RF devices (art. 03893 and art. 03895) which can be used to activate art. 03980
to make an emergency call.
N.B. The bracelet/pendant in the pack is already associated with the Hands-free Unit.
Entering Learning Mode
Press the Alarm Button of art. 03980 for 8 seconds; it will emit one beep at the 8th second. Release the button after the beep at the 8th second
to enter learning mode.
Device Learning and Testing
1. Press the Button on the RF device to transmit signals. Refer to the RF device manual for details.
2. Art. 03980 emits 2 beeps when it receives the signal from the pendant to indicate it has learned the bracelet/pendant.
3. Repeat Steps 1-2 to learn all devices.
To check the correct reception in all points of interest, make sure you can hear the confirmation tone from the hands-free unit when the
bracelet/pendant push button is pressed.
After completing learning, press the Alarm Button on art. 03980 once to exit learning mode; art. 03980 will emit 2 beeps.
Device Removal
Press the Alarm Button twice quickly in learning mode; art. 03980 will emit two beeps to indicate that ALL RF devices have been removed and
will exit the learning mode automatically.
CHARACTERISTICS.
• Frequency range: 868.3 MHz
• RF transmission power: < 25 mW (14dBm)
• Transmission bands:
- B1 (2100 MHz)
- B3 (1800 MHz)
- B5 (850 MHz)
- B8 (900 MHz)
• Rechargeable Ni-Mh battery 6 V 850 mAh (not replaceable)
• Operating time: 72 hours
REGULATORY COMPLIANCE.
Directive RED. Directive RoHS. Standards EN 301 489-3, EN 301 489-52, EN 301 908-1, EN 300 220-3-2, EN 50130-4, EN 55032, EN 55035,
EN IEC 61000-3-2, EN 61000-3-3, EN 62368-1, EN 50385, EN 62479, EN IEC 63000.
Vimar SpA declares that the radio equipment complies with Directive 2014/53/EU. The full text of the EU declaration of conformity is on the
product sheet available on the following website: www.vimar.com.
REACH (EU) Regulation no. 1907/2006 – Art.33. The product may contain traces of lead.
WEEE - User information
The crossed bin symbol on the appliance or on its packaging indicates that the product at the end of its life must be collected separately from other waste. The user must therefore hand the
equipment at the end of its life cycle over to the appropriate municipal centres for the differentiated collection of electrical and electronic waste. As an alternative to independent management,
you can deliver the equipment you want to dispose of free of charge to the distributor when purchasing a new appliance of an equivalent type. You can also deliver electronic products to be
disposed of that are smaller than 25 cm for free, with no obligation to purchase, to electronics distributors with a sales area of at least 400 m2. Proper sorted waste collection for subsequent
recycling, processing and environmentally conscious disposal of the old equipment helps to prevent any possible negative impact on the environment and human health while promoting the
practice of reusing and/or recycling materials used in manufacture.

Viale Vicenza, 14
36063 Marostica VI - Italy
www.vimar.com
49401856A0 02 2311
FRONT VIEW
LED Red LED Green
Speaker
Microphone
Alarm Button
DC Jack
Battery
Switch
Micro USB Jack
(not used)
SIM Card Slot
REAR VIEW
Behaviour Condition
Alarm Button
Press once To make an emergency call / activate alarm
To answer an incoming call
Press and hold for 5 seconds To cancel the alarm
To terminate the call
LED Green
Light on AC Power on
Flashes once every 5 seconds No mains power supply
LED Red
Flashes once every 2 seconds Low Battery
Flashes once every 5 seconds GSM fault
WARNING:
Dispose of batteries in the specific separate collection bins.
Other manuals for CALL-WAY
1
This manual suits for next models
1
Table of contents
Languages:
Other Vimar Remote Control manuals

Vimar
Vimar Eikon TACTIL 21122 User manual

Vimar
Vimar BY-ALARM PLUS 03839 User manual

Vimar
Vimar By-alarm 01730 User manual

Vimar
Vimar 03890 User manual

Vimar
Vimar 03890 User manual

Vimar
Vimar EIKON TACTIL User manual

Vimar
Vimar 03893 User manual

Vimar
Vimar ELVOX ETT01F User manual

Vimar
Vimar Elvox ETFN2 User manual

Vimar
Vimar ELVOX ETT01T User manual